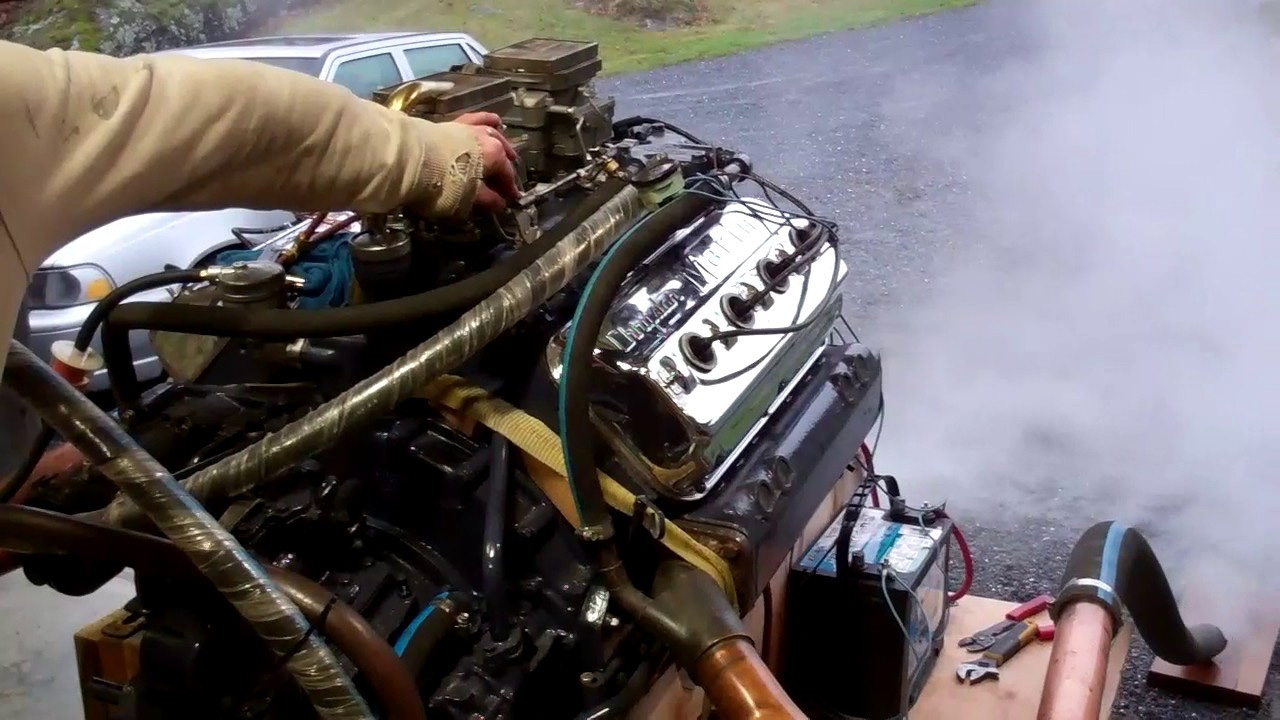
Wow! Voodoo Child’s Dual Quad Four 331 Hemi V8 has a bark for sure… and torque.
She went through a comprehensive rebuild under the watchful eye of Robert Henkel, Peter Henkel Inc., Marine City, MI.
Robert now does all of our engines. I will not send them anywhere else. You can find him on the Web at www.chris-craft-parts.com, or email him at [email protected].
We will now winterize and fog the beast before we begin what will be a near Herculean task of installing the Hemi in Voodoo Child’s engine compartment.
Why Herculean? The engine and V-drive transmission will not fit through the engine hatch and must be dropped into the bilge ahead of the engine bay bridge, and then, using two chain falls, slowly teased under the bridge and onto the engine mounts.
The install can begin as soon as we’ve completed the engine’s winterization, as we have finished polishing her hull, which means all is go for reassembling her.
Arguments about how “best” to varnish a boat can become heated, and I am not taking sides here. We have experimented with buffing (polishing) varnish, most recently on the 1952 18’ Chris-Craft Riviera we preserved. Ridding the surface of haze was our nemesis with each effort.
Then I happened upon an intriguing article on “the practice of polishing varnish” that appeared in a recent copy of the Chris-Craft Antique Boat Club’s “The Brass Bell,” Here is a link to a scanned copy of the article in PDF format
Voodoo Child served as our lab rat for an experiment following the process described therein, one that began with allowing the varnish to cure for 30 days after the final coat was applied.
We were concerned about just how much varnish is polished away through this process, as sanding through would be a disaster, so we applied a full 20 coats of Pettit Easypoxy Hi-build varnish, let Voodoo Child sit for 30 days, and initiated the process November 2. We finished on November 7, having logged 42 hours from beginning to end.
Wet sanding begins with 1000 grit and sanding blocks, and proceeds through 1200 and 1500, all by hand. At that point we switched to a dual-action orbital sander, and proceeded wet sanding through progressively finer grits until we made one last pass with 5000 grit.
Even at this point it was clear that we are onto something special, as the surface was literally glowing.
Keeping the surface free of sanding residue is critical, lest that residue be ground back into the surface, creating scratches along the way.
Per the article’s guidance, we then switched to mechanical buffing, never exceeding 1,500 RPM. Several passes using Mequiar’s Mirror Glaze M101 Foam-cut Compound removed 1200 and finer scratches. We finished with Mequiar’s M205 Ultra Finishing Polish. The result is a deep and glossy, almost mirror-like surface.
Let’s get that engine in the bilge so we can begin the fun part, installing hardware, ceilings, seating, and the rest!