1967 Century Palomino: Removing Bungs Flush with Planking

1967 century palomino removing bungs flush planking

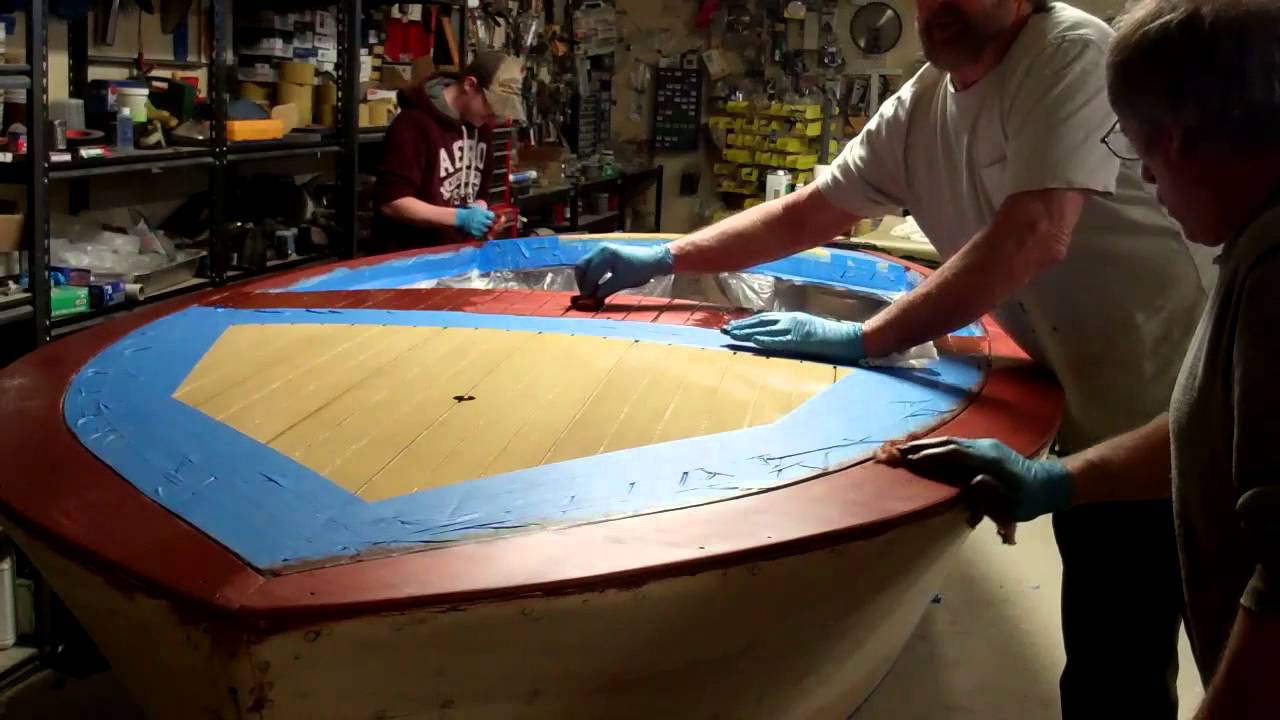
This 1967 Century Palomino’s decks were completely released so we could gain access to the areas beneath. With all of the framework complete, and everything sealed and coated in multiple coats of Sandusky Paints Mahogany Bilge paint, the deck planking has been re-fastened with silicon bronze Frearson head wood screws

Next we inserted mahogany and Avodire bungs, making sure that each bung’s grain was aligned with that of the plank. Gorilla Glue ensures a waterproof bond is established

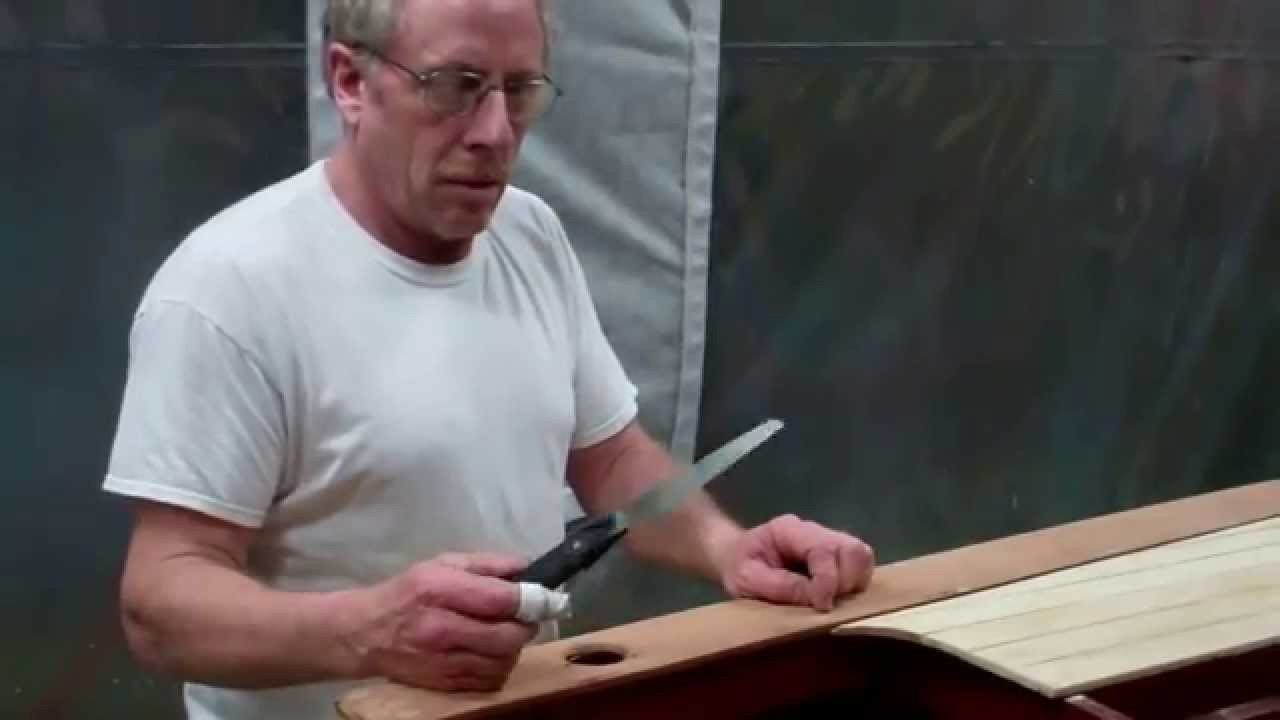
But then we have a sea of bungs standing proud of the deck. Each must be cut flush to the planking. This clip is a response to the many questions we have received about how we do it at SMB. Well, we tried all manner of high-end chisels, honed to a razor’s edge. No matter how carefully we sliced through each bung, some would break off below the plank’s surface, which meant digging them out and inserting new bungs

And then there would be the inevitable, “Oh s….!” Someone had slipped and gouged the plank. No matter how good you get at it, filling a gouge means a bruise remains, one that seems to jump out at anyone who looks carefully at the surface

And it was slow and tense.

Now we are standardized on the VERITAS flush-cut hand saw. It is incredibly sharp, and with zero offset to the teeth, these saws cut the bung off precisely at the surface without marring it. Time means cost to our clients, so the fact that we can excise 400 or so bungs per hour with these saws also makes us more competitive

We experimented with less expensive brands, like Stanley, but in every case rejected them because at least one tooth was offset just enough that we got scratches in our test planks.

1957 Century Palomino Applying Filler Stain

1957 Century Palomino Applying Filler Stain

We achieved a major milestone in our 1957 Century Palomino preservation project today. The hull is now stained in the traditional two-tone Palomino manner. Blonde Avodire (African white mahogany, graces both the fore and aft decks, save for the crescent just aft of the windshield, which is stained to match the covering boards. We used Interlux IInterstain thinned about 10% and applied it with plain old chip brushes. Besides being thinned to a consistency that approximates house paint and applying it liberally on the surface, t here are two keys to achieving a stained surface that is uniform and free of blotches.

First, is being patient, but not too patient. Way too many stain teams assign application to one person while the rest follow immediately behind scrubbing stain off the surface. Doing so prohibits the stain from penetrating the wood fibers. As hard as it might be, wait until the stain “flashes,” at which point the surface begins taking on a dull look. Do not wait too long, however, as the stain continues curing, and if you wait too long, scrubbing the surface clean becomes a nightmare.

Now it is time to begin scrubbing across the grain, not with the grain. A filler stain is designed to fill the valleys in the grain left by sanding with the grain to 80 or 100 grit. (Sanding the surface smoother than 100 grit max robs the surface of the ridges and valleys — the teeth — that the stain will fill.)

Scrub, scrub, scrub. Change your cheese cloth or terry cloth toweling when it becomes caked with residue. (Be sure to drape the used rags over a close line, or something similar to avoid spontaneous combustion. They are safe to discard only when they become stiff as a board.) How do you know you are finished? The surface will begin feeling smooth and almost slippery. And your towels will come away nearly clean when you burnish across the grain with them.

Staining is anything but glamorous, but nothing can do more harm to your project than scrubbing too soon or too little. The varnish will amplify every blemish and every blotch a hundredfold.