1948 Chris Craft Special Runabout Bleeding Stain Out Of The Wood

1948 Chris Craft Special Runabout Bleeding Stain Out Of The Wood

Let’s do a bit of how-to this morning.

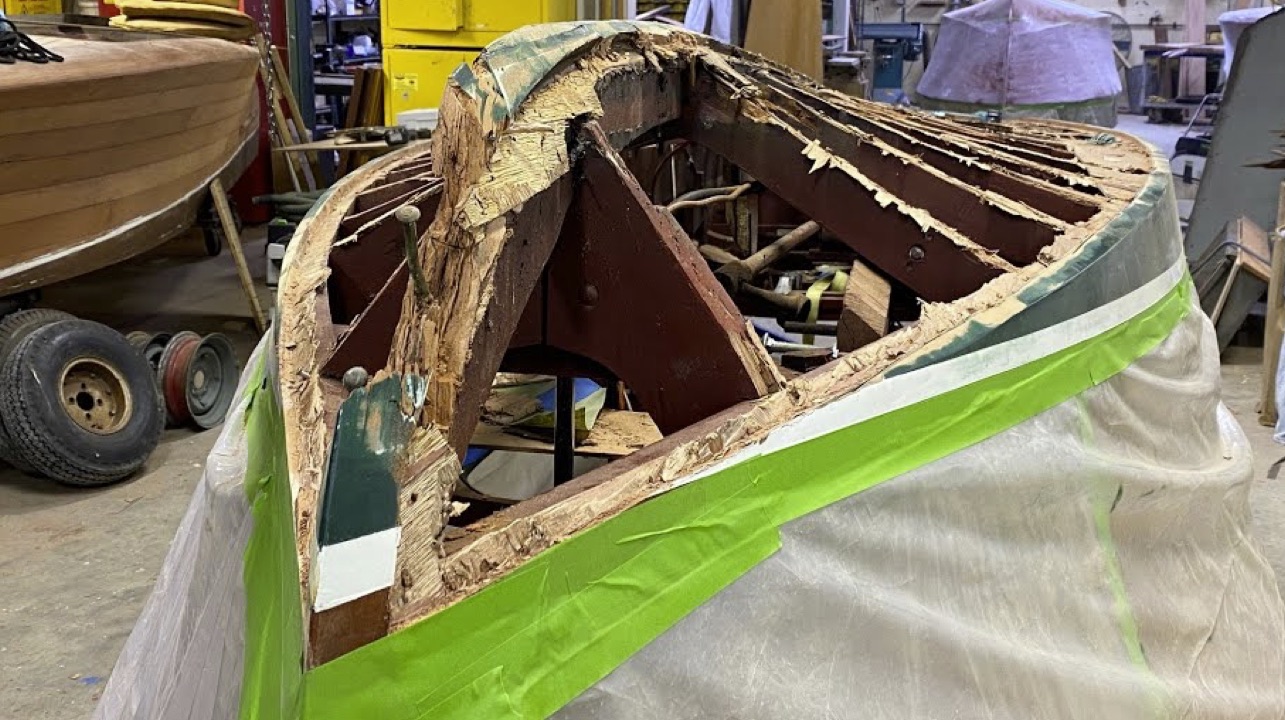
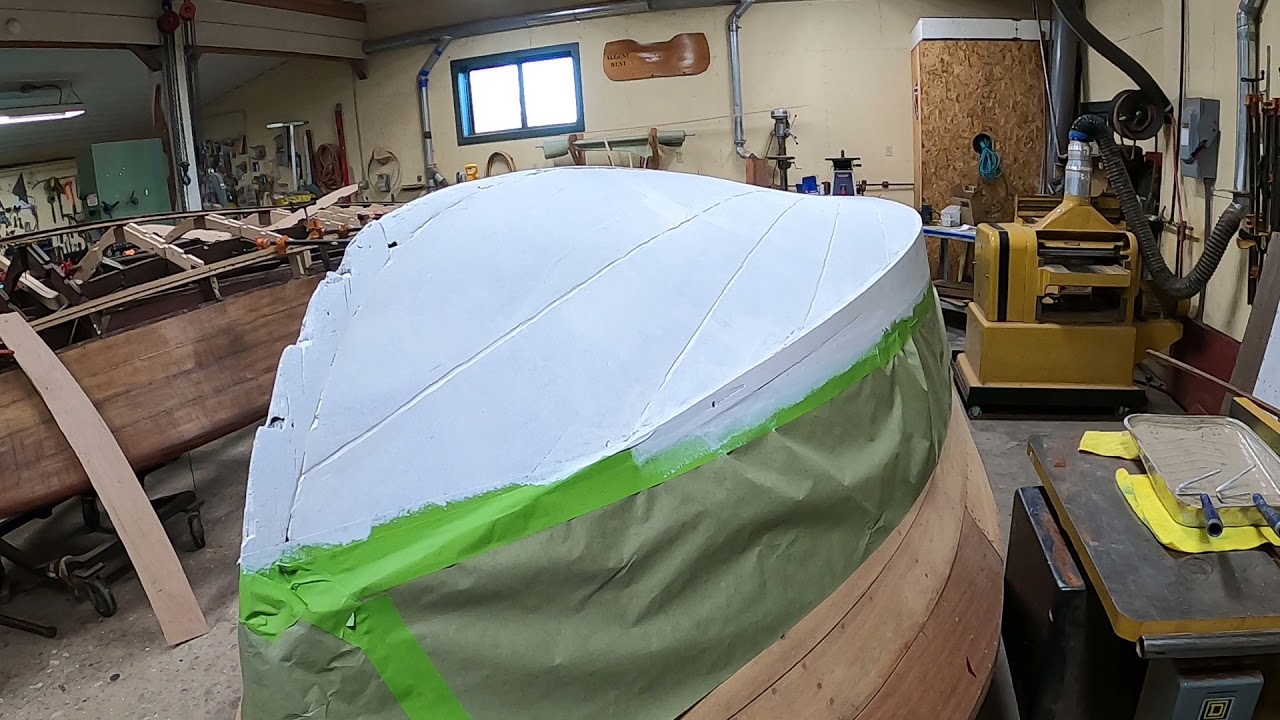
It has taken you hours and hours of scraping, swearing, swearing some more and scrubbing the old finishes from your woody. Finally, all that old varnish is gone and you are down to “bare” wood.

Really? No, you are not down to bare wood because it will still be adulterated with wood stain. Bleeding that old stain out of the wood is a critical component of achieving a blemish- and blotch-free new finish.

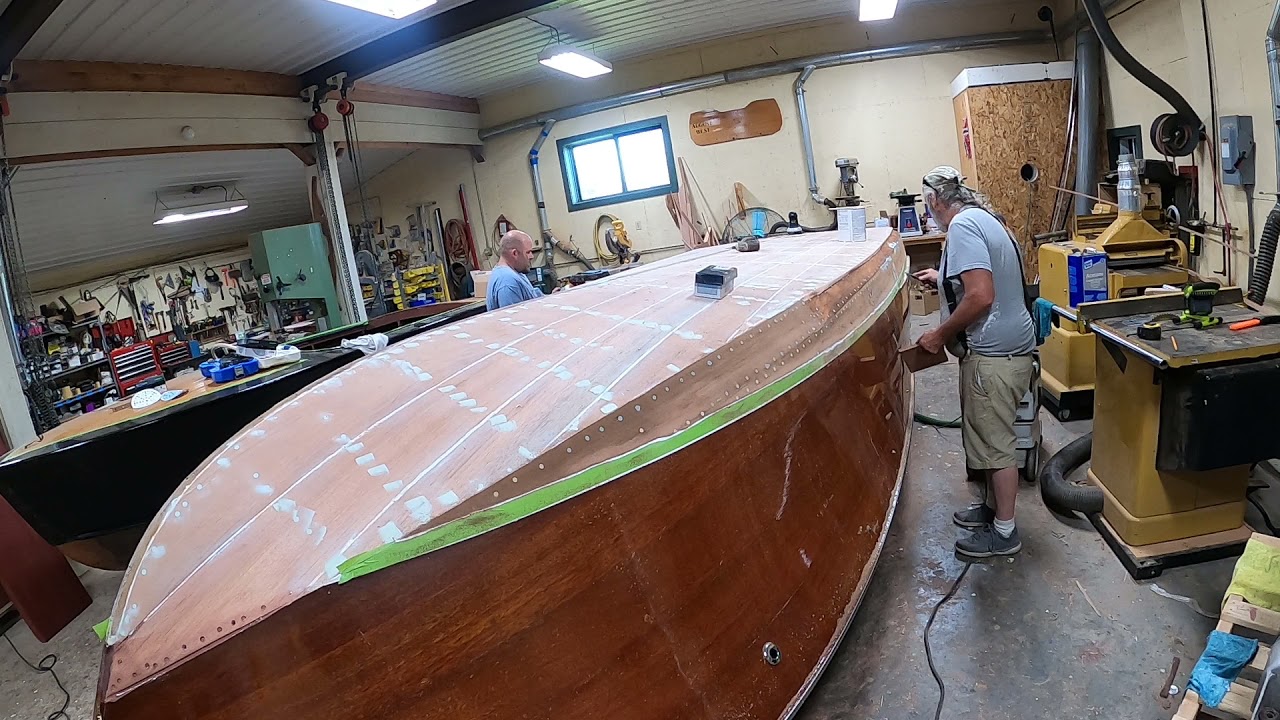
We tried and rejected Scotch Brite pads, in favor of have always used kitchen-grade stainless pot scouring pads here, but they take forever and tend to load up very quickly. They are cheap, however; just $13 for a 12-pad bag of them.

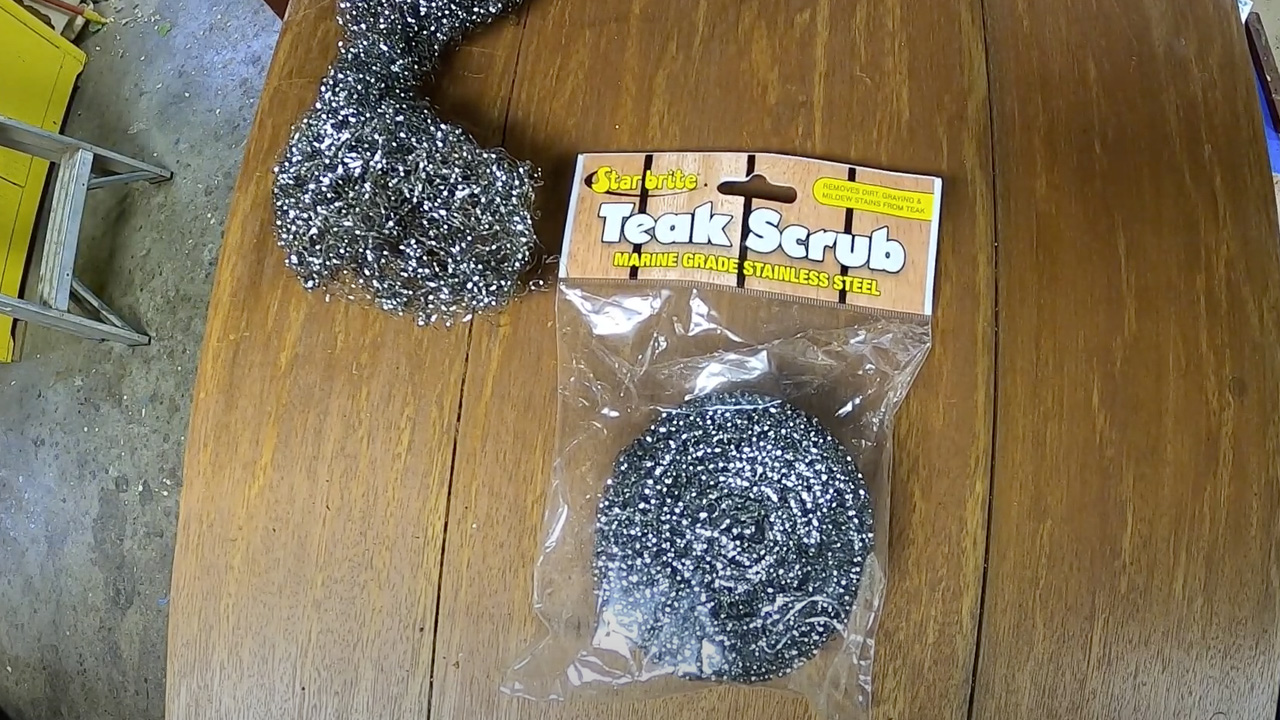
The cheap pads are great for scrubbing varnish and paint, but borderline maddingly limited for bleeding stain out of the wood. I was searching – my wife calls it trolling – Amazon at the end of January, when up popped the Star-brite Teak Scrub marine-grade, stainless scrub pad that is designed for refinishing wood.

Star-brite claims these pads “remove dirt, graying & mildew stains from teak. There is a catch, however. They will cost you $13.34 EACH!

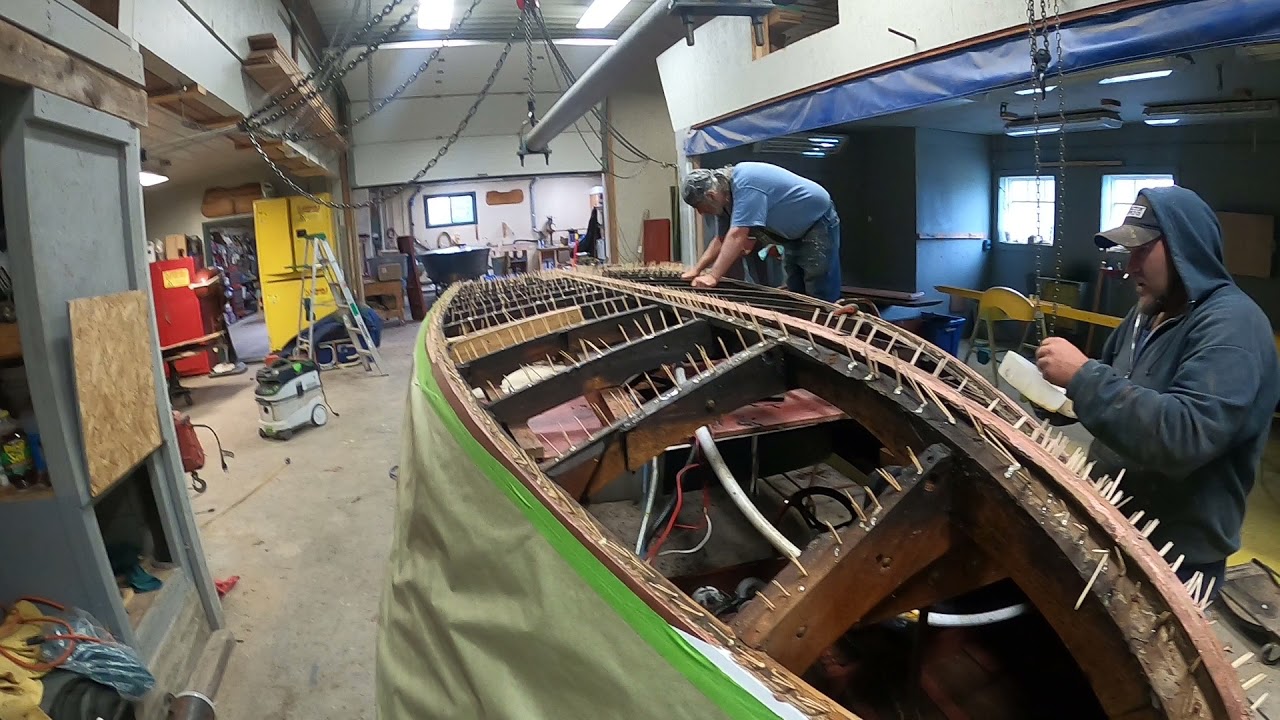
Guess what? These puppies also bleed filler and J’eld stain out of mahogany, oak and white cedar! As such, and even at $13.34 each, they will henceforth be our go-to tool for this no-fun job.

We will still reach for the cheap, old-school pads for removing finishes, but leave them on the shelf when it is stain-bleeding time.

1940 Chris Craft Barrelback True 5200 Bottom Milestone

1940 chris craft barrelback 5200 bottom

Priscilla, our 1940 seventeen-foot Chris-Craft Runabout has blasted through her True 5200 Bottom milestone!

After replacing nearly half of her rotted bottom framing and installing a new inner skin comprised of 4 mm Meranti mahogany marine plywood six-inch-wide planks laid at an approximately 45 degree angle with respect to the chines and keel, all of which was bedded in 3M5200, we fabricated and installed outer planking using three-eighths FAS-grade Meranti mahogany plywood, also bedded in 3M5200.

It was all sanded fair with countersinks and declivities filled using 3M Premium Marine Filler before being faired and sealed with CPES a final time.

Priming – five coats of Interlux 2000E Barrier Coat Primer – was followed by applying multiple coats of dark green Interlux Ultra-Coat hard antifoul paint.

We will now flip her upright, repair several dings and gouges and then hand block sand her using 250 and 600 grit. Finally, she will receive upwards of ten coats of Pettit Captain’s Ultra Clear varnish and buffed.

Once she is reassembled, she will be ready for her final milestone, returning home to Delaware, OH.

1940 17 Chris Craft Barrelback 5200 Bottom Planking Update

1940 chris craft barrelback bottom planking

Priscilla, our 1940 17-foot Barrelback “lab rat” experiment is progressing rapidly now that we finally took delivery and milled the Meranti mahogany planking needed to complete her True 5200 bottom. As we shared in our last update, rather than install her inner skin using 6 mm plywood panels, we are reverting to what is a truly very old school alternative: replacing the inner skin using strips of planking laid at approximately 45 degrees to the keel.

In so doing, we will deliver a bottom, the inner skin of which precisely matches that installed in Algonac in 1940.

Once we dry-fitted each, approximately 5-3/4”-wide plank, everything was sealed with four coats of Smith’s CPES, after which we have applied three coats of Chris-Craft mahogany bilge paint to their inner surfaces. Next, we installed these planks bedded in mahogany 5200 using #6×1” Frearson-drive, flathead silicon bronze wood screws.

Happily, her bilge now presents exactly as it did when Priscilla left Algonac in 1940.

Planking the inner skin produces a tighter, more rigid skin that follows the bottom’s contours precisely. Any interior squeeze-out will be removed using nylon putty knives before it, too, receives three full coats of Chris-Craft mahogany bilge paint.

Post this experiment, SMB will make individually planking inner skins our standard for SMB True 5200 bottoms.

With the Meranti planking in-hand, and having milled it to land fair with the chines, and began dry fitting it to her bottom. Our first step involves measuring both bottom faces at their widest point between the keel and the chine.

Here, and as we’ve shared with you earlier, we once again confirmed that Chris-Craft’s rule-of-thumb was operating at Algonac when her hull was being laid out. She is 7/8” wider on port than she is on starboard at the widest point between her keel and chines. And, at the transom, she is a 1/2” wider on starboard than she is on port.

Joe will dry fit and fasten the outer planks temporarily, working from her keel to her chines. Once laid out completely, the planks will be released and sealed on all sides with four coats of Smith’s CPES. We will also apply one final “insurance” coat of CPES to her inner skin’s bottom.

The final assembly step involves bedding each outer plank in an at least one-eight-inch-thick bed of white 3M5200, before fastening them with #8×1-1/4” flathead silicon bronze wood screws. Finally, and that’s when she really begins looking good, we apply five coats of Interlux InterProtect 2000E Barrier Coat Epoxy Primer, with alternating gray and white coats, which helps expose any holidays. Per Interlux’s instructions, 2000E should be applied in thin coats.

1940 Chris Craft Barrelback 5200 Bottom Planking

1940 chris craft barrelback 5200 bottom

Priscilla, our 1940 17-foot Barrelback became our lab rat today as we tested what we are calling a New Day at Snake Mountain Boatworks when installing a truly True 5200 bottom.

Rather than install her inner skin using 6 mm plywood panels, we are reverting to what is a truly very old school alternative: replacing the inner skin using 6mm strips of planking laid at approximately 45 degrees to the keel.

In so doing, we are able to deliver a bottom, the inner skin of which precisely matches that installed in Algonac in 1940.

Once we have dry-fitted each, approximately 5-3/4”-wide plank, everything will be sealed with four coats of Smith’s CPES, and we have applied three coats of Chris-Craft mahogany bilge paint to the inner surfaces, we will then install these planks bedded in mahogany 5200 using #6×1” Frearson-drive, flathead silicon bronze wood screws.

Once finished, the bilge will present exactly as it did when Priscilla left Algonac in 1940.

We will then proceed as we do with all SMB True 5200 bottoms, installing the outer mahogany planks bedded in white 5200 using #8×1-1/4” Frearson drive, flathead, silicon bronze wood screws.

Planking the inner skin produces a tighter, more rigid skin that follows the bottom’s contours precisely. Any interior squeeze-out will be removed using nylon putty knives before it, too, receives three full coats of Chris-Craft mahogany bilge paint.

Post this new day, SMB will make individually planking inner skins our standard for SMB True 5200 bottoms.

1950 Chris Craft Riviera 5200 Bottom Update

1950 Chris Craft Riviera 5200 Bottom Update

Our 1950 18’ Chris-Craft Riviera’s new True 5200 bottom has passed a major milestone with the preliminary fitting and installation of its inner plywood skin.

We use Aquatek Meranti marine plywood, 7/16” thick for the inner skin.

Once we have dry fitted the skin’s components, they receive 4 – 5 coats of Smith’s Clear Penetrating Epoxy Sealer followed by three coats of Sandusky Paint Company’s Chris-Craft Mahogany Bilge Paint.

Each frame is then buttered with an 1/8” thick layer of 3M5200, and the skin’s components are laid in place and secured with a combination of #6×1-1/4 silicon bronze flathead wood screws and 1” copper ring-shank nails.

We then allow for 7-8 days of cure time before we complete sanding the edges in place.

1950 Chris Craft Riviera 5200 Bottom Update

1950 Chris Craft Riviera 5200 Bottom

Our 1950 18-foot Chris-Craft Riviera is well on her way to having a new True 5200 bottom.

We achieve that goal by using 6mm Aquatek Meranti Maring Plywood for the inner skin, after which we fabricate exterior planks patterned on her original planks using 3/8-inch Meranti FAS grade mahogany.

The ply is first is sealed with three coats of CPES, inside and out and then painted with three coats of Chris-Craft red Sandusky paint Company bilge paint, and then installed using mahogany 5200 bedding on the frames and the battens.

The exterior planks are sealed with three coats of CPES and then bedded in a uniform, approximately 1/8-inch-thick bed of white 5200, save for the outermost plank, that is bedded in mahogany 5200 where is sweeps above the waterline. They are installed using #8 x 1-1/2 flathead silicon bronze screws.

The final result is a rock-hard, super-stiff bottom.

We then apply three more coats of CPES to the bottom planking before priming it using five coats of Interlux Tow-Part 2000E Barrier Coat Epoxy Primer, alternating between gray and white as we build coats.

Finally, her bottom will receive three coats of Pettit Hard Racing Bronze bottom paint, and we will then resume focusing above the waterline.

1959 Chris Craft Sportsman 5200 Bottom Update

1959 Chris Craft Sportsman 5200 Bottom Update

Miss Take, our 1959 17’ Chris-Craft Sportsman, arrived on May 27, 2020. Today, June 9, 2021, just 12 days later, we have replaced here tired, leaky, heavily damaged bottom with an entirely new True 5200 bottom.

Remember, all materials used and their sources are available on our Materials and Sources page.

Well, almost. An inner layer of seriously sealed – Smith’s CPES – 6 mm Meranti Marine (Aquatek) plywood has been secured, bedded heavily in mahogany 3M5200. (We use the much more expensive mahogany 5200 at this step so that the bilge is not an abstract “painting” of white 5200 squeeze-out.)

A new suite of planks has been fabricated, also sealed in multiple coats of CPES, bedded in 5200 and screwed down using #8 silicon bronze – never, ever, ever stainless – flathead, Frearson wood screws.

After fairing the planks using 40 and 80 grit, the countersinks are being filled and faired using 3M Premium Marine Filler.

Next comes another three coats of CPES, followed by FIVE, not 2, not 3, not 4 coats of Interlux 2000E Two-Part Epoxy Barrier coat.

Lastly she will receive three coats of Pettit Hard Racing Copper Bronze Enamel.

She will be in the water by July 4!

1959 Chris Craft Sportsman Porcupined

1959 Chris Craft Sportsman Porcupined

Yes, it is Memorial Day, but we have a boat needing a new bottom, so have dropped all else to make some real progress, but also to discover what is or is not lurking beneath that plywood. Our 1959 Chris-Craft Ski Boat must get back to her owner ASAP, so we are on task.

The good news is that, save fore one of them, her frames are sound; yes, grease-sodden, but solid. Joe was able to sister the one port side forward frame that had broken.

We will not attempt applying bilge paint to the frames as the grease and oil has penetrated to the point it would not adhere. We will scrape and then sand all of the plywood inner skin landings on the frames.

Remember my endless comments about how these venerable ladies keep secrets beneath their skirts? Well, this lady’s secret is that what we have been removing is anything but her original bottom. Indeed, independent of what the owner was told then, whoever is the villain of this piece should be dragged and quartered.

Why? Just imagine using 3/8” A/C construction plywood for the bottom of a wood boat! It has delaminated everywhere. Once again, thank the Lord that she and her owner did not find the bottom!

At this point we are “porcupining,” which involves filling every empty screw hole with three to four hardwood toothpicks and waterproof Gorilla glue. Once all of them have been inserted, Joe and Rick will spray the bottom lightly with water. Doing so accelerates curing while strengthening the bond formed between the oak frames and hardwood toothpicks.

Remember, you can access all the materials we use and their sources by navigating to our Materials and Sources page.

Next, we will use our Fein MultiMaster tools to skim off the toothpicks, at which time the landings will be ruthlessly scraped, sanded and treated with three full coats of Smith’s – and only Smith’s Clear Penetrating Epoxy Sealer.

Following will be fitting the Meranti Aquatek Marine plywood bottom panels, sealing them with CPES and applying three coats of Sandusky Paint Company Chris-Craft Mahogany Bilge Paint.

None of the bottom planks, several of which just might be other than mahogany, can be saved. While the 5200 in which the plywood panels are bedded cures, we will be using the released planks as patterns and then sending them to the transfer station for recycling.

As always, you can delve much, much deeper into the what and how of a True 5200 Bottom by navigating to our True 5200 Bottom page.

She will be roaring across her home lake well before our promised July 4 delivery.

1947 Chris Craft Whiteside U22 Preserved

1947 chris craft whiteside U22 preserved

For guidance on installing a True 5200 bottom, please click here… for details roster of materials and their sources, click here.

If only the sun were shining! Rock Bottom 1947 has been saved and today was to be her winter debut, that is, before we received six inches of snow last night. So, as we say in Vermont, “We are making do,” and shooting her debut indoors.

She’s endured being majorly disassembled. Her entire bottom and chines were released, failed and oak-soaked frames were replaced. Then the frames received four coats of REAL Smith’s Clear Penetrating Epoxy Sealer and three coats of Smith’s Penetrating Sealer. Three coats of Sandusky Paint Company Chris-Craft Mahogany Bilge Paint followed.

We fabricated her inner skin using 4 mil Meranti Aquatek Marine Plywood that was dosed with four coats of CPES on both sides and all edges and then installed bedded in copious amounts of mahogany 3M 5200 using #6 Frearson driver, silicon bronze flathead wood screws. (The inner faces received three coats of SANPACO bilge paint ahead of installation.)

Her 3/8” Meranti planks, combined with her Meranti plywood inner skin, especially having been heavily frosted with 3M 5200, delivers a near bomb-proof bottom.

The rest of our work was the standard sequence – strip, fair, stain, seal, paint or varnish, varnish some more, and some more, all followed by final assembly. As always:

  • Robert Henkel, Peter Henkel INC recovered, rebuilt and thereby saved Rock Bottom’s original engine and driveline
  • Shauna Whiting, Kocian Instruments, transformed her tired gauges into cosmetically stunning, perfectly functioning instruments they once were
  • Mickey Dupuis and his crew at D&S Custom Metal Restoration transformed dull and scratched into incredibly show-ready hardware
  • Chris Hanson, Marine Canvas of Shelburne, restored her upholstery to as new condition.

We did the rest and cannot wait to drop her into Lake Champlain next spring so we can challenge her with her sea trial before returning her to the only home in Maine she has ever known.