How to Install Bottom Battens in a True 5200 Bottom – 1938 19′ Chris-Craft Custom Runabout

1938 chris craft runabout bottom battens

As is typical of all Chris-Craft utilities and runabouts, this 1938 19’ Chris-Craft Custom Runabout, Flyin’ By’s hull is comprised of a series of heavy frames to which the bottom is fastened. A series of battens run athwart between the frames, thereby adding substantial stiffness to the bottom.

Simply put installing battens is a thankless, two-person challenge. Here are the steps for installing one batten at a time, followed by filling the countersinks, fairing the bottom, sealing, priming and applying bottom paint. The process is described for one batten, one that will be repeated for all of them:

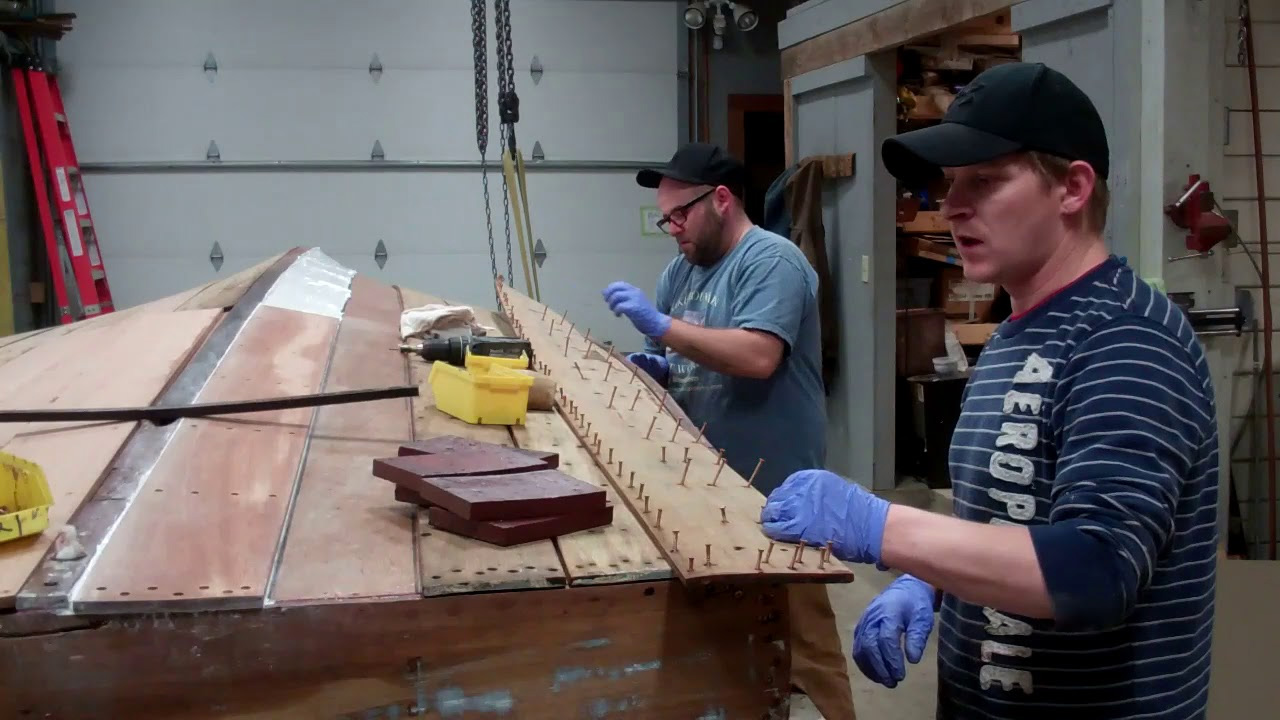
Installing the Battens.

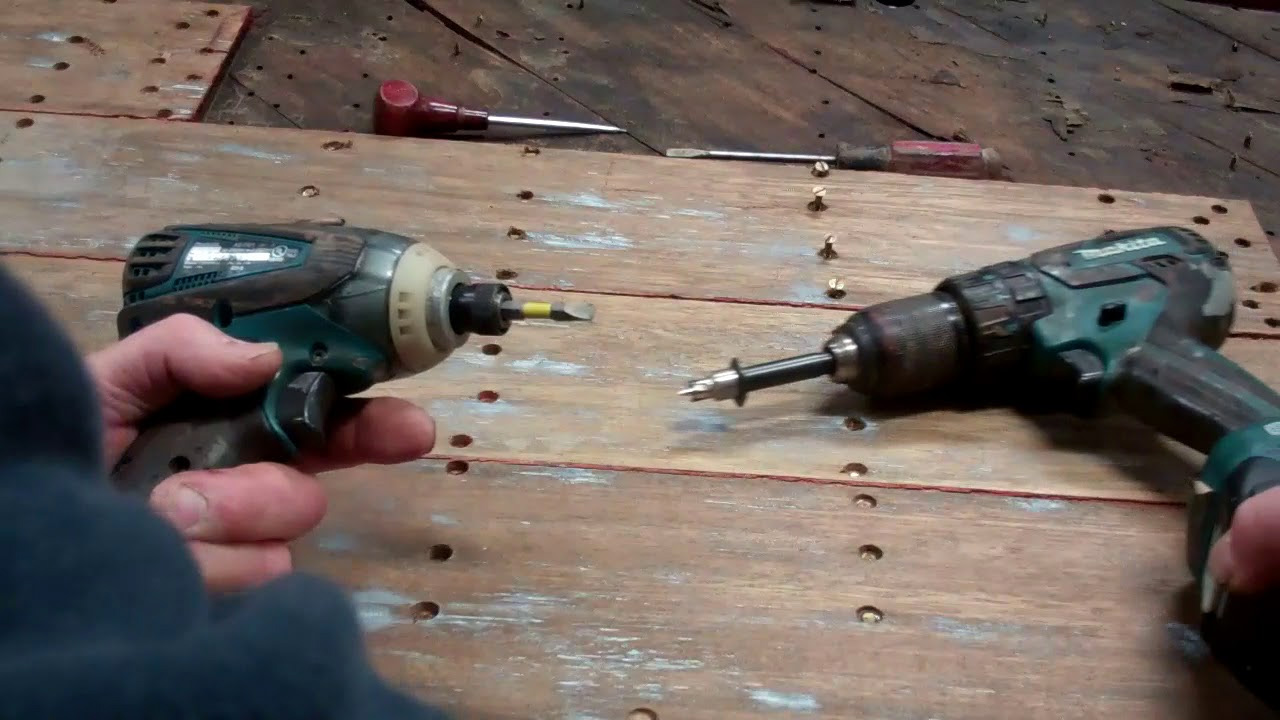
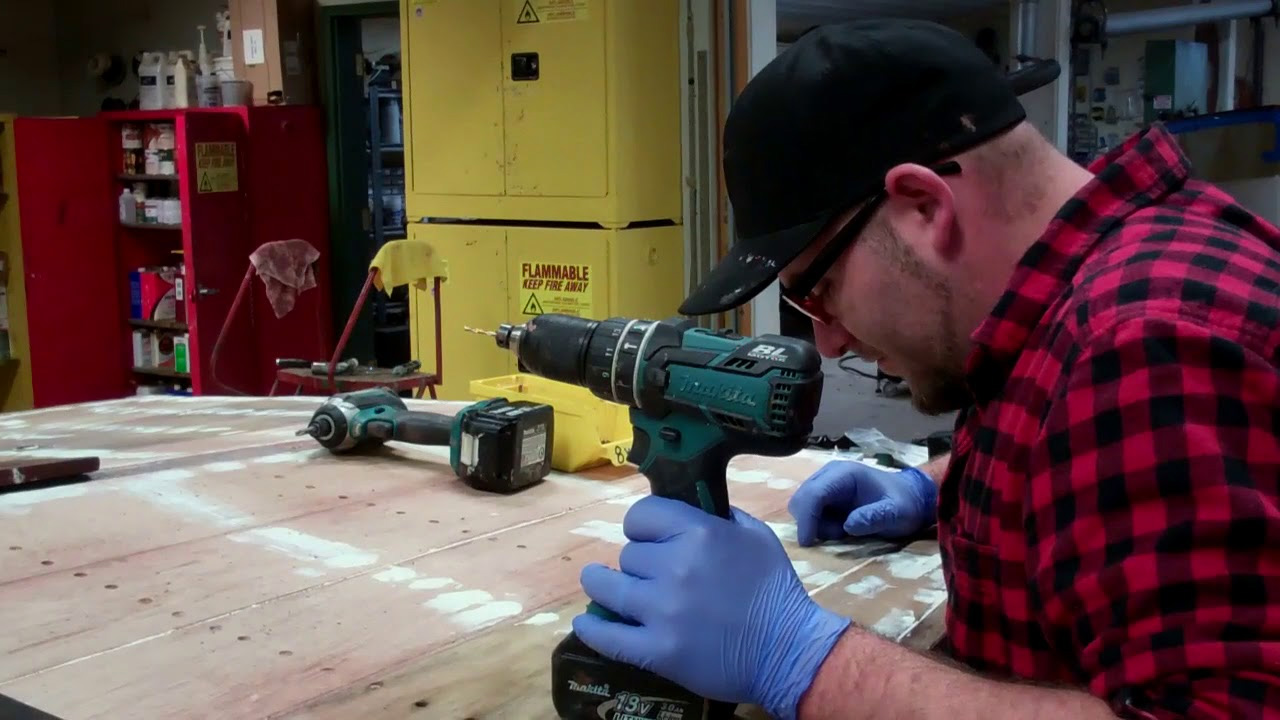
  • From the inside, drill two pilot holes towards the ends of the batten. • Using a straightedge and pencil, scribe a line between the pair of holes.
  • Drill holes along the line, about 1.5 inches apart using a countersink pilot drill.
  • Dry fit the batten and, while the guy underneath presses it in place, drill two holes from the outside in through two of the countersinks.
  • Sink screws through those two holes. We use #6 x 1 or x 1-1/4, depending on the thickness of the inner plywood skin plus the exterior planks.
  • Stand the remaining screws through the remaining holes and drive them home.
  • Release all of those screws for now.
  • Butter the batten’s bottom face about 1/8” thick with 3M 5200 – mahogany.
  • Hand it to the guy beneath the boat, who presses it in place.
  • Starting with the two end screws, and remembering to stand screws in all of the holes, drive all of them in place. (Standing the screws in the holes first ensures that fountains – volcanoes? – of 5200 do not squirt though the other screw holes as you work along the batten.)
  • Repeat for all battens on both bottom faces. Flyin’ By has twenty of them per face.

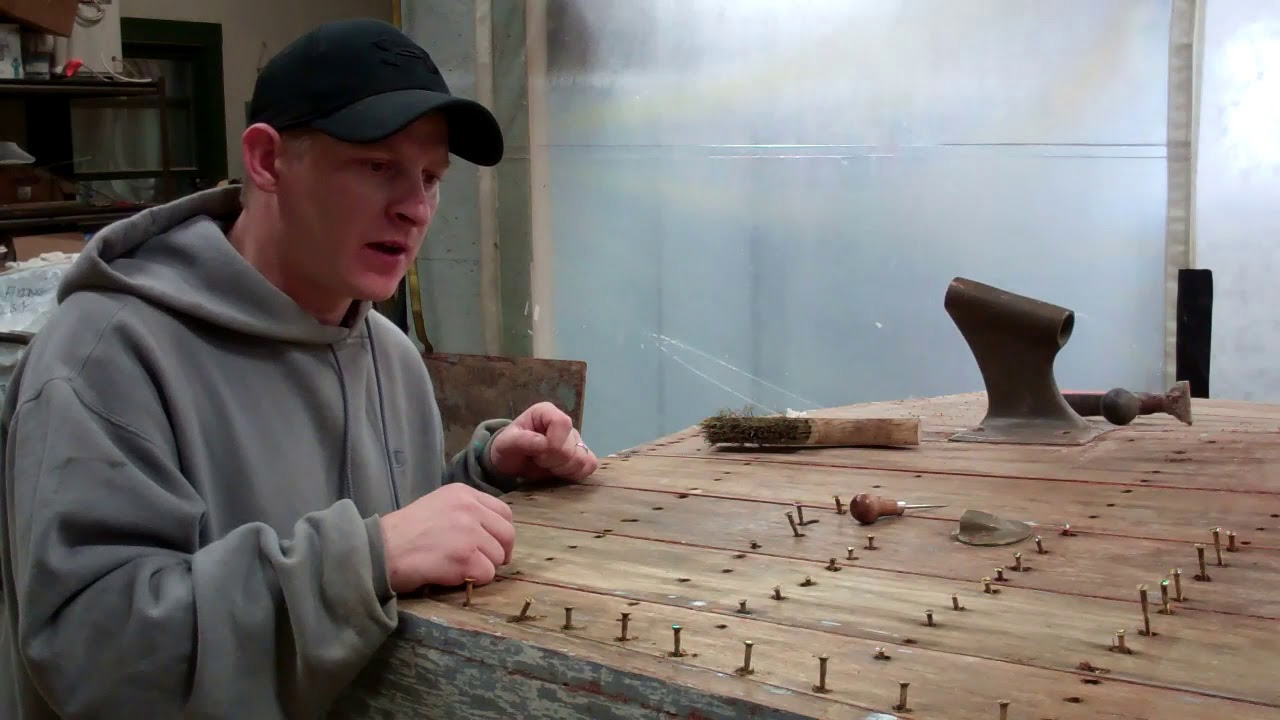
Filling Countersinks and Fairing the Bottom.

Filling countersinks and fairing the bottom is next. We use 3M Premium Marine Filler, available from Jamestown and elsewhere, to fill and fair the countersinks.

Three applications are required. We sand using 80 grit and one of our Festool random orbit sanders after the first coat, just to knock down ridges and what I call overspread.

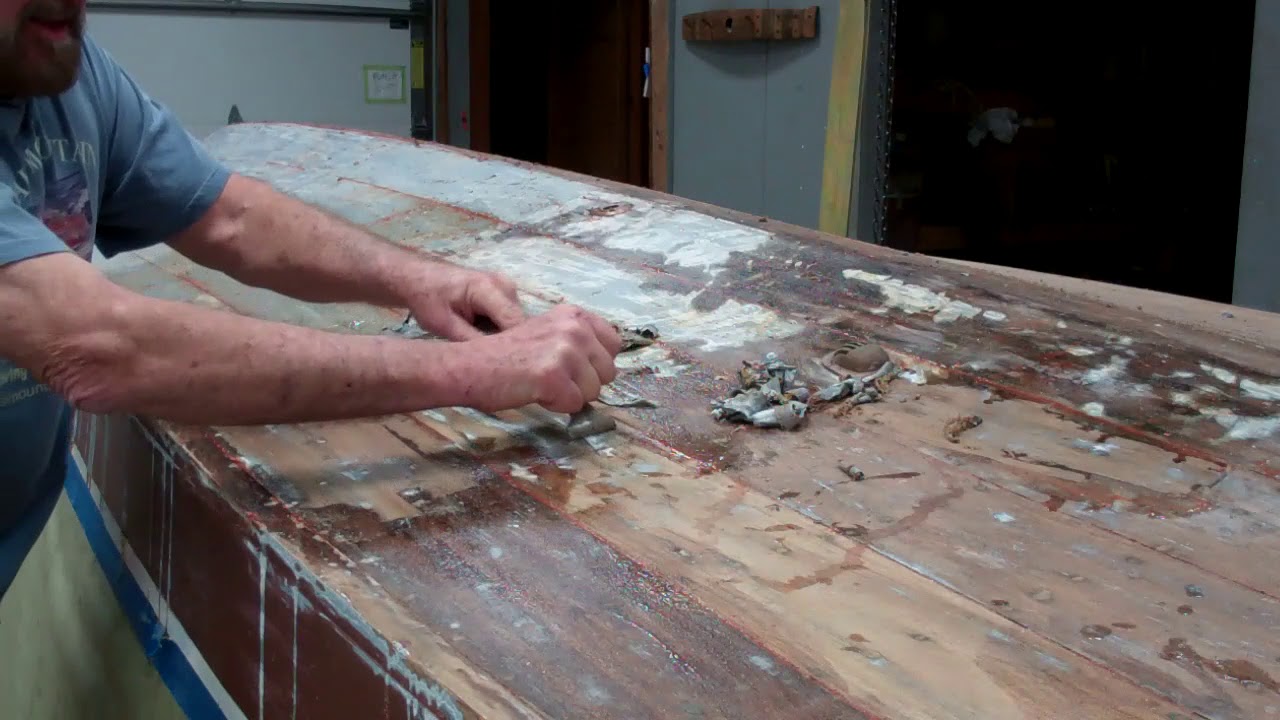
Once the last application has cured – about 4 – 6 hours – we sand the entire bottom fair using 80 grit on our pneumatic longboard sanders. Declivities may show themselves at this stage, which requires interrupting the sanding as Premium Filler is applied to them. Sealing, Priming and Bottom Paint.

Once the bottom is fair, apply three coats of Smith’s Clear Penetrating Epoxy Sealer. Danenberg recommends applying the second coat immediately after the first, so we apply the CPES to one entire face and then return to where we began and apply a second coat.

I know there are other penetrating sealers available, and we’ve tested most of them. Let me just say that we use Smith’s CPES, which is available at good prices from Star Distributing in West Mystic, CT: http://www.star-distributing.com/smit….)

Our go-to primer is Interlux InterProtect 2000E Two-Part Barrier Coat Epoxy Primer because it works

From Jamestown:

Interlux’s Micro-Plate formula creates an effective barrier against water permeation. 2000E may be used above and below the waterline as a universal primer for all surfaces. It is also an excellent primer for all metals and can be used as part of a no sand system.

From Interlux:

  • Two-part epoxy water barrier with Micro-Plates
  • Up to two weeks is allowed between coats of 2000E
  • Now available in two colors, Gray and White
  • Fast drying, easy application
  • Sag resistance to insure the elimination of sags and runs during application

Technically, InterProtect Micro-Plates provide millions of overlapping microscopic plates that create a barrier similar to shingles on a roof. These overlapping Micro-Plates eliminate any direct path for water migration and also improve the sag resistance of the epoxy making application easier.

We will have a gallon each of gray and white 2000E on hand for Flyin’ By’s bottom and chine plank – boot stripe included. Once we’ve applied five thin coats, we will have created an impenetrable barrier against water permeation.

Since Flyin’ By will be dry sailed by her new owners, we will apply three coats of Pettit Old Salem Copper Bronze Hard Racing Enamel, at which point she will sport a True 5200 Bottom.

Finally, she was in show ready condition, with over 20 coats of varnish having been applied and buffed when the moment to flip her arrives. No matter how careful any of us is, and no matter how many pads we placed strategically, Flyin’ By is heavy, and her hull shape presents long sweeping curves. And with three of us working around, under and even atop her, bumps and bangs are all but inevitable.

That said her varnish is scuffed in several places, so we will sand the entire hull flat anew and apply three or so coats of Interlux Perfection Plus Two-Part Varnish to her, and let it clear before she returns to storage.

How to Install Bottom Planks in a True 5200 Bottom – 1938 19′ Chris Craft Custom Runabout

1938 chris craft runabout install bottom planks

Installing the bottom planks can be tedious and is fraught with all manner of challenges.

First and foremost, unless the planks are dry-fit so that the seams between them are of uniform width, you will all but certainly experience and “Oh X$#%^!” moment when try to install the final, chine, plank.

I cannot tell you how many bottoms we’ve encountered that sport the telltale “skinny plank” along the chine. Failing to fit first, mark the edge of each plank heavily and then obey the lines usually translates into a super wide seam, sometime over an inch, and a plank that does not fit at the stem.

Once again we drop screws part way into all of a plank’s holes before setting it in place, and screw each of them in only part way thereafter. Once all the screws are down far enough that the shanks are in the plank’s holes, begin driving them home. (We work from the middle out, but given how narrow the planks are, you can also work from either, or both ends towards the middle.)

When you clean excess 5200 – that which squeezes out – work towards to ancillary goals. Keep the countersinks free of the 5200 so that the 3M Premium Marine Filler can make a purchase on wood, not on slipper adhesive. And, be sure that all seams are filled fair with 5200.

Clean with Interlux Brushing Liquid 333, and then wipe everything down with acetone, which will accelerate the curing process.

Finally, be patient. I do not care what Interlux says, 5200 can have a mind of its own around curing.

Sometimes waiting 2 – 3 days are fine, but we wait longer, at least a week, before we go at the bottom with sandpaper.

You will be helped with being patient as the countersink filling and bottom fairing process is might time consuming when done correctly. Remember, whether it is 3M Premium Marine Filler or some other fairing compound of your choosing, it shrinks as it cures. You want every countersink filled fair to the plank surface. Apply it twice and then sand everything as smooth as you can with 80 grit – no finer, before applying it a third time and sanding again.

Even though the planks were dosed with three coats of CPES before installation, you have likely sanded into the sealed layers, so applying three more coats is not overkill.

We prime all bottoms with five, not three or four – coats of Interlux 2000E Barrier Coat Primer before applying Pettit Hard Racing Copper Bronze Bottom Paint – three coats.

How To Remove Bottom Fasteners in a True 5200 Bottom – 1938 19′ Chris Craft Custom Runabout

1938 chris craft runabout bottom fasteners

That Flyin’ By’s bottom was original to the boat is absolutely certain. How do we know for sure? After stripping her bottom’s port face bare, and finding nothing but an original inner layer of 3/16” mahogany laid on the bias, we inspected each frame searching for any evidence of extra screw holes or holes that had been filled during a bottom replacement. No such evidence exists.

Additionally, save for the aft garboard planks, the screw pattern, their sizes and lengths are precisely consistent throughout both bottom faces. The substitution of bronze Reed and Prince fasteners for the original brass slot-headed fasteners tells us that both aft garboards were removed and then reattached at some point.

Nowhere is there any evidence that the inner layer has deteriorated or been replaced. What remains of the original canvas interlayer is somewhere between some and none. Additionally, the original brass screws have been replaced along the keel edge of both forward garboards.

The aft garboards – the #1 planks – and the next ones outboard – the #2 aft planks – lie immediately beneath the engine and transmission, and are sufficiently oil-soaked that their ability to hold 5200 and paint is at best suspect. They must be replaced.

The balance of the original bottom planking is as hard and as sound as the day it left Algonac, MI in 1938. Releasing the screws fastening the bottom is a four-part sequence

  • Using a 3/8” Rotabroach cutter and electric drill set at high speed, drill each countersink until you hear the telltale sound of the steel cutter grinding the head of the brass or bronze (or stainless) screw. Take care here. The Rotabroach is designed for grinding off excess spot weld. The cutters are super hard and super sharp. Applying too much down force or grinding for too long risks rounding off the screw’s head and erasing its driving slots.
  • Reach for a sharpened awl and clean each countersink, paying particular attention to the screw’s slot or R&P driver. Grind through these and you will “enjoy” extracting the screw using one of the damaged screw extractors available today.
  • Blast all residue out of the countersink with an air chuck and compressor delivering at least 110 PSI. (That’s why wearing safety glasses are absolutely required. The particles erupt from the countersink with surprising force.)
  • Using either a slot or R&P driver inserted in a variable-speed impact gun, carefully and slowly tease the screw as it begins backing out of the wood. Trigger control is critical lest you want to destroy the screw’s head and be reaching for the damaged screw extractor.

Voila’! One screw is released. You have only hundreds and hundreds and hundreds to go!

Every screw I’ve released to this point was dropped into a plastic paint pail that now weighs over 20 pounds!

Only a hundred or so to go…

How to Open Countersinks and Remove Fasteners from the bottom of a 1938 19’ Chris-Craft Custom Runabout

1938 chris craft runabout countersinks fasteners

We clean fastener countersinks using a Blair Equipment 11090N Rotabroach Cutter Kit, which is available from Amazon.com (https://www.amazon.com/Blair-Equipmen…)

Yes, even if a plank will be reused and is filled with either a wood or putty, we remove its wood bungs, but in this application always choose a cutter that is smaller than the diameter of the bungs being removed. The cutter bores through the bung without touching the countersink’s edges and is then cleaned using one of the awls we have on hand.

We are much less careful when releasing failed planking, and often use a cutter one size larger than the diameter of the countersink. The goal here is removing the plank without breaking it so it remains available to patterning.

The air chuck is key here, as RJ demonstrates in the clip. With our compressor set at 110 PSI, the chuck delivers a concentrated blast of air that (almost always) leaves the countersink bereft of waste material.

Finally, if you have a super steady hand, as RJ does, you too can back the screws out with an impact gun, not a hand screwdriver.

When stripping a bottom, be sure to remember RJ’s admonishment. Climb beneath the hull, or down into if she’s not flipped yet, and number the intermediate frames, sometimes referred to as battens.

While we will bed them in 3M5200 during final assembly, they are originally installed by driving screws from outside the hull, through the external planking and inner skin, and into the batten without any adhesive applied to the batten or inner skin.

Numbering these battens before they’ve dropped to the floor and skittered about will save endless time and frustration during reassembly.

1938 Chris Craft – How-to Strip INT 200E Barrier Coat using Circa 1850

1938 chris craft circa 1850 interlux 200e stripping

Yes, once again, no matter how long I’ve been preserving wood boats, seldom does a day go by that I do not learn something new.

Long ago Don Danenberg did his best to sell me on the absolute necessity of applying five coats of 2000E to achieve a True 5200 Bottom. Yes, we are standardized on this practice, primarily because I so respect Don’s wisdom and experience, but I must say, I’ve always wondered, “Is it really that tough? Is it really the tenaciously adhering and true barrier coat, one that combats water infiltration to the fullest extent possible?”

Don makes his argument most forcefully in his seminal article, “What is a True 5200 Bottom?” that he published in the Sept-Oct 2014 issue of Classic Boating magazine. Here is a link to PDF copy.​

Any doubts I may have harbored evaporated over learning firsthand what it takes to remove this stuff from mahogany planking.

My lessons for today:

  1. Allow the Circa 1850 Heavy Body Paint and Varnish Remover enough dwell time to do its work, but not so long that it begins drying out.
  2. Use a SHARP scraper, bonehead! I began stripping Flyin’ By’s bottom on November 2, which is when I shot the previous video that chronicles the epic battle between five full coats of Interlux Interprotect 2000E Barrier Coat Epoxy Primer and Circa 1850 stripper.

Both products are available from Jamestown Distributors. (copy the links into your browser.)

  1. Interlux 2000E
  2. Circa 1850

You will sense my frustration in the November 2, 2018 clip. Well, having learned how best to utilize Circa 1850’s prodigious stripping qualities, today’s clip chronicles the victory of Circa 1850 over Interlux 2000E.

To be clear I misspeak on this clip. The first coat of stripper was followed with a second one about an hour later. I then allowed about one hour of dwell time, during which I sharpened the BAHCO scraper blade and reinserted it into my Sandvik scraper.

Then I went after the paint using two hands with long, and I hope fluid strokes. After several strokes, the 2000E just rolled off the surface leaving smooth mahogany behind it.

As I began shooting this clip, I had progressed about half way from the transom to the bow on the starboard side, and believe that I’ll need about two hours to reach my goal, a clean starboard face of her bottom.

Time to return and work towards reaching the bow today!