Miss Take, our 1959 17’ Chris-Craft Sportsman, arrived on May 27, 2020. Today, June 9, 2021, just 12 days later, we have replaced here tired, leaky, heavily damaged bottom with an entirely new True 5200 bottom.
Well, almost. An inner layer of seriously sealed – Smith’s CPES – 6 mm Meranti Marine (Aquatek) plywood has been secured, bedded heavily in mahogany 3M5200. (We use the much more expensive mahogany 5200 at this step so that the bilge is not an abstract “painting” of white 5200 squeeze-out.)
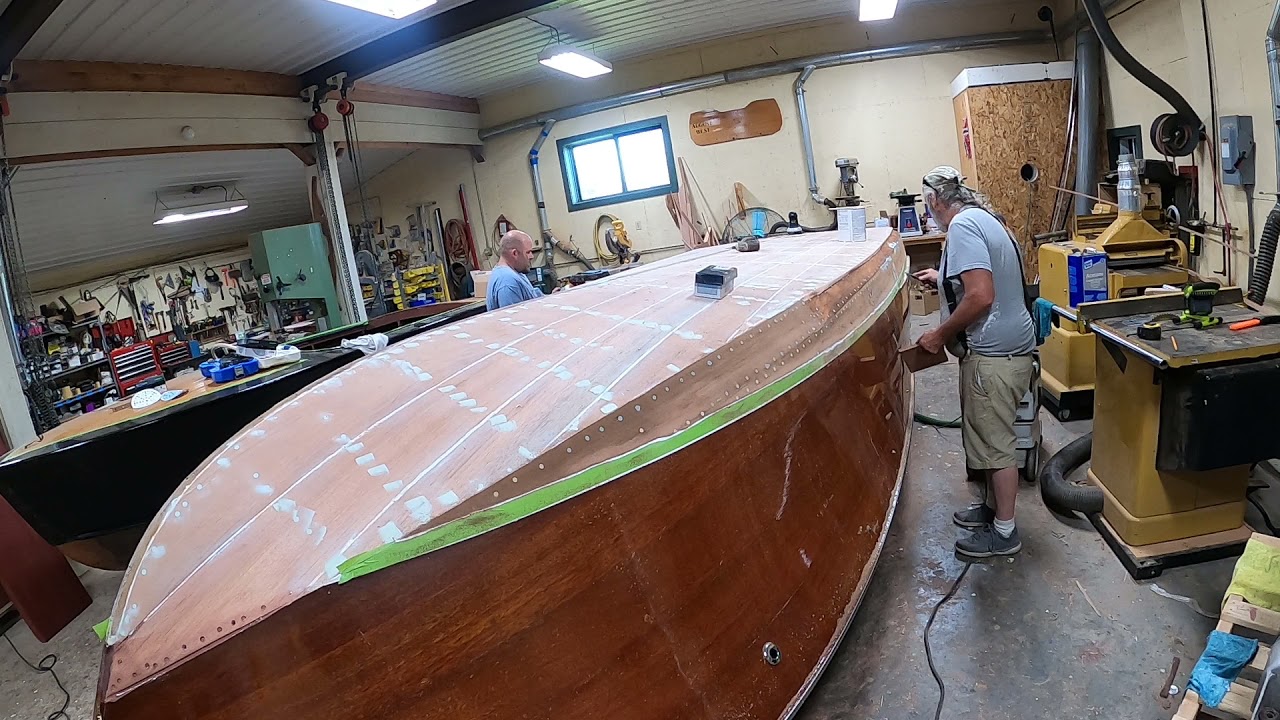
A new suite of planks has been fabricated, also sealed in multiple coats of CPES, bedded in 5200 and screwed down using #8 silicon bronze – never, ever, ever stainless – flathead, Frearson wood screws.
After fairing the planks using 40 and 80 grit, the countersinks are being filled and faired using 3M Premium Marine Filler.
Next comes another three coats of CPES, followed by FIVE, not 2, not 3, not 4 coats of Interlux 2000E Two-Part Epoxy Barrier coat.
Lastly she will receive three coats of Pettit Hard Racing Copper Bronze Enamel.
Yes, it is Memorial Day, but we have a boat needing a new bottom, so have dropped all else to make some real progress, but also to discover what is or is not lurking beneath that plywood. Our 1959 Chris-Craft Ski Boat must get back to her owner ASAP, so we are on task.
The good news is that, save fore one of them, her frames are sound; yes, grease-sodden, but solid. Joe was able to sister the one port side forward frame that had broken.
We will not attempt applying bilge paint to the frames as the grease and oil has penetrated to the point it would not adhere. We will scrape and then sand all of the plywood inner skin landings on the frames.
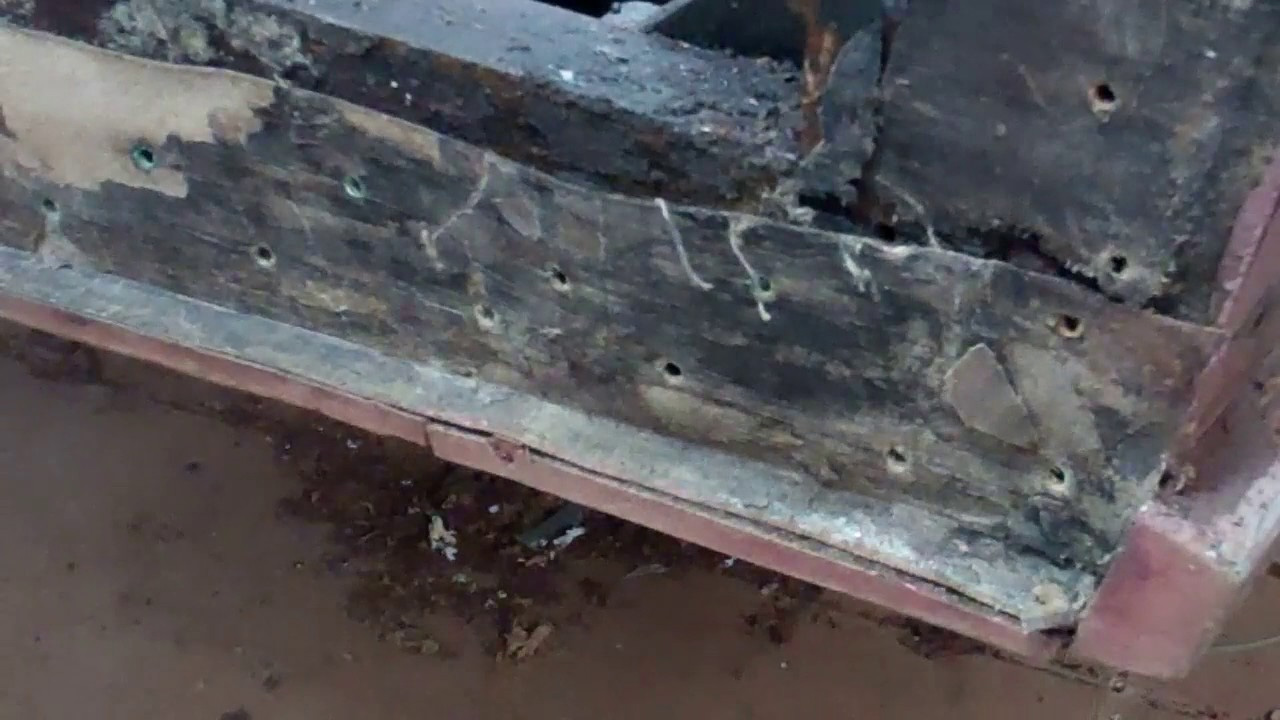
Remember my endless comments about how these venerable ladies keep secrets beneath their skirts? Well, this lady’s secret is that what we have been removing is anything but her original bottom. Indeed, independent of what the owner was told then, whoever is the villain of this piece should be dragged and quartered.
Why? Just imagine using 3/8” A/C construction plywood for the bottom of a wood boat! It has delaminated everywhere. Once again, thank the Lord that she and her owner did not find the bottom!
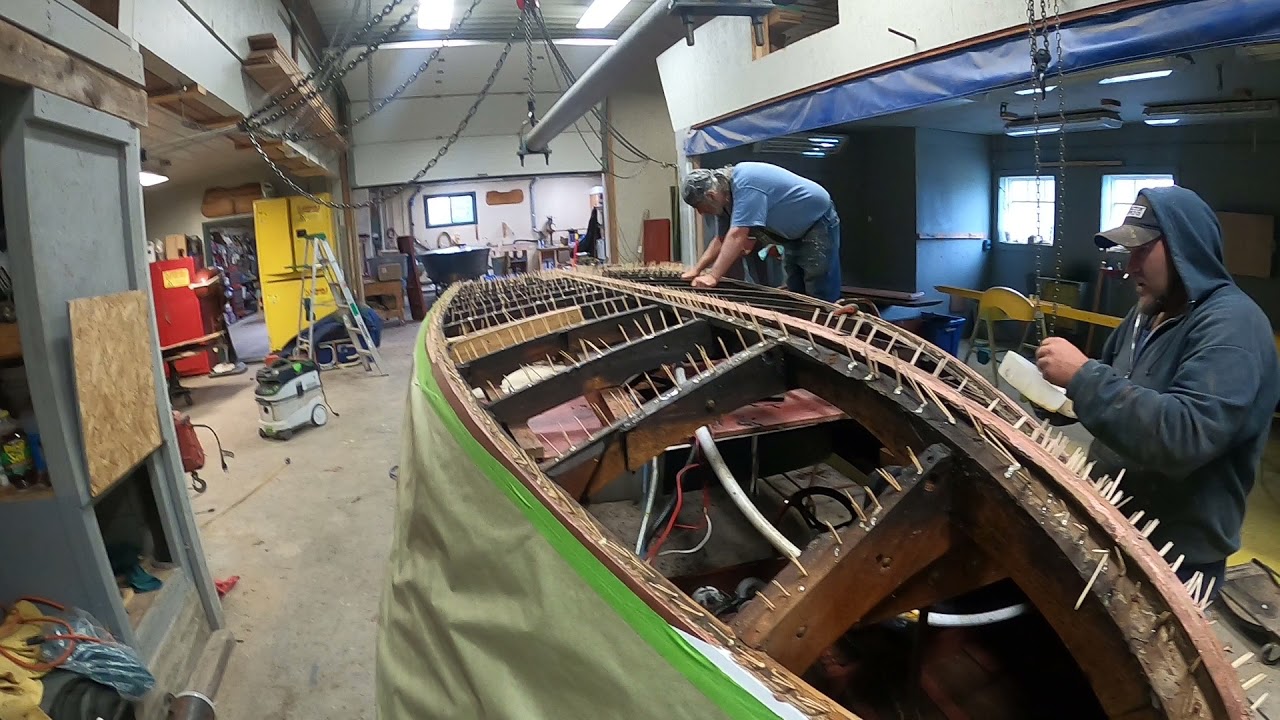
At this point we are “porcupining,” which involves filling every empty screw hole with three to four hardwood toothpicks and waterproof Gorilla glue. Once all of them have been inserted, Joe and Rick will spray the bottom lightly with water. Doing so accelerates curing while strengthening the bond formed between the oak frames and hardwood toothpicks.
Remember, you can access all the materials we use and their sources by navigating to our Materials and Sources page.
Next, we will use our Fein MultiMaster tools to skim off the toothpicks, at which time the landings will be ruthlessly scraped, sanded and treated with three full coats of Smith’s – and only Smith’s Clear Penetrating Epoxy Sealer.
Following will be fitting the Meranti Aquatek Marine plywood bottom panels, sealing them with CPES and applying three coats of Sandusky Paint Company Chris-Craft Mahogany Bilge Paint.
None of the bottom planks, several of which just might be other than mahogany, can be saved. While the 5200 in which the plywood panels are bedded cures, we will be using the released planks as patterns and then sending them to the transfer station for recycling.
As always, you can delve much, much deeper into the what and how of a True 5200 Bottom by navigating to our True 5200 Bottom page.
She will be roaring across her home lake well before our promised July 4 delivery.
Today’s bleaching update follows yesterday’s by a bit over 24 hours. We kept the ’59 Chris-Craft 17-foot Sportsman bathed in bleach from a bit after noon through midnight yesterday.
Even though the surface feels dry to the touch, our moisture meter pegged well above 30 percent everywhere on the decks and covering boards. The wood must gas off much more moisture before we can stain it. As it does, the color becomes more and more uniform.
The bleaching process raises grain while it bleeds the tannin out of the fibers, leaving thousands of little feathers, which must be removed to achieve a uniform color when stain is applied.
The challenge is removing the feathers without cutting through the very, very thin layer of bleached mahogany. Sandpaper, even a very fine grit, is just too aggressive, so we reach for coarse Circa 1850 scuff (Scotch Brite) pads from Jamestown Distributors.
A light scuffing, being sure to only do so with the grain, quickly releases the feathers, and subsequently vacuuming using a bristle tool removes them sufficiently. (You might use a tack cloth, but only if you purchase those that are devoid of wax or oil. Depositing either on the surface guarantees seeing a blotch form because the stain cannot penetrate the deposit. But for now we will wait until our moisture meter reads no higher than 15%.
Then the blonde elements will be stained with Sandusky Paint Company Chris Craft Corina Blonde Filler Stain, followed by a mixture of brown and red mahogany Interlux Interstain.
Be sure to allow several days for the stain to cure, lest your application of CPES pulls the stain and kills color uniformity in the process.
Stained! Finally we see an early hint of here elegance. Yes, the hull’s surface is deadly dull right now, but only until we begin applying Clear Penetrating Epoxy Sealer.
Because we used Interlux Interstain Wood Filler Stain, we will give it a full week to cure. When we have not done so, we fought the CPES, which pulled the semi-cured stain out of the wood. Brushing the CPES on created the worst problems.
Allowing the stain to cure for a full week stopped the bleeding.
Yes, we have experimented with Interlux Wood Sealer, but, as Don Danenberg has said, it is just not CPES in terms of its performance. Even worse, we tested masking by applying various tapes – blue painter’s, Frog, and even gaffer – to test panels that had been sealed with the Interlux product. In way too many cases, pulling the tape took the sealer with it, leaving dull declivities behind.
That said, we will begin sealing her hull next Monday, applying the first two coats one immediately after the other, per Danenberg’s recommendation.
We may apply a base coat of varnish before flipping her right-side-up, but that’s a decision for some time next week.
Right now, as the Dutchmen begin disappearing with the staining application, it is just super to see her coming back to where she was many decades ago.
The 1959 17’ Chris-Craft Deluxe Sportsman passed several critical milestones this week. All Dutchman repairs, and there were many of them, including replacing half of the stem, have been executed.
Two of the most challenging repairs involved the framing at the top of both aft corners of the hull. Extensive rotted material was released with new framing fabricated and installed. Dutchman repairs on both corners completed the task.
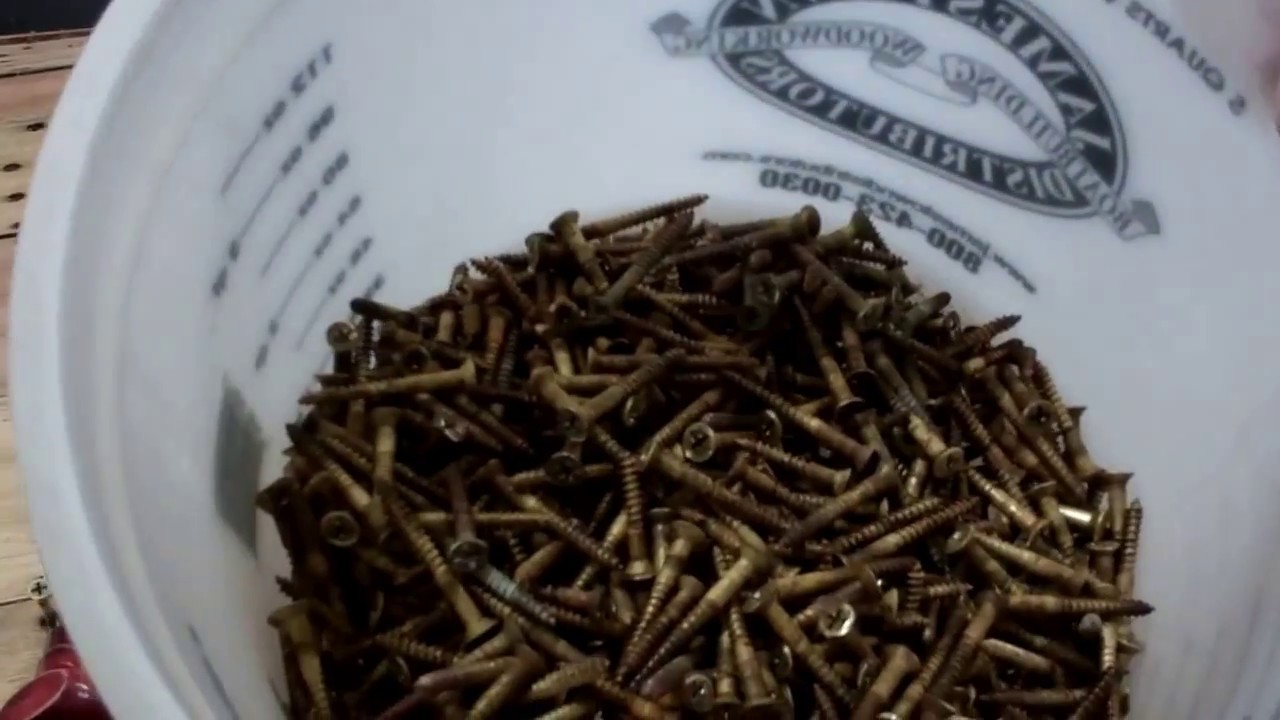
John replaced well north of two-hundred fasteners that had failed, each of which has been bunged anew.
Sanding the transom and topside planking fair and flat followed, and proved to be a bear of a challenge. The boat has been sitting and exposed to the elements for some decades, during which time the topside planking expanded and contracted, and became bowed in the process. John was able to save every plank and deliver a completely flat outcome. Doing so, however, required starting with 40 grit paper and sanding cross grain with our longboard, inline sander. (Sanding with the grain would only perpetuate the rolling side planking.)
Once the high surfaces were sanded flat, John sanded with the grain, starting with 40 and progressing through 60, and finishing with 80 grit.
As shown in the addendum to the initial video, we then began bleaching these surfaces in the early afternoon on the 20th, using Daly’s Two-Part Wood Bleach, and kept the wood wet with repeated applications until about 7:00 PM that day.
The second half of this video shows you the results.
Next we will sand lightly with 320 grit, just enough to knock off any feathers raised by the bleaching process, and then stain using Interlux Interstain Wood Filler Stain, two parts brown to one part Chris-Craft red mahogany stain.
We will give the stain four days to cure before sealing these surfaces with CPES, after which we will apply one sealer coat of Pettit Easypoxy Hi-Build Varnish, and flip the hull right-side up. Such a satisfying way to end the week!
Given the evidence that it has shrunk – a very wide seam between it and the next transom plank above, I fully expected to release the bottom transom plank.
However, the prospect of first stripping bottom paint lying on my back and then releasing all the fasteners driven through the tails of the bottom planks and into the bottom transom plank was foreboding at best.
Then, when I was having difficulty with the last few fasteners, I called in, RJ, who has what he terms his “special touch” releasing buried wood screws. As the last one backed out, RJ exclaimed, “I think your plank is free already!” And it was and is. We now know that Chris-Craft moved the final course of fasteners forward from the tails, just enough that they are driven into the transom frame’s bottom bow.
The attempt to waterproof the seam along the bottom edge of the bottom plank was attempted using the oil-permeated canvas we have all seen when releasing bottom planking. Suffice it to say that, like the stuff under bottom planking, this course of canvas had long since lost whatever waterproofing qualities it had in 1959.
When the time comes we will install the bottom plank bedded in copious amounts of mahogany 3M5200.
A combination of finding green, and therefore moisture adulterated, fasteners behind the test bungs I popped, and a ubiquitous design issue that translates into a chronic, although slow leak, we also released the next transom plank. The issue occurs at both ends of that plank, from its bottom edge up about 2 inches. Chris-Craft originally sealed the seam between this plank and the transom frame member it lands on using the same sealer-impregnated canvas technique.
However, each of the first 3 1954-1959 17’ Sportsman models we have preserved to date tended to seep water through that joint until we bedded them in 3M5200.
Proving that even old boat guys can learn, we routinely release this plank, remove what is left of the canvas and install it anew bedded in mahogany 3M5200.
With Christmas weekend peaking over the horizon, cleaning out the bilge and then pressure washing it will not begin until next Monday.
The goal here is removing fairing-compound-filled countersinks and releasing the over 1,000 fasteners driven through the bottom planking and chines without damaging the edges of the countersink hole.
We begin with a portable drill and drill bit. (We use a pilot bit because it can withstand lateral pressure without breaking.)
Why drill all these holes? The Rotabroach cutter includes a positioning, spring-loaded pin. Yes, it can position the cutter in the countersink center, but it quickly gets loaded up with residue and fails to pop out once a countersink is opened. Then it walks across the plank until you grab a vice grip, remove the cutter and clean it.
Drilling the pilot hole gives the pin someplace to go without being pressed into the cutter head.
Next clean the hole using a scratch awl, and then the Frearson head slots using a pick, and blow the hole clean with an air chuck. (A shop vacuum will work here if the crevice tool is used, but the blast of compressed air cleans much, much more thoroughly.
Grab the impact gun to which you have fitted a #2 Frearson (Reed & Prince) driver and carefully back the screw out. (The impact gun’s trigger must be feathered so that it turns as slowly as possible for the initial rotations. A portable screw gun can be used, but it is much slower.)
The mini hook comes into play for those fasteners that simply spin in the hole. Carefully work the hook under the screw head and apply a bit of upward pressure by levering against the edge of the countersink. (Yes, “unpleasant” utterances are part of this process.)
Once you have all the fasteners – which you absolutely will not reuse – safely in the recycling bucket, and have teased all the planks off the inner planking, you are ready for the next steps. In the case of the ’59 Chris-Craft Sportsman, since the plywood inner skin presents as almost new, the next step is scraping all the canvas off, cleaning the surface and proceeding to toothpicking every fastener hole in the entire bottom.
Once you have inserted 4 to 5 toothpicks dipped in Gorilla Glue, or about 5,000 in total, into all the fastener holes, and the glue has set, reach for your Fein Multimaster and “shave” the plywood. What a mess!
Time for CPES, 3M5200 and installing bottom planking!