1956 Chris Craft Capri Bleach & Stain Milestone

1956 chris craft capri bleach stain

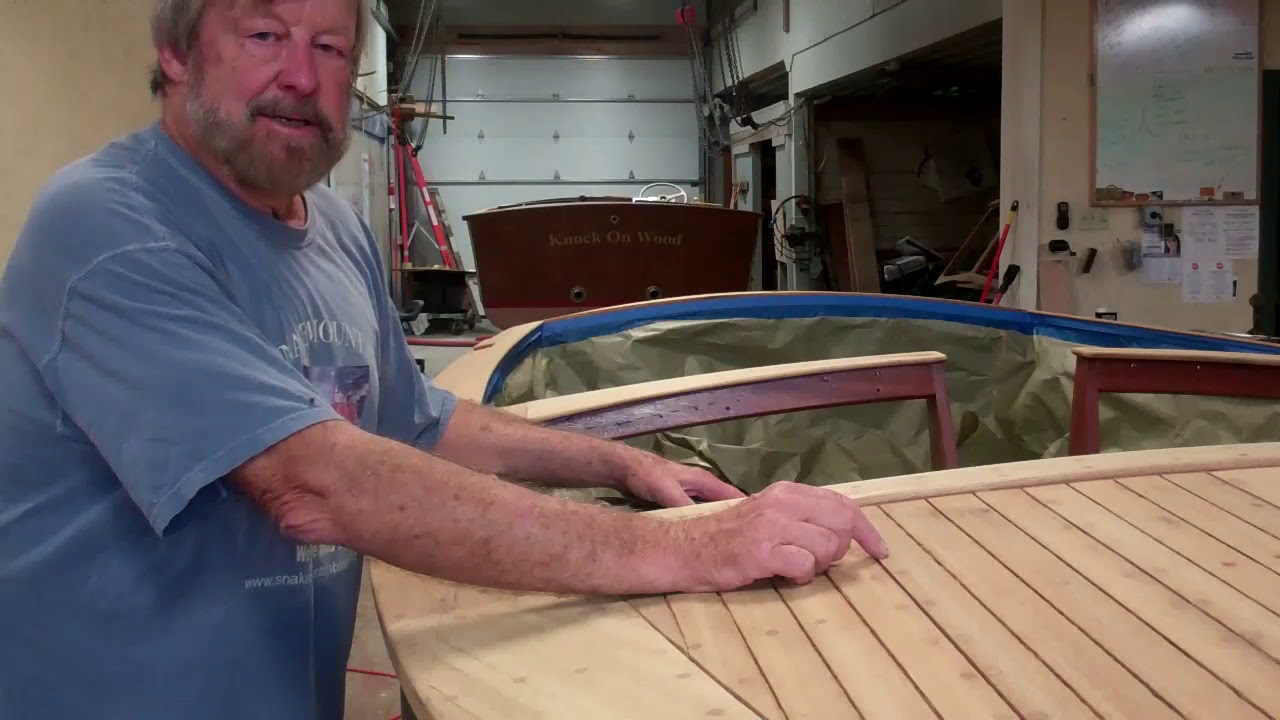
Our 1956 Chris-Craft Capri Runabout blew past a major milestone today. Her decks and gunwales been sanded fair, Joe has replaced rotted perimeter wood along the margins of her cockpit, bleached with Daly’s A & B Wood Bleach, and stained using Lake Oswego Boat Co. J’eld stain – Post-War Chris-Craft

Next she will be sealed with multiple coats of Smith’s CPES, followed by scuff sanding using medium Scotch Brite pads, clean the entire surface with Acetone-dampened shop towels and begin applying Pettit Flagship High-Build varnish.

The blonde king plank will not be stained as we continue following the original Chris-Craft practice of simple varnishing it with an amber varnish, which will impart a honey-blonde hue.

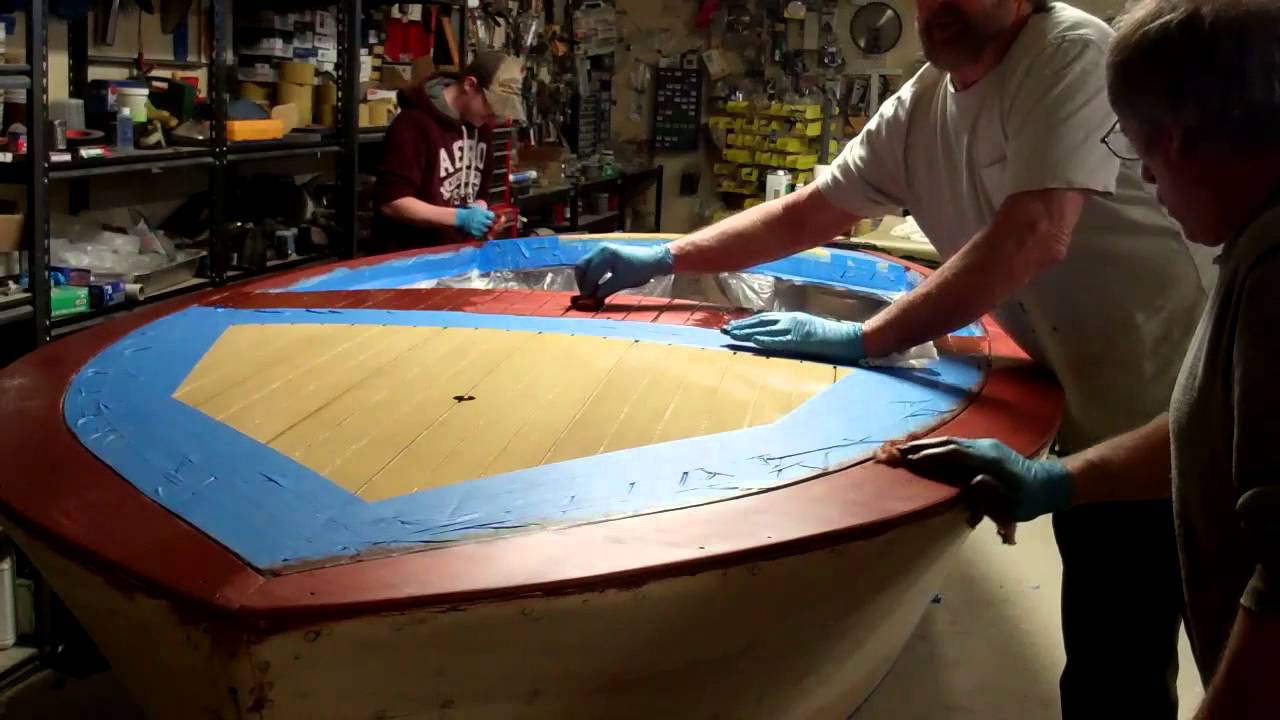
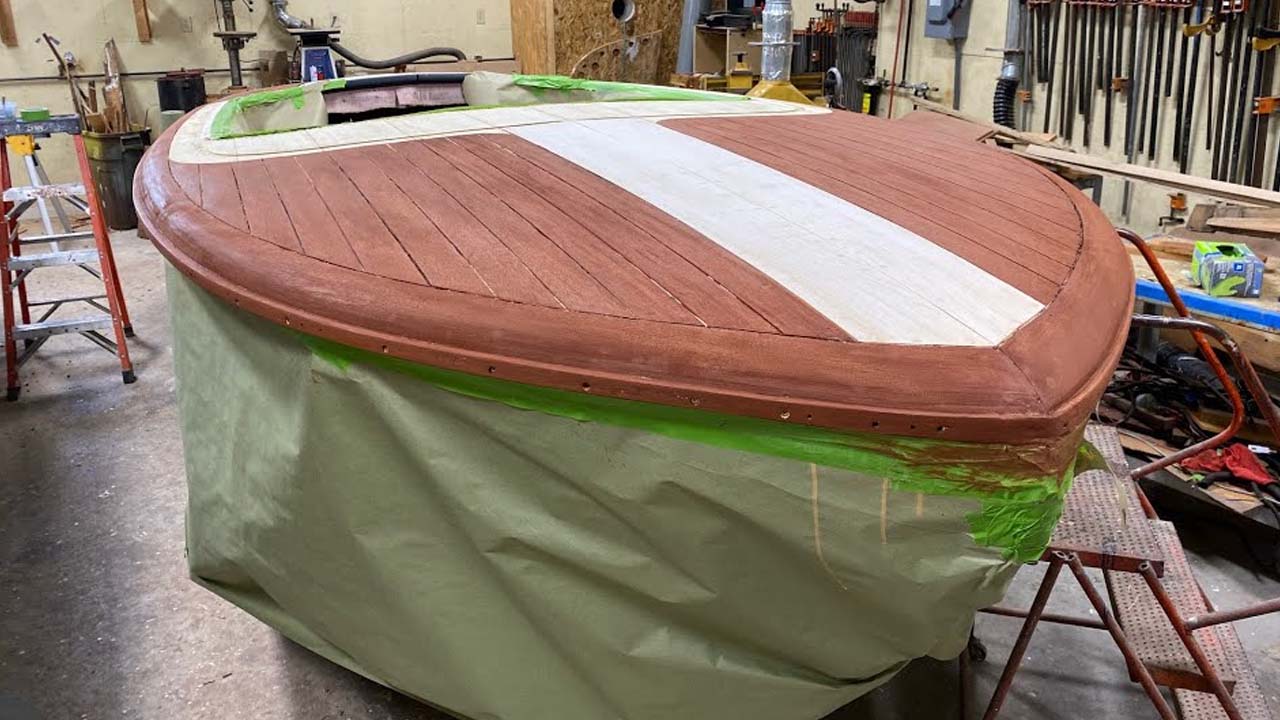
After applying about 15 coats, and because they will be painted white, we will fill the deck seams using mahogany Sikaflex, paint them white using Interlux Boottop and Striping Enamel and then apply the final five or so coats using Pettit Z-Spar Captain’s Ultra Clear varnish, thereby adding UV protection to the paint.

Rather than type out all the materials’ names and source links correctly each time, you can find a comprehensive roster by clicking here.

1956 Chris Craft Capri Bleach Stain Milestone

1956 chris craft capri bleaching staining

What a great milestone to have disappearing in our wake.

Once the wood dried down to 5%-10% moisture content, which required applying Dalys A & B Wood Bleach, mixed 3B:2A, twice, the uniformity we sought was achieved.

Now that we have scuff-sanded the entire surface with medium grit Scotch Brite pads, it is time for bleaching her with Mike Mayer’s Lake Oswego Boat Co. Post-War Chris-Craft J’eld stain.

We are now standardized on J’eld stain, whether it is sourced directly from Wood Kote, or most often from Mike. The advantage of using Mike’s products is that he offers a wide array of stains formulated to match original company stains exactly.

Why J’eld stain? Here is the link to the video shot at the Snake Mountain Boatworks’ J’eld stain workshop.

We just might have applied some varnish by week’s end!

1959 Chris Craft Sportsman Time to Stain

1959 Chris Craft Sportsman Time to Stain

Today’s bleaching update follows yesterday’s by a bit over 24 hours. We kept the ’59 Chris-Craft 17-foot Sportsman bathed in bleach from a bit after noon through midnight yesterday.

Even though the surface feels dry to the touch, our moisture meter pegged well above 30 percent everywhere on the decks and covering boards. The wood must gas off much more moisture before we can stain it. As it does, the color becomes more and more uniform.

The bleaching process raises grain while it bleeds the tannin out of the fibers, leaving thousands of little feathers, which must be removed to achieve a uniform color when stain is applied.

The challenge is removing the feathers without cutting through the very, very thin layer of bleached mahogany. Sandpaper, even a very fine grit, is just too aggressive, so we reach for coarse Circa 1850 scuff (Scotch Brite) pads from Jamestown Distributors.

A light scuffing, being sure to only do so with the grain, quickly releases the feathers, and subsequently vacuuming using a bristle tool removes them sufficiently. (You might use a tack cloth, but only if you purchase those that are devoid of wax or oil. Depositing either on the surface guarantees seeing a blotch form because the stain cannot penetrate the deposit. But for now we will wait until our moisture meter reads no higher than 15%.

Then the blonde elements will be stained with Sandusky Paint Company Chris Craft Corina Blonde Filler Stain, followed by a mixture of brown and red mahogany Interlux Interstain.

Be sure to allow several days for the stain to cure, lest your application of CPES pulls the stain and kills color uniformity in the process.

1959 Chris Craft 17′ Sportsman Stained!

1959 Chris Craft Sportsman Stained

Stained! Finally we see an early hint of here elegance. Yes, the hull’s surface is deadly dull right now, but only until we begin applying Clear Penetrating Epoxy Sealer.

Because we used Interlux Interstain Wood Filler Stain, we will give it a full week to cure. When we have not done so, we fought the CPES, which pulled the semi-cured stain out of the wood. Brushing the CPES on created the worst problems.

Allowing the stain to cure for a full week stopped the bleeding.

Yes, we have experimented with Interlux Wood Sealer, but, as Don Danenberg has said, it is just not CPES in terms of its performance. Even worse, we tested masking by applying various tapes – blue painter’s, Frog, and even gaffer – to test panels that had been sealed with the Interlux product. In way too many cases, pulling the tape took the sealer with it, leaving dull declivities behind.

That said, we will begin sealing her hull next Monday, applying the first two coats one immediately after the other, per Danenberg’s recommendation.

We may apply a base coat of varnish before flipping her right-side-up, but that’s a decision for some time next week.

Right now, as the Dutchmen begin disappearing with the staining application, it is just super to see her coming back to where she was many decades ago.

1957 Century Palomino Applying Filler Stain

1957 Century Palomino Applying Filler Stain

We achieved a major milestone in our 1957 Century Palomino preservation project today. The hull is now stained in the traditional two-tone Palomino manner. Blonde Avodire (African white mahogany, graces both the fore and aft decks, save for the crescent just aft of the windshield, which is stained to match the covering boards. We used Interlux IInterstain thinned about 10% and applied it with plain old chip brushes. Besides being thinned to a consistency that approximates house paint and applying it liberally on the surface, t here are two keys to achieving a stained surface that is uniform and free of blotches.

First, is being patient, but not too patient. Way too many stain teams assign application to one person while the rest follow immediately behind scrubbing stain off the surface. Doing so prohibits the stain from penetrating the wood fibers. As hard as it might be, wait until the stain “flashes,” at which point the surface begins taking on a dull look. Do not wait too long, however, as the stain continues curing, and if you wait too long, scrubbing the surface clean becomes a nightmare.

Now it is time to begin scrubbing across the grain, not with the grain. A filler stain is designed to fill the valleys in the grain left by sanding with the grain to 80 or 100 grit. (Sanding the surface smoother than 100 grit max robs the surface of the ridges and valleys — the teeth — that the stain will fill.)

Scrub, scrub, scrub. Change your cheese cloth or terry cloth toweling when it becomes caked with residue. (Be sure to drape the used rags over a close line, or something similar to avoid spontaneous combustion. They are safe to discard only when they become stiff as a board.) How do you know you are finished? The surface will begin feeling smooth and almost slippery. And your towels will come away nearly clean when you burnish across the grain with them.

Staining is anything but glamorous, but nothing can do more harm to your project than scrubbing too soon or too little. The varnish will amplify every blemish and every blotch a hundredfold.