
“Here’s how I do it, thanks for asking”… This was a section in Classic Boating written by Don Danenberg years ago and my dad and I used to always say that before a conversation. We thought it was funny…
SURFACE PREP
Once all of the woodwork is done, or if you are just stripping for a re-stain, you need to make sure the hull is perfectly fair and that there are no cross grain scratches.
If I am fairing a newly planked boat I may start with 36G on a grinder to fair the hull. Once the hull is rough faired I move on to a smaller random orbital sander (RO) starting with 40G and working up to 100G. Once I get to 100G on the RO I go back to 60G with a long board or some other device to sand with the grain, by hand. Be careful not to sand sideways or sand into the coverboards or any other opposing grain. I sand all the way to 100G and then stop. Some guys go higher but I don’t. The stain and varnish need some “tooth” to bite into. Plus, by the time I’ve gone this far I’m tired of sanding!
Once you are done… or THINK you are done, it is a good idea to wipe the boat with Methanol. Methanol will show the grain and any cross grain scratch without raising the grain. Plus it evaporates quickly so you can keep moving along.
Be careful not to “re-sand” one specific area for too long because this will show at the end. If you have scratches in one small 4” area… sand that but then stretch it out to 16”-24” until it is all blended together.
I always re sand the whole boat once all the cross grain scratches are gone with 100G. It is so important to make sure that the last time you sand you have sanded the entire boat, not just a section.
If you should find some minor scratches while you are staining you can actually sand them out while the stain is wet. Keep some good paper handy and just sand it out. Re-stain, move on and pretend it never even happened. No one will know and it will blend. If you were using filler stain you will not enjoy this luxury. Trust me!
STAIN APPLICATION

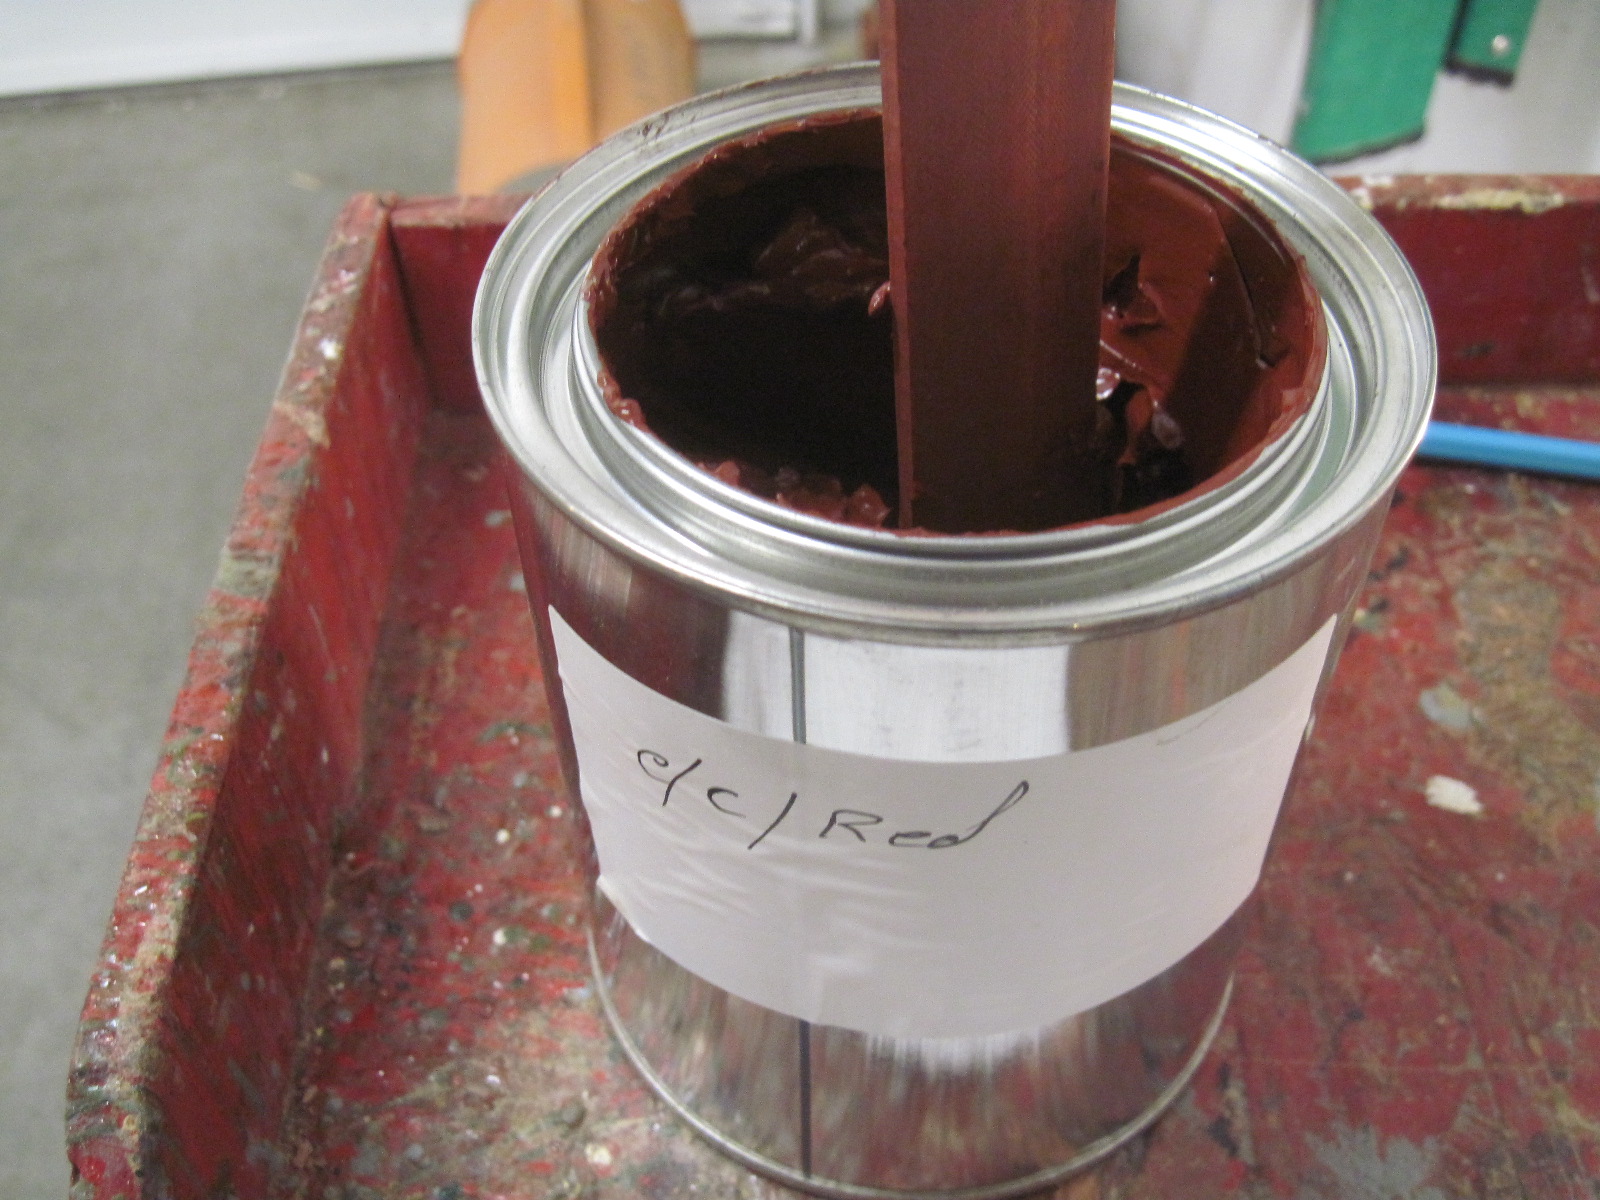
Apply the stain right out of the can. No mixing or thinning required. If you have purchased more than one can of the same color for the same project it’s a good idea to mix both cans together so you are assured the same exact color throughout. I mix these by hand so there is potential for slight differences between batches. It may be easier to transfer the stain to a less deep container with a larger opening. I use a Tupperware container.
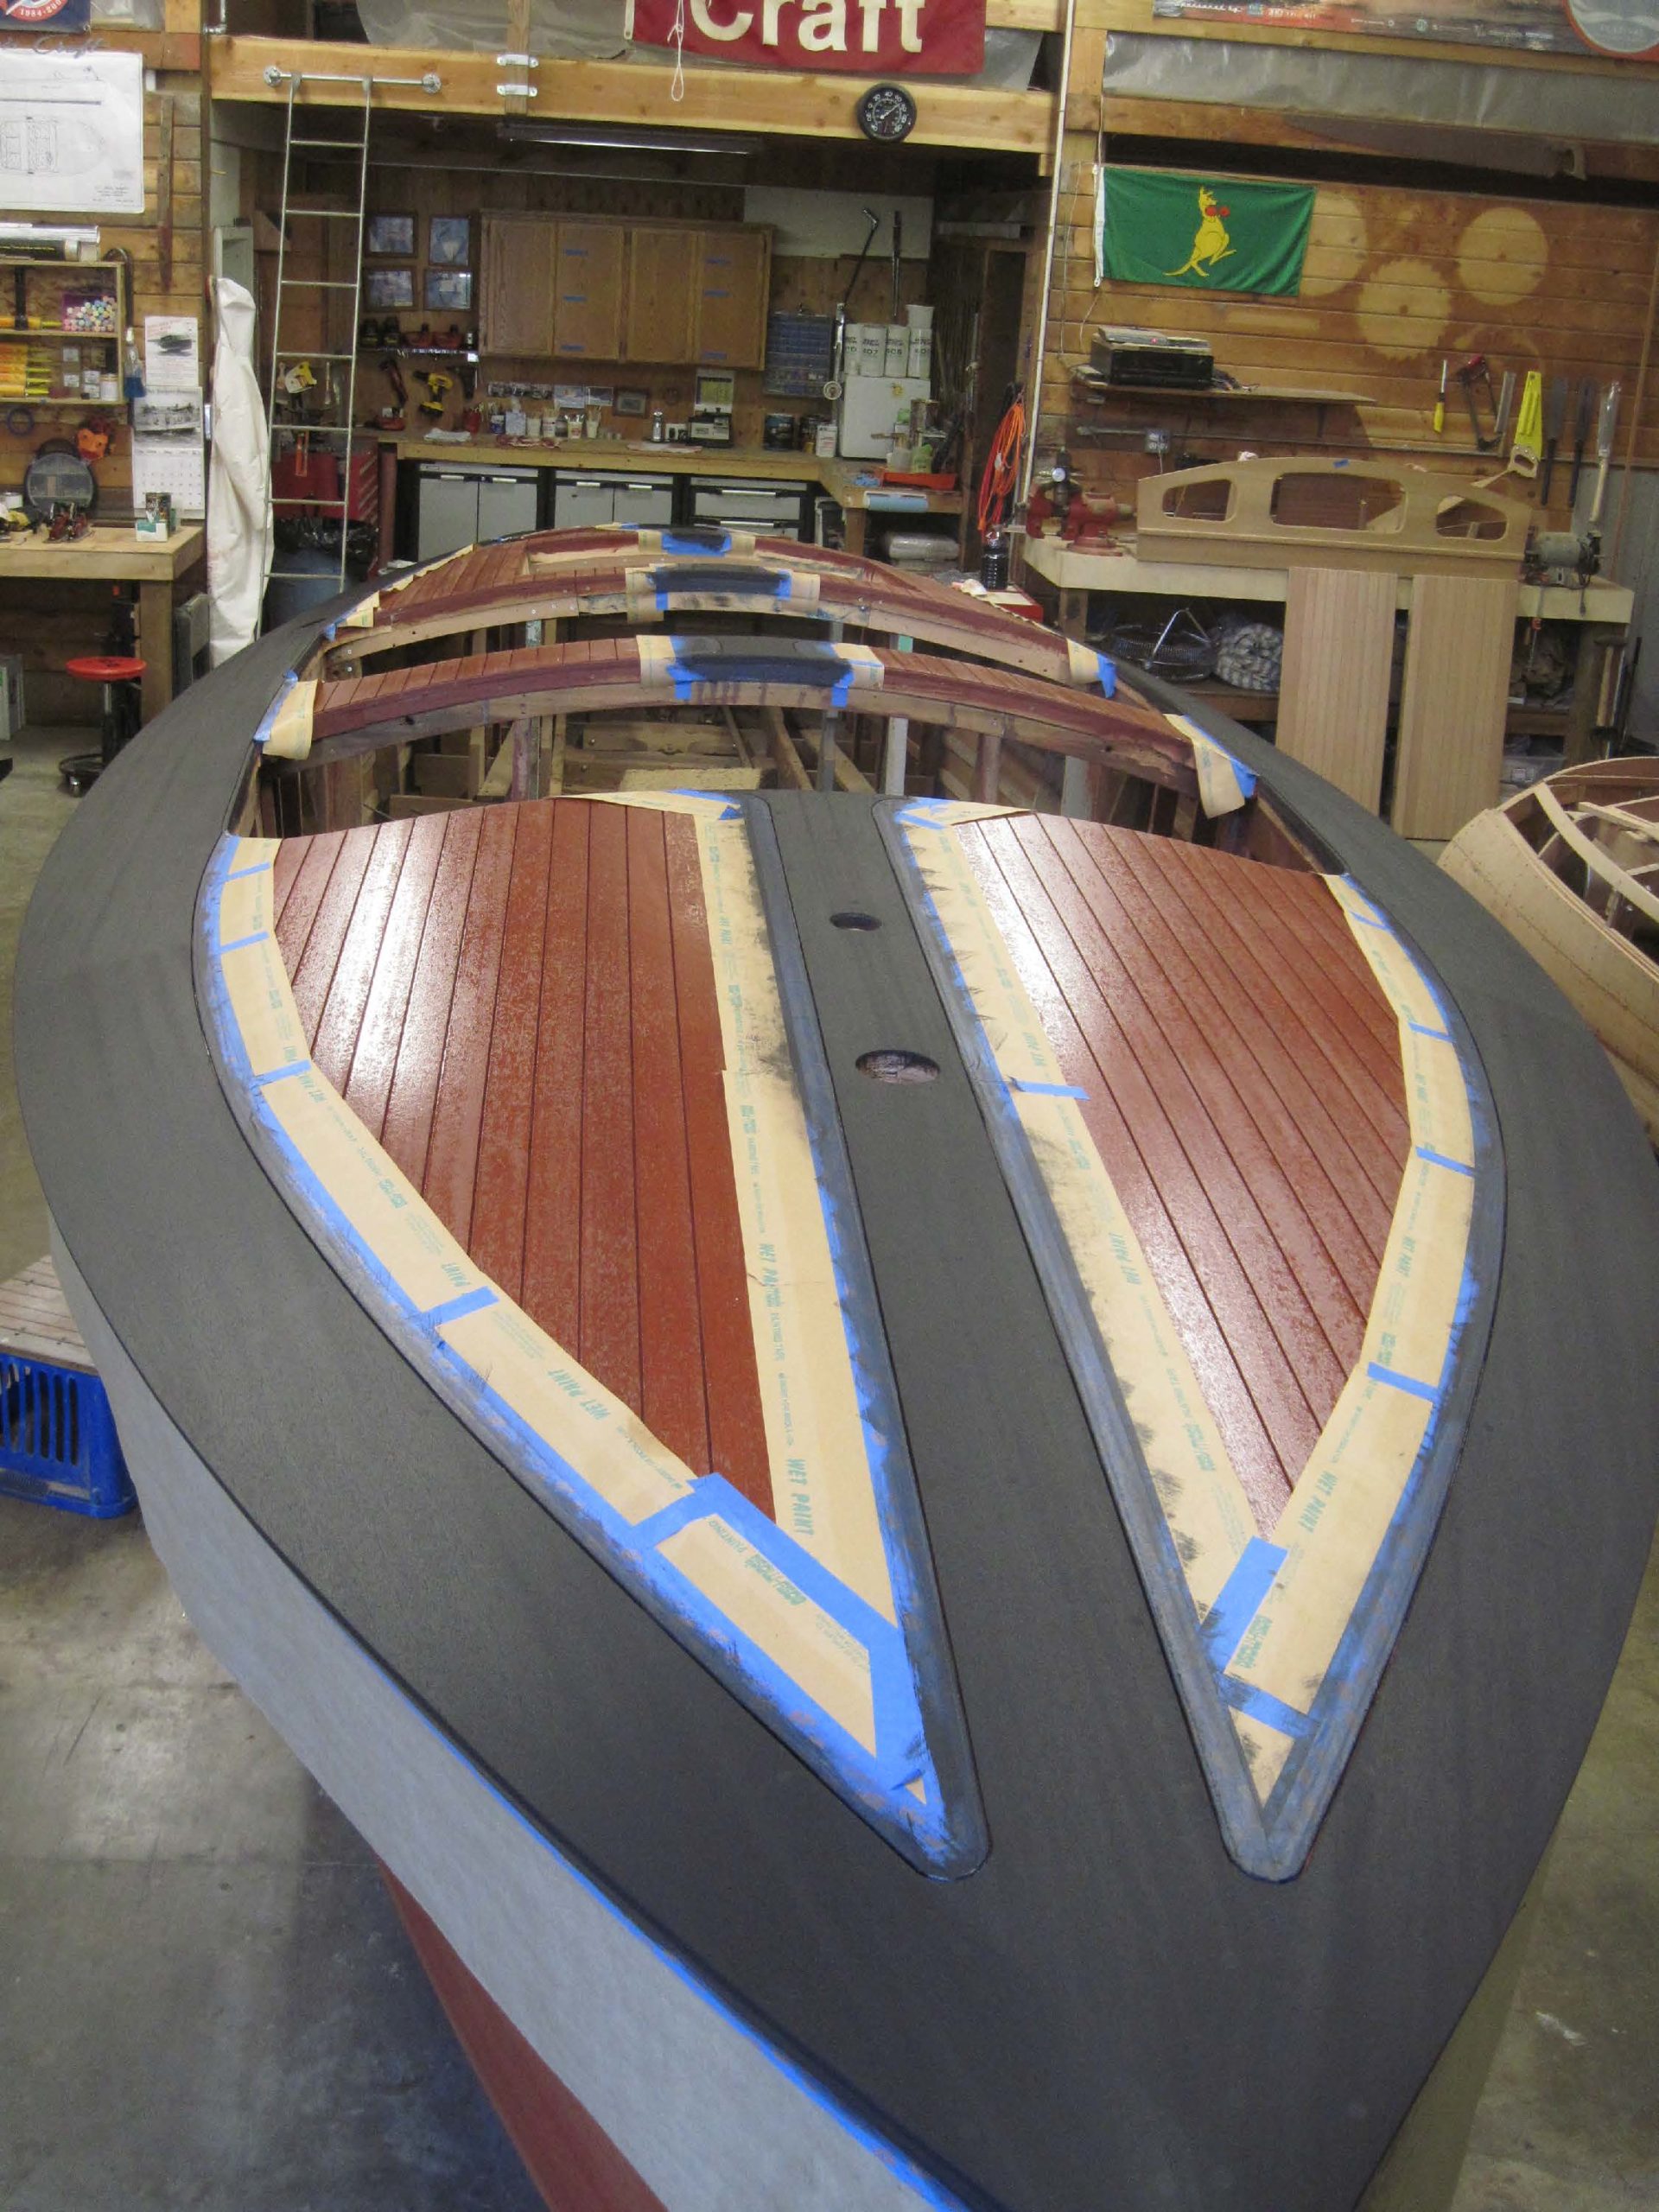
If your decks are two-tone it is best to do the larger space first, seal it and then tape it off to do the smaller area. For dark cover boards I first stain them red and then go over the red with the dark cover board stain. Make sure the red is dry before going over with the dark color. Once the dark coat is dry it is OK to seal.
- Apply stain with a white T-shirt rag. Apply in a circular motion. Remove the same way… I use two rags for removal. A first pass rag and then a final pass rag when I’m done. When applying I “Scrub” the stain into the grain. It’s important to fill all of the grain. (In full disclosure… I actually use a chip brush to apply. It uses more stain but it’s easier on my finger tips)
- Removal. Removing the stain is important but not nearly as difficult as it is with filler stain. It is always good to be consistent with the process. The same person should apply consistently the whole time and if you have a helper they should remove stain in the same way. Eventually the “first pass” rag becomes saturated so promote the “second pass” rag to first position and get a clean one for final wipe. When you are done wipe the whole boat with a clean rag, with the grain.
- Let the stain dry for at least 24 hours. You do NOT want to seal stain that isn’t fully dried. Longer is better. Especially in cooler or higher humidity
- DO NOT PILE THE RAGS!!! When you are done open them up on the shop floor or take them outside and open them up to dry. This stain is not very combustible but we don’t take any chances with this.
SEALING
There are many different ways to do this… ask five restorers and you will get five answers. Maybe six… you can seal with sealer, CPES or thin the varnish you will be using. There are probably more theories but these are the most common.
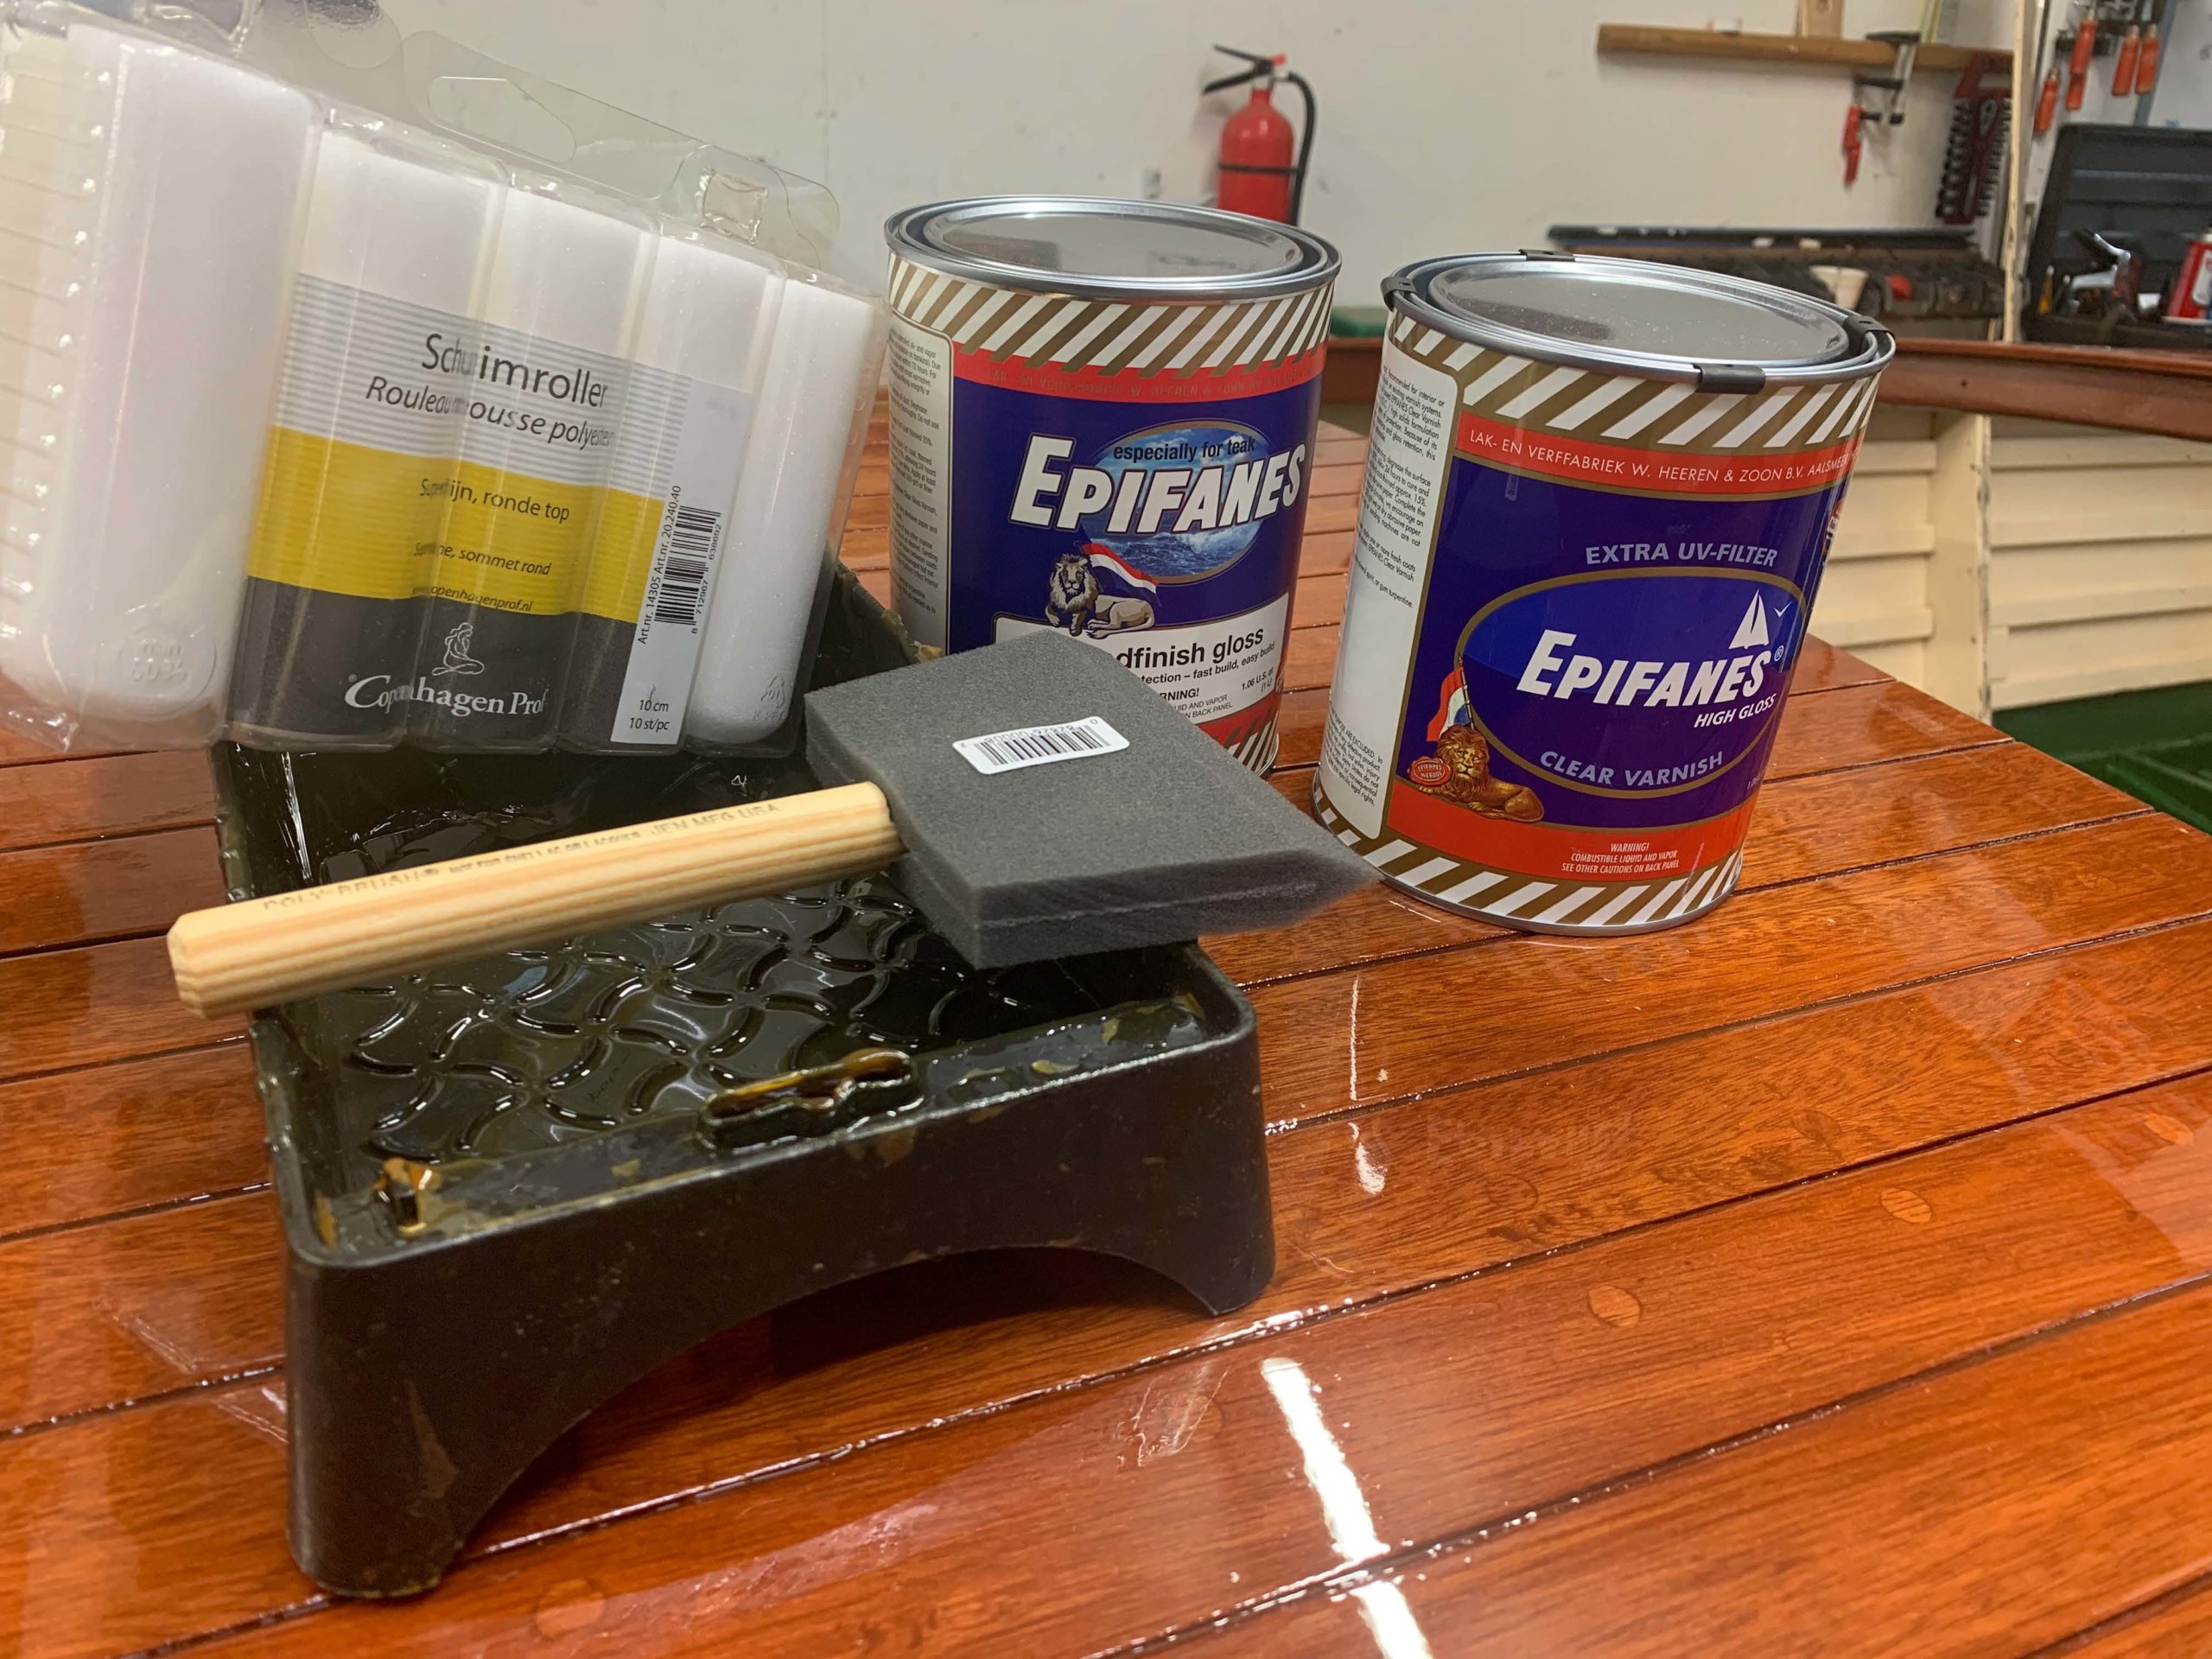
- I am an Epifanes guy. I seal with Epifanes Wood Finish Gloss and I thin it according to the can for application over bare wood. I put two coats on, quickly, right over each other. I do the deck first…start at starboard bow and work back and around. Then I do it again. I then start at the starboard bow and hit the sides. I go around the boat twice. I use a 4” chip brush because I’m cheap. And yes… I spend some time pulling bristles out. But they come out the next day and after a few coats of varnish you’re fine. You will never know they were there.
- Varnish – My first coat of varnish is thinned as instructed on the can. Again, I am using Epifanes WF Gloss for all of my build coats. I apply varnish with a foam roller and a foam brush, employing the “roll and tipl” method. I have found that the Epifanes rollers and tray work best. I use Red Tree foam brushes. I usually go through two or three brushes per coat. One roller is fine for one coat but multiple brushes are usually necessary because they “load” with varnish. As odd as it seems, I used to use Home Depot rollers but something changed and I was getting bubbles and all sorts of stuff I couldn’t control. I spoke with Epifanes tech assist and he told me to try the Epifanes roller and tray. I tried their roller and I had better but not perfect results. I called back and he asked if I was using their tray. I thought he was crazy but I started using their tray and it is definitely an improvement.
- More Varnish. I started using Epi WF Gloss because you don’t have to sand between coats if you re-coat within 72 hours. I put on 4-5 coats and then sand with a random orbital sander and 220G. Be careful… 4-5 coats isn’t that much and you can sand through easily.
- After sanding I vacuum and wipe the boat down. I use blue shop towels and Windex for this. You can use thinner or whatever you want to get the residual dust off`. This works for me…it’s cheap and does the job and it doesn’t stink. These build coats are important but not critical. A little dust in the 6th coat is not a big deal.
- Build coats. All of these build coats are just dress rehearsals for the money coat(s). Practice your technique now so when it’s show time you are comfortable with the process.
- Final coats. I stop with Wood Finish at about 10 coats and then start with wiring, installing fuel tank, motor, floorboards, seam compound etc. Once I’m done climbing in and out and ready for final coats I sand again with the RO and 320G
- Final coats. I use Epifanes Clear Varnish for my final coats. This is compatible with the Wood Finish but does require sanding between coats. This is when I start wet sanding and try to get the finish perfectly smooth.
SUMMARY
At the end of the day….have fun with this.
In the worst case scenario you will have to sand off all of your hard work and start over. But that won’t happen.
If you have questions give me a call.
Thanks again!
–Mike Mayer of Lake Oswego Boat Co.