1948 Truscott Barrelback Runabout True 5200 Bottom

1948 truscotts barrelback runabout 5200 bottom

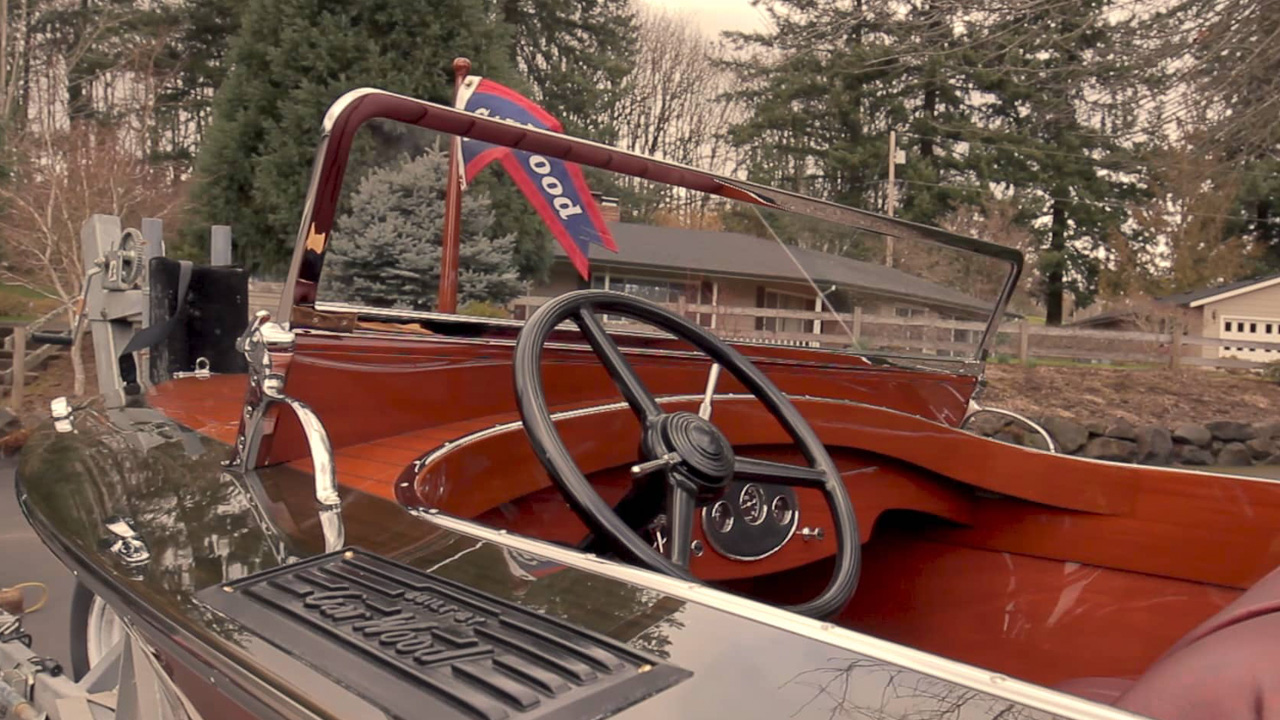
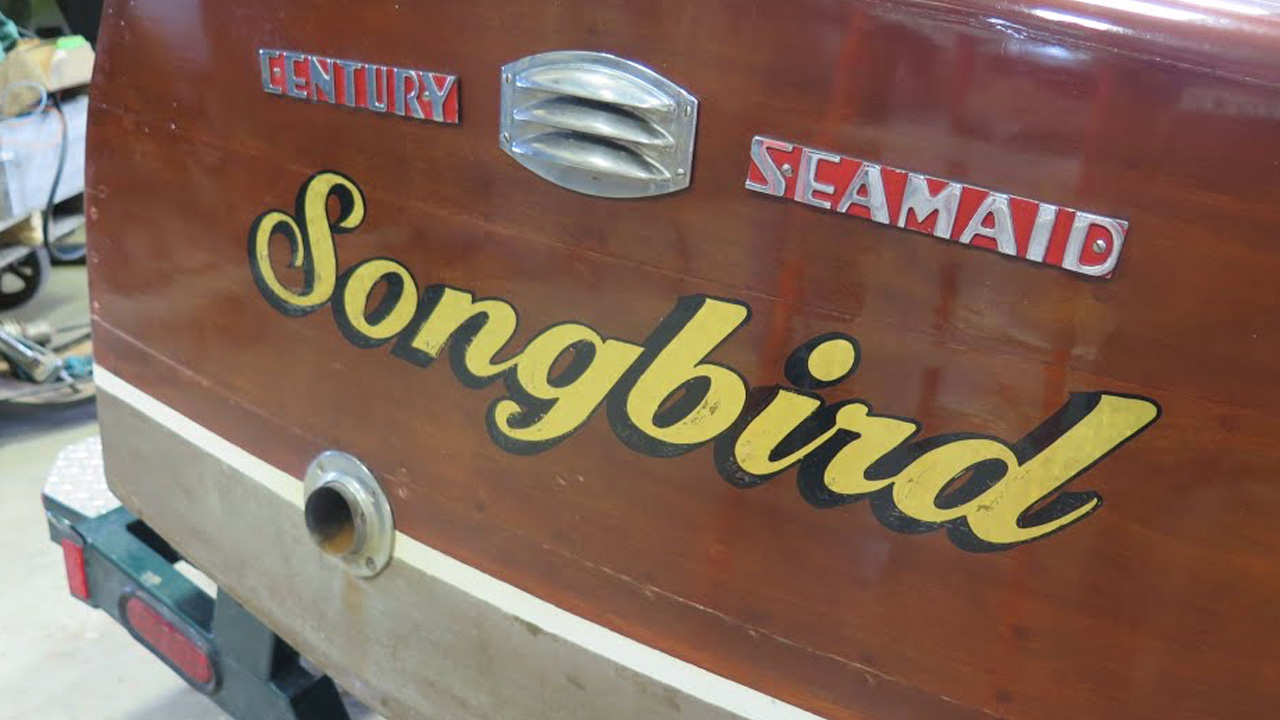
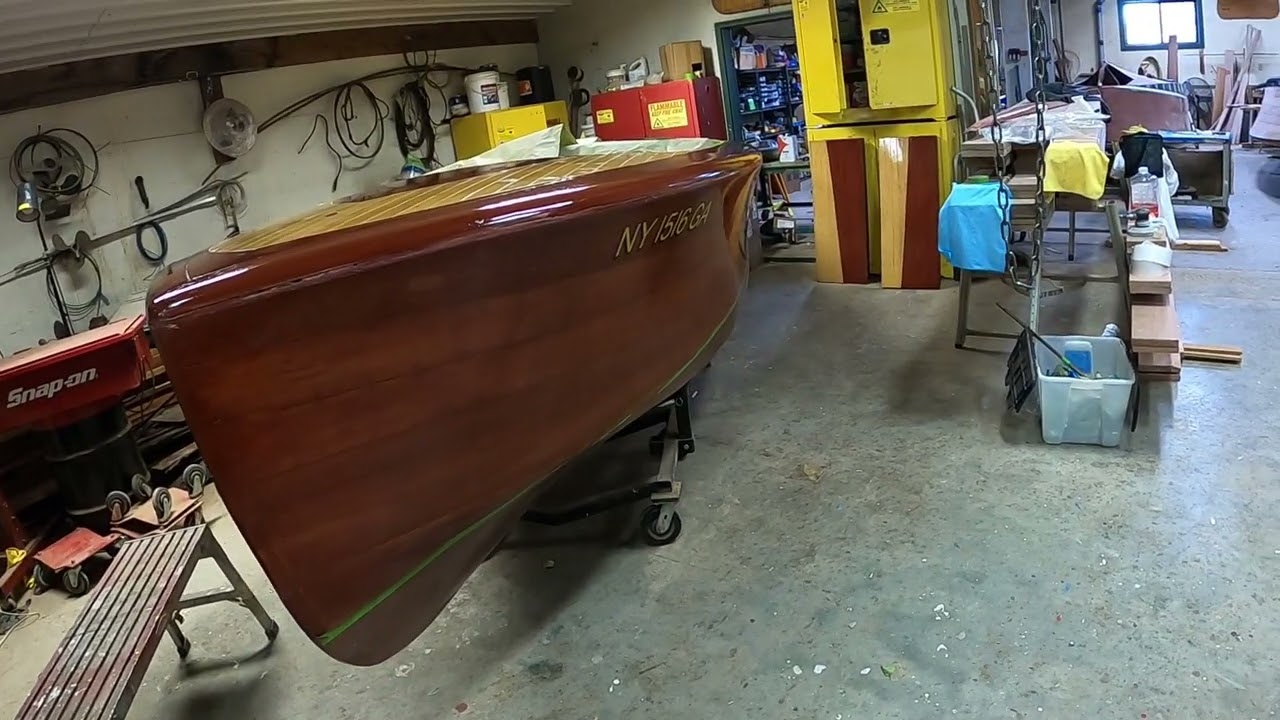
Our 1948 Truscott Barrelback Runabout has almost blasted through her True 5200 Bottom milestone! Her cousin, our 1948 Truscott utility’s stripping milestone is behind her.

I am now comfortable with having consigned both Truscotts to be fully preserved and resting on their identical Loadmaster custom trailers sitting on the green at the 2022 ACBS International Show in Burlington, VT, September 9 and 10. We hope to see you there!

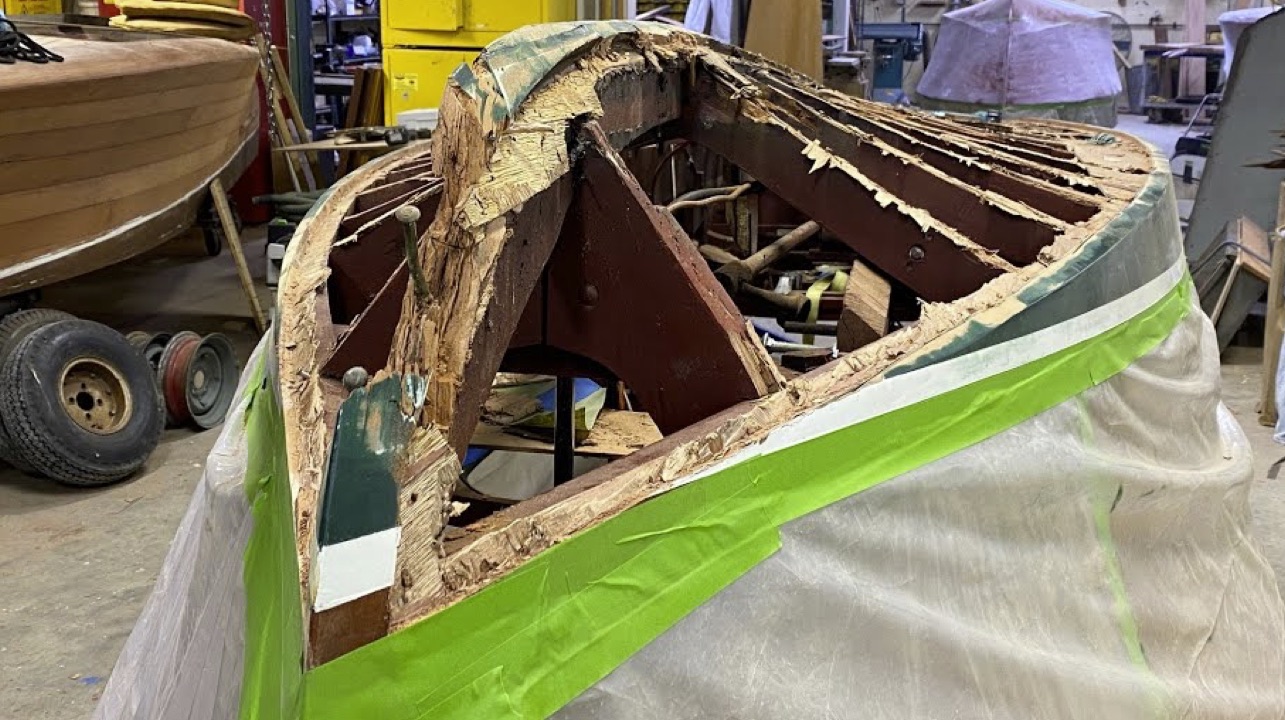
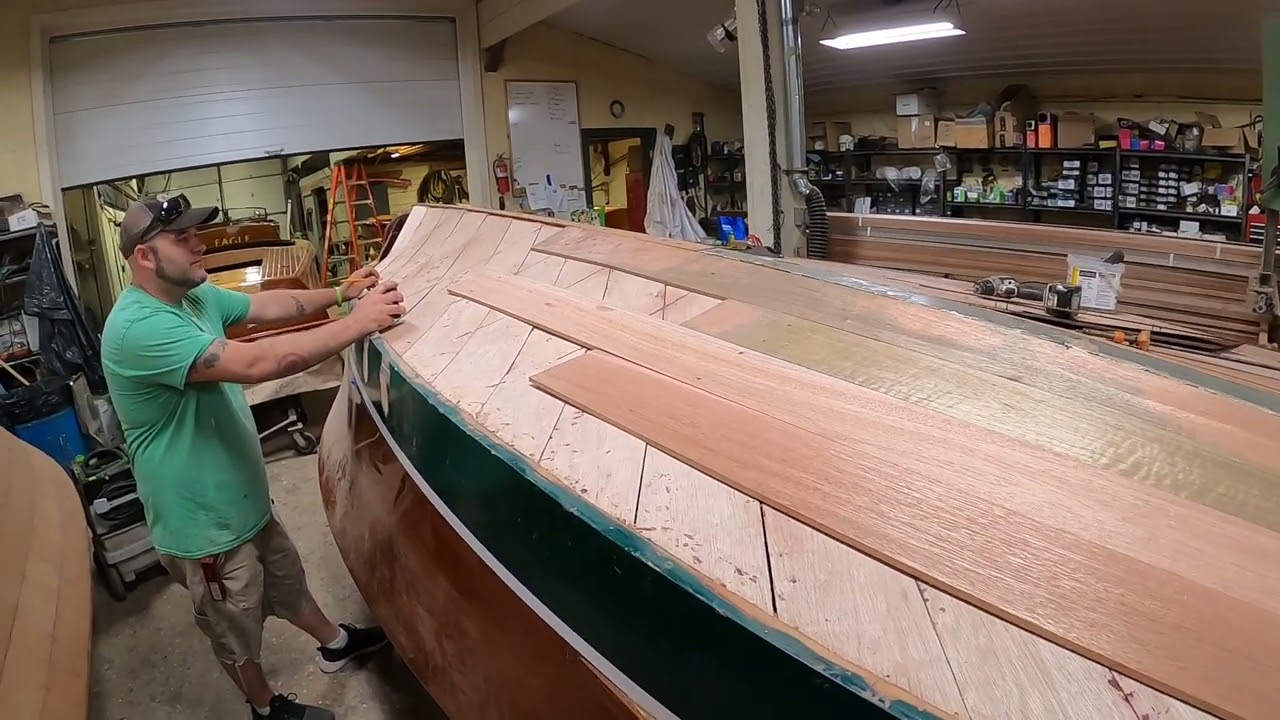
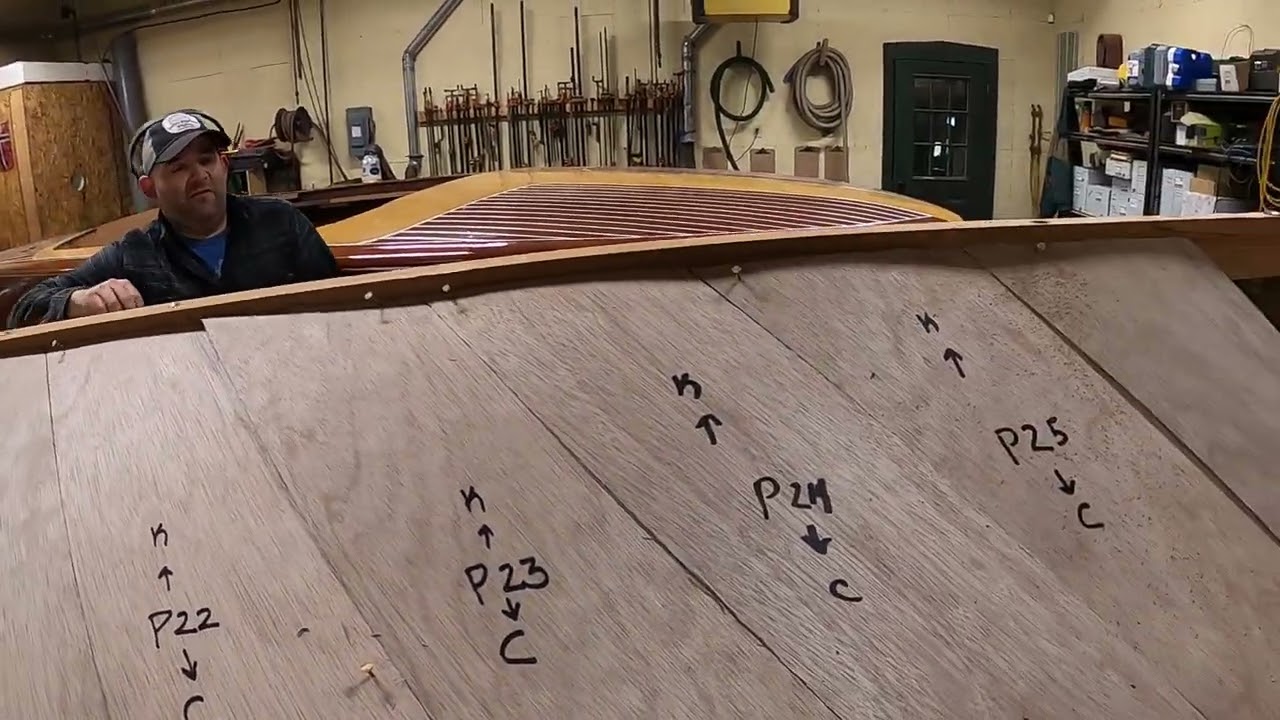
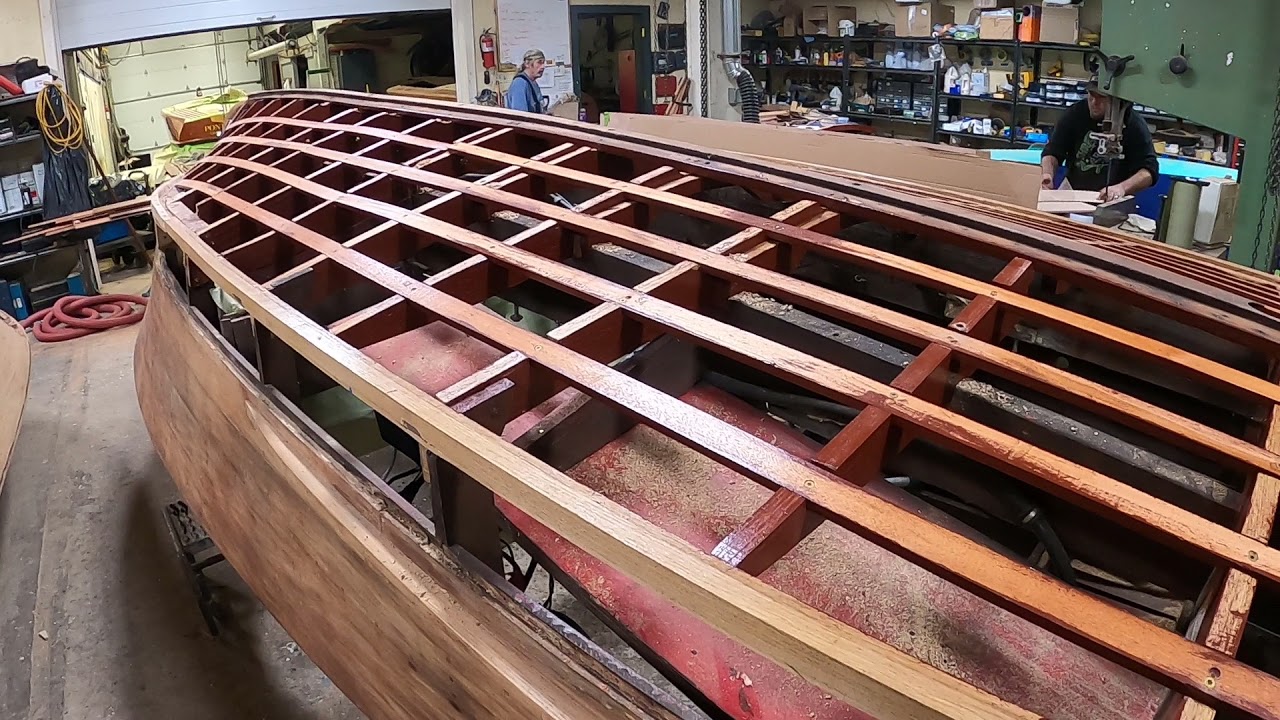
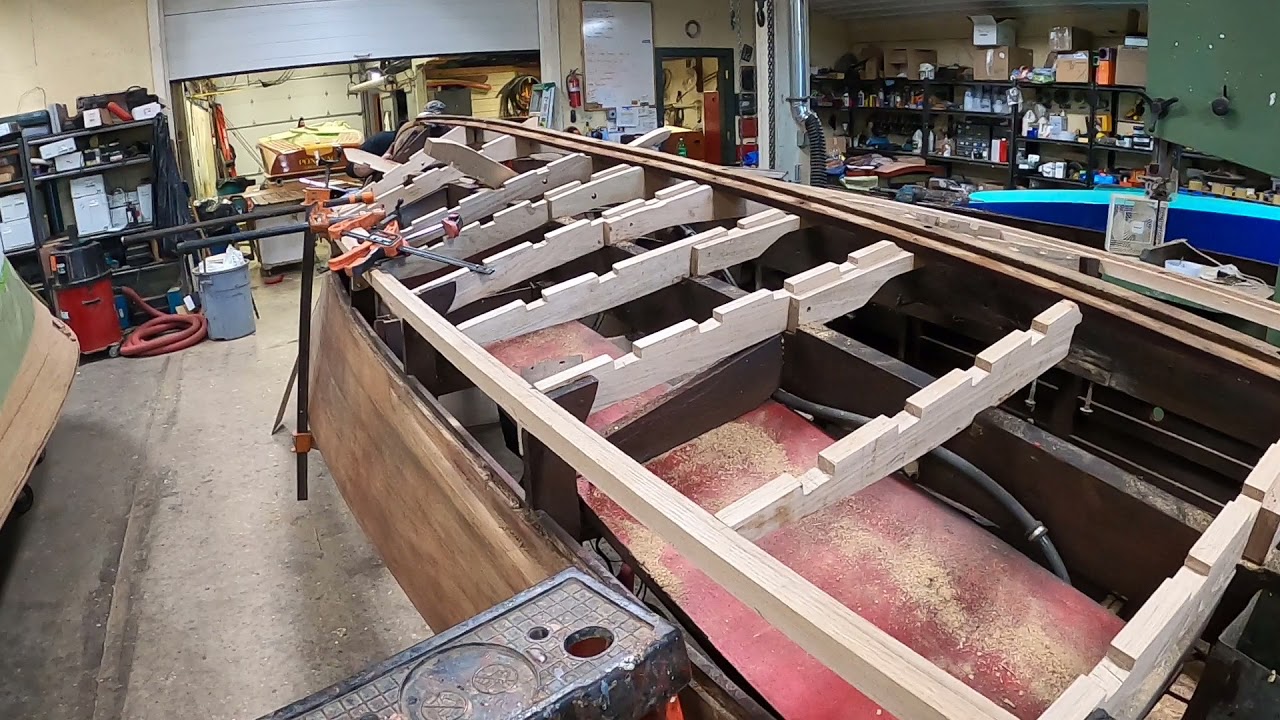
After replacing a couple of the runabout’s rotted bottom frames and installing a new inner skin comprised of 4 mm Meranti mahogany marine plywood six-inch-wide planks laid at an approximately 45 degree angle with respect to the chines and keel, all of which was bedded in 3M5200, we fabricated and installed outer planking using three-eighths FAS-grade Meranti mahogany plywood, also bedded in 3M5200.

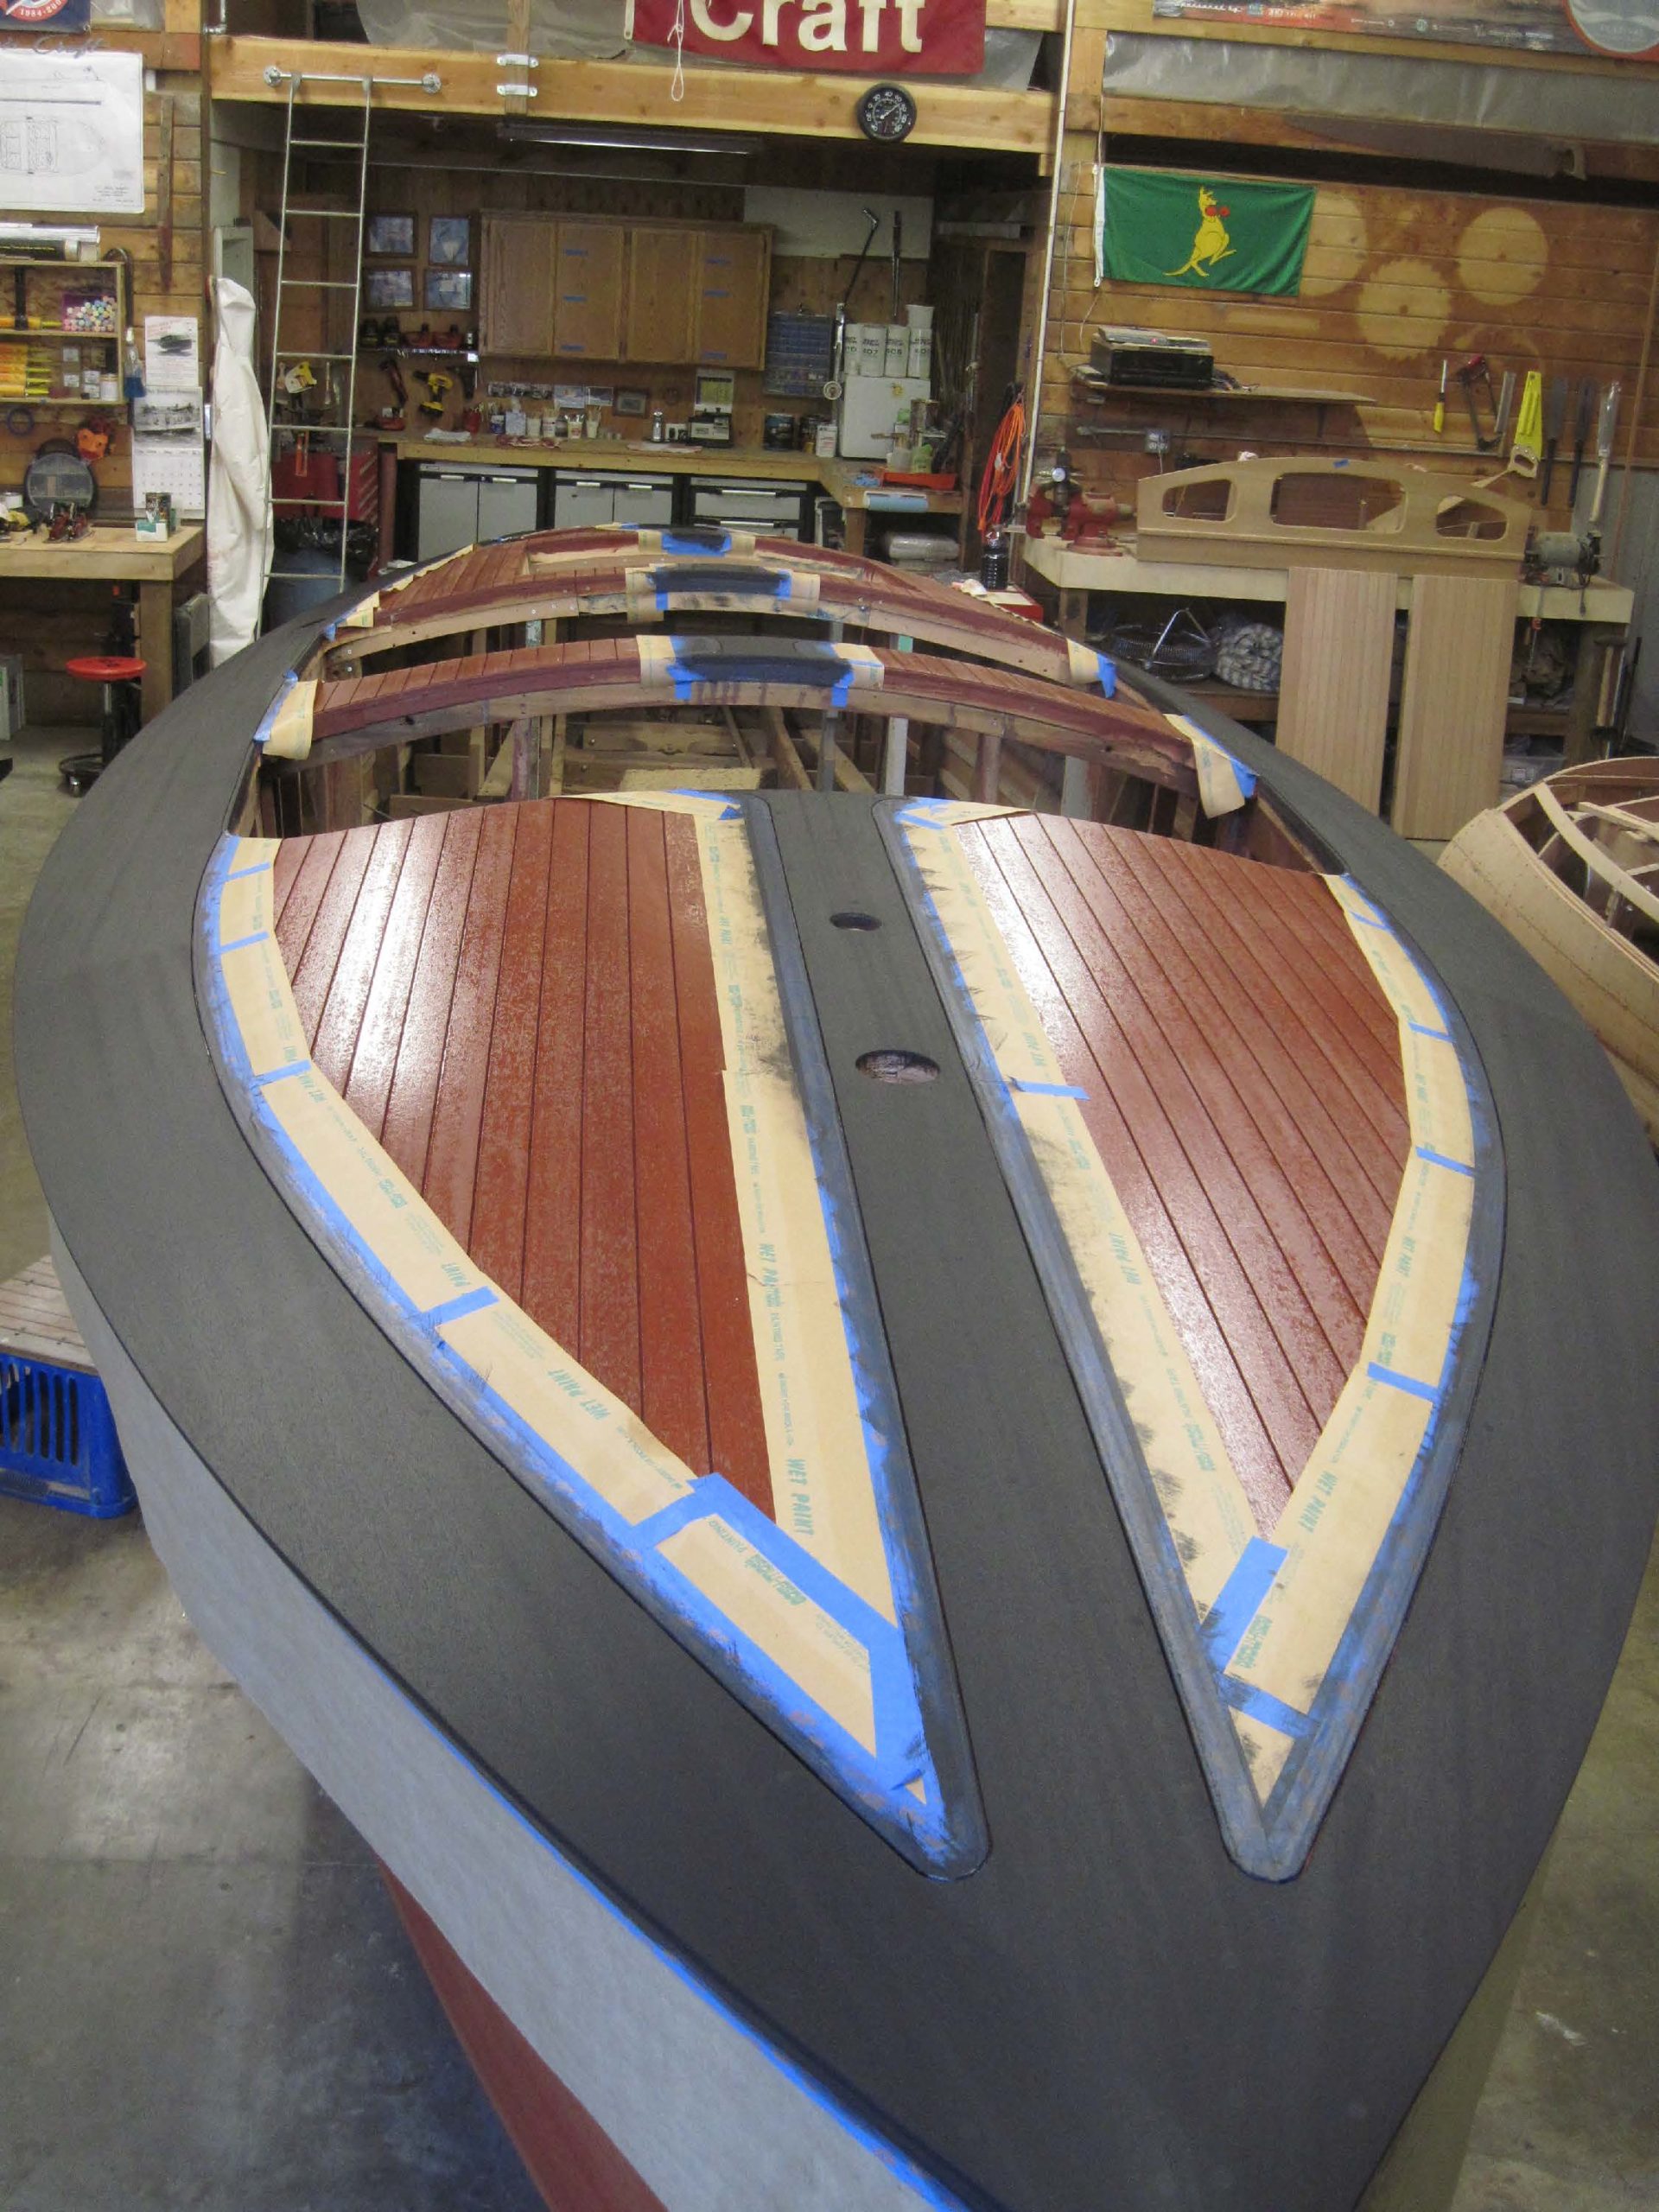
It was all provisionally sanded fair. Rick is now almost finished filling countersinks and declivities 3M Premium Marine Filler. He will then sand the bottom, chines, hullsides and transoms fair a final time. However, we will then use her as a Don-Danenberg-inspired lab rat.

Don has just published yet another incredible how-to article, Using Common Sense Is Allowed, pp. 44-55, Classic Boating, July/August 2022, which is a must-read for anyone serious about wooden boat preservation. (To the fellow who savaged me, claiming “Don Danenberg is my friend, and I know he would never wet a hull down and cover it with plastic sheeting,” please pay attention …) “…The outside bottom of the hull can now be … be hosed down with fresh water.

“The next procedure I call pre-soaking. After the bottom planks are thoroughly wetted out, I cover the entire bottom with a very thin plastic sheet (.35 mil) and rub out all of the air bubbles as if the plastic were Saran Wrap. The thinner the plastic, the better this works. Cheap painters’ drop cloths work well. For the next two days peel up edges of the plastic to wet it and again rub out the air bubbles. This procedure changes the moisture content of the wood and causes it to swell, forcing out all excess rubber and, hopefully any trapped air.

“The equilibrium moisture content for the wood in your boat is dictated by the average relative humidity and temperature of the environment your boat lives in. For example, in most of the United States with lakes, it is in the 18% range, while in Arizona, it is 11%.

“Kiln dried mahogany from my suppliers is in the 6-10% range. Changes in overall moisture content of the wood can be retarded by protective coatings, not prevented. I know if this boat is to be kept in Michigan, this wood will eventually learn to exist at roughly 18% moisture content. Personally, I feel it wise to set it to this level before sealing it. (Claudon note: I received precisely the same advice from Don about the rest of the hull’s exterior planking.)

“When properly sealed against seasonal variations in relative humidity, this type of construction exhibits little or no expansion or contra traction great enough to crack the enamel paint at the plank seams. In order for this to work, of course, the bottom must be well sealed from excessive moisture absorption from extensive periods in the water.

“After two days of wetting the bottom, allow it to set for two more days until the moisture is noticeably absorbed and the surface appear dry. Remove the plastic and allow the surface to become completely dry. Now you must quickly cut off all the excess rubber, fill in all the screw holes, grind and fair the bottom, and get it sealed before it dries too much.” (pp 51, 55)

Unfortunately, we received Classic Boating and read Don’s piece after we began fairing the countersinks in our runabout’s bottom.

We will execute Don’s Pre-wetting procedure completely on the utility.

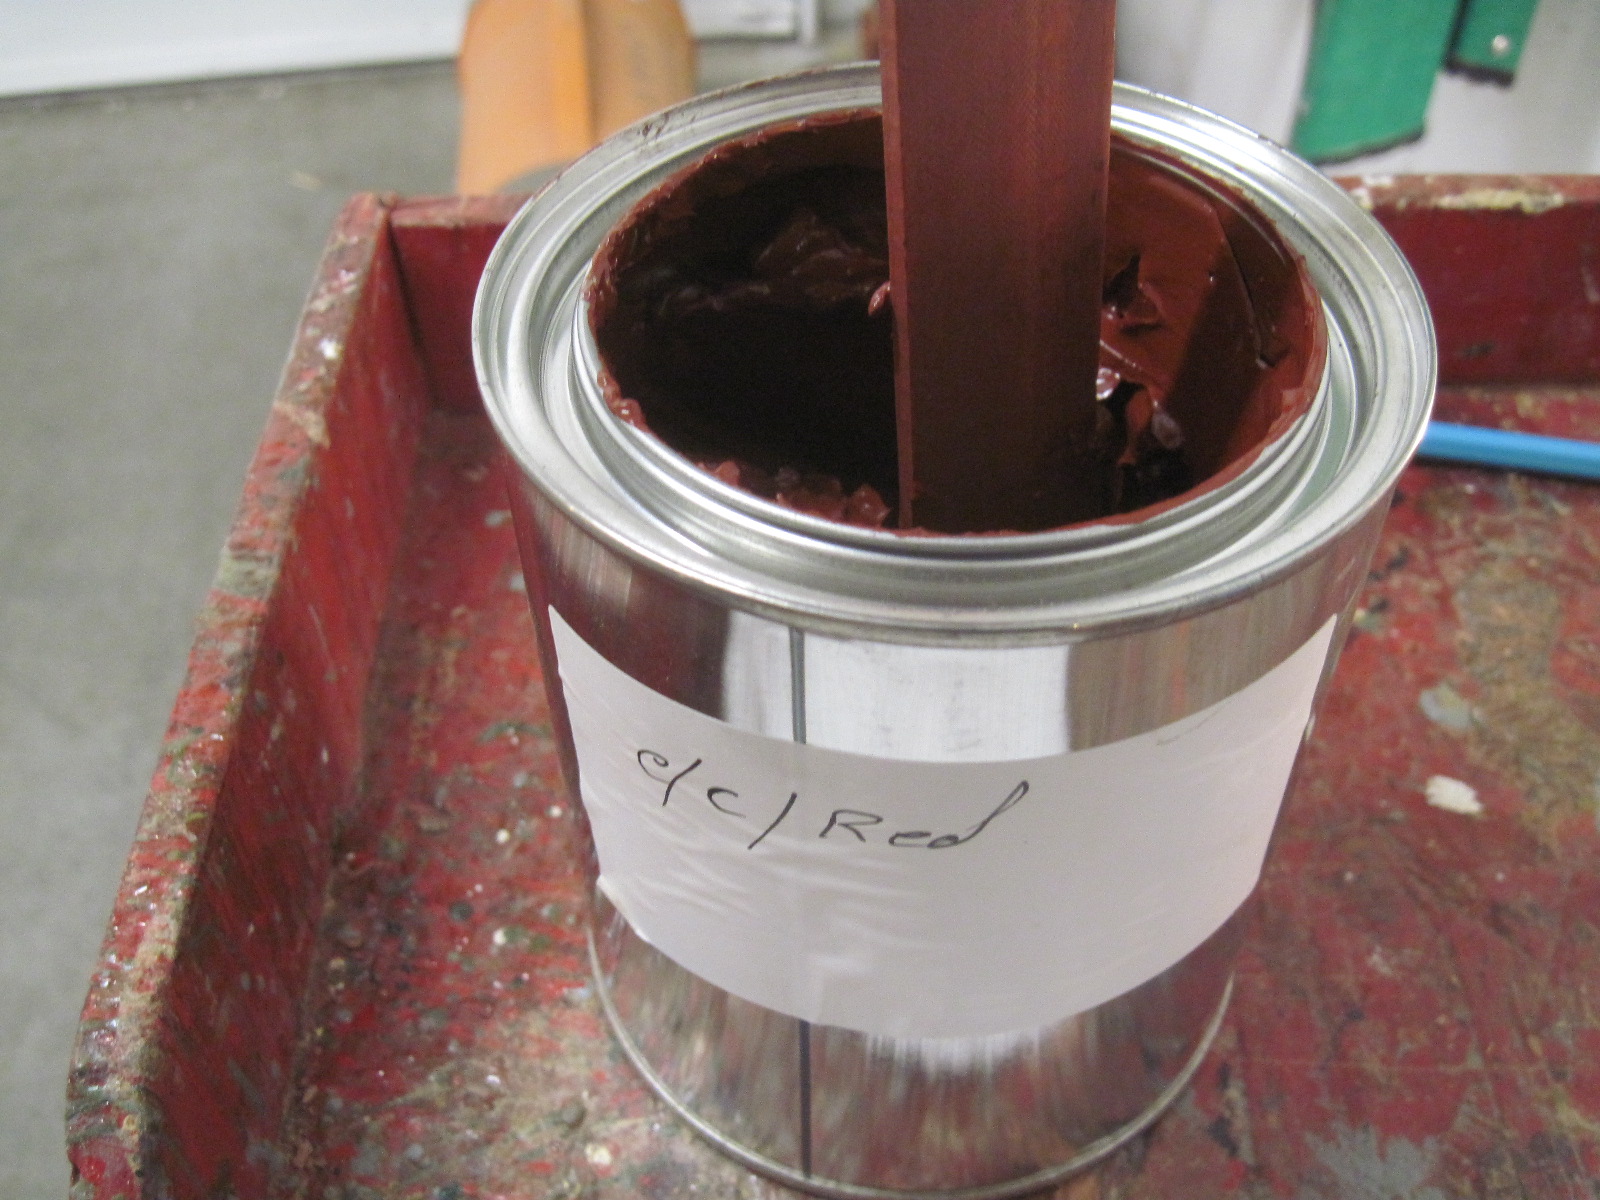
Priming – five coats of Interlux 2000E Barrier Coat Primer Will be followed followed by applying multiple coats of red hard antifoul paint.

1940 Chris Craft Barrelback True 5200 Bottom Milestone

1940 chris craft barrelback 5200 bottom

Priscilla, our 1940 seventeen-foot Chris-Craft Runabout has blasted through her True 5200 Bottom milestone!

After replacing nearly half of her rotted bottom framing and installing a new inner skin comprised of 4 mm Meranti mahogany marine plywood six-inch-wide planks laid at an approximately 45 degree angle with respect to the chines and keel, all of which was bedded in 3M5200, we fabricated and installed outer planking using three-eighths FAS-grade Meranti mahogany plywood, also bedded in 3M5200.

It was all sanded fair with countersinks and declivities filled using 3M Premium Marine Filler before being faired and sealed with CPES a final time.

Priming – five coats of Interlux 2000E Barrier Coat Primer – was followed by applying multiple coats of dark green Interlux Ultra-Coat hard antifoul paint.

We will now flip her upright, repair several dings and gouges and then hand block sand her using 250 and 600 grit. Finally, she will receive upwards of ten coats of Pettit Captain’s Ultra Clear varnish and buffed.

Once she is reassembled, she will be ready for her final milestone, returning home to Delaware, OH.

How to Stain and Varnish

lake oswego boat co.
Guest post by Mike Mayer of Lake Oswego Boat Co.

“Here’s how I do it, thanks for asking”… This was a section in Classic Boating written by Don Danenberg years ago and my dad and I used to always say that before a conversation. We thought it was funny…

SURFACE PREP

Once all of the woodwork is done, or if you are just stripping for a re-stain, you need to make sure the hull is perfectly fair and that there are no cross grain scratches.

If I am fairing a newly planked boat I may start with 36G on a grinder to fair the hull. Once the hull is rough faired I move on to a smaller random orbital sander (RO) starting with 40G and working up to 100G. Once I get to 100G on the RO I go back to 60G with a long board or some other device to sand with the grain, by hand. Be careful not to sand sideways or sand into the coverboards or any other opposing grain. I sand all the way to 100G and then stop. Some guys go higher but I don’t. The stain and varnish need some “tooth” to bite into. Plus, by the time I’ve gone this far I’m tired of sanding!

Once you are done… or THINK you are done, it is a good idea to wipe the boat with Methanol. Methanol will show the grain and any cross grain scratch without raising the grain. Plus it evaporates quickly so you can keep moving along.

Be careful not to “re-sand” one specific area for too long because this will show at the end. If you have scratches in one small 4” area… sand that but then stretch it out to 16”-24” until it is all blended together.

I always re sand the whole boat once all the cross grain scratches are gone with 100G. It is so important to make sure that the last time you sand you have sanded the entire boat, not just a section.

If you should find some minor scratches while you are staining you can actually sand them out while the stain is wet. Keep some good paper handy and just sand it out. Re-stain, move on and pretend it never even happened. No one will know and it will blend. If you were using filler stain you will not enjoy this luxury. Trust me!

STAIN APPLICATION

Apply the stain right out of the can. No mixing or thinning required. If you have purchased more than one can of the same color for the same project it’s a good idea to mix both cans together so you are assured the same exact color throughout. I mix these by hand so there is potential for slight differences between batches. It may be easier to transfer the stain to a less deep container with a larger opening. I use a Tupperware container.

If your decks are two-tone it is best to do the larger space first, seal it and then tape it off to do the smaller area. For dark cover boards I first stain them red and then go over the red with the dark cover board stain. Make sure the red is dry before going over with the dark color. Once the dark coat is dry it is OK to seal.

  1. Apply stain with a white T-shirt rag. Apply in a circular motion. Remove the same way… I use two rags for removal. A first pass rag and then a final pass rag when I’m done. When applying I “Scrub” the stain into the grain. It’s important to fill all of the grain. (In full disclosure… I actually use a chip brush to apply. It uses more stain but it’s easier on my finger tips)
  2. Removal. Removing the stain is important but not nearly as difficult as it is with filler stain. It is always good to be consistent with the process. The same person should apply consistently the whole time and if you have a helper they should remove stain in the same way. Eventually the “first pass” rag becomes saturated so promote the “second pass” rag to first position and get a clean one for final wipe. When you are done wipe the whole boat with a clean rag, with the grain.
  3. Let the stain dry for at least 24 hours. You do NOT want to seal stain that isn’t fully dried. Longer is better. Especially in cooler or higher humidity
  4. DO NOT PILE THE RAGS!!! When you are done open them up on the shop floor or take them outside and open them up to dry. This stain is not very combustible but we don’t take any chances with this.

SEALING

There are many different ways to do this… ask five restorers and you will get five answers. Maybe six… you can seal with sealer, CPES or thin the varnish you will be using. There are probably more theories but these are the most common.

  1. I am an Epifanes guy. I seal with Epifanes Wood Finish Gloss and I thin it according to the can for application over bare wood. I put two coats on, quickly, right over each other. I do the deck first…start at starboard bow and work back and around. Then I do it again. I then start at the starboard bow and hit the sides. I go around the boat twice. I use a 4” chip brush because I’m cheap. And yes… I spend some time pulling bristles out. But they come out the next day and after a few coats of varnish you’re fine. You will never know they were there.
  2. Varnish – My first coat of varnish is thinned as instructed on the can. Again, I am using Epifanes WF Gloss for all of my build coats. I apply varnish with a foam roller and a foam brush, employing the “roll and tipl” method. I have found that the Epifanes rollers and tray work best. I use Red Tree foam brushes. I usually go through two or three brushes per coat. One roller is fine for one coat but multiple brushes are usually necessary because they “load” with varnish. As odd as it seems, I used to use Home Depot rollers but something changed and I was getting bubbles and all sorts of stuff I couldn’t control. I spoke with Epifanes tech assist and he told me to try the Epifanes roller and tray. I tried their roller and I had better but not perfect results. I called back and he asked if I was using their tray. I thought he was crazy but I started using their tray and it is definitely an improvement.
  3. More Varnish. I started using Epi WF Gloss because you don’t have to sand between coats if you re-coat within 72 hours. I put on 4-5 coats and then sand with a random orbital sander and 220G. Be careful… 4-5 coats isn’t that much and you can sand through easily.
  4. After sanding I vacuum and wipe the boat down. I use blue shop towels and Windex for this. You can use thinner or whatever you want to get the residual dust off`. This works for me…it’s cheap and does the job and it doesn’t stink. These build coats are important but not critical. A little dust in the 6th coat is not a big deal.
  5. Build coats. All of these build coats are just dress rehearsals for the money coat(s). Practice your technique now so when it’s show time you are comfortable with the process.
  6. Final coats. I stop with Wood Finish at about 10 coats and then start with wiring, installing fuel tank, motor, floorboards, seam compound etc. Once I’m done climbing in and out and ready for final coats I sand again with the RO and 320G
  7. Final coats. I use Epifanes Clear Varnish for my final coats. This is compatible with the Wood Finish but does require sanding between coats. This is when I start wet sanding and try to get the finish perfectly smooth.

SUMMARY

At the end of the day….have fun with this.

In the worst case scenario you will have to sand off all of your hard work and start over. But that won’t happen.

If you have questions give me a call.

Thanks again! 

Mike Mayer of Lake Oswego Boat Co.

1940 17 Chris Craft Barrelback 5200 Bottom Planking Update

1940 chris craft barrelback bottom planking

Priscilla, our 1940 17-foot Barrelback “lab rat” experiment is progressing rapidly now that we finally took delivery and milled the Meranti mahogany planking needed to complete her True 5200 bottom. As we shared in our last update, rather than install her inner skin using 6 mm plywood panels, we are reverting to what is a truly very old school alternative: replacing the inner skin using strips of planking laid at approximately 45 degrees to the keel.

In so doing, we will deliver a bottom, the inner skin of which precisely matches that installed in Algonac in 1940.

Once we dry-fitted each, approximately 5-3/4”-wide plank, everything was sealed with four coats of Smith’s CPES, after which we have applied three coats of Chris-Craft mahogany bilge paint to their inner surfaces. Next, we installed these planks bedded in mahogany 5200 using #6×1” Frearson-drive, flathead silicon bronze wood screws.

Happily, her bilge now presents exactly as it did when Priscilla left Algonac in 1940.

Planking the inner skin produces a tighter, more rigid skin that follows the bottom’s contours precisely. Any interior squeeze-out will be removed using nylon putty knives before it, too, receives three full coats of Chris-Craft mahogany bilge paint.

Post this experiment, SMB will make individually planking inner skins our standard for SMB True 5200 bottoms.

With the Meranti planking in-hand, and having milled it to land fair with the chines, and began dry fitting it to her bottom. Our first step involves measuring both bottom faces at their widest point between the keel and the chine.

Here, and as we’ve shared with you earlier, we once again confirmed that Chris-Craft’s rule-of-thumb was operating at Algonac when her hull was being laid out. She is 7/8” wider on port than she is on starboard at the widest point between her keel and chines. And, at the transom, she is a 1/2” wider on starboard than she is on port.

Joe will dry fit and fasten the outer planks temporarily, working from her keel to her chines. Once laid out completely, the planks will be released and sealed on all sides with four coats of Smith’s CPES. We will also apply one final “insurance” coat of CPES to her inner skin’s bottom.

The final assembly step involves bedding each outer plank in an at least one-eight-inch-thick bed of white 3M5200, before fastening them with #8×1-1/4” flathead silicon bronze wood screws. Finally, and that’s when she really begins looking good, we apply five coats of Interlux InterProtect 2000E Barrier Coat Epoxy Primer, with alternating gray and white coats, which helps expose any holidays. Per Interlux’s instructions, 2000E should be applied in thin coats.

1948 Century Sea Maid Deck Seams & Varnish update

1948 Century Sea Maid Deck Seams Varnish

Songbird is progressing, despite curing still being severely hampered throughout the shop by chronic humidity levels of 80%-90%+ daily until yesterday. That we are “fully enjoying” monsoon rains and even higher humidity today is not helping.

However, Joe took advantage of yesterday’s low humidity, which allowed varnish applied last Sunday to finally cure fully, to pay mahogany Sikaflex 291 LOT into Songbird’s deck seams.

Now we are waiting again.

If the rest of this week’s low humidity levels holds, we should be able to apply another coat of Pettit Flagship Varnish on Friday, and finally the last of the amber varnish next Monday.

Painting the seams with high-gloss white Interlux Premium Yacht Enamel will follow. As soon as it cures, we will be able to do a final block sanding of the entire hull using 600 grit before applying the final two-three coats of Pettit Captains Ultra Clear Varnish.

Finally, it will be final buffing/waxing and reassembly time, after which Songbird will be homeward bound. We cannot wait, which pales by comparison to how anxious her owner-stewards are to have her on the water again!

1948 Century Sea Maid Varnish!

1948 Century Sea Maid Varnish

Finally! Songbird is spreading her wings as we apply Pettit Z Spar Flagship High Build varnish… three coats to date. Rick will be rolling and tipping coat number four later this afternoon.

No, the varnished surface on the decks is not flat …. Yet. Once we have applied her initial five build coats, we will sand the entire hull using 320 grit on one of our Hutchins manual longboards now, and progress towards 600 grit later in the process.

You may notice that we have corrected the seam lines on her decks, and that where Century wanted her blonde or dark and bereft of seam lines, she now is.

We will continue varnishing and be back to you about ten more down the road.

1940 Chris Craft Barrelback 5200 Bottom Planking

1940 chris craft barrelback 5200 bottom

Priscilla, our 1940 17-foot Barrelback became our lab rat today as we tested what we are calling a New Day at Snake Mountain Boatworks when installing a truly True 5200 bottom.

Rather than install her inner skin using 6 mm plywood panels, we are reverting to what is a truly very old school alternative: replacing the inner skin using 6mm strips of planking laid at approximately 45 degrees to the keel.

In so doing, we are able to deliver a bottom, the inner skin of which precisely matches that installed in Algonac in 1940.

Once we have dry-fitted each, approximately 5-3/4”-wide plank, everything will be sealed with four coats of Smith’s CPES, and we have applied three coats of Chris-Craft mahogany bilge paint to the inner surfaces, we will then install these planks bedded in mahogany 5200 using #6×1” Frearson-drive, flathead silicon bronze wood screws.

Once finished, the bilge will present exactly as it did when Priscilla left Algonac in 1940.

We will then proceed as we do with all SMB True 5200 bottoms, installing the outer mahogany planks bedded in white 5200 using #8×1-1/4” Frearson drive, flathead, silicon bronze wood screws.

Planking the inner skin produces a tighter, more rigid skin that follows the bottom’s contours precisely. Any interior squeeze-out will be removed using nylon putty knives before it, too, receives three full coats of Chris-Craft mahogany bilge paint.

Post this new day, SMB will make individually planking inner skins our standard for SMB True 5200 bottoms.

1948 Century Sea Maid Bottom Time To Skin

1948 Century Sea Maid Bottom Time To Skin

It is time to apply the inner skin and outer planks on our 1948 18-Ft Century Seamaid Songbird’s new True 5200 bottom.

Since the last update, every:

  • Frame was disassembled, heavily sealed with four coats of Smith’s, followed by three coats of OEM Century bilge paint.
  • Using 4mm Aquatek Meranti Marine plywood, all of the inner skin panels have been fabricated, fit, sealed with CPES and received three coats of OEM Century bilge paint.
  • The battens and bottom planks were milled to proper thickness, fabricated, fit and similarly painted, and the battens have been installed. Only final shimming of two batten landings remains, a task Joe and Rick are executing as I type.
  • All joints were bedded in 3M 5200.
  • All joints were secured with either 3/8” x 3” silicon bronze carriage bolts or #10 silicon bronze wood screws in varying lengths.

The ply will be in place by today’s close. The planks will be in place, sealed again with multiple coats of CPES and have received five coats of Interlux 2000E Two-Part Barrier Coat Primer by Christmas.

Merry Christmas, Happy Holidays and Happy New Year to one and all!

1948 Century Seamaid Bottom Frames & Bow

1948 Century Seamaid Bottom Frames & Bow

Our 1948 18-foot Century Seamaid is well on her way to having a virtually all-new bottom from the waterline down.

All be three new frames, the stem and the gripe, as well as the chine frames and bottom bow have been fabricated and rough-installed. (We use FAS grade white oak for the structural members.)

Once Joe finishes final fabrication of the stem, we will remove, seal and bilge paint all structural members.

Once sealed and painted, we will install her new bottom frame bedded in 5200 and secured with silicon bronze wood screws and carriage bolts. We will use longitudinal strings to ensure an absolutely true and fair frame.

We are replacing the Seamaids’ single plank-on-batten bottom with a True 5200, which is double plank. To ensure the new bottom’s final thickness matches the single-plank bottom, we use 4mm Aquatek Marine Plywood for the inner skin, followed by FAS grade Meranti planking planed so that it lands fair with the keel and just shy of share with the chine planks.

The inner skin is bedded to the battens and frames using mahogany 5200 and silicon bronze fasteners. The outer skin will be bedded in a 1/8-inch-thick layer of white 5200, save for mahogany 5200 forward where the bottom planks sweep above the waterline.

We will be updating you again sometime next week, when we should have the frame members and inner skin installed.

1948 Century Sea Maid Replacing Bottom Frames & Bow

1948 Century Sea Maid Replacing Bottom Frames & Bow

Songbird is on her way back. Rick has roughed in what will become a solid white oak bottom bow.

Degreasing the keel is ongoing, and the process confirms that its oil/grease is on the surface only.

Joe has begun replacing all of the frames from the firewall to the transom on both port and starboard. Preserving these vessels requires endless skill, but also the ingenuity that Joe exhibited in reaching for and tapping frame members using a small ballpeen hammer. If/when a series of taps returned a spurt of oil to the surface, the frame in question has failed beyond reason and will be replaced.

The starboard chine frame must have “enjoyed” several destructive visits by our resident genius. Using twenty-four inches of quarter-inch Luan plywood and sheetrock screws does not a sister make. (This is even worse when those screws are being “driven” into wood that is rotted to powder through and through!)

Each of the boat outfits had their issues – think of Chris-Craft’s use of a “rule of thumb” instead of a ruler to lay-up its hulls, with the resulting horror that the two covering boards on the same boat can differ by an inch or more in length. However. Century’s strategy of using quarter-inch-thick strips of mahogany for laminating a bottom bow strip-by-strip with the strips being installed and glued-up piece by piece is perhaps the worst methodology we have encountered to date.

Each of the boat outfits had their issues – think of Chris-Craft’s use of a “rule of thumb” instead of a ruler to lay-up its hulls, with the resulting horror that the two covering boards on the same boat can differ by an inch or more in length.

Songbird will have come a long way towards being strong and true by week’s end.