1953 Shepherd 110 S Sportsman 5200 Bottom Progress

1953 shepherd sportsman 110s 5200 bottom progress

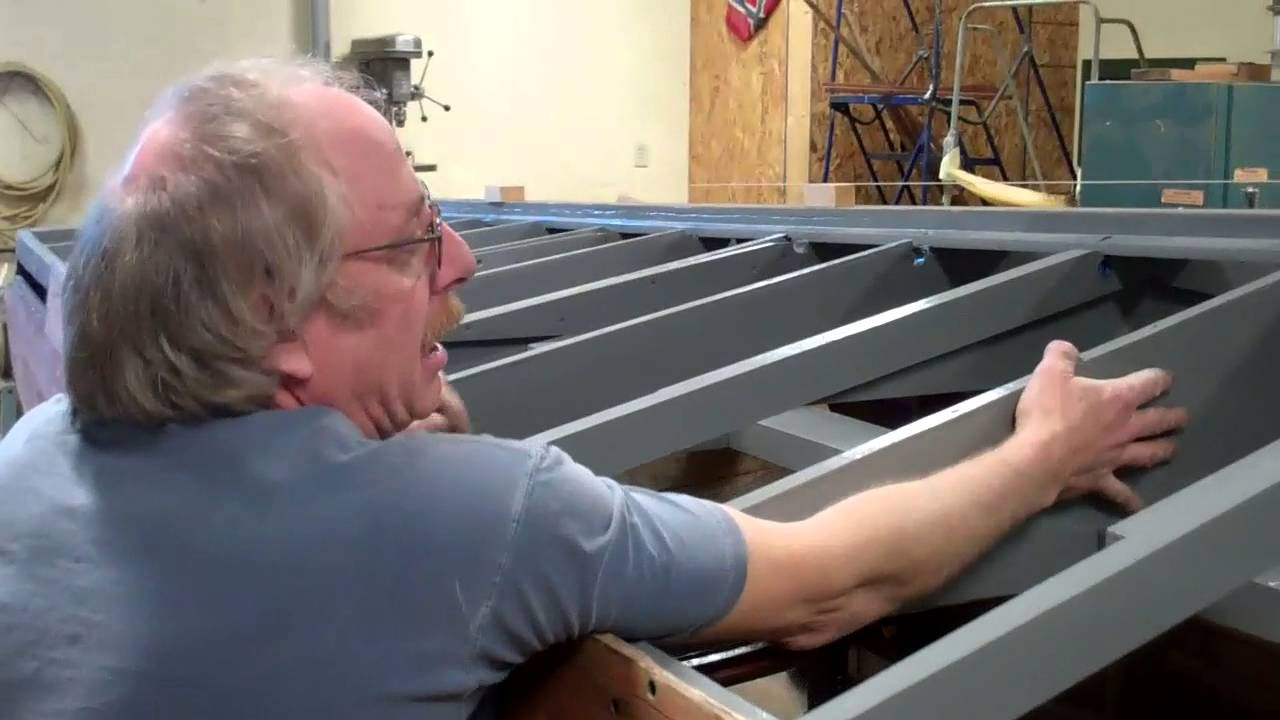
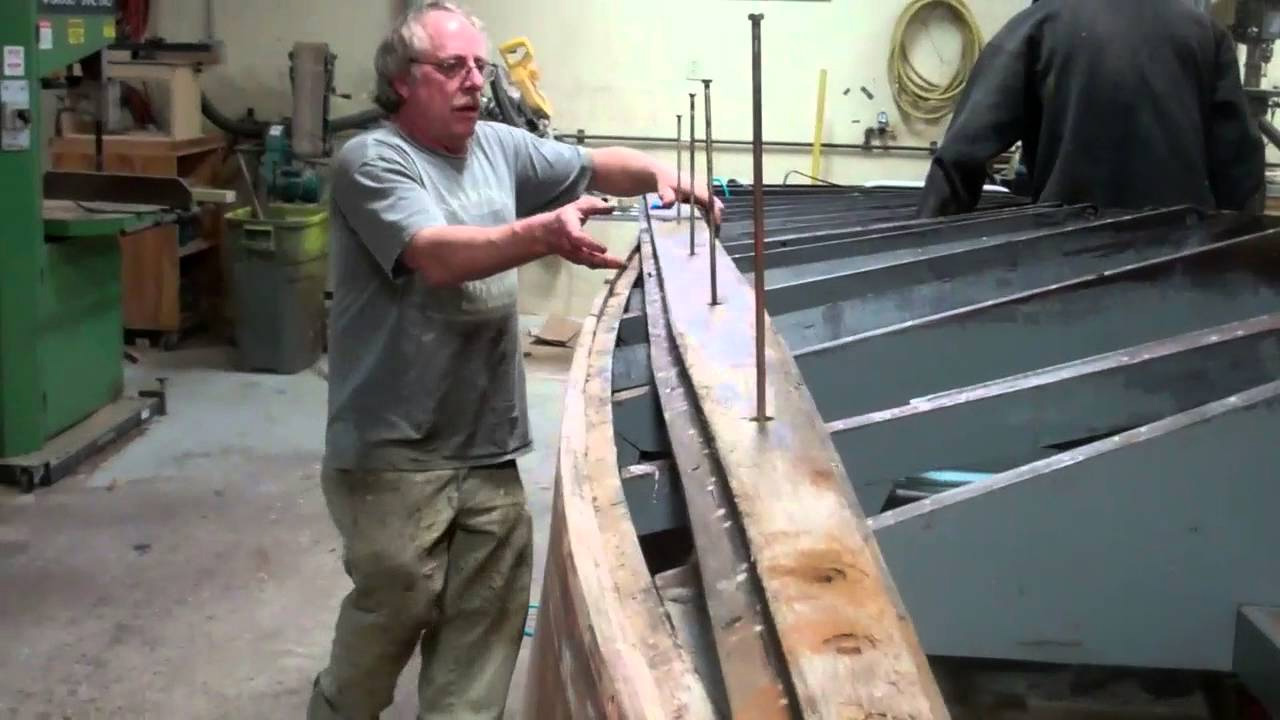
The port face of my 1953 22’ Shepherd Model 110-S Sportsman is one plank course shy of being fully planked.
We had installed the last of the first five courses, complete with a new aft chine plank, yesterday. And I had previously packed the countersinks in the first two courses with two applications of 3M Premium Marine Filler.
The butt joints between planks should never land on a rib. Doing so permits a single course of fasteners driven through the last about 3/4″ of each plank, which can tear out over time.

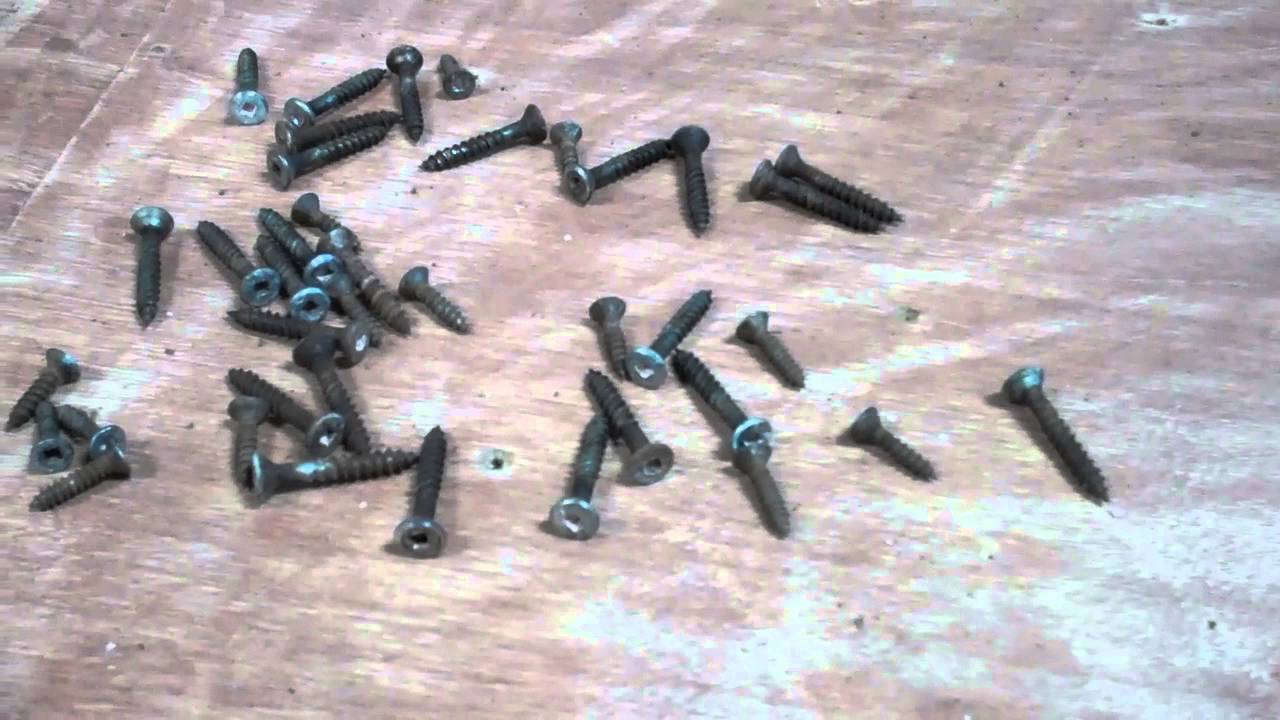
Landing them between the ribs and onto a 3/4″ marine plywood block permits driving three courses of silicon bronze wood screws through the plank. (Each block is coated in 5200 prior to its positioning so that screws can be driven through the planks and into it.)

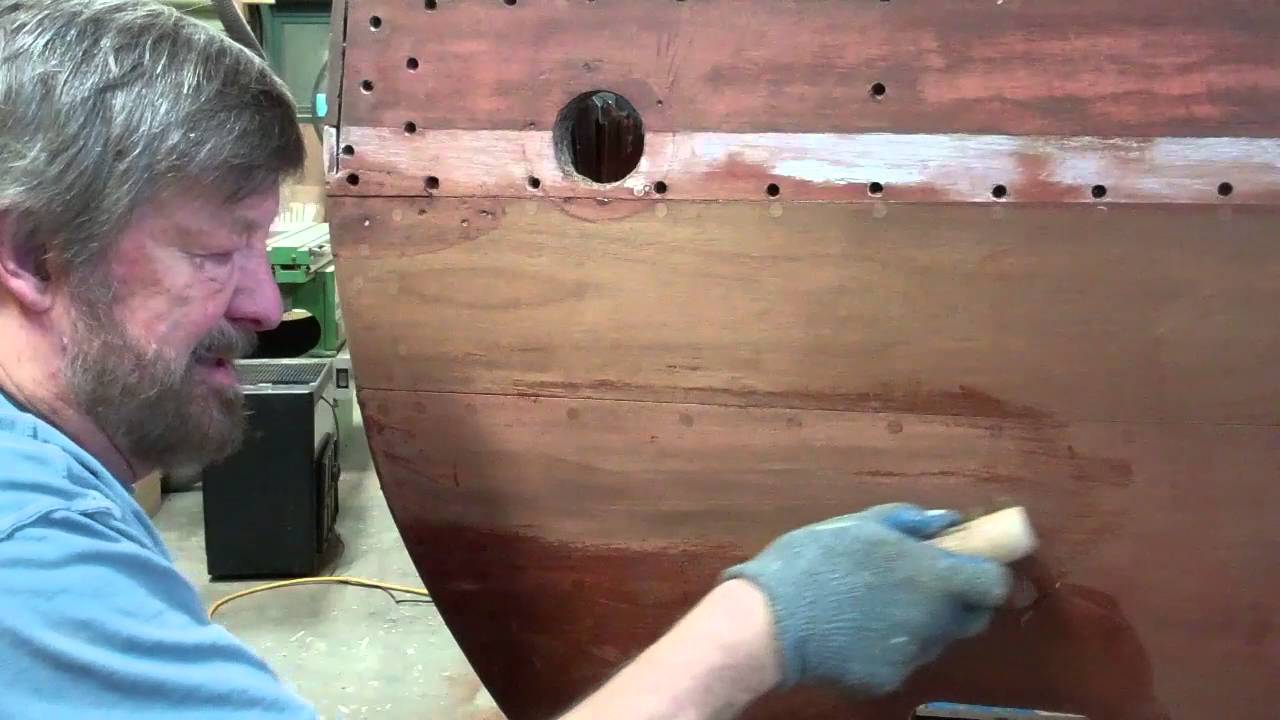
We know that each plank has been sufficiently slathered with 3M 5200, when it bleeds out through the seams and countersinks as we screw it down. Cleaning the seams and especially the countersinks is therefore a vitally important step in the process.

We clean the countersinks with a terrycloth rag soaked in Interlux 333 brushing liquid and a small flat blade screwdriver. Especially above the waterline where they will be bunged, the countersinks must be akin to surgically clean.

We wipe the seams and plank surfaces with a terrycloth rag, being sure that the surface of the 5200 in the seams is slightly concave and below the plane of the planks themselves. Leaving it flush with, or what is infinitely worse, proud of the planks adds special challenges to the flatboard sanding that follows once the 5200 is cured.
Folks have emailed me wondering if what they see in the clips is correct, that we are using white 5200. Why? Cost is the driver here. I have kept count, and thus far we used 18 tubes, installing the plywood inner skin, and an additional 33 tubes installing the first five port-side courses – just over 6 per course – of bottom planks. If we stay on course and use 6 more for the final course, the port-side planks alone will have “cost” us 39 tubes, and we will have used upwards of 80 total once the starboard face is planked, and almost 100 tubes including installing the plywood.

Mahogany 5200 cures in about half the time required by the white alternative, but it also costs between $20 and $23 per tube, depending when you buy it. White 5200 runs between $12 and $14 per tube.
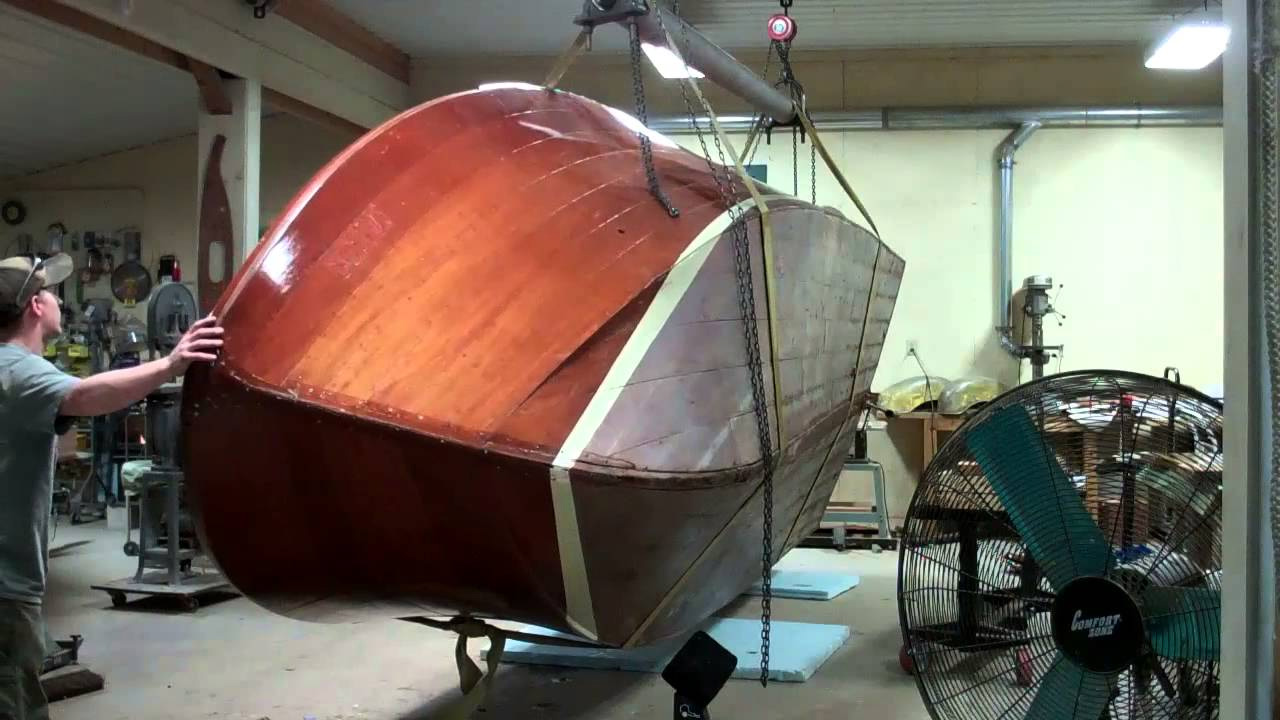
The approximately $8 differential between mahogany and white adds about $800 in material costs for an application in which the 5200 all but disappears. (We do use mahogany for the forward ends of the planks that land above the waterline and will therefore be finished bright.)

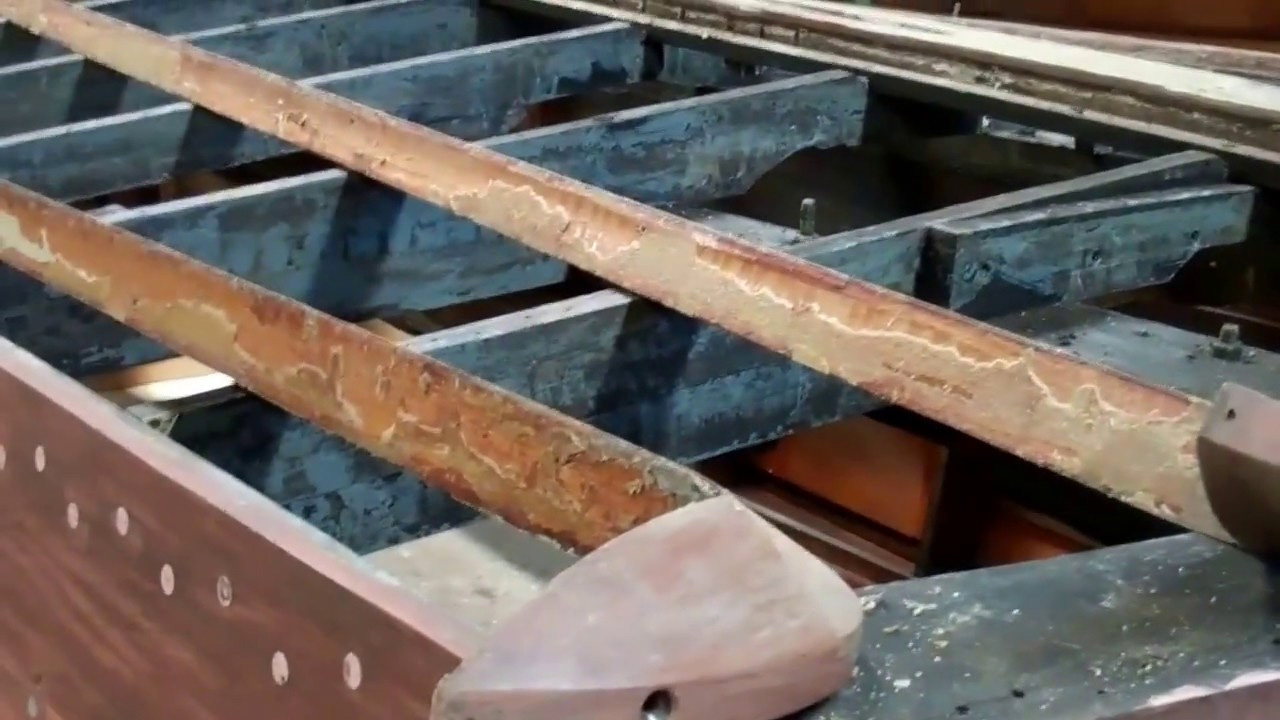
Yes, there is push out along the bilge framing when the plywood is installed, which we clean, leaving a very faint white line along the seam between frame members and the plywood.

The entire bilge will be coated with multiple coats of bilge paint, which, if the seams have been cleaned properly, should render them invisible.

of which hide the seams nicely. And, any adhesion failure at these seams remains largely invisible, especially in the case of the gray bilge paint.

Chris-Craft, however, used Chris-Craft red bilge paint. In such cases we offer owners the option of using mahogany 5200 for installing the plywood. The two colors are very, very close, and doing so avoids the contrast between the C-C bilge red and the white 5200.

On to the starboard face…

1953 22′ Shepherd Sportsman 110 S True 5200 Bottom Update

1953 shepherd sportsman 110s true 5200 bottom update

We reached a critical milestone in this preservation project this morning. The repair and preservation of the bilge framing, stem and keel of my 1953 22’ Shepherd Sportsman 110-S is behind us!

All existing fasteners have been replaced with silicon bronze.

About 40% of the ribs were replaced completely, including all the frames beneath the engine compartment. We added stiffness by replacing the 7/8” thick mahogany with 1-1/8” white oak ribs.

Almost every other rib was repaired to some extent, with all of the fasteners replaced in the components of the floating (secondary) ribs.

As chronicled in an earlier video, John rebuilt the gripe and knee using his amazing Dutchman technique.
The broken and rotted aft 3’ of the keel has been replaced and repaired by John using a long scarf joint.
Every gusset at the knees was fabricated anew and installed bedded in 5200.

Everything has been re-installed bedded in 5200. (No, I do not care that we have created a nightmare for whoever is “lucky” and inherits the challenge of disassembling the literal monolith we have created.

She came to us suffering a significantly hogged keel amidships. Years of hanging with water in the bilge almost up to the chines had taken its toll. Virtually all of the ribs in this center section had either loosened or completely broken away from the keel. The wood had rotted and stainless bolts had snapped. Sadly, the gunwales spread about 1-1/2” as a result, and the still-attached ribs tugged the keel into the hull.

We squeezed her hull until her beam returned to 7’, braced her and, using strategically-placed chain falls, gently teased the keel back into its proper shape. Rotted floating frames were then fabricated anew to fit properly, rather than to the dimensions of the failed members. The solid ribs were shimmed ever so slightly. Finally we had every rib landing properly on a keel that is straight as an arrow, at which point every joint was bedded in 5200, and secured with new silicon bronze carriage bolts.

Her former owner mentioned that the hull seemed to flex when he dropped the hammer on the Hemi. No wonder, since the bottom planking was at best symbolically fastened to the ribs and chines, and many of the ribs themselves had long ago been freed at their landings.

All of the components’ surfaced received three coats of CPES, followed by two coats of Interlux Bilgekote before being reassembled and installed. All surfaces then received another coat of Bilgekote.

Fabricating and installing the inner layer of 5/16” Okoume plywood is next. Using construction paper, and starting at the bow, John will begin patterning the pieces. All surfaces, and especially the edges of each sheet, will then be sealed with three coats of CPES, and the inner side will get two coats of Bilgekote.

Once installed, bedded in copious amounts of 5200, the hull will be materially stiffer than it is now based on John’s test, scaling the hull and bouncing up and down on the keel. OMG!

And me? All of those mahogany bottom planks must be cleaned, sanded and sealed with CPES before being bedded in a literal sheet of 5200 and screwed down.

In answer to an earlier question, given the size of the Shepherd’s bottom, we project needing at least 75 tubes of 5200, and several thousand #8 silicone bronze wood screws to complete this process.

1953 Shepherd Sportsman 110S Extracting Stain From Planking

There is no glory in pulling residual penetrating filler stain out of planking. However the returns for doing so are worth the drudgery and elbow grease involved. Sandpaper does not fill up as quickly, and subsequent bleaching delivers a materially more uniform result.

Our tools for the job: sandvik scraper with forward hand hold, heavy duty stainless steel scrubber, stiff-bristled brass brush, and Circa 1850 Heavy Duty Paint and Varnish Remover. I have experimented with several scrubbers, but the one that we find most effective is available from Amazon.com. Search for “Heavy Duty Stainless Steel Scrubbers, 3.5” large Diameter…” A pack of twelve is $12.99 on Amazon Prime.

I had previously made four passes, mostly with the scraper and brush, and one with the scrubber on the transom in the clip. Now I continue with one additional scraper and brush passes and two scrubber passes.

My hope is that the camera picked up the increasing difference between the area worked and that surrounding it. An additional plus is that, after seven or eight passes, we become intimately familiar with the planking, its fasteners and bungs, which also renders discovering blemishes or damage needing Dutchman repairs quite straightforward.

Once the cleaning is complete, we will flat board the topsides and transom with 80 grit, making sure we do not leave any cross-grain scratches, before we proceed to bleaching, staining, sealing and varnishing.

1953 Shepherd Sportsman 110 S Fabricating a Stem Dutchman

1953 shepherd sportsman 110s fabricating a stem dutchman

The survey completed immediately after she was flipped made clear that the 1953 Shepherd Sportsman 110-S’s knee and forward keel had seen much better days.

Could it be repaired using TotalBoat Thixo two-part epoxy? Possibly, but then I put a wrench on one of the carriage bolts – all of which were beyond suspect and must be replaced. The nut moved, but so did the entire bolt. And as it turned, the head, the sides of which were ground flat, split what was left.

In this clip, John takes you through the process. Using one of our Fein Multimasters, John carefully excised the damaged material in preparation for executing another of his remarkable Dutchman repairs.

Why not just tear all the planking away and replace all of it with new wood? We strive towards preservation over “restoration,” a major component of which is replacing only that which cannot be repaired. As is clear in the clip, repair is readily available and a sound choice for addressing this issue. We would replace only that wood which we cannot save.

John shaped the replacement sections, refining the profile and sanding the adjoining faces in using a combination of hand-held and horizontal belt sanders.

Here is the result … so much better than trying to “save” these parts using epoxy forced into the splits.

Reinstalling the framework is next, so fabricating and installing the first layer of the new True 5200 Bottom is not far away..

Why using stainless steel fasteners below the waterline is VERBOTEN

stainless steel hull fasteners

Don Danenberg’s seminal piece on 5200 bottoms, “What is a TRUE 5200 bottom,” Classic Boating, September/October 2014) is a must ready for anyone undertaking replacing an antique or classic wood boat’s bottom. The section on fasteners is particularly apt in this setting:

“Stainless steel was invented in 1913. The 300 series (302-316) includes 18-20% chromium and 8-12% nickel. (316 has 2-3% molybdenum, which makes it slightly less susceptible to crevice corrosion.) In the presence of oxygen, the chromium and nickel form a surface coating that protects 70% of the material is mild steel. If you bury them in the hull, covered with putty and paint, they are cut off from oxygen and will soon corrode like mild steel. Only silicon bronze is long lasting here. The only apparent reason some use stainless steel is that, coming from Taiwan, they are cheap!

“It doesn’t matter if they are advertised as ‘marine grade.” That only applies in the presence of oxygen. Please see this website (sic) link: http://www.stevedmarineconsulting.com

This clip illustrates exactly what Danenberg asserts. These fasteners have been in the chine planks for fewer than eight years, and have already failed completely.

Please insist on silicon bronze below – or near – the waterline. In fact, Snake Mountain Boatworks will not fasten anything but hardware with stainless. Yes, the silicon bronze, Frearson head fastener is much more expensive.

Here once again is a prima facie example of how eventual cost being seldom equals the initial price. Chines should not fail in fewer than eight years, and replacing them is far, far more expensive than the original cost differential between stainless and silicon bronze would have been had this owner insisted that only the latter be used to fasten her new chines.

How To Release Clinch Nails – 1942 Century Imperial Sportsman

how to release clinch nails 1942 century imperial sportsman

Clinching (sometimes spelled “clenching”) is when you drive a nail that passes through both thicknesses of wood you are fastening. The tip of this nail sticks out about 1/4” and is bent over and driven into the wood.

That is all and good, but how about the poor person trying to repair or preserve a wood boat like the 1942 Century Imperial Sportsman that has been clenched?

If you can get to the edge of a board so fastened, and there is room for the tool, the nails can simply be cut off using a tool like a Fein MultiMaster.. It is quick, clean and relatively easy to execute. It also leaves the tip of the nail imbedded into whatever framing the nail was clenched to. Woe be unto the unsuspecting person who reaches in there with a fine handsaw or worse, has released the frame member that is too thick for some reason and runs it through his/her planer! Those blades are anything but free!
Seeing me with the Fein tool in hand, RJ suggested pulling them with a simple hand tool, a staple or upholstery tack puller.

Voila’! Yes, a bit of patience and care is involved, but the tool can be gently inserted beneath the nail’s head, which is then carefully rocked upward to reveal its shaft.

In the clip I used right-angle needle nose pliers to finish carefully levering the nail free. Yes, it works, but it is also clumsy and can exert too much force all at once. (Or the operator can do so!)

Shifting to a six inch, very fine flat bar is the answer. Levering it slowly caused the nail to rotate as it was releasing, thereby leaving only a very small hole behind, one that is easily repaired with toothpicks and Gorilla Glue and faired.

I do not recommend this method on planking that is finished bright as it does tend to tear the edges of the holes left behind on the outer surface’s. Here I would go back to the Fein tool method so I could either clench anew or use silicon bronze wood screws during reassembly.

Do not try to pull the nails out by hand! I did so and yelped. That copper head’s edges are super sharp. Putting your heart into your work is one thing. Bleeding on it is quite another!

1953 Shepherd Sportsman 22′ Releasing Her Keel

1953 shepherd sportsman - releasing her keel

I spent much of this afternoon scraping frame members, during which I could not help but notice several loose fasteners running through the keel into the ribs. Backing them out conveyed a stark realization that every one of them was rusted common steel. When I released four that ran through the transom and into the keel’s aft end, and, you guessed it, all of them were badly rusted common steel.

Releasing the keel is the only way to address this issue, and release it we did.

Ever have one of “those” nagging feelings that something is amiss? We finally had all of the fasteners released.

Save for the brass – maybe silicon bronze, but I do not think so – hex bolts passing through the keel and into the ribs, every one we removed was severely rusted common steel.

Still that sense of unease remained, and was only answered while I was shooting this video, and after the keel had been moved off the hull. Listen and you will hear John say, “You have a broken keel.”

Now I understood that gnawing discomfort. Thank goodness we decided that, with all the common steel fasteners we found and the copious amounts of grease- and oil-soaked wood among the ribs, releasing the keel was just the right thing to do.

Just imagine if we pressed ahead with the keel in place and completed our preservation only to have her waggle her fanny across the water each time we accelerated!

We will scarf a new section of white oak to the aft 20 inches of the keel and all will be fine there.

At the same time, we will be releasing a hideously ineffective collection of ¾” plywood gussets, all of which have failed, and likely began failing the day they were installed. Each will be released with a mahogany gusset fabricated to match the original ones which are still to be found on the hull.

We will also be fabricating mahogany replacements for every rib member that shows any sign of deterioration. That Hemi power plant can either drive her forward or twist her out of shape. We will render the hull so true and stiff that every ounce of power the Hemi delivers translates into acceleration.

1953 Shepherd Sportsman 22′ Varnish Stripping Update

1953 shepherd sportsman varnish stripping

My wife keeps asking, “Why is it taking you so long to just strip the varnish from that Shepherd?”

Well, 22 feet long, almost 3 feet from chine to gunwale translate into lots and lots of surface area. Lots!
And, whoever varnished her last made sure the stain penetrated the mahogany, and then must have applied something like 18-20 coats of varnish.

I have complete a first pass on port and about 40 percent on starboard. Once the balance of the starboard side and the transom are denuded of all varnish and bottom paint, I will begin another lap using the Circa 1850 Heavy Bodied Stripper and stainless pot scrubbers to pull the stain out of the wood.

I have exhausted 3 gallons of Circa 1850 to this point, and expect to go through at least another 2 gallons before I have the topsides and transom down to truly bare wood.

As you see in the clip, and as is our custom, the spray rails have been released. Doing so is the only way to inform ourselves about the condition of the topside planking behind them. We are also afforded an opportunity to examine the fasteners – stainless square drive here – and toothpick the fastener holes with waterproof Gorilla Glue so the new fasteners have something to bite on after we have drilled new pilot holes and countersinks.
Even though they appear to be fine, never, ever will we use stainless fasteners at or below the waterline, or anywhere else on a wood boat save for hardware installation. Stainless is completely unforgiving, and they weaken very quickly when exposed to water, especially in an anaerobic environment.

For the same reasons we will likely replace the chine fasteners as well, but first it is slop on, scrape off, slop on, scrape off… So much fun.

1953 Shepherd Sportsman 22′ Starboard Bottom Planking Update

1953 Shepherd Sportsman 22' Starboard Bottom Planking Update 11 27 2015

I am halfway home on the first step of installing a true 5200 bottom on my 1953 Shepherd Sportsman. As of a few minutes ago, all of the starboard side bottom planking has been removed, exposing the frame members to cleaning and careful inspection.

Simply put, the inner planking, which was fabricated with 3/8” mahogany will be useful for patterning, but not much else, which is fine. It will be replaced with Okoume’ marine plywood, which will impart substantial additional strength to the hull.

The outer planking by contrast is solid, easily cleaned and will be reinstalled.

I did encounter a repair of the plank running along the chine. Two short planks, each of which is about 30” long were installed one ahead of the other, and ahead of the cut-off remained of the aft-most plank. The latter plank is about 50” long. Honest!

Since that longer plank had to be released to have the damaged section cut out, why this person failed to execute the repair using a single new plank that began at the transom and extended forward about 9 feet is at least baffling. Must be he/she had a couple of short lengths of mahogany lying around, so why not just screw them in place?

We will replace this mess with a single plank.

Other than one cracked rib that we will replace, the frames are as solid as stone, and, save for one other frame, the fasteners are tight.

Tomorrow I “get” to begin on the port side. Yahoo!

Flipping Our 1953 22′ Shepherd Sportsman! OMG!

Even with her 331 cubic inch Hemi V8 out of her hull and on a cradle, this 1953 22’ Shepherd Sportsman hull (22-53-308) weighs something like 3,500 pounds, and possibly more. Our chain falls and rolling infrastructure is rated for 10 tons, so lifting her is not the challenge.

Given her volume, however, three guys must somehow roll her 180 degrees. Here is how we got there.

We quickly realized that rolling her to port was driving the aft strap off the roller, so we reversed course and began flipping her to starboard.

There is a moment of truth, just as the hull is hanging on edge – on one of the gunwales – in the straps. It still wants to come back, and we must overcome those forces and literally get the uppermost gunwale past the tipping point. Usually we can muscle it through this point, but, as is clear in the clip, the Shepherd easily resisted all we could muster, even when RJ is hanging on the hull.

As John can be heard worrying, setting her lower gunwale on the ground and allowing gravity to become our friend offers a solution, but one that risks distorting the hull or worse. These hulls are not designed to carry their weight over one small area of a gunwale.

Our strategy, as is evident in the clip was to slowly lower her until she began to roll past the tipping point. The straps continue carrying most of her weight, and the two-inch blue board cushions the wood.

Slowly, slowly, slowly over she came, quickly evidencing one main advantage of this strategy: We could control the amount and rate of roll.

Finally, over she goes, and momentarily threatens to keep going, but we catch her and settle her on the aft dolly, at which point all the tension leaves the room.

Next comes stripping all of the bottom paint and releasing all of the outer bottom planking, which appears to be in great shape and savable.

The inner planking will be another story given the many, many months she hung in her boathouse with her bilge full of water.

Once all the planking is released and we repair framing as needed, a new true 5200 bottom will be installed.
Happy Thanksgiving!