Snake Mountain Boatworks Workshop Using a Dutchman to Repair a Stem 1 24 2015

Our January 24, 2015 workshop included a clinic led by John La Fountain on using a Dutchman for repairing the stem of 1953 Shepherd 22’ utility we are preserving.
Following is the handout he prepared and distributed to workshop participants.

1. Inspect stem and knee to determine if a Dutchman can solve the rotting and grain separation issues where the stem and knee meet.

2. Remove the bad part by cutting away any rot or split-out wood.
a. Always cut the top at an upward angle relative to the leading edge of the stem so that water runs off the Dutchman, not down inside it.

3. Make a template using cardboard.

4. Locate a straight-grained, clear piece of white oak – usually 8/4, as it was here. (Be sure to wear heavy gloves!)
a. Using a band saw, rough-out the mating surfaces between the Dutchman and stem or knee, after transferring the templates to the blocks of wood.
b. Rough out the abutting faces of the two Dutchmen.

5. Sand the Dutchmen to shape

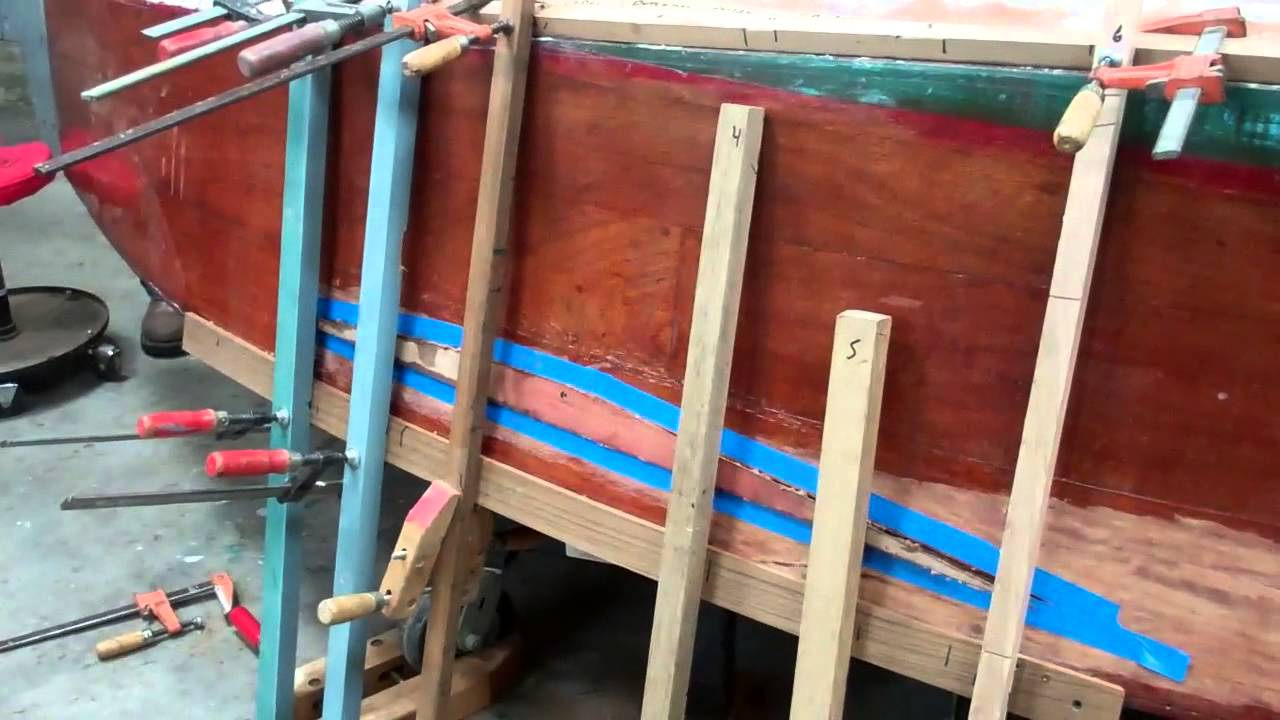
6. Re-fasten the leading ends of the planking – or strakes in a lapstrake hull – bedded in 3M 5200.

7. Repair any rot, cracks or over-sized holes with TotalBoat Thixo Thickened Epoxy adhesive now. (The above-waterline seams will be affixed with TotalBoat Wood Epoxy System.)

8. Once epoxy has cured, do a final sanding and shaping of both Dutchmen and the surfaces they will mate to on the stem and knee.

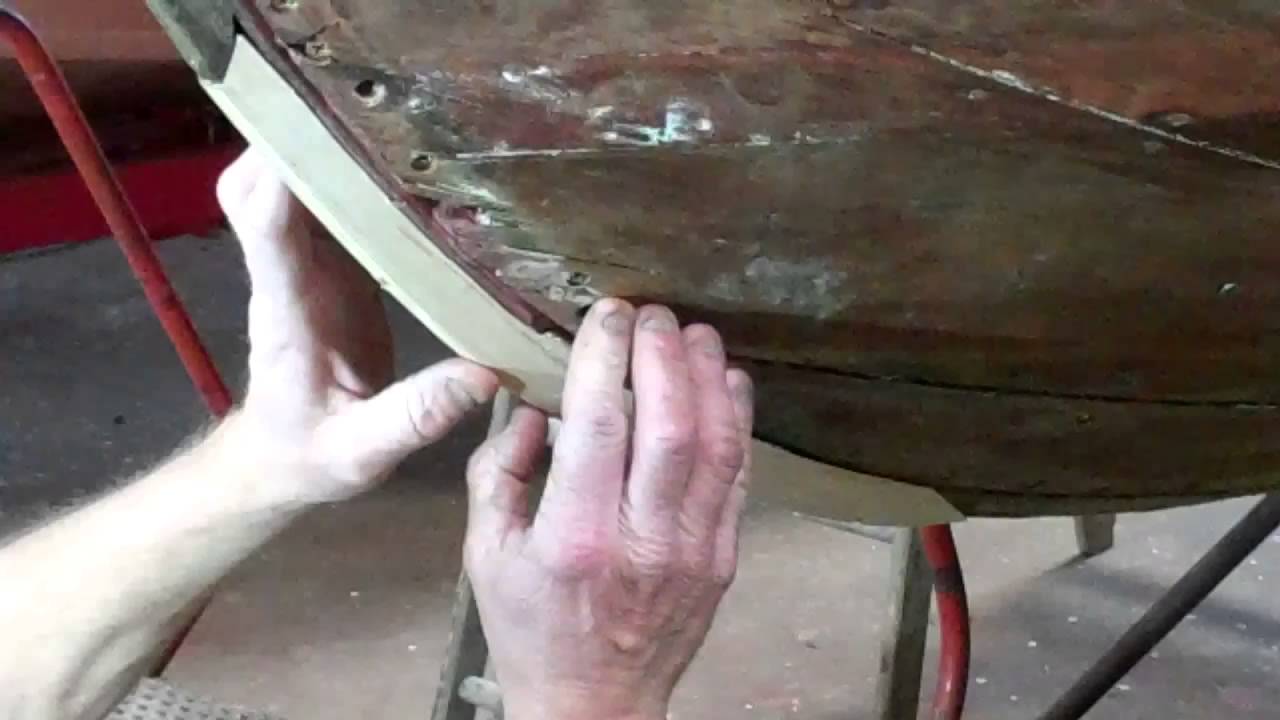
9. After a final check for fit, some final sanding, fit the Dutchmen in place and one fastener pilot hole into each.

10. Glaze both surfaces with TotalBoat Thixo, and the abutting surfaces with 3M 5200, and fasten them in place with fasteners passing through the pilot holes.

11. Wait 24-48 hours.

12. Drill the carriage bolt holes from the inside of the stem and knew out, and insert silicon bronze carriage bolts – 4 in the case of the Shepherd.

13. Do a final sanding and fairing.

14. You are ready for paint!

Snake Mountain Boatworks Dutchman Topside Repair Clinic 1 24 2015

Here is the handout John prepared for the crew:
The first starboard-side Dutchmen covers 5 screw holes that were driven through the topside plank and into the block added behind the damage, and the longitudinal splits in the plank that appear to have resulted from tangling with a dock and losing.

1. Since the backing block was left flat, rather than shaped to the curvature of the plank, the “fix” results in severely distorting the proper shape.

2. Our first task was blocking the planking out from behind so that the contours match those on the port – undamaged – side, and so it can be faired to that original shape via careful sanding.

3. This Dutchman repairs the screw holes and the two splits in the plank.

4. Excising material to create the female side of the Dutchman is accomplished with a combination of a router followed by detailed hand-chisel work.

5. A template is then fabricated out of cardboard, and then used to rough out the Dutchman.

6. The Dutchman will initially be thicker than needed, both to provide a proud surface for clamping and then to sand in so that it is fair with its surrounding planking.

7. The inner side of the through-and-through splits will be secured with TotalBoat Thixo Thickened Epoxy adhesive when the Dutchman is applied and wedged into place using a SMB-original clamping system.

8. Glaze both the Dutchman and its female counterpart with Thixo, put the Dutchman in place, and clamp aggressively.

9. Once the adhesive between the Dutchman and the plank has cured, remove the clamps and sand the patch fair.

10. You are now ready to bleach, stain and varnish the topsides.

Snake Mountain Boatworks Dutchman Topside Repair Clinic Intro 1 24 2015

The Lake Champlain Chapter of ACBS organizes a series of workshops hosted by wood boat shops in the region each winter. It gives us an opportunity to commiserate that, in Vermont we have 9 months of winter and 3 months of hard sledding – our boat season.
Snake Mountain Boatworks’ workshops place a premium on doing something hands-on that has potential to add value for everyone in the room. Last winter we had folks donning gloves and testing a variety of paint and varnish strippers.
This year, and in response to all the questions we have had about invoking a Dutchman repair to preserve the maximum possible amount of original wood during a preservation project.
John La Fountain leapt into action and prepared Dutchman projects to repair rotted and separated wood in the stem of the 1953 22’ Shepherd Utility, and splits, random fastener holes in a topside plank of the 1930 16’ Dodge runabout we are preserving.
The Dodge Dutchman repair is presented here and in the clip that follows immediately below. We will post the Shepherd stem/knee Dutchman clinic soonest.
Yes, these two clips are long by YouTube standards, but I lost the story when I edited it down to under 3 minutes. So, grab a cup of whatever, sit back, and enjoy the next 16 minutes or so.

Topside Dutchman Repair Completed

One Dutchman repair completed. Just a bit after of this one, also in the first topside plank, several more, albeit much smaller, Dutchmen await John’s attention.

The TotalBoat Thixo Wood thickened epoxy blends beautifully into the surrounding mahogany.

John is still faced with addressing two fastener holes – bungs will do this job, and a hairline split for which Famo Wood is the material of choice.

Once he has addressed the other starboard Dutchmen needs and sanded everything fair with 40 grit, we will apply two coats of varnish to protect the wood until Minnow returns to her owner in Oregon, who will have the pleasure of restoring all the bright work.

Repairing a Stem With a Dutchman Update II 1 23 2014

What a nice way to end the week! John has continued working on the Dutchman repair to the 1953 Shepherd’s stem. I hope you will agree as you view this clip that he’s made some solid progress.
We filled the cavities around the original carriage bolts with Jamestown Distributors Thixo Thickened Epoxy, which we will allow to cure over the weekend.
Then John will use the same adhesive to bond the stem and knee components of this Dutchman repair to the native surfaces, securing them temporarily in place with wood screws. 3M 5200 will be applied on the two elements’ joining faces.
Once the adhesive has cured and the screws have been removed, John will complete his final sanding-in process and drill new carriage bolt holes from the inside out.
Yes, surfaces will be sealed with CPES prior to being glued in place.
We are doing a Dutchman repair workshop this Saturday, and hope to have some interesting content uploaded next week.
Description

Dutchman Topside Repair Clinic – Pt 2

vintage boat dutchman topside repair clinic

Here is the handout John prepared for the crew:

The first starboard-side Dutchmen covers 5 screw holes that were driven through the topside plank and into the block added behind the damage, and the longitudinal splits in the plank that appear to have resulted from tangling with a dock and losing.

1. Since the backing block was left flat, rather than shaped to the curvature of the plank, the “fix” results in severely distorting the proper shape.

2. Our first task was blocking the planking out from behind so that the contours match those on the port – undamaged – side, and so it can be faired to that original shape via careful sanding.

3. This Dutchman repairs the screw holes and the two splits in the plank.

4. Excising material to create the female side of the Dutchman is accomplished with a combination of a router followed by detailed hand-chisel work.

5. A template is then fabricated out of cardboard, and then used to rough out the Dutchman.

6. The Dutchman will initially be thicker than needed, both to provide a proud surface for clamping and then to sand in so that it is fair with its surrounding planking.

7. The inner side of the through-and-through splits will be secured with TotalBoat Thixo Thickened Epoxy adhesive when the Dutchman is applied and wedged into place using a SMB-original clamping system.

8. Glaze both the Dutchman and its female counterpart with Thixo, put the Dutchman in place, and clamp aggressively.

9. Once the adhesive between the Dutchman and the plank has cured, remove the clamps and sand the patch fair.

10. You are now ready to bleach, stain and varnish the topsides.

Dutchman Topside Repair Clinic – pt 1

vintage boat dutchman topside repair

The Lake Champlain Chapter of ACBS organizes a series of workshops hosted by wood boat shops in the region each winter. It gives us an opportunity to commiserate that, in Vermont we have 9 months of winter and 3 months of hard sledding – our boat season.

Snake Mountain Boatworks’ workshops place a premium on doing something hands-on that has potential to add value for everyone in the room. Last winter we had folks donning gloves and testing a variety of paint and varnish strippers. This year, and in response to all the questions we have had about invoking a Dutchman repair to preserve the maximum possible amount of original wood during a preservation project.John La Fountain leapt into action and prepared Dutchman projects to repair rotted and separated wood in the stem of the 1953 22’ Shepherd Utility, and splits, random fastener holes in a topside plank of the 1930 16’ Dodge runabout we are preserving.

The Dodge Dutchman repair is presented here and in the clip that follows immediately below. We will post the Shepherd stem/knee Dutchman clinic soonest.

Yes, these two clips are long by YouTube standards, but I lost the story when I edited it down to under 3 minutes. So, grab a cup of whatever, sit back, and enjoy the next 16 minutes or so.

1953 Shepherd: How to Repair a Stem with a Dutchman (update)

1953 shepherd dutchman repair stem

What a nice way to end the week! John has continued working on the Dutchman repair to the 1953 Shepherd’s stem. I hope you will agree as you view this clip that he’s made some solid progress. We filled the cavities around the original carriage bolts with Jamestown Distributors Thixo Thickened Epoxy, which we will allow to cure over the weekend.

Then John will use the same adhesive to bond the stem and knee components of this Dutchman repair to the native surfaces, securing them temporarily in place with wood screws. 3M 5200 will be applied on the two elements’ joining faces.

Once the adhesive has cured and the screws have been removed, John will complete his final sanding-in process and drill new carriage bolt holes from the inside out.

Yes, surfaces will be sealed with CPES prior to being glued in place.

We are doing a Dutchman repair workshop this Saturday, and hope to have some interesting content uploaded next week.