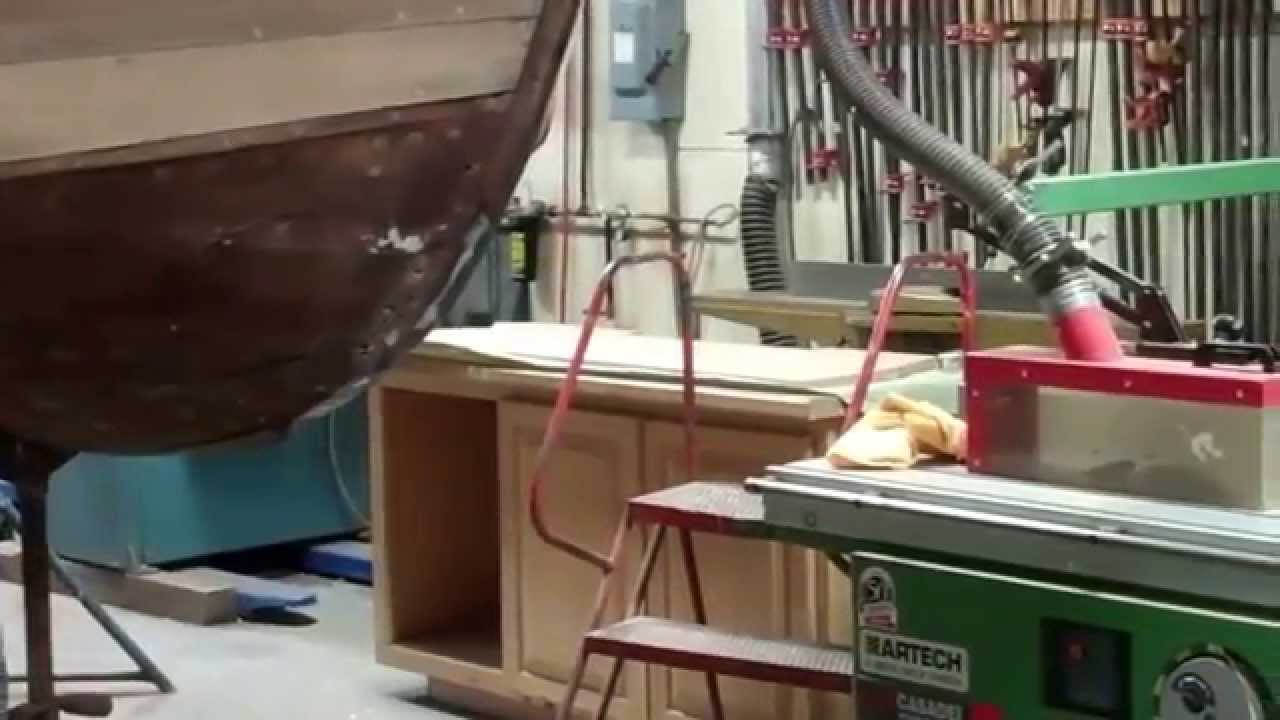
John continued fabricating two Dutchmen blanks for his stem repair, so here is an update on the initial report uploaded a few hours ago.
As he details here, the blanks will be temporarily screwed in place so that, using a belt sander, he can shape and sand in the two blanks so they are fair with the rest of the stem and knee.
Description
A Dutchman Repair for a Rotted Stem ’53 Shepherd 22′ Utility 1 22 2015
Yes, a Dutchman can repair a stem that is only suffering surface rot, and this clip will begin our chronicling of doing so on the stem of the 1953 Shepherd 22’ Utility we are preserving.
The first step involves excising the rotted wood using our Fein MultiMaster, which truly is a revolutionary tool having seemingly endless applications in the wood shop.
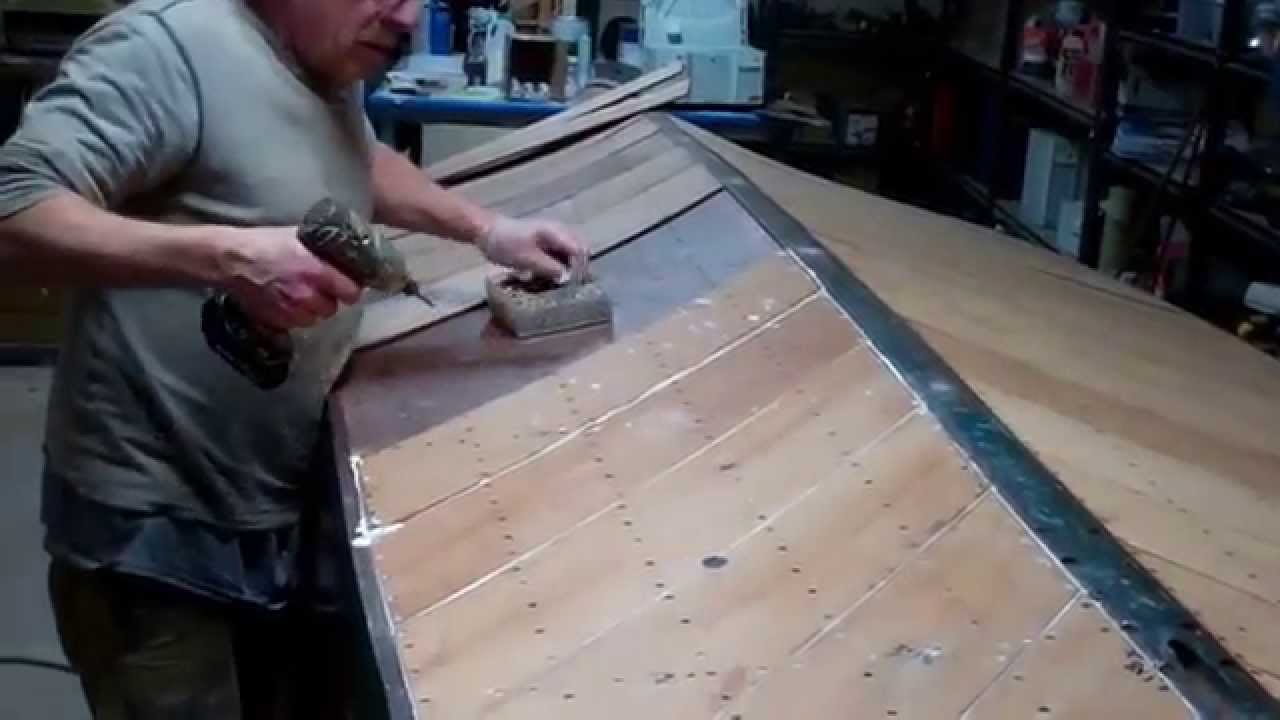
John began peeling layers off the rotted section of her stem until he found sound oak, which is where he is in this clip. He then creates a template using heavy industrial paper, which he will transfer to two blocks of white oak, following which he will saw out the blanks. (John was initially going to execute the entire repair using one Dutchman, but we decided to retain the joint between the stem and knee.)
After sealing them with CPES, we will pack Jamestown Distributors’ Thixo thickened epoxy into the voids and allow it to clear.
Each Dutchman will be rough-shaped, sealed with CPES, glued in place using Thixo thickened epoxy and through-bolted to the existing using appropriately-sized silicon bronze carriage bolts. 3M 5200 will be applied to the joining faces of the stem and knee patches before the second one is installed.
1953 Shepherd: How to use a Dutchman to Repair a Stem
Our January 24, 2015 workshop included a clinic led by John La Fountain on using a Dutchman for repairing the stem of 1953 Shepherd 22’ utility we are preserving.
Following is the handout he prepared and distributed to workshop participants.
- Inspect stem and knee to determine if a Dutchman can solve the rotting and grain separation issues where the stem and knee meet.
- Remove the bad part by cutting away any rot or split-out wood. a. Always cut the top at an upward angle relative to the leading edge of the stem so that water runs off the Dutchman, not down inside it.
- Make a template using cardboard.
- Locate a straight-grained, clear piece of white oak – usually 8/4, as it was here. (Be sure to wear heavy gloves!) a. Using a band saw, rough-out the mating surfaces between the Dutchman and stem or knee, after transferring the templates to the blocks of wood. b. Rough out the abutting faces of the two Dutchmen.
- Sand the Dutchmen to shape
- Re-fasten the leading ends of the planking – or strakes in a lapstrake hull – bedded in 3M 5200.
- Repair any rot, cracks or over-sized holes with TotalBoat Thixo Thickened Epoxy adhesive now. (The above-waterline seams will be affixed with TotalBoat Wood Epoxy System.)
- Once epoxy has cured, do a final sanding and shaping of both Dutchmen and the surfaces they will mate to on the stem and knee.
- After a final check for fit, some final sanding, fit the Dutchmen in place and one fastener pilot hole into each.
- Glaze both surfaces with TotalBoat Thixo, and the abutting surfaces with 3M 5200, and fasten them in place with fasteners passing through the pilot holes.
- Wait 24-48 hours.
- Drill the carriage bolt holes from the inside of the stem and knew out, and insert silicon bronze carriage bolts – 4 in the case of the Shepherd.
- Do a final sanding and fairing.
- You are ready for paint!
True 5200 Bottom Update 1930 Dodge Runabout 1 21 2015
Sorry about the typo in the title. Today truly is January 21. We finally found the plank we were looking for on the starboard face of the bottom. By the time we leave the shop tonight, the final six port “bow section” planks will be sealed and screwed down, and the first coat of 3M Premium Marine epoxy filler will have been applied to the fastener countersinks. A second application will follow tomorrow morning, at which time we will allow the 3M 5200 to cure for a week before we sand the countersinks and finish fairing the bottom with Premium Marine filler.
Yes, we use Acetone as our go-to solvent throughout the shop. In this application, and unlike Interlux 202, 333 or 216, the Acetone flashes immediately and in our experience and in the literature actually accelerates the curing process. (We tested the other solvents on 5200, only to find that they actually retarded, and in some cases seriously so, the curing process.)
We will begin applying five coats of Interlux 2000E two-part epoxy barrier coat next week, followed by three coats of Pettit Copper Bronze antifouling bottom paint.
Soon Minnow will be equipped with what in Danenberg’s world constitutes a true 5200 bottom.
Description
1930 Dodge Runabout True 5200 Bottom Progress Update 1 16 2015
Installing the Minnow’s True 5200 Bottom is progressing nicely. Three-quarters of the bottom planks have been fabricated, which has turned into a near-Herculean task. Why? None of the planks has parallel sides, and the degree to which each plank tapers from chine to keel differs from board to board.
And using the boards from one side as patterns for the other? Well, they are close, but close does not deliver perfect mating with the two boards on either side of the one being fabricated.
John has patiently sanded every plank in using our 36” horizontal, stationary belt sander.
As you see, we lay all the planks out, placing one positioning fastener in each, and then laying out a grid for all the fasteners, and drilling all of the countersink holes, so that the planks end up screwed down where we want them to be.
We test as we go, choosing between #6 and #8 silicon bronze, Frierson wood screws ranging from ¾” to 1-1/2” long.
Why not stainless? Read Danenberg’s article in the Sept-Oct 2014 issue of Classic Boating magazine to find the clearest, science-based, and most objective explanation I have read yet.
Each plank is literally buttered with a 1/8” thick layer of white 3M 5200. Why not mahogany? It costs about 50% more because of the color alone. Since it will end up hidden by five coats of Interlux 2000E Epoxy Barrier Coat Primer, selecting mahogany just wastes money.
As you see, John drives the screws in with an impact gun, and then pounds and pounds the edge of the plank with a large rubber hammer. Doing so drives the 5200 all the way out and beyond the plank’s edge.
What we did not show was the next, not-so-fun step, cleaning the excess 5200 from the plank’s face, edge and surrounding area. Pay special attention to cleaning the trailing edge so that the next plank fits snuggly in place.
Interlux will happily sell you 202 or 216, or some other more exotic solvent. Acetone is our go-to solvent throughout the shop. Unlike the expensive thinners, it flashes off almost immediately, and leaves no residue behind, oily or otherwise.
As John remarks in the clip, “There is nothing clean about installing planks as part of a true 5200 bottom!
Description
1930 Dodge Runabout True 5200 Bottom Progress Update
Installing the Minnow’s True 5200 Bottom is progressing nicely. Three-quarters of the bottom planks have been fabricated, which has turned into a near-Herculean task. Why? None of the planks has parallel sides, and the degree to which each plank tapers from chine to keel differs from board to board.
And using the boards from one side as patterns for the other? Well, they are close, but close does not deliver perfect mating with the two boards on either side of the one being fabricated.
John has patiently sanded every plank in using our 36” horizontal, stationary belt sander.
As you see, we lay all the planks out, placing one positioning fastener in each, and then laying out a grid for all the fasteners, and drilling all of the countersink holes, so that the planks end up screwed down where we want them to be.
We test as we go, choosing between #6 and #8 silicon bronze, Frierson wood screws ranging from ¾” to 1-1/2” long.
Why not stainless? Read Danenberg’s article in the Sept-Oct 2014 issue of Classic Boating magazine to find the clearest, science-based, and most objective explanation I have read yet. Each plank is literally buttered with a 1/8” thick layer of white 3M 5200. Why not mahogany? It costs about 50% more because of the color alone. Since it will end up hidden by five coats of Interlux 2000E Epoxy Barrier Coat Primer, selecting mahogany just wastes money.
As you see, John drives the screws in with an impact gun, and then pounds and pounds the edge of the plank with a large rubber hammer. Doing so drives the 5200 all the way out and beyond the plank’s edge.
What we did not show was the next, not-so-fun step, cleaning the excess 5200 from the plank’s face, edge and surrounding area. Pay special attention to cleaning the trailing edge so that the next plank fits snuggly in place.
Interlux will happily sell you 202 or 216, or some other more exotic solvent. Acetone is our go-to solvent throughout the shop. Unlike the expensive thinners, it flashes off almost immediately, and leaves no residue behind, oily or otherwise.
As John remarks in the clip, “There is nothing clean about installing planks as part of a true 5200 bottom!
1930 Dodge 16′ Runabout 5200 Bottom Update 1 13 2015
We have been so busy making progress elsewhere that we have been unable to get back to the 1930 Dodge Runabout 5200 bottom project until yesterday.
As of this mid-afternoon yesterday, John, RJ and I have finished re-sawing and milling FAS grade mahogany planks – 6/4×18”x16.5’ – into a collection of 1/4×6-1/2”x48” bottom planking blanks.
John then began fabricating new bottom planks, one-by-one, since ever one is different from all the others. We find John now having fabricated all of the starboard planks, and, as the clip closes, beginning to seal each of them on all four sides with CPES.
We hope to begin screwing them down, heavily bedded in 3M 5200. In his recent article, “What is a True 5200 Bottom?” (Classic Boating, September/October, 2014), Don Danenberg is blunt about how skimping on 5200 simply translates into fool’s errand now, and troubles lurking on the horizon:
In communication with the two 3M scientists who invented and developed the 5200 product, I was told that one of their first, largest customers was Chris-Craft, who used it to replace the two-part Thiokol they were currently using in the plywood Cavalier and Sea-Skiff divisions. It was apparently tried in the main division of planked boats but added far too much in construction costs to be cost-effective. Higher-end boat builders, like Trumpy
Yacht Company, used it as their standard construction procedure after 1966.
The biggest problem I’ve seen here is inadequate amounts being used. Where I recommend 40 to 60 tubes just for the bottom plank installation, these troubled guys reported they had been billed for 24 tubes. This is simply not enough product to fill all voids. Okay, so you saved a few hundred bucks, but compromised the entire operation?” (p. 24.)
Also following Danenberg, five coats of Interlux 2000E Barrier Coat Primer will be applied once the bottom has been installed and the 5200 has cured, a process that takes 7 days.
Quoting Danenberg again from the same article:
“One of the biggest problems I have seen with short-cut 5200 bottoms is either a total lack of, or inadequate amounts of, Interlux 2000E Barrier Coat Primer. This two-part (thus epoxy) paint is a water barrier coats meant to keep the water from soaking into the bottom planks. It does that with minute platelets in the makeup that vastly slow the movement of water. Unlike hard epoxy laminating glues, it is flexible enough to move with the bottom.” (p. 25.)
Description
1952 Chris Craft Riviera Achieving Flat
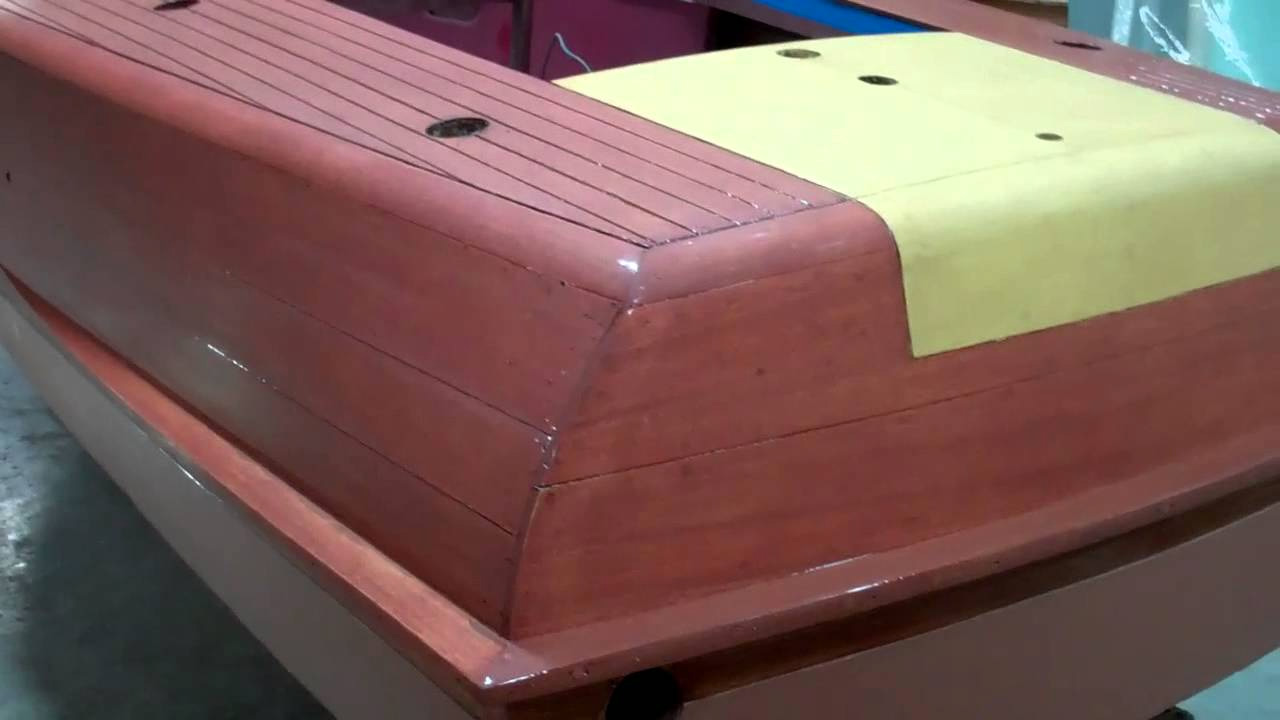
RJ once again transformed the surfaces of the ’52 Chris-Craft Riviera Runabout to snow fields, but this time the results are different. This time, the gloss is successfully fighting its way through the haze created by sanding with 800 grit dry paper.
Are we there? It is difficult not to believe we are, but I pay the bills and RJ is thirsting to get to at least 15 coats before we declare, “Finis!”
Coat 10 will be rolled and tipped this weekend, followed by number 11 on Monday. I must admit to believing that diminishing returns have set in to the point where reaching beyond 11 borders on a fool’s errand. But only time will tell, and we make group decisions at SMB.
We also listen to our community, so please weigh in when we come back to you early next week once coat 11 has cured.
’52 Chris Craft Riviera Achieving Flat
RJ once again transformed the surfaces of the ’52 Chris-Craft Riviera Runabout to snow fields, but this time the results are different. This time, the gloss is successfully fighting its way through the haze created by sanding with 800 grit dry paper.
Are we there? It is difficult not to believe we are, but I pay the bills and RJ is thirsting to get to at least 15 coats before we declare, “Finis!”
Coat 10 will be rolled and tipped this weekend, followed by number 11 on Monday. I must admit to believing that diminishing returns have set in to the point where reaching beyond 11 borders on a fool’s errand. But only time will tell, and we make group decisions at SMB.
We also listen to our community, so please weigh in when we come back to you early next week once coat 11 has cured.
Description
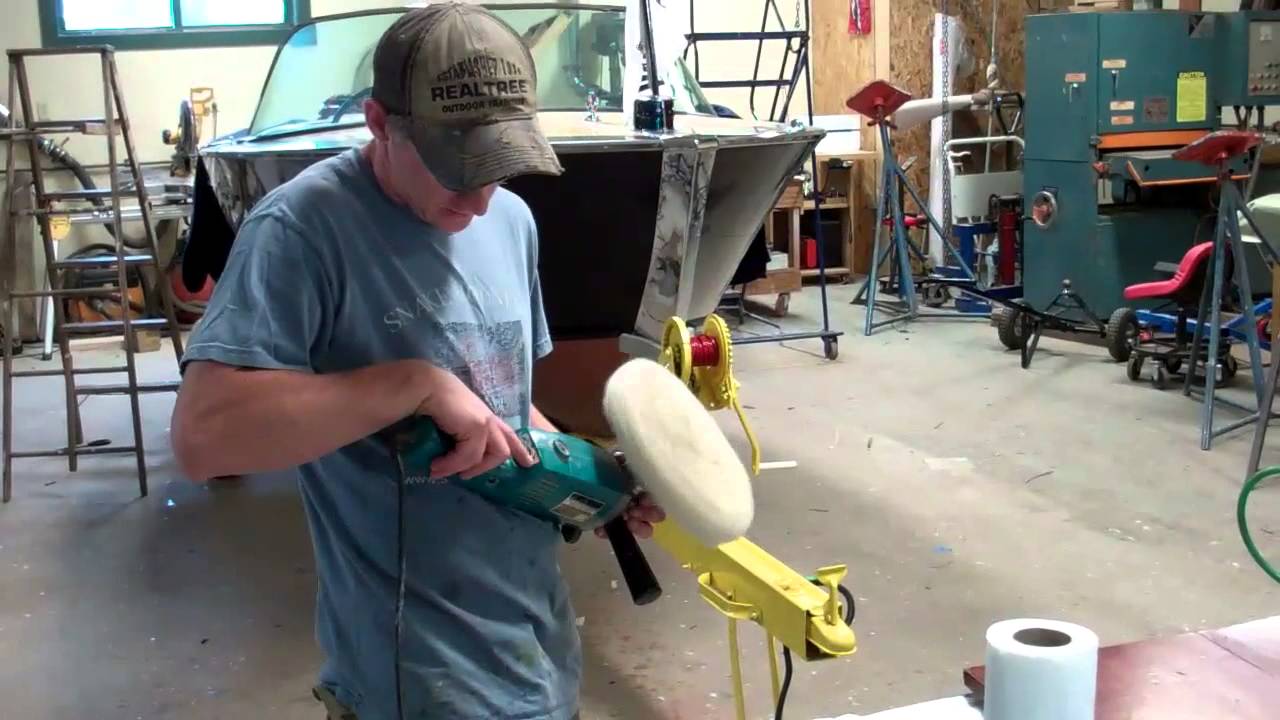
Wood Boat Varnish Buffing – RJ’s Clinic
The last coat of varnish has been oh so carefully rolled and tipped. The mahogany gleams, but up close you see a bit of dirt, or maybe even lots of dirt has been trapped on your otherwise gleaming surface.
Using a pneumatic sander set at about half-throttle, RJ begins the buffing and polishing process wet sanding through five increasingly finer grades of wet/dry paper: 1000, 1200 1500, 2000 and 3000. His goal here is sanding every scratch out of the surface without cutting through the built-up layers of varnish.
After carefully wiping the surface dry, first with dry paper towels and then with Acetone, it is time to begin buffing the surface using our Makita buffer set at approximately 2,000 RPM and the Presta Buffing System.
The first two grades of buffing compound, Ultra Cutting Crème and Ultra Cutting Crème Lite, are applied with an 8-inch wool cutting pad. The final step, using a 9,000 grit foam pad, uses Polishing Crème to bring the surface to a brilliant shine.
Getting a fantastic gloss is all about achieving a flat surface, one that is completely devoid of scratches and even tiny hills and valleys. Compare your reflection in a cheap big box store mirror against it in a high-end mirror. The first can be wavy and even distorts the image you see, while the high-end mirror reflects all that stands in front of it perfectly.
Our goal is transforming that varnished surface into one that is as close to that high-end mirror as is humanly possible. Do it well and you see a face smiling back at you as you peer into its surface.