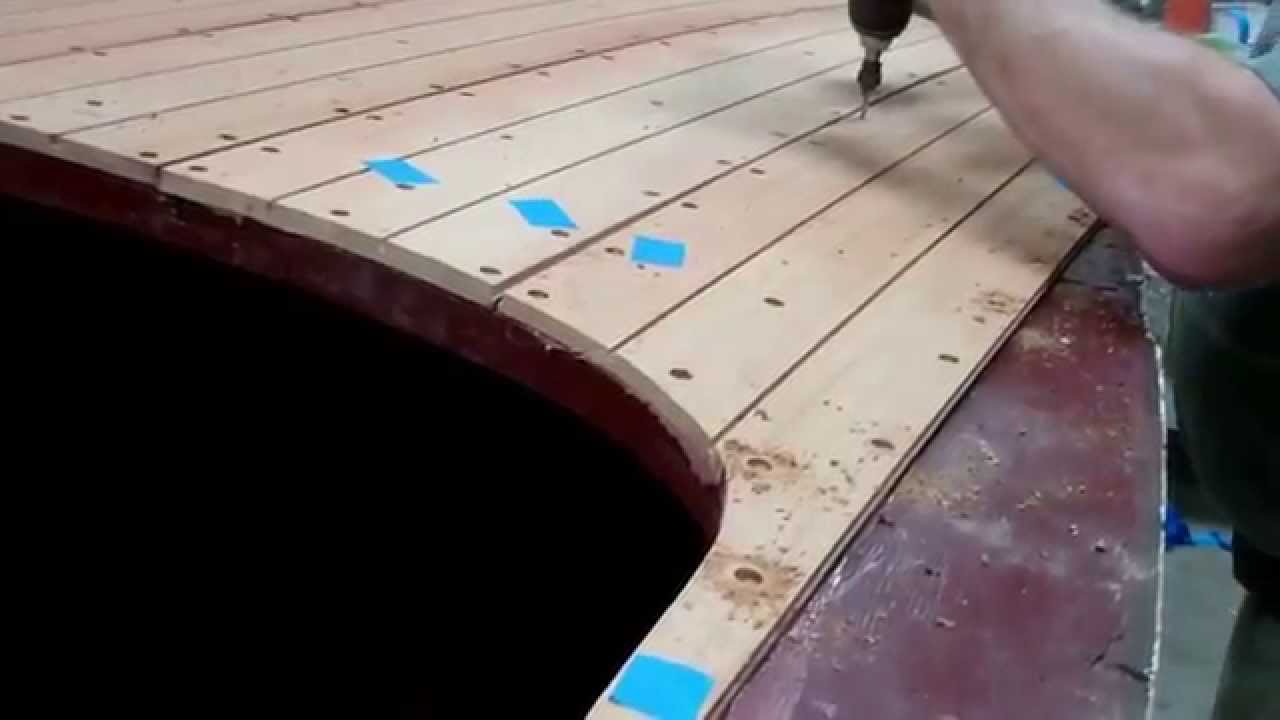
Friday the 13th turns out to be a near milestone day for the 1946 Gar Wood Ensign deck planking project.
As it opens, you can enjoy with John and me seeing all the planking, fasteners and bungs in place, and all of the deck seams having been routed out.
What remains? As we explained in earlier reports, both decks were flying loose and sagging where they met the gunwales. That droop hid the fact that the deck boards we removed were actually thicker than are the covering boards. As a result, the new planking is proud of the covering boards now that the framework has been completed.
We use the Veritas Detail Flush-Cutting Saw, with a 26 TPI blade (05K34.10) for trimming the bungs fair with the surface. It is the first flush-cutting saw we’ve used that absolutely will not scratch the surface around the bung.
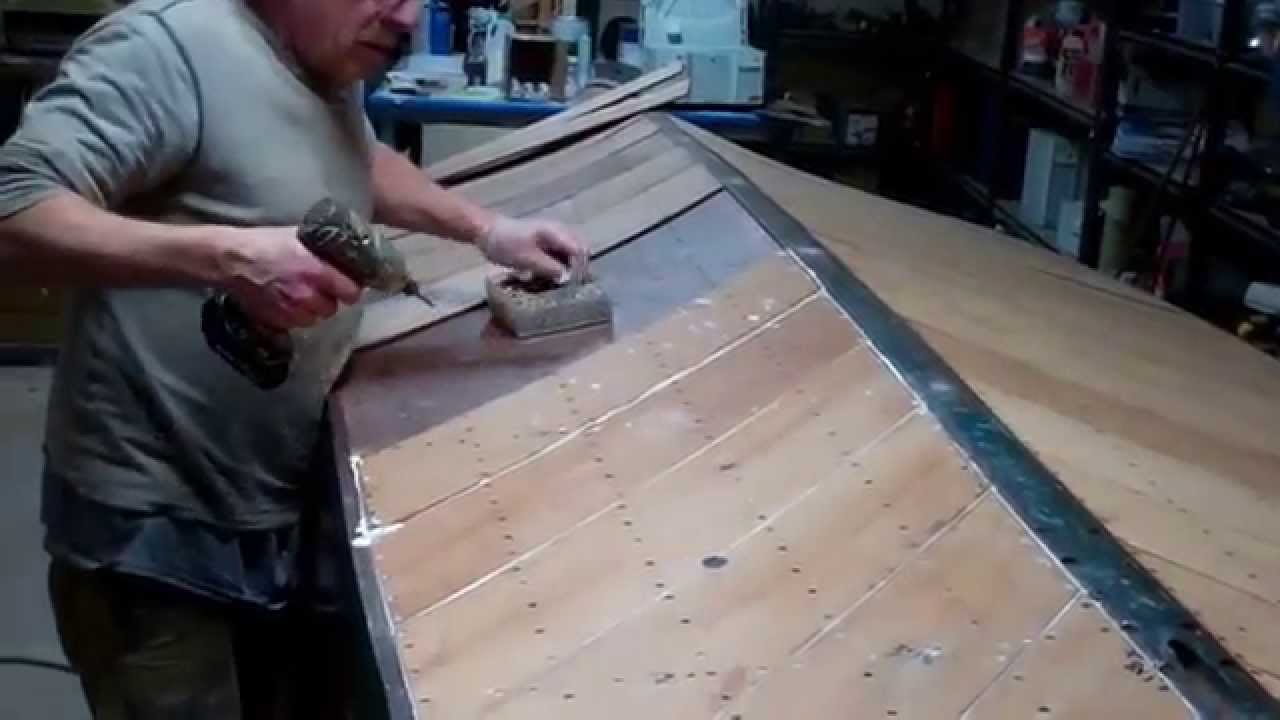
John’s final challenge, one that begins with 40 grit paper on our longboard sander, and ends with 80 grit, is to sand the decks fair with the covering boards.
Bleaching will follow as will follow, which we will chronicle for the community.
We are nearing a major milestone on the 1946 Gar Wood Ensign deck replanking portion of this preservation project.
Fabricating two small sections of planking, fastening them bedded in 3M5200, bunging the countersinks and sawing the excess away, and we will be ready for sanding and fairing the decks and covering boards.
Bleaching and staining will be next, followed by rolling, tipping and sanding coats of varnish.
We will be using Epifanes Gloss Clear Varnish on the decks and transom at the request of the owner.
Installing the Minnow’s True 5200 Bottom is progressing nicely. Three-quarters of the bottom planks have been fabricated, which has turned into a near-Herculean task. Why? None of the planks has parallel sides, and the degree to which each plank tapers from chine to keel differs from board to board.
And using the boards from one side as patterns for the other? Well, they are close, but close does not deliver perfect mating with the two boards on either side of the one being fabricated.
John has patiently sanded every plank in using our 36” horizontal, stationary belt sander.
As you see, we lay all the planks out, placing one positioning fastener in each, and then laying out a grid for all the fasteners, and drilling all of the countersink holes, so that the planks end up screwed down where we want them to be.
We test as we go, choosing between #6 and #8 silicon bronze, Frierson wood screws ranging from ¾” to 1-1/2” long.
Why not stainless? Read Danenberg’s article in the Sept-Oct 2014 issue of Classic Boating magazine to find the clearest, science-based, and most objective explanation I have read yet. Each plank is literally buttered with a 1/8” thick layer of white 3M 5200. Why not mahogany? It costs about 50% more because of the color alone. Since it will end up hidden by five coats of Interlux 2000E Epoxy Barrier Coat Primer, selecting mahogany just wastes money.
As you see, John drives the screws in with an impact gun, and then pounds and pounds the edge of the plank with a large rubber hammer. Doing so drives the 5200 all the way out and beyond the plank’s edge.
What we did not show was the next, not-so-fun step, cleaning the excess 5200 from the plank’s face, edge and surrounding area. Pay special attention to cleaning the trailing edge so that the next plank fits snuggly in place.
Interlux will happily sell you 202 or 216, or some other more exotic solvent. Acetone is our go-to solvent throughout the shop. Unlike the expensive thinners, it flashes off almost immediately, and leaves no residue behind, oily or otherwise.
As John remarks in the clip, “There is nothing clean about installing planks as part of a true 5200 bottom!
This 1967 Century Palomino’s decks were completely released so we could gain access to the areas beneath. With all of the framework complete, and everything sealed and coated in multiple coats of Sandusky Paints Mahogany Bilge paint, the deck planking has been re-fastened with silicon bronze Frearson head wood screws
Next we inserted mahogany and Avodire bungs, making sure that each bung’s grain was aligned with that of the plank. Gorilla Glue ensures a waterproof bond is established
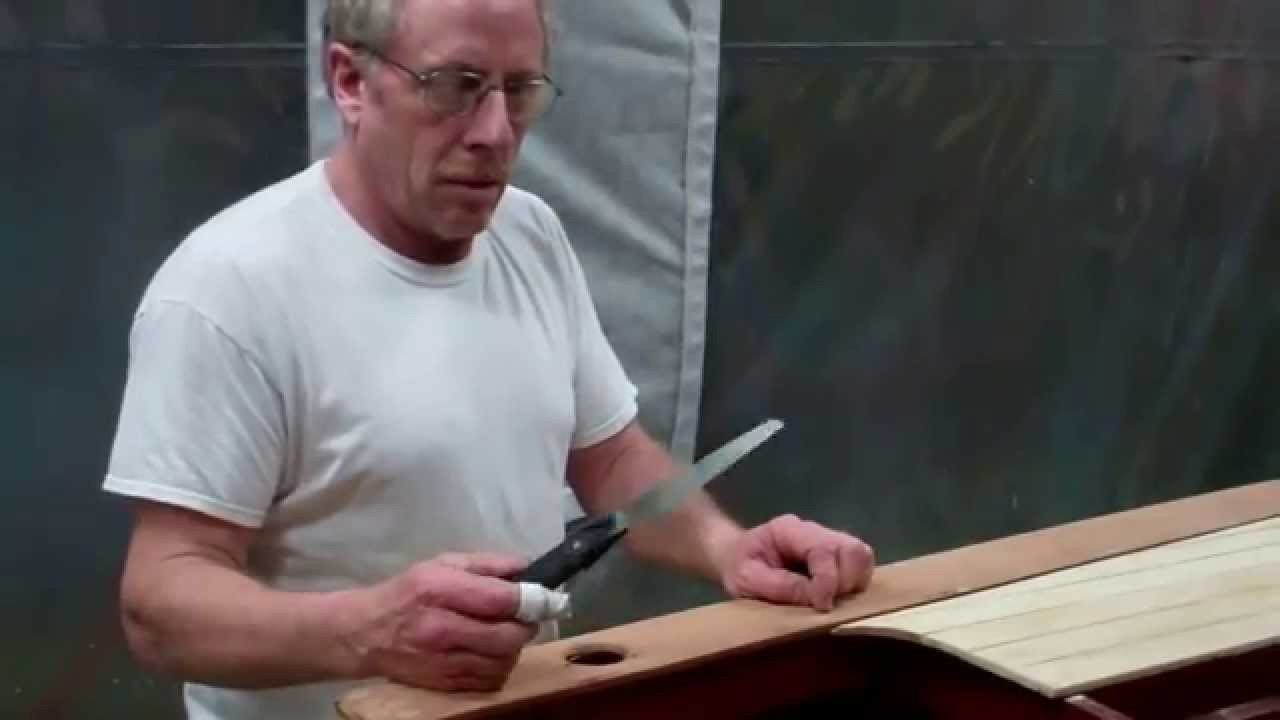
But then we have a sea of bungs standing proud of the deck. Each must be cut flush to the planking. This clip is a response to the many questions we have received about how we do it at SMB. Well, we tried all manner of high-end chisels, honed to a razor’s edge. No matter how carefully we sliced through each bung, some would break off below the plank’s surface, which meant digging them out and inserting new bungs
And then there would be the inevitable, “Oh s….!” Someone had slipped and gouged the plank. No matter how good you get at it, filling a gouge means a bruise remains, one that seems to jump out at anyone who looks carefully at the surface
And it was slow and tense.
Now we are standardized on the VERITAS flush-cut hand saw. It is incredibly sharp, and with zero offset to the teeth, these saws cut the bung off precisely at the surface without marring it. Time means cost to our clients, so the fact that we can excise 400 or so bungs per hour with these saws also makes us more competitive
We experimented with less expensive brands, like Stanley, but in every case rejected them because at least one tooth was offset just enough that we got scratches in our test planks.
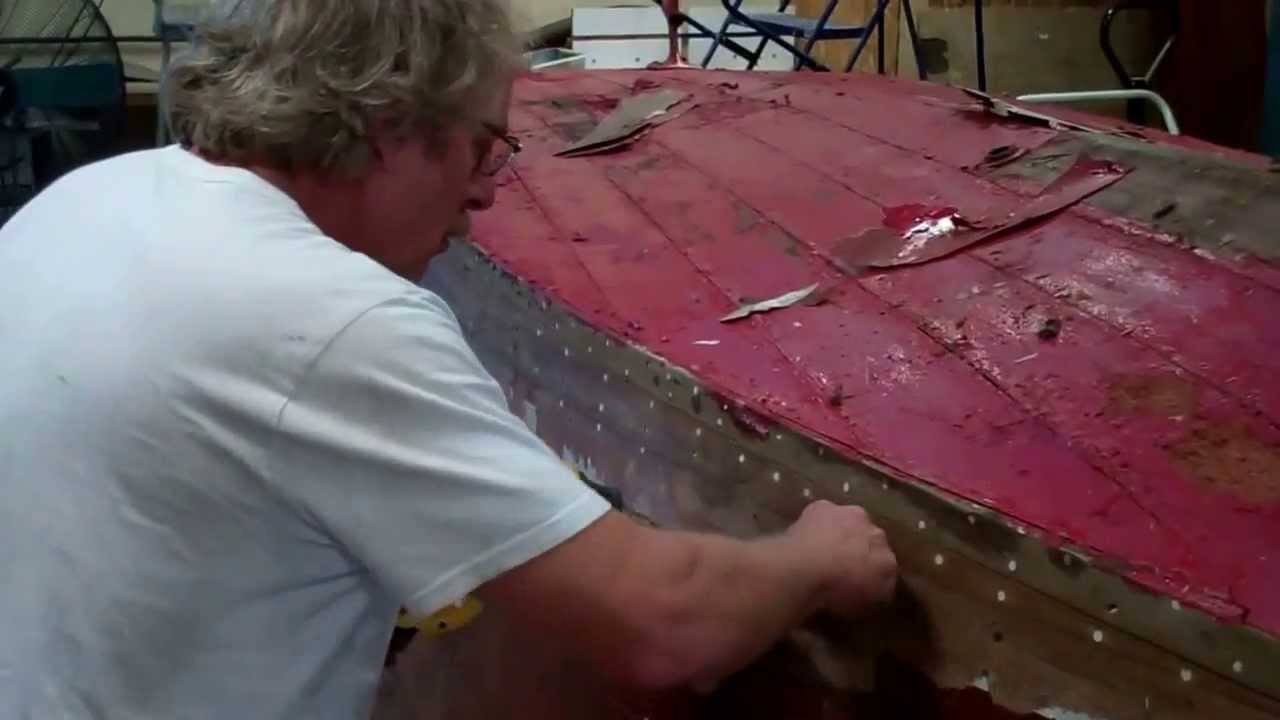
Here is the next installment on our 1946 GarWood Ensign restoration project. With everything removed from the hull, we have flipped her onto boat dollies in preparation for removing the planking, repairing all the failed, rotted and broken framework beneath them and then installing a 5200 bottom.
This boat spent most of her life on Squam Lake or Little Squam Lake in New Hamspire.
That these lakes have a well-earned reputation for unforgiving, rocky bottoms is evidenced by all the damage that this hull has suffered below the waterline. Indeed, the previous owner(s) installed iron strapping along the stem and forward sections of the keel. Then there is the through-and-through fracture of the keel just forward of the prop shaft tunnel.
Removing the fasteners and these straps was simple.
But then comes the fiberglass. Yes, someone fiberglassed the entire bottom, the chines and up the topsides as much as 8 inches. We “get” to remove all of it. Not doing so makes removing bungs and bottom plank fasteners all but impossible, never mind the fact that we are doing our utmost to preserve the original planks.
We have tried using chisels, which worked well along the keel and garboards, where sheets of fiberglass peeled off with relative ease.
However, the fabric-infused resin remained, and presents us with a challenge of much greater magnitude. It will be incredibly tedious and time-consuming, but using a combination of heat guns and sharpened putty knives seems to be the best solution. The challenge here is not gouging 60 year-old wood with the hot, sharp putty knife. We are also running into large areas of rot where water managed to breach the fiberglass skin and soaked the wood in a largely anaerobic environment.
We will soldier onward, but want to make a plea to all woody owners and preservationists, “Please, please do not fiberglass your wood boats!” Doing so is a lose-lose proposition, especially for these irreplaceable artifacts of the past.