1956 Chris Craft Capri Preservations Begins

1956 chris craft capri preservation

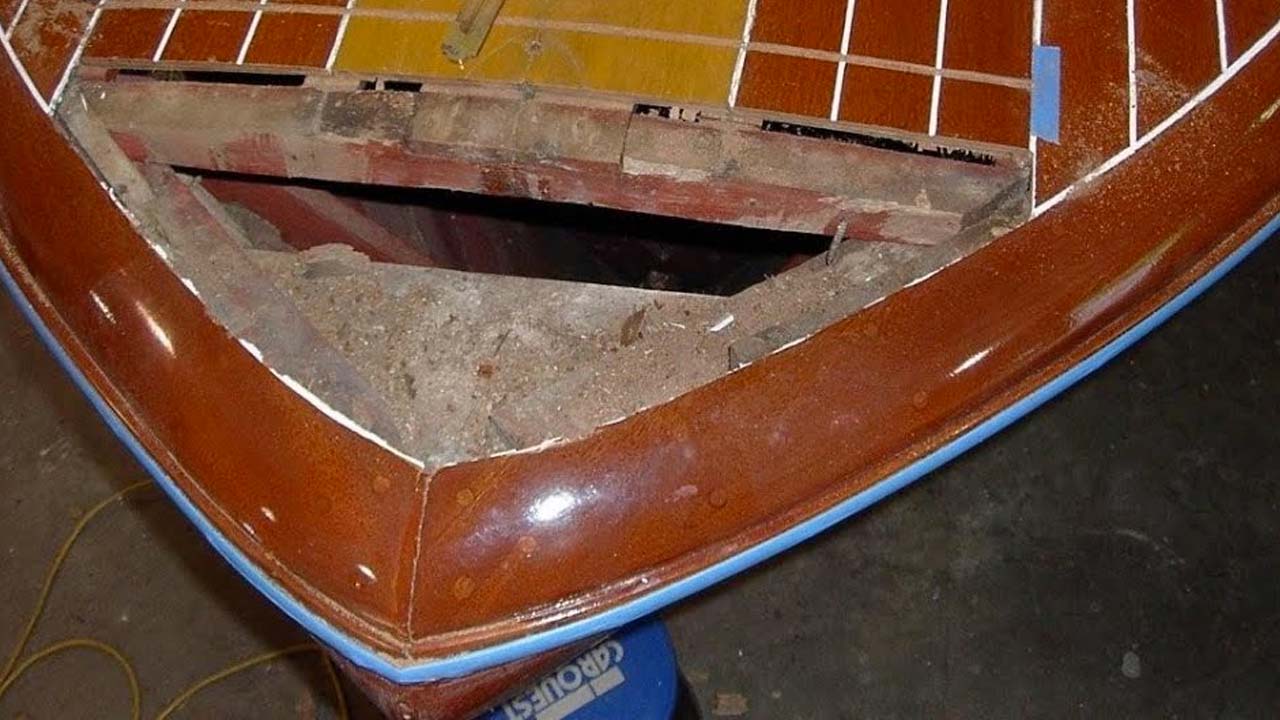
We have launched the preservation of a beautiful 19′ 1956 Chris-Craft Capri that has been the victim of some “difficult” restoration over the years.

She has been re-powered several times and now has a GM 350 automobile engine in her bilge that was marinized using what appears to me an Osco conversion kit. We will know more once we have shipped her to Robert Henkel, Peter Henkel, Inc. in Marine City, MI (www.chris-craft-parts.com)

The engine is too long for its bay, so the lower forward pulley invades the aft cockpit about 2-3 inches. This fact forced someone to add a stand-off addition to the upper aft seating assembly, which, in turn makes the seat back uncomfortably erect. Correcting the latter issue means either moving the engine aft, which is impossible, or swapping engines, which seems to be overkill given the expense involved. (I will ask Henkel if he can install a shorter lower pulley and assembly.)

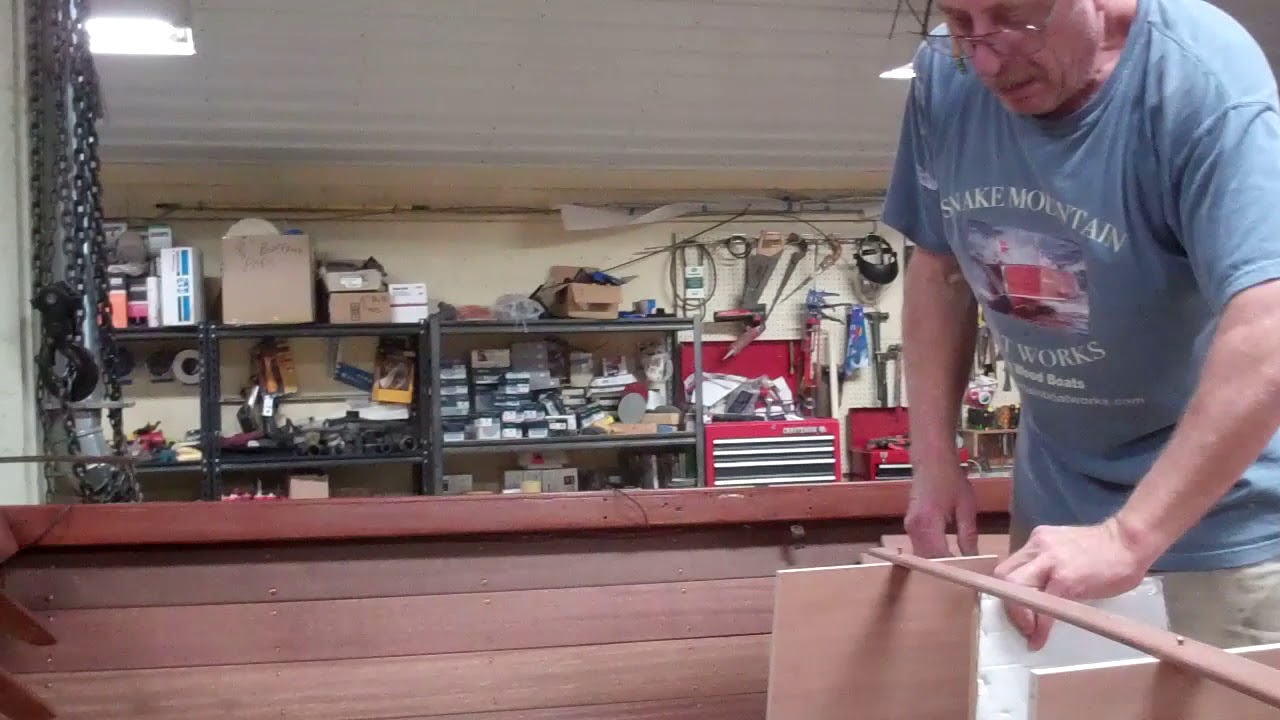
Beyond that, I will let my commentary with the clip convey the issues we must confront.

One added thought. Several times this week, potential clients have complained bitterly when I share the reality that, unlike auto repair which is billed by the flat rate book, the cost of preserving antique and classic boats is largely a crap shoot unless and until deconstruction is behind us. Even then, moving forward all too often exposes additional issues.

Bottom line. I can offer a ballpark guesstimate most of the time, but in no way can I be held to it. We will know how much it will cost when we are finished preserving her; not a minute before. Anyone who tells you otherwise is blowing smoke you know where.

1957 Lyman Runabout Helm Seating Fabrication Update

1957 lyman runabout helm fabrication

Under John’s eye and steady hands, sheets of half-inch ribbon-cut marine plywood are slowly being transformed into what will be a commodious helm station, complete with a flat floor from the forward end of the engine to the firewall.

That John is in his element, muttering measurements and angles to himself is evident. That he needs his space and wants to be left alone is even more evident. “Helpful” kibitzing is verboten. Prior to launch this slow, exacting process, John and RJ finished fabricating and installing the balance of her new ceilings. With the ceilings in place, John knows precisely the arcs and spaces before him.

It will likely take him the better part of a week to complete the new seating configuring, at which time we must release all of it, including all of the ceilings so they can be finish sanded, bleached, stained and sealed with three coats of Clear Penetrating Epoxy Sealer (CPES). (The lockers will likely be assembled ahead of time so that we can attend to plugging countersinks ahead of bleaching, staining and sealing.

We will apply fifteen coats of Pettit Hi-Build varnish before installing everything for good. We received the final batch of hardware and hinges back from D & S Custom Metal Restoration yesterday.

Shauna Lawrence, Kocian Instruments, expects to ship the preserved gauge cluster in a few weeks. Weather is our major frustration at present. We sourced some beautiful, air-dried Honduran mahogany, which will be transported on an open flatbed trailer. Given the good things that multiple years of air drying has done for the lumber, transporting it through the driving monsoon-like rains we are now suffering is not OK and will not happen.

Looks like a dry window is opening the first half of tomorrow. Guess who will be on the road well before the first glimmer of sunrise emerges over the Green Mountains?

1957 Lyman Runabout Arrives from Ohio

1957 lyman runabout arrives for preservation

According to Tom Koroknay, 893 23-foot Lyman Runabout were built from its introduction in 1957 until the end of 1960.

“The 23-foot Inboard Runabout was one of the best rough-water boats that Lyman ever made…. All of these inboard models were basically earlier versions that were stretched and widened until the desired length was achieved. Thanks to this trial-and-error method, the 23-foot hull was nearly the perfect combination of beam and length and featured the traditional Lyman soft entry, rounded chine, and slight dead rise in the stern…

“Standard inboard construction was used for this model also, but the ribs were increased to 1-1/8-inch with the standard 13/16-inch thickness, and placed on 6-inch centers.” (Tom Koroknay, Legend of the Lakes, p. 98)

It took less than a heartbeat to agree on the transaction when I learned from Dave Ramsey, Ramsey Brothers Restorations in Toledo, Ohio, that hull number E1083, powered by her Chrysler Crown M47, was available.

So I asked Trailer Outlet in Tilton, NH, my go-to source of Sea Lion trailers, to get an appropriately spec’d trailer to me. Joe’s son delivered it last Friday, and I left midday Monday for a trek that took me first to Toledo to load the Lyman and then to Marine City, MI and Robert Henkel’s engine shop, Peter Henkel Inc., to pull the engine for a total rebuild.

With 1,484 miles logged, the Lyman and I arrived in Vermont late last night.

The hull is in remarkably sound shape. That the keel is straight as an arrow is a huge plus. Her four-plank, solid-mahogany transom needs nothing more than stripping to bare wood, bleaching, staining sealing and varnishing.

We will know more once the paint is off the hull, but the crew and I went over it today. Other than the typical gripe-knee gapping, there is little to be worried about.

The foredeck will get most of our attention. The previous owners replaced the foredeck’s port panel with some sort of mongrel plywood. She will have a proper ribbon cut foredeck when we are through.

And the white pegboard ceilings? Happily Dave removed the one on port, but left to us the fun of releasing the one on starboard. (Fortunately these folks cut the peg board around all of the seating and bracing!)

I am certain other surprises await us. For now she’s in storage and in line to come into the shop, but I fully intend to have her on the water soonest after ice-out next spring!

That I began building a great relationship with Dave, his dad and brothers who comprise Ramsey Brothers was the best part of the whole trip!

1938 Chris Craft Runabout Special: How to Seal Bottom Plank Seams

1938 chris craft sealing bottom plank seams

We continue racing against the March 21, 2017, deadline, the day I begin towing my 1938 19’ Chris-Craft Custom Runabout to Tavares, FL, and the Sunnyland ACBS Show.

We have applies the first five of an eventual twenty coats of Pettit Hi-Build Varnish have begun the process of varnishing her above the waterline.

Mickey Dupuis, Custom Metal Restoration in Holyoke, MA, is about half-way to preserving all of the hardware, including Flyin’ By’s long cutwater.

Her original bottom has our attention now. We tested about 50 fasteners, finding all of them rock solid tight. The red enamel, not bottom paint, yielded to the Circa 1850 Heavy Body Paint & Varnish Remover quite easily. Removing her original copper bronze paint was another matter, but, finally, we reached our goal, bare wood from stem to stern and chine to keel.

The planking, which is original to the boat, is in near perfect condition. No splits or cracks could be found. The inevitable dings and gouges have been addressed using 3M Premium Marine Filler.

This morning, and what is the topic of this video, we are focused on sealing her bottom seams using Interlux Seam Compound for Underwater Seams.

Seam Sealer must only be applied to wood that has been primed. The three coats of CPES also acts as an excellent primer for this purpose.

Filling each seam completely is the goal. Reaching that goal will likely involve at least two applications of Seam Sealer, done 24 – 48 hours apart.

The tools for this task are simple: an about 5’ x 8” piece of thin wood of some sort, a flexible putty knife, Interlux 216 Special Thinner as the solvent, and a quart of Interlux brown seam sealer. We have “only” 80+ feet of seams to fill… What fun!

1946 Chris Craft U22 – How to Release the Gripe

1946 chris craft u22 replacing gripe

And now to the gripe. As we released the keel from the gripe, we could not help notice that the gripe appeared to be severely fractured on its starboard side. Additionally, evidence of dry rot jumped out at us, in addition to its severely rotted outer radius.

Here I just let the camera run so it could record the process involved, and what we discovered once the gripe was free.

(Yes, early in the clip I slipped again, by saying “knee” when I meant “gripe.” There is no knee in this model.

Topside Priming Knock on Wood 1960s 20′ Lyman Part II 03 31 2015

It is all about minimizing the amount of paint applied with each coat. We alternate between gray and white so we can ensure there is a ghost image of the previous coat showing through the one that is being applied.
Minimizing film thickness, in turn, is all about rolling each stroke out aggressively. Coverage is not your goal here. Build three super-thin coats to retain this primer’s wonderfully flexible properties.
We have tried most of the other topside primers on the market. TotalBoat is not only the best value, it is the best topside primer available today in our experience.
It dries quickly – to the touch in less than half an hour at most at 65 F. If your surface is still sticky 30 minutes or so post application, you are laying on way too much paint onto the surface.
Recoating in 4 hours means you can apply the first 2 coats on day 1, and the final coat the next morning. Four hours later, after a final quick sanding and wash-down with Acetone, and you are ready to begin applying the Interlux Premium Yacht Enamel.

Topside Priming Knock on Wood 1960s 20′ Lyman Part III 03 31 2015

Knock on Wood has her sights on the finish line. Two more coats of Pettit Tie Coat Primer below the waterline, followed by 3 – 4 of Pettit 1933 Antifouling Copper Bronze bottom paint and she’s ready to float.
Three coats of Interlux Premium Yacht Enamel, which we will roll and tip, and she’s almost there.
We still have 3 – 4 more coats of varnish to roll and tip onto the transom. Her lettering will follow, as will rea-installing her drive train and hardware, and she will be good to go home.
Well, not quite as we have a surprise for her owners that will stay strictly in-house … for now.

Topside Priming Knock on Wood 1960s 20′ Lyman Part I 03 31 2015

Knock on Wood is a mid-1960s 20’ Lyman runabout who has reached the priming and painting lap of her preservation process.
We use Pettit Tie Coat Primer 6627 below the waterline and Total Boat Topside Primer above it. The TB primer is available in gray and white, which we alternate from one coat to the next as doing so helps us discern how much paint is actually being applied.
Applying super thin, what I term ghost-like coats of both primers is our, and should be your goal. Refer to the excellent product and “how-to” content Jamestown Distributors offers on its Web site, http://ift.tt/1xTXPT4.
While a yellow foam rollers is excellent at applying paint and varnish super evenly, it will only give you headaches on lapstrake hulls. The hard end of the roller can catch on and scratch the paint off the lower edge of the strake above the one you are painting.
Our roller of choice is the Pro-Line Mighty-Mini 4-inch foam roller, with foam extending completely around the outer end. (http://ift.tt/1NESYZq).
We will finish below the waterline with 3 – 4 coats of Pettit 1933 Antifouling Copper Bronze bottom paint, and Interrlux Premium Yacht Enamel, 220, semi-gloss white for the topsides.
Interlux 220 is a wonderful topside paint that dries to a lustrous sheen, rather than a high gloss. As such it is our go-to topside paint for Lyman runabouts and Chris-Craft Sea Skiffs.
Keeping a wet edge is the key to success in any painting project, a goal that is quite challenging with applying TotalBoat primer since it dries so quickly. The next clip shows you how we apply this paint successfully at Snake Mountain Boatworks.

46 Gar Wood Engisn Finished Bright 03 25 2015

Rolling and tipping the final coat of Pettit Hi-Build gloss varnish on this 1946 Gar Wood Ensign is now behind us. We will allow the curing process to run for several days before John launches another session of taping off and filling seams with Sikaflex 295 UV.
Yes, I am repeating myself, but this step is critical to achieving as dust-free a result as is possible. All of the lights in the paint room will remain on until the surface is dry to the touch. Why? Fluorescent lights create static electricity when on that attracts and holds dust particles in place. Turn off the lights and gravity works. Dust particles are released from the fixtures, settle on a boat’s horizontal surfaces, imbed themselves into the varnish if it is still wet or even slightly tacky, and ruin the surface.
We will apply one more coat of semi-gloss white (220) Interlux Premium Yacht Enamel to the topsides and touch up the copper bronze bottom paint, at which time she will be ready for reassembly.

Installing Her Lycoming Engine Back in the 1930 Dodge’s Engine Bay 03 23 2015

Her original, totally rebuilt Lycoming flathead four is back in the 1930 Dodge runabout’s engine bay. But it did not go easily.
The engine hatch is so small relative to the engine, that even spinning it 90 degrees failed to give us enough room until we removed the generator.
But now it is in sitting on the stringers, secured to its mounting bolts, at least provisionally.
The prop and engine couplings do not quite line up, and almost is just not good enough unless you want your power train to vibrate the hull to pieces. Hulls can change shape when they sit for decade after decade, which, in this case translates into a shaft log and strut that are no longer aligned perfectly. The prop will turn, but not without a bit of resistance at some points around the circle.
We will be fabricating and installing shims until the two couplers mate perfectly and the prop turns smoothly when the engine is in neutral.