Our 1948 19.5-foot Truscott barrelback deluxe runabout survived Don Danenberg’s “Pre-Soaking” step in the process of installing what her terms a True 5200 Bottom.
We thoroughly wetted down her hull and left it soaking beneath a layer of .15 mil plastic sheeting, and then did our utmost to wiped out all of the air bubbles, per Don’s guidance.
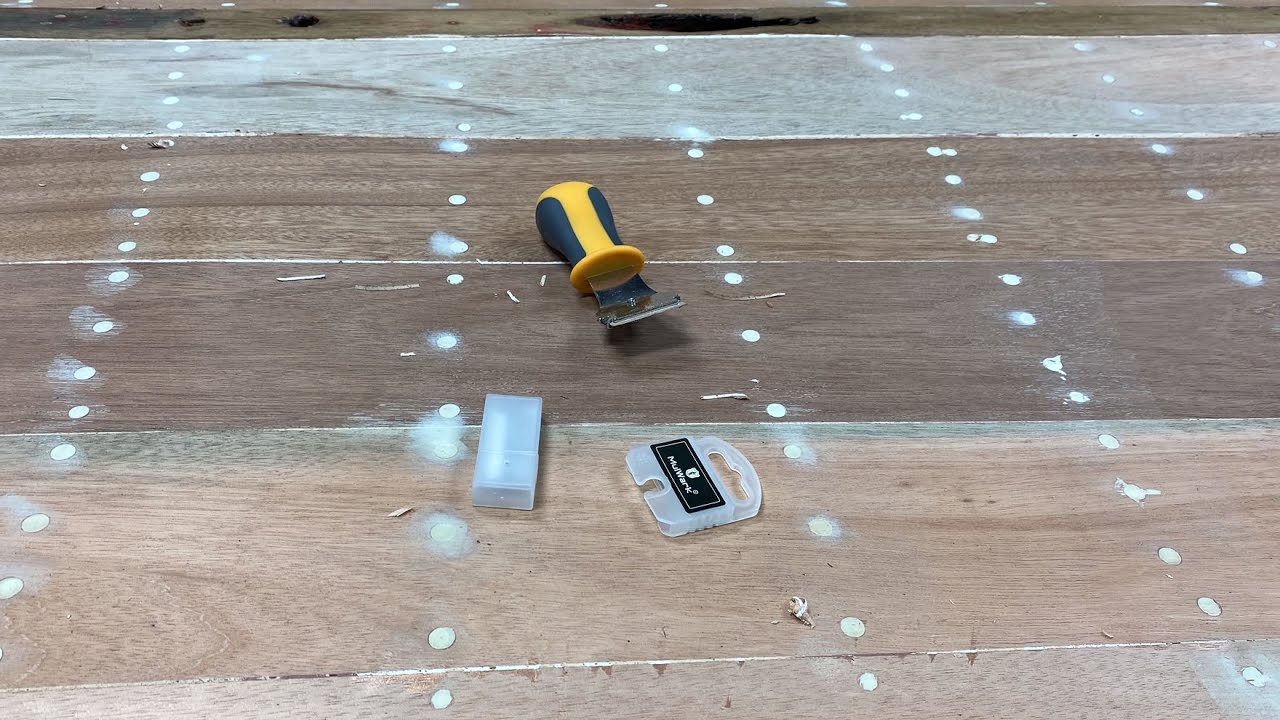
We then repeated this step yesterday. This video presents the results after having removed the plastic film this morning, July 18. As Don predicts, there is now 3M5200 squeeze out standing proud of virtually all of the bottom plank seams.
Next, as Joe illustrates here, we are using a multi-purpose razor blade scraper with its angled handle to slice the 5200 fair with the bottom planks.
The result? The bottom is tight, tight, tight! The topsides, which we kept wet under the plastic film as well, have also swelled and closed the intra-plank seams noticeably.
After the moisture content gets down to 15%-18%, we will make one final pass with our longboard sanders, and apply multiple coats of CPES, with the first two applied one immediately after the other and allow it to cure for 24 hours before we apply the final two coats.
Five coats on Interlux InterProtect 2000E Barrier Coat Epoxy Primer, with a goal of reaching a 10 mil film thickness. Finally, she will receive three coats of Rochelle Red Interlux Perfection 2-Part Polyurethane paint. Yes, this is a topside paint. However, since she will be dry sailed and therefore remain dry when she’s not in the water, this topside paint, which Jamestown carries and is available in many colors, will serve the purpose nicely.
All that said, given what we see as very positive results, Danenberg-Pre-Soaking will henceforth be a regular component of Sanke Mountain Boatworks’ True 5200 bottoms.
Here for those of you who did not click on the “SHOW MORE” link in the last two videos on the subject, is the excerpt included therein:
Don has just published yet another incredible how-to article, Using Common Sense Is Allowed, pp. 44-55, Classic Boating, July/August 2022, which is a must-read for anyone serious about wooden boat preservation. (To the fellow who savaged me, claiming “Don Danenberg is my friend, and I know he would never wet a hull down and cover it with plastic sheeting,” please pay attention …) “…The outside bottom of the hull can now be … be hosed down with fresh water. “The next procedure I call pre-soaking. After the bottom planks are thoroughly wetted out, I cover the entire bottom with a very thin plastic sheet (.35 mil) and rub out all of the air bubbles as if the plastic were Saran Wrap. The thinner the plastic, the better this works. Cheap painters’ drop cloths work well. For the next two days peel up edges of the plastic to wet it and again rub out the air bubbles. This procedure changes the moisture content of the wood and causes it to swell, forcing out all excess rubber and, hopefully any trapped air. “The equilibrium moisture content for the wood in your boat is dictated by the average relative humidity and temperature of the environment your boat lives in. For example, in most of the United States with lakes, it is in the 18% range, while in Arizona, it is 11%. “Kiln dried mahogany from my suppliers is in the 6-10% range. Changes in overall moisture content of the wood can be retarded by protective coatings, not prevented. I know if this boat is to be kept in Michigan, this wood will eventually learn to exist at roughly 18% moisture content. Personally, I feel it wise to set it to this level before sealing it. (Claudon note: I received precisely the same advice from Don about the rest of the hull’s exterior planking.) … “When properly sealed against seasonal variations in relative humidity, this type of construction exhibits little or no expansion or contra traction great enough to crack the enamel paint at the plank seams. In order for this to work, of course, the bottom must be well sealed from excessive moisture absorption from extensive periods in the water. “After two days of wetting the bottom, allow it to set for two more days until the moisture is noticeably absorbed and the surface appear dry. Remove the plastic and allow the surface to become completely dry. Now you must quickly cut off all the excess rubber, fill in all the screw holes, grind and fair the bottom, and get it sealed before it dries too much.” (pp 51, 55)