Ok, I am calendar challenged, still. Yes, the 25th, today, is Tuesday, not Wednesday. Sharing my apology trumps re-shooting the entire clip.
Since uploading the video on bleaching Avodire deck panels on our 1956 Century “Cowhide” Palomino, viewers have requested more details around exactly how and why we bleach every boat ahead of staining and varnishing her.
The why is easy. Bleaching erases unwanted color variation in the wood, whether it be residual stain, bungs that conflict with planking and Dutchman patches that present differing colors.
The how is probably quite similar to answers crafts people offer to any such question. Ask 10 of them and you will get 13 often-conflicting responses. Well, here is our answer to the how of bleaching.
Wood moisture content. Our shop is in northern Vermont, where a combination of pellet stoves and radiant heating can transform a healthy environment into a veritable desert. We maintain 70% humidity with a fleet of humidifiers and my dedication to wetting down concrete floors every night when we leave the shop.
We have learned that, even at 70%, wood planking and decking still tends to dry out. Therefore, every boat that has been stripped is maintained at 15% moisture measured twice daily with a moisture meter, by literally being wetted down once or twice daily.
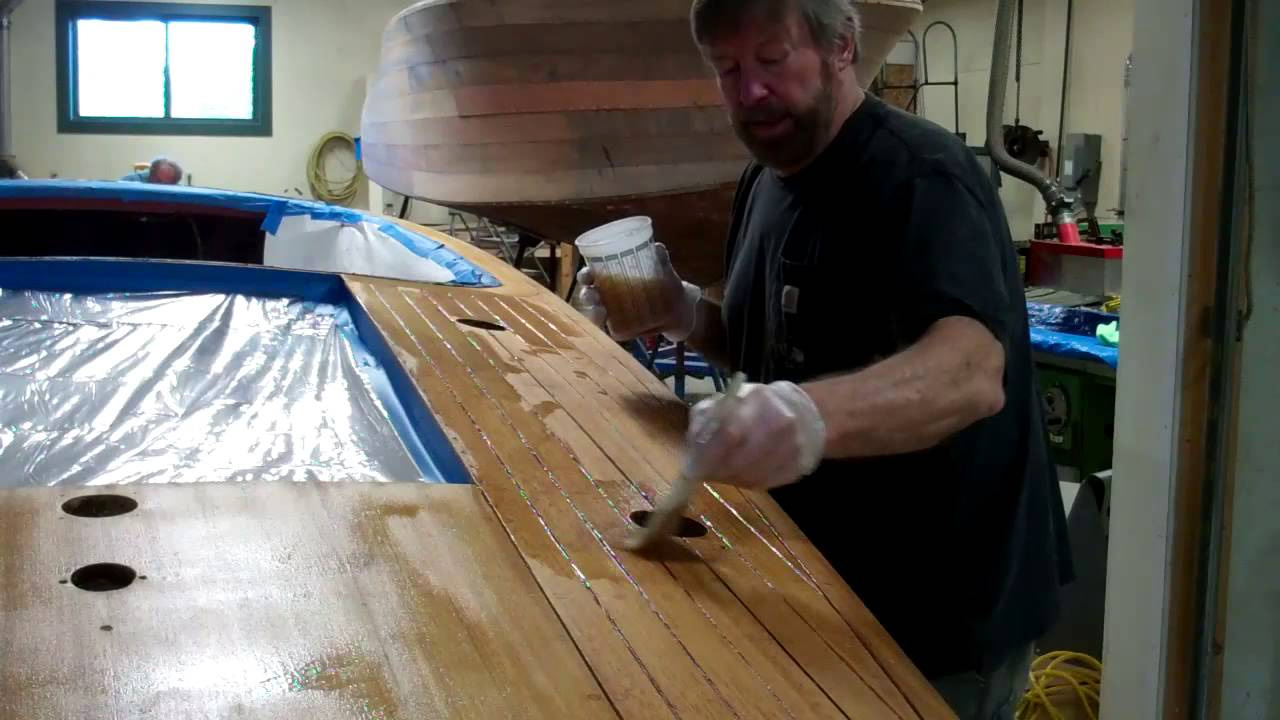
The planking and decking in this 1952 Chris-Craft Riviera 18’ runabout in this clip was at 15% – 18% moisture content this morning before we began bleaching her. Not only will maintaining this moisture content allow the bleach to work, rather than being sucked into the wood’s surface, maintaining 15% moisture content keeps the seams between topside and deck planking closed.
We are standardized on Klean Strip Wood Bleach. No, that is not a typo. It is available in two-gallon kits from Amazon. In addition to working consistently and extremely well, we appreciate the virtually complete absence of any discernible VOCs. Latex gloves are a must, however.
Keep it wet for at least four hours. Through trial and error, and way too many errors, we have discarded the usual and customary, apply-once-and-let-dry approach that is followed by follow-on doses of either the 50:50 solution or one of the two parts.
Keeping the wood wet, the longer the better, works for us. Yes, there are diminishing returns, and wasted bleach solution results as doses go beyond what we are now standardized on.
Initially, we begin by applying liberal quantities of bleach solution one plank at a time, starting at the bottom-most plank. Why? We have learned that the alternative, applying bleach to a block and then moving to the next block tends to produce overlap areas, which can produce uneven results.
And, starting at the topmost plank produces runs and drips down vertical surfaces that can leave streaks.
The initial application is really sort of a mini-marathon, often lasting an hour or more, depending on the boat’s size. We make an initial lap around the boat, flooding vertical and horizontal surfaces from bottom up and from gunwales to deck centers. Then one of us “gets” to shepherd a process of continually working around the boat, keeping all surfaces wet. I made at least 8 laps around the Riviera, for example.
Then we wait 30-45 minutes , which allows the bleach to begin working, before we come back and make 1 or 2 more laps around the boat, flooding all surfaces with more bleach.
The Riviera will be left until tomorrow morning, when her wood should be dry enough – about 12-15% moisture content – for one light hand sanding with 120 grit before we begin staining the hull.
Yes, I will shoot a short video in the morning, when it truly is Wednesday!
Vintage Boat Preservation