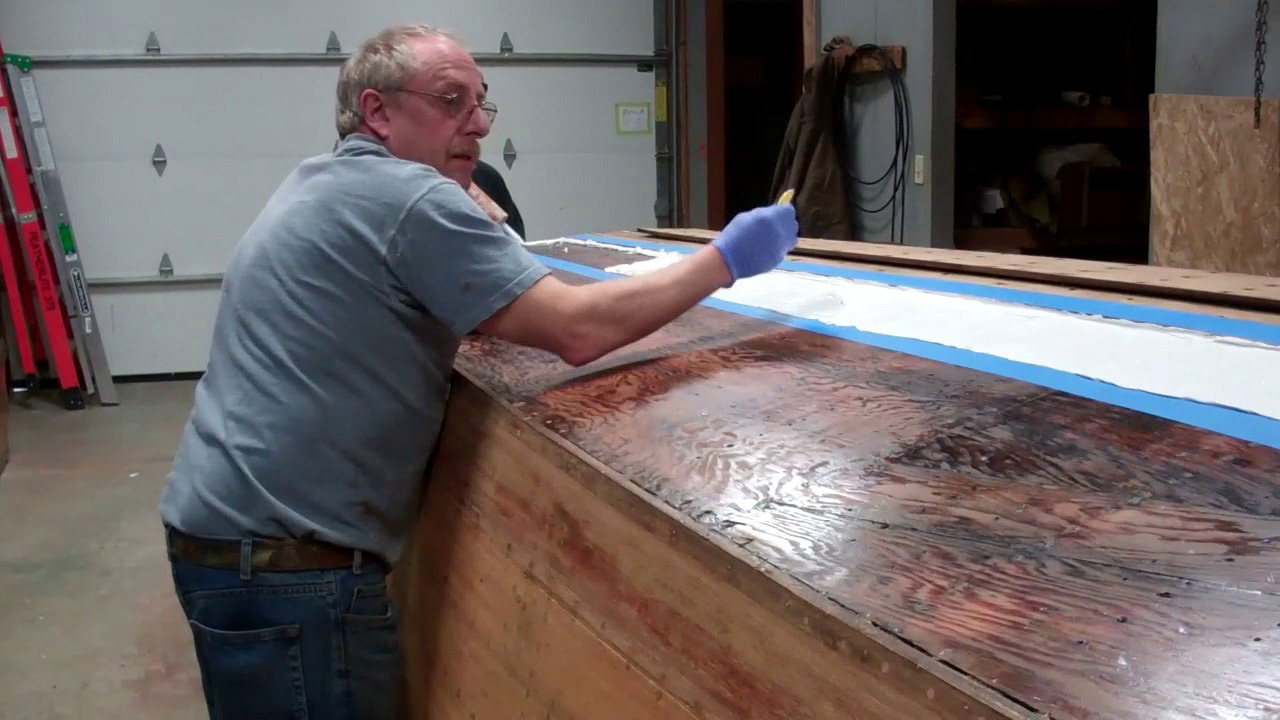
I have had several requests for a video showing our crew installing the bottom planks into a bed of 3M5200.
Here it is. Using the 1959 17’ Chris-Craft Sportsman as our “lab rat,” John and RJ share some of the tricks we have learned that help us ensure a complete seal between the planking and the plywood outer skin, and, what in some ways is critical, that the 3M5200 ends up where we want it without suffering hours of misery cleaning the 5200 off places it does not belong – in countersinks, oozing between the planks, and – horror of horrors, dripping down the topsides.
First and foremost, as Danenberg urges to all who will listen, scrimping on the 5200 translates into a shortcut 5200 bottom that will not last. Lay it on … thickly. We lay down at least 1/8” to 3/16” of the goo. Yes, that translates into a huge number of very expensive tubes of 5200, probably at least 60 for the layer between the inner plywood skin and the bottom planks in this case of this 17’ hull. And, yes, you will end up removing lots and lots of the stuff where it squeezes out through the seams. But, as is so trite, but also so true, price and cost diverge quickly here. A proper 5200 bottom means investing in mountains of 5200. Do it right, however, and you have a bottom that will last many decades. Take the shortcut route and, well, you might well experience the pain and suffering of removing a failed cheap alternative.
And, not Life Caulk, which is fantastic when used for its intended applications, cannot be substituted to save money. It’s cheaper now for sure, but oh so much more expensive in the long run.
We use blue painter’s tape to keep the 5200 away from adjoining planks and also the surface of the plank being installed. You will see how in the clip.
We learned the hard way what a disaster we and you will have on your hands if the 5200 pushes up through empty pre-drilled fastener holes. The silicon bronze fasteners, the drill bit, the disposable gloves, and the plank’s surface end up hopelessly befouled by 5200. Yes, it can be cleaned using Interlux Brushing Liquid 333, but why put this horror show on you when a technique John and RJ developed absolutely ensures no fountains of 5200 rising through fastener holes?
As with so many super creative and completely intuitive solutions, this one is trivially simple. Sink a fastener in each hole, but stop just short of driving it home. The fastener head will have seated in its countersink just enough to act as a seal. No 5200 can squeeze by.
Once all of the fasteners have been sunk in this manner, a crew member begins at each end of the plank, driving them home. As is illustrated in the video, yes, there is squeeze out, and lots of it, but the escaping 5200 lands on the blue tape, not the wood, or the screws or the gloves, well, not so much on the gloves.
Once every screw has been driven home, the squeeze-out is scooped off the tape using a combination of a plastic scraper and a simple wood paint stirring stick. Having removed all of it, we simply pull the tape, leaving an almost clean surface.
Using Interlux Brushing Liquid 333, we then scrub everything absolutely clean. However, the 333 actually retards 5200 curing, so the final step involves wiping everything down with Acetone.
C’est finis!

