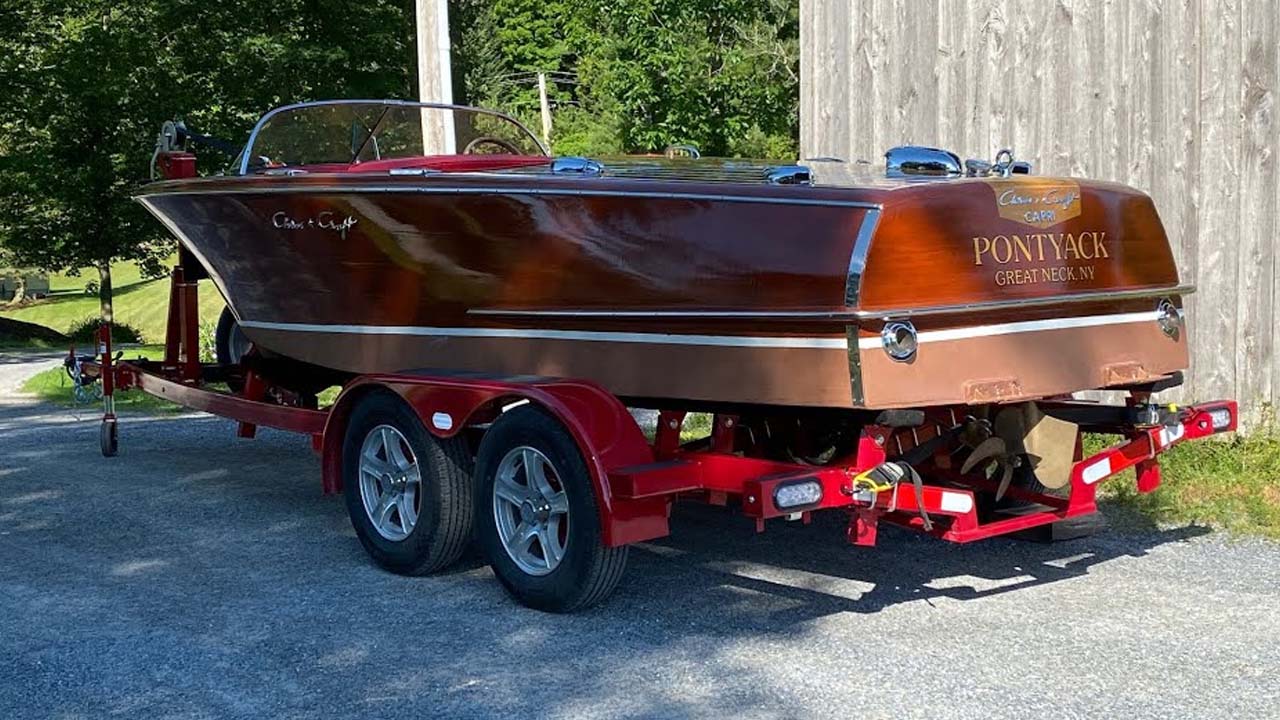
Pontyack is on her way home, having been fully preserved by Snake Mountain Boatworks LLC over two years.
We thank her owner for entrusting saving this iconic Chris-Craft Capri to us.
Vintage Boat Preservation
Pontyack is on her way home, having been fully preserved by Snake Mountain Boatworks LLC over two years.
We thank her owner for entrusting saving this iconic Chris-Craft Capri to us.
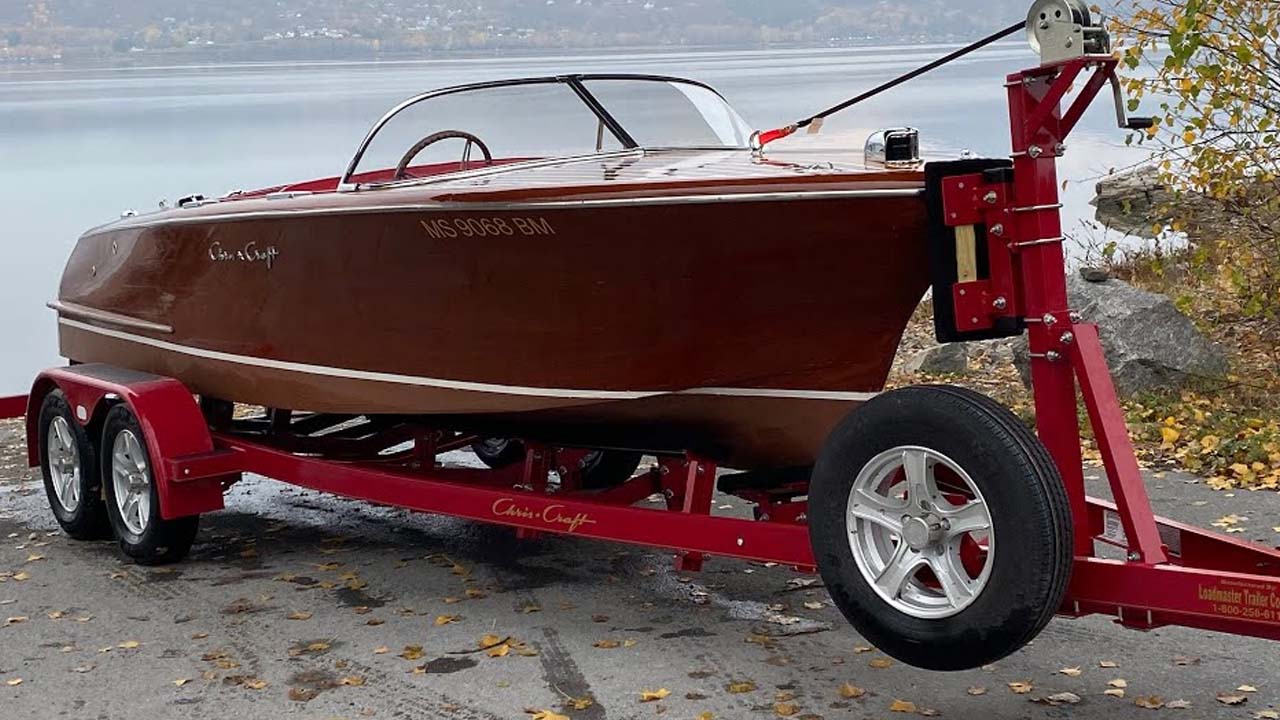
All good things must come to an end, but completing our 1956 Chris Craft Capri’s comprehensive preservation at 31 F is not how we envisioned it last January, when she arrived at Snake Mountain Boatworks.
We hoped the sun would break through as forecast, but, as you see in the clip, we found a dense fog laying on the flat water when launched her into Lake Champlain this morning.
That we expect our first significant snow, maybe as much as 5”, starting tonight, and with nothing but below-freezing temperatures in the forecast, and a water temperature falling through 50 F, we had one window.
We ran her around in a couple of circles just beyond the dock, and she performed nicely, given the temperatures, but I just could not countenance allowing my guys to venture any further for fear of a very dangerous MOB situation erupting.
So she is back on her custom-built Loadmaster trailer, but still backed into the water so we can adjust her idle, prop shaft and rudder stuffing boxes.
Now it is back to the shop to winterize the gas with Startron Enzyme Fuel Treat, winterize her and close this chapter by fogging the Edelbrock carb and engine.
She’ll be ready for her trip home by the end of the week.
Sweet! The Capri ranks among Chris-Craft’s most iconic models in my world. And now we that have completed Pontyak’s preservation, I am every bit a believer as I was before.
Mickey Dupuis once again transformed tired chrome into jewelry.
We had to reverse some horrible insults perpetrated by what used to be one of the foremost wood boat shops around. There simply is no excuses for cross-cutting through for deck planking and then replacing part of what was with garbage. The engine hatch cover had been similarly raped. No more …. I hope you will agree that she is again ready to strut her stuff.
Executing a sea trial is our last hurdle, but Lake Champlain is almost two feet low, the water temperature is approaching fifty degrees and we are being buffeted by strong north winds and the rollers they create daily. We need a break in the weather to clear this last hurdle so she can go home.
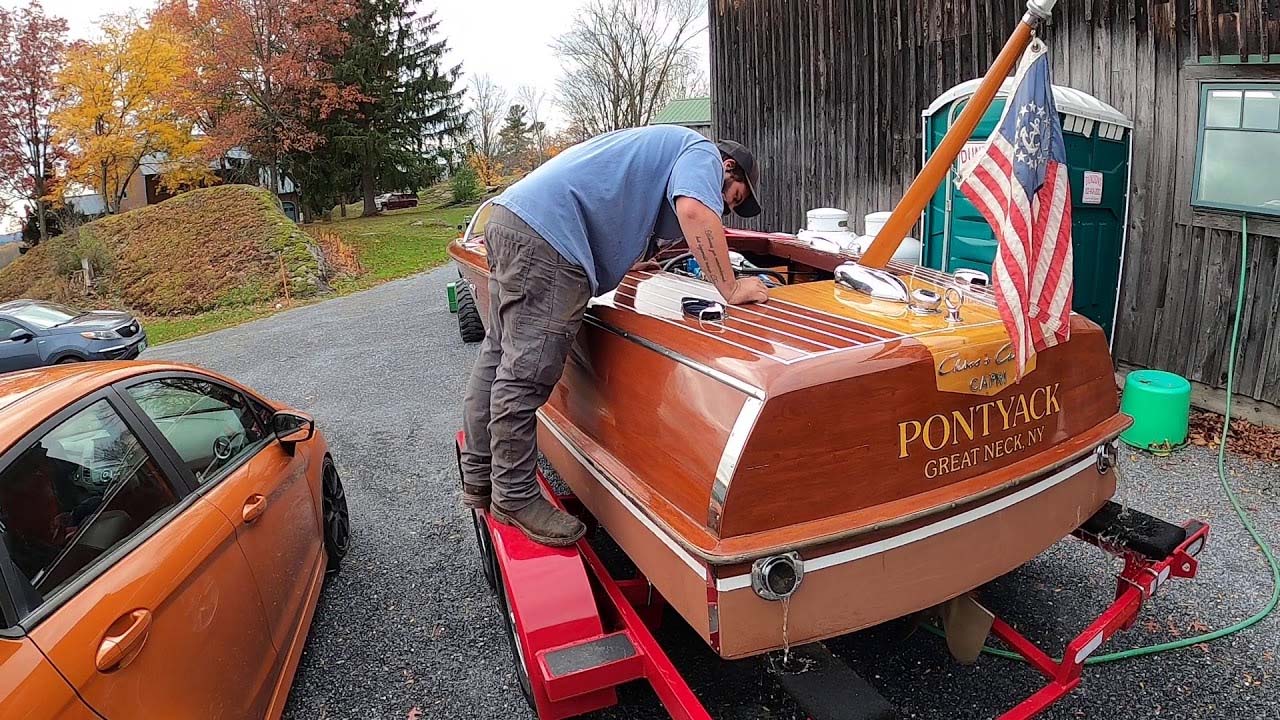
This Capri has been repowered by a GM 350 that has been updated and totally rebuilt by Robert Henkel, Peter Henkel Inc. in Michigan.
We replaced the entire wire harness, which had been patched together and showed much evidence – melted and burned insulation – that it got really hot many times over the years.
But the land engine test is always an eye opener. Most of them are fine, and today’s was no exception. The 350 fired and was running almost instantaneously, pumping water, holding good oil pressure and 130-140-degree water temperature, “All” we need now is some flat water so we can test her under load, adjust her stuffing boxes and confirm that all systems are good-working.
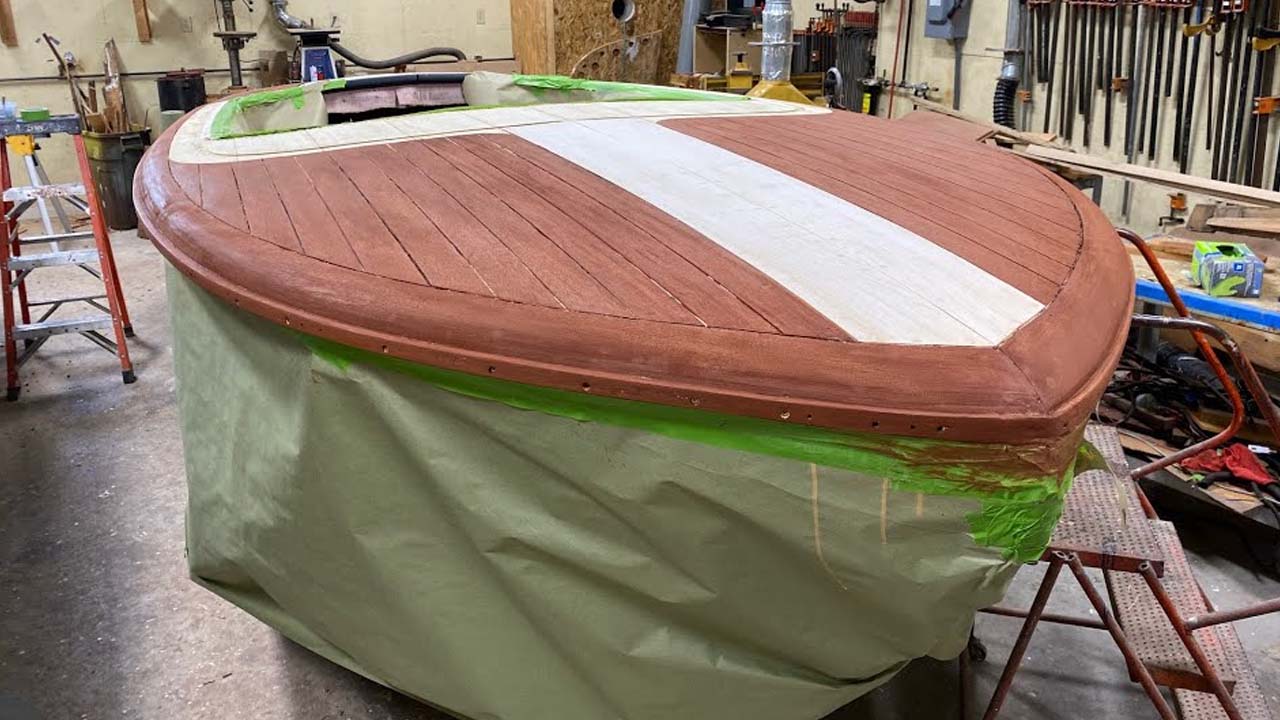
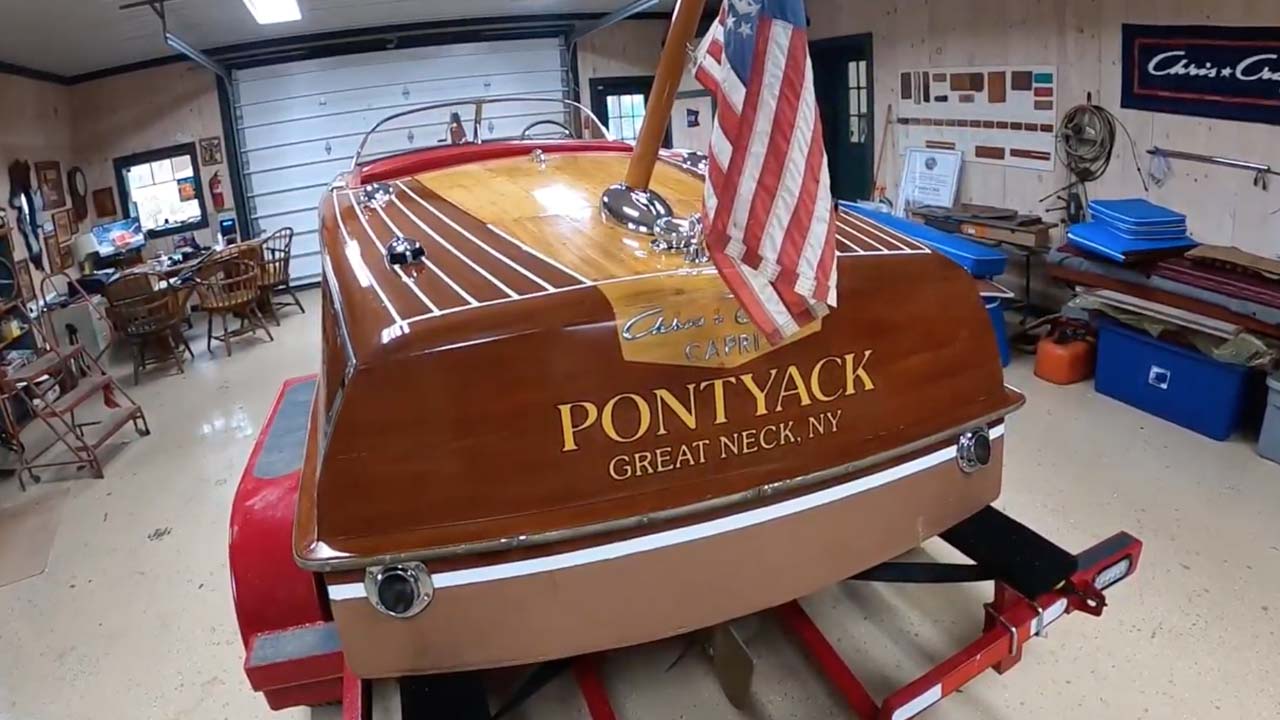
Our 1956 Chris-Craft Capri Runabout blew past a major milestone today. Her decks and gunwales been sanded fair, Joe has replaced rotted perimeter wood along the margins of her cockpit, bleached with Daly’s A & B Wood Bleach, and stained using Lake Oswego Boat Co. J’eld stain – Post-War Chris-Craft
Next she will be sealed with multiple coats of Smith’s CPES, followed by scuff sanding using medium Scotch Brite pads, clean the entire surface with Acetone-dampened shop towels and begin applying Pettit Flagship High-Build varnish.
The blonde king plank will not be stained as we continue following the original Chris-Craft practice of simple varnishing it with an amber varnish, which will impart a honey-blonde hue.
After applying about 15 coats, and because they will be painted white, we will fill the deck seams using mahogany Sikaflex, paint them white using Interlux Boottop and Striping Enamel and then apply the final five or so coats using Pettit Z-Spar Captain’s Ultra Clear varnish, thereby adding UV protection to the paint.
Rather than type out all the materials’ names and source links correctly each time, you can find a comprehensive roster by clicking here.

Our 1956 19’ Chris-Craft Capri Runabout is upright again! Joe has focused on repairing damaged deck and engine hatch framing, after which he fabricated the new deck planking made necessary by the previous “restorer’s” butchery.
Happily, Joe resawed a 5/4 FAS grade Philippine mahogany plank that was long and wide enough to saw out and replace all the offending deck and hatch planks. The result is book-matched planking from bow to transom.
Several of the retained foredeck planks’ edges had been severely beaten up by the previous folks, so he fashioned 1/8” thick strips, which he wrapped in wax paper and inserted into the seams temporarily. Using TotalBoat ThixoWood from Jamestown, he was able to fill the gouges and leave a dead straight knife edge behind.
He is now having way too much fun sanding the decks, covering boards and engine hatch fair, after which we will bleach with Daly’s A & B Wood Bleach and stain using Loboat J’eld stain – Chris-Craft Post War.
Four full coats of CPES will be followed by launching varnishing, which will continue until we’ve built 20+ coats.
Can’t wait…
Oh, rather than type out all the materials’ names and source links correctly each time, you can find a comprehensive roster in by clicking here.

What a great milestone to have disappearing in our wake.
Once the wood dried down to 5%-10% moisture content, which required applying Dalys A & B Wood Bleach, mixed 3B:2A, twice, the uniformity we sought was achieved.
Now that we have scuff-sanded the entire surface with medium grit Scotch Brite pads, it is time for bleaching her with Mike Mayer’s Lake Oswego Boat Co. Post-War Chris-Craft J’eld stain.
We are now standardized on J’eld stain, whether it is sourced directly from Wood Kote, or most often from Mike. The advantage of using Mike’s products is that he offers a wide array of stains formulated to match original company stains exactly.
Why J’eld stain? Here is the link to the video shot at the Snake Mountain Boatworks’ J’eld stain workshop.
We just might have applied some varnish by week’s end!
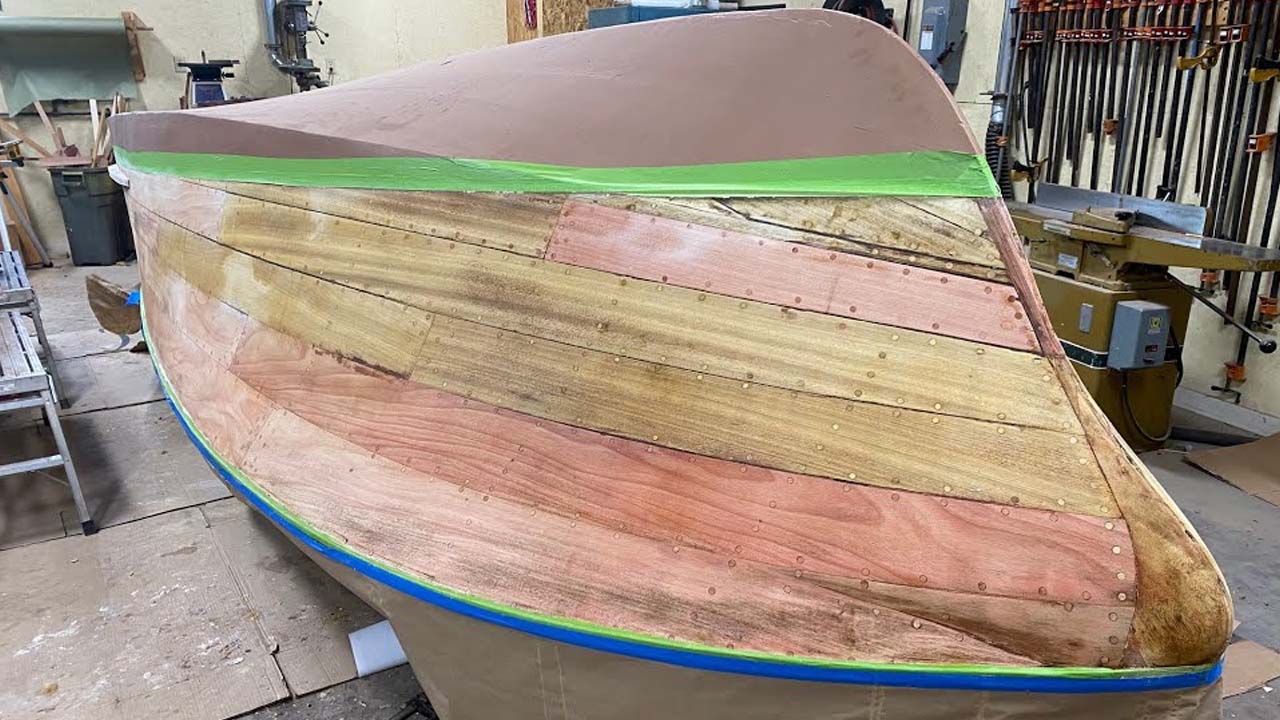
It’s bleaching, well, bleaching-over-two-days, for our 1956 19’ Chris Craft Capri Runabout. Joe has been applying Dalys A & B Bleach, mixed 3:1, B:A for about 2+ hours when the first half of the clip was shot on May 28, 2020. That clip promises a follow-up view of snow white topsides and transom today, May 29, 2020.
While much of the wood, which is still 35% moisture content on the gauge this morning, is quite white, and will get even whiter as it dries, the fact that there are so many replaced planks, each of which is a different species of mahogany, we failed to achieve our desired uniformity. Anthony has attacked the topsides again, and he will keep apply the 3B:1A bleach mix for the next several hours. Then we will allow it to dry down to 10% or so before we scuff it with medium Scotch Brite pads, vacuum it thoroughly and begin staining it.
Our stain of choice, and it will be yours as well once you try it, is J’eld stain from the Lake Oswego Boat Co. Mike Mayer offers this incredibly easy-to-apply, easy-to-get-to-uniformity stain in quarts. We will use Chris-Craft Post War.
More on its way to you shortly…..
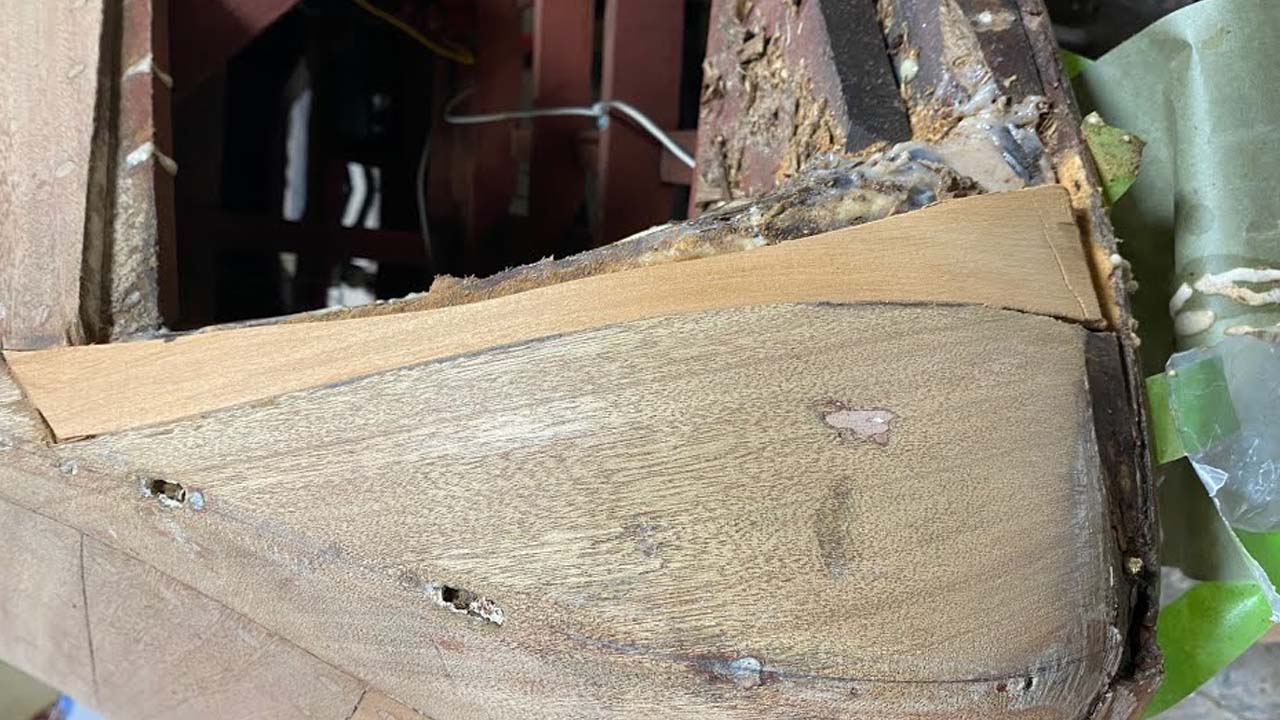
Let’s give credit where credit is due. Credit for this excellent Dutchman repair of the 1956 19’ Chris-Craft Capri’s bullnose goes happily and totally to Joe.
The fix is in and the glue is curing. Tomorrow he can execute the final sanding in after he’s addressed the tiniest of voids with his no not-so-secret sauce: TotalBoat Thixo Wood 2:1 Epoxy can be stained!
Joe will mix up a batch using the same Jel’d stain we will use on the hull and pay it. Once it’s cured and sanded, the seam will disappear.
Next comes replacing the failed battens, one of which must be steamed. There we will use a method for steaming in a plastic bag we learned by watching shipwright Louis Sauzedde do it. Such a simple solution! You should not miss watching him.
With the battens and planks repaired, one of which will receive another Dutchman from the hands and mind of Joe, they will be installed and sanded fair, and it will be time to bleach. Her topsides will be stained, sealed and varnish will begin soon!
Nice milestone, Joe!
As is so often the case with antique and classic wooden boat preservation, vessels tend to keep secrets. Our 1956 19′ Chris-Craft Capri Runabout gave no hint of what previous butchers had done to her and the horrific water trap they created in the process.
She let us in on this secret yesterday as Joe was finishing sanding her topsides fair. “We are almost to bleaching! I have only the last four or so feet to do on each side and I will be at the bow.” Right. Then his inline sanded started throwing up chunks, and suddenly, he had broken through a plank just aft of the bullnose bow.
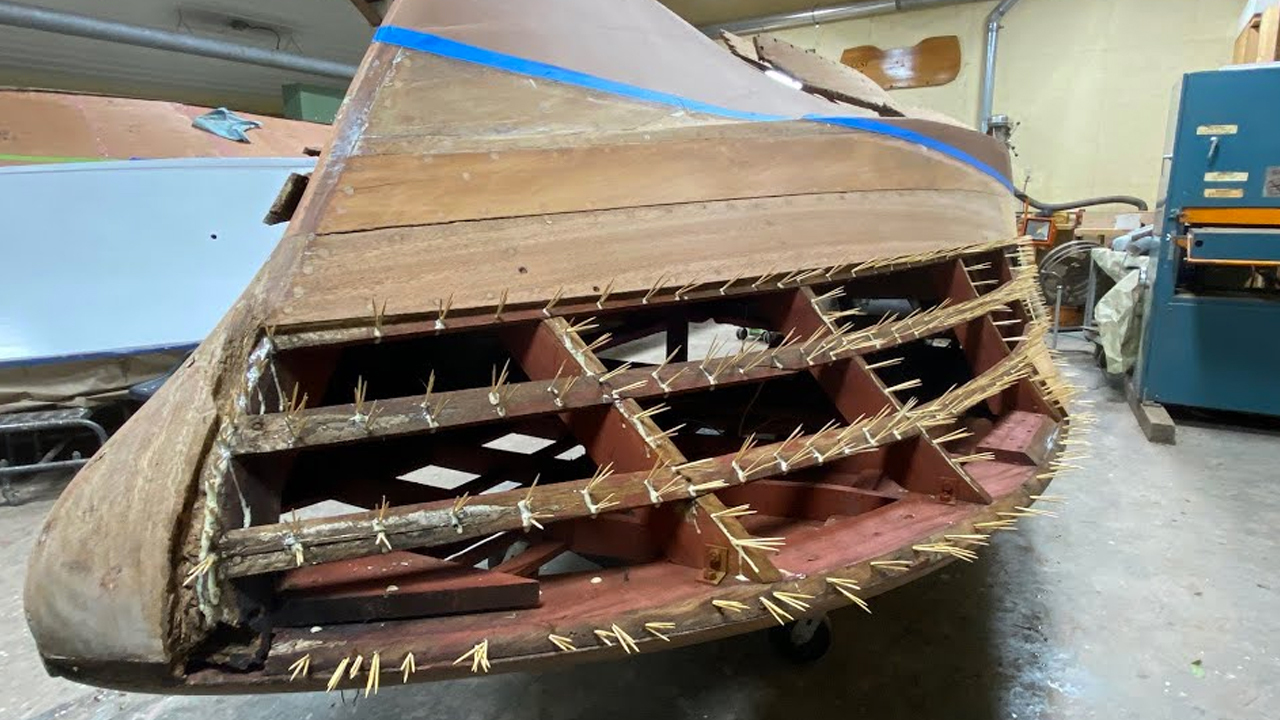
Careful probing told the story. Our Capri’s bullnose is severely rotted along its starboard margin, as are the forward ends of the top three planks. One plank on port is rotted through as well. All of it is because the butchers were too lazy to address foredeck framing issues properly, by releasing planks rather than reaching for a circular saw and simply making an athwart cut through them all the way across the deck.
A sloppy athwart seam butt joint “repair” failed, of course. The seam opened at some point, allowing water to infiltrate and keep the planks and bow wet. Talk about a perfect storm for rot! As I explain in the clip, Joe will address the bullnose rot using a Dutchman repair. Then the offending planks will be replaced, which is both best for the boat and likely also best for her owner as it’s a least-cost path relative to trying to scab new planking onto the ends of the existing and rotted planks.
Now that I have released the damaged planks, I am tooth-picking, filling each and every screw hole in the frames and battens with three white ash toothpicks and Gorilla Glue. It is a tedious, gooey task, but is the only right way to go. (Toothpick source: https://cibowares.com/products/plain-round-toothpicks)
Replacing the #8 with #10 screws is absolutely the wrong way to go. The holding power of that aged wood is compromised, and, since the #10’s have larger heads than the #8’s, larger countersinks must be driven, which, in turn requires inserting larger bungs, if you can find them. Go the lazy way and you “earn” weak fastening and wood bungs that are noticeably larger than all the others on your boat. UGHHHHH!