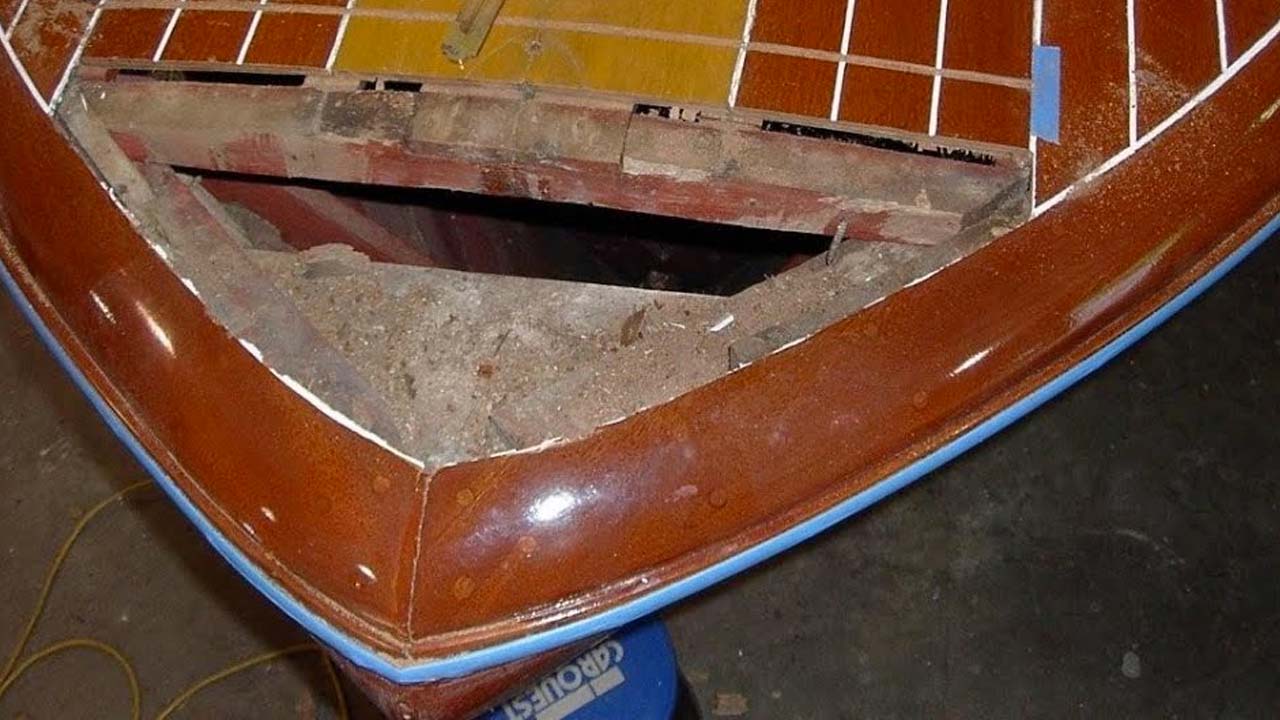
Our 1956 19’ Chris-Craft Capri Runabout is upright again! Joe has focused on repairing damaged deck and engine hatch framing, after which he fabricated the new deck planking made necessary by the previous “restorer’s” butchery.
Happily, Joe resawed a 5/4 FAS grade Philippine mahogany plank that was long and wide enough to saw out and replace all the offending deck and hatch planks. The result is book-matched planking from bow to transom.
Several of the retained foredeck planks’ edges had been severely beaten up by the previous folks, so he fashioned 1/8” thick strips, which he wrapped in wax paper and inserted into the seams temporarily. Using TotalBoat ThixoWood from Jamestown, he was able to fill the gouges and leave a dead straight knife edge behind.
He is now having way too much fun sanding the decks, covering boards and engine hatch fair, after which we will bleach with Daly’s A & B Wood Bleach and stain using Loboat J’eld stain – Chris-Craft Post War.
Four full coats of CPES will be followed by launching varnishing, which will continue until we’ve built 20+ coats.
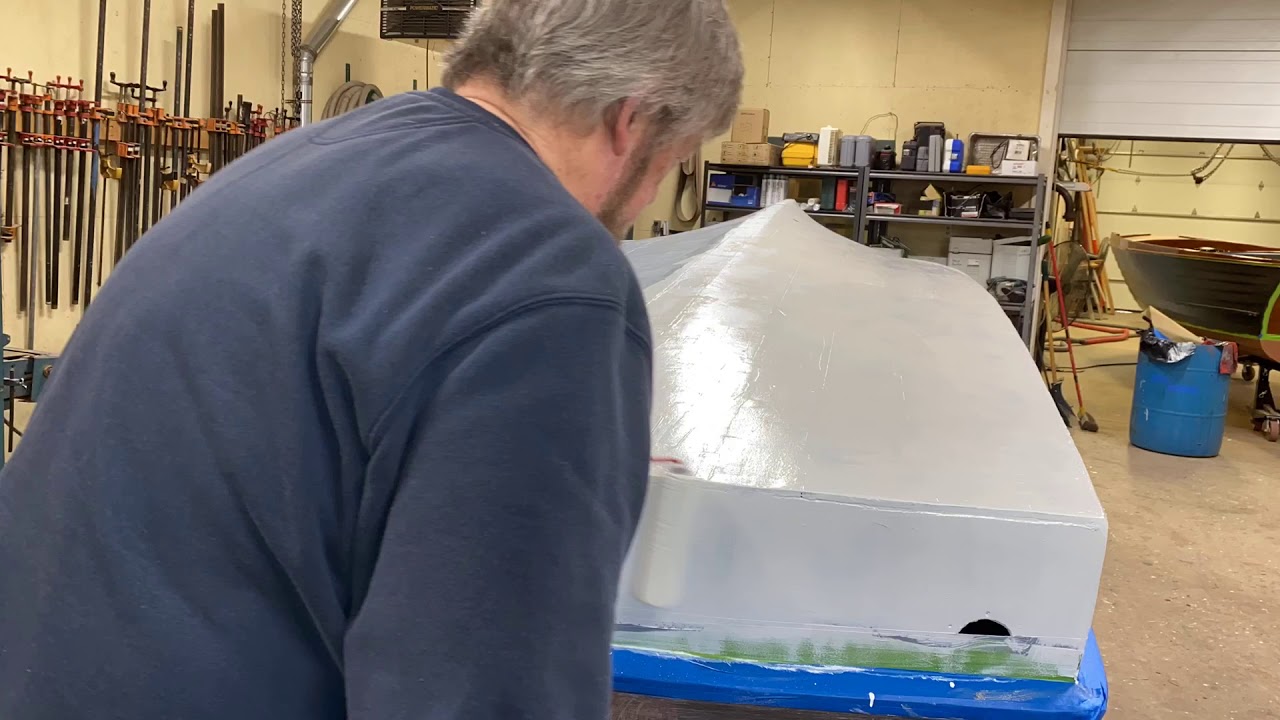
Here is a bit of fun – My first attempt at a time lapse video as I apply the third coat of Interlux 2000E Barrier Coat to the bottom of the 1956 19′ Chris-Craft Capri.
Tools:
Disposable roller tray
Seven-inch yellow foam roller cover
West System Epoxy roller covers are not required as I can apply a coat to the entire bottom using one low rent cover
Three-inch chip brush
Long sleeves for me and good rubber or latex gloves
The Capri’s engine is out, crated and begins its trek to Peter Henkel, Inc. in Marine City, MI tomorrow.
While her owner reports that the engine has run reliably and strongly for at least a decade, we now know that it has also been losing copious amounts of oil and transmission fluid into the bilge. Indeed, the transmission had very little fluid in it, which probably helps explain the issues her owner has experienced with shifting and staying in gear.
This engine is plumbed in an interesting manner. For example, raw water is drawn in, but first passes through what appears to be a transmission cooler before continuing to the water pump. Perhaps this plumbing is a component of the Moroso kit that was used to marinize what had been an automobile engine.
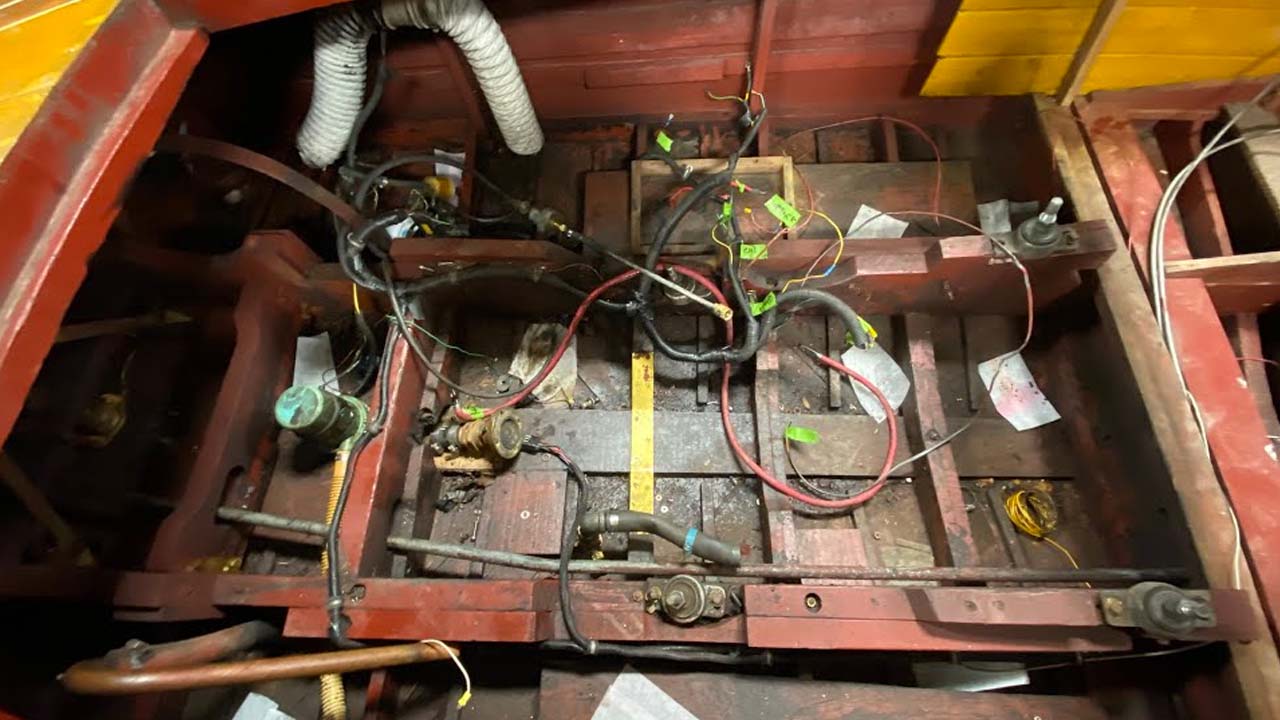
We will learn much more once Robert Henkel lays hands and eyes on, and goes through the engine. All the fluids that have leaked from the engine and transmission over the years, perhaps decades, found a home in the bilge. The clip gives you a feeling for how much, but we pulled the engine yesterday, only to find several actual pools of oily fluid that has soaked into the wood by this afternoon. I can only guess what we will find once we have cleaned the bilge, flipped the hull and stripped off her bottom paint, especially what is left of it on the keel, garboards and related planks. We agreed with her owner that, if at all possible, we would not begin releasing bottom planking, but if we discover planking that is as oil-soaked as the bilge suggests it is, we will have no alternative. (She appears to retain her original planking, so just plucking off a plank here and there is near impossible. Remember, hundreds of ½’ slot-head screws and that sheet of canvas are lurking beneath the exterior planks.)
The wiring is an absolute nightmare, and dangerous to boot. The engine gets fuel via an electric fuel pump that someone wired directly to the positive side of the coil, which can if the wire is sized sufficiently large so that the pump is supplied with the voltage it needs without over-heating the wire. This boat’s pump is fed current from the coil via a 14 ga wire, which seems at least skimpy to me.
Beyond that, we have found seemingly unconnected masses and rats nests of all sorts of wire, most of which is not AWG, throughout the bilge and especially behind the gauges. (We will do our best to convince her owner that the truly safe course involves stripping all of it out and wiring it again from the get go.)
Since the bilge is oil-adulterated from just ahead of the shaft log through and to beneath the helm station, we must remove the rest of the seating, the bench seat bases and all of the flooring before Anthony and I begin fully enjoying going after all that grease and oil with putty knives, wire brushes and gallons of Roll-Off!
We have launched the preservation of a beautiful 19′ 1956 Chris-Craft Capri that has been the victim of some “difficult” restoration over the years.
She has been re-powered several times and now has a GM 350 automobile engine in her bilge that was marinized using what appears to me an Osco conversion kit. We will know more once we have shipped her to Robert Henkel, Peter Henkel, Inc. in Marine City, MI (www.chris-craft-parts.com)
The engine is too long for its bay, so the lower forward pulley invades the aft cockpit about 2-3 inches. This fact forced someone to add a stand-off addition to the upper aft seating assembly, which, in turn makes the seat back uncomfortably erect. Correcting the latter issue means either moving the engine aft, which is impossible, or swapping engines, which seems to be overkill given the expense involved. (I will ask Henkel if he can install a shorter lower pulley and assembly.)
Beyond that, I will let my commentary with the clip convey the issues we must confront.
One added thought. Several times this week, potential clients have complained bitterly when I share the reality that, unlike auto repair which is billed by the flat rate book, the cost of preserving antique and classic boats is largely a crap shoot unless and until deconstruction is behind us. Even then, moving forward all too often exposes additional issues.
Bottom line. I can offer a ballpark guesstimate most of the time, but in no way can I be held to it. We will know how much it will cost when we are finished preserving her; not a minute before. Anyone who tells you otherwise is blowing smoke you know where.
When we lost him to a heart attack, John had just finished his initial pass at fabricating and installing the new starboard helm station seating and locker.
Save for the copious notes he kept, using the starboard components as templates, and all of the time he spent teaching his methods and skills to his step-son, RJ had precious little to go by. “I’m not nearly as good as John, but I am comfortable doing this.”
The last thing he needed was having me stand looking over his shoulder, so I just worked elsewhere and doing other things like winterizing engines – not my favorite task for sure!
He may not be John’s equal yet, but RJ combined his native talent with all he learned from John to fabricate port helm station seating and locker components that are indistinguishable from John’s on starboard.
Soon we will have a complete set, at which time the fun truly begins. Every bit of her interior must be released, sanded a final time, stained and sealed with three coats of Clear Penetration Epoxy Sealer and scuffed with Scotch Brite pads, before we can begin applying 16-20 coats of Pettit Easypoxy Hi-Build Varnish.
As her owner shared with me, “The grieving process is neither linear nor predictable.” At least RJ and I feel as though we can begin thinking of and remembering John and smile, not grimace!
John has continued living with his “furniture-to-be.” That he’s made great progress is evident from what you will see in the clip.
The helm and passenger seats, and their accompanying lockers will be identical to one another and also as close to being identical to Lyman’s “pass-through” seating configuration as he can get.
He’s matched the radii along the edges, carved an exact copy of the Lyman anchor in the door that are found in original pass-through seating arrangements. We’ve managed to source sufficient OEM Lyman hinges for all moving components, all of which were transformed into jewelry by Mickey Dupuis and his team at D & S Custom Metal Restoration in Holyoke, MA.
But then there are the additional “John” touches, two weep channels in each locker top, additional framing and cleats that are both invisible and add sturdiness to each unit.
Her owners requested that John supply a lip, sort of a toe rail, running along the two outer edges of the locker tops, but only if he could envision and then create profiles that melded with other cockpit components. John did it and the result is both functional and elegant.
And we are working with Pattern Grade genuine mahogany planks that were sawed out of logs that had been graded veneer quality, save for the sides and back, which are ribbon-cut mahogany.
The starboard set should be fabricated and ready for disassembly and finishing by late today or midday tomorrow.
The port unit is next, but John has the starboard unit as his guide, so his “only” challenge is to match what he created there, which he will.
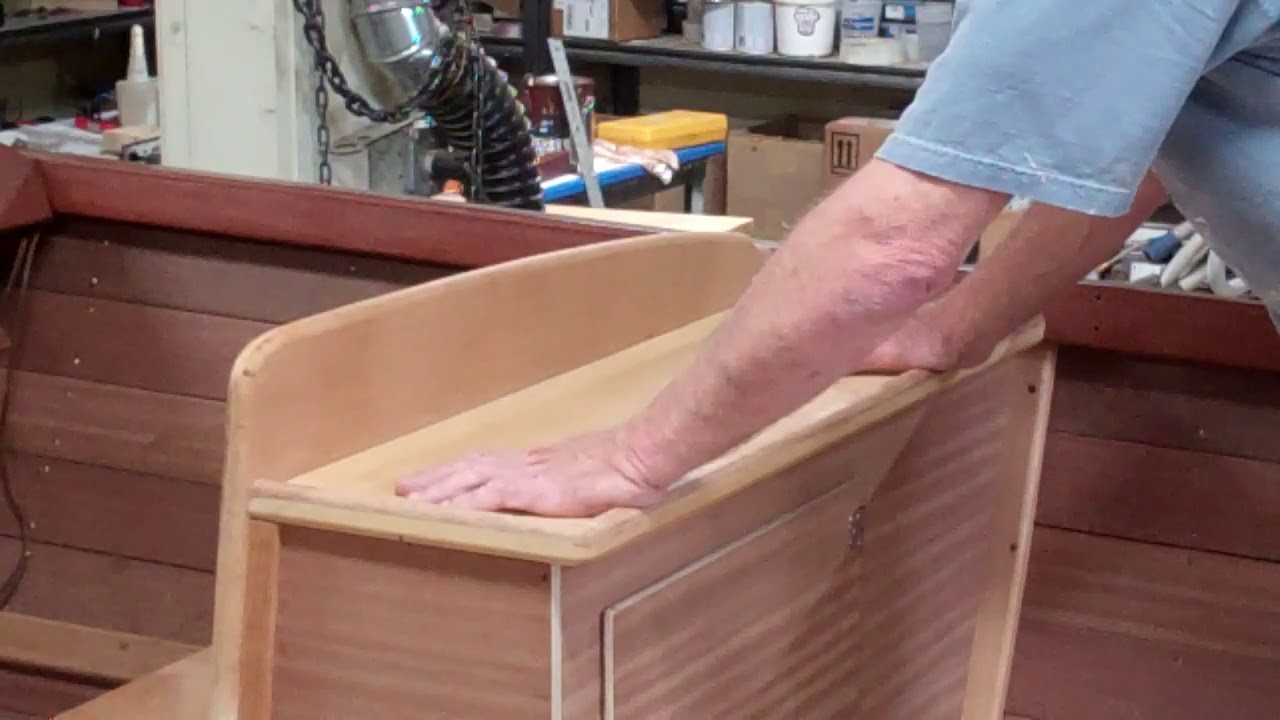
Her owners challenged John to design, fabricate and install a pair of boarding steps that are also comfortable jump seat – units for our 1957 23’ Lyman Runabout preservation project.
Sourcing stainless brackets that were strong and worked simply proved to challenging, but Google sent us to www.boatoutfitters.com, who stock stainless steel folding seat brackets that are perfect for this purpose.
We caught up with John about halfway through this challenge. Today’s video celebrates another milestone facing into our wake.
I will allow John to fill in the details and demonstrate his units’ utility and versatility. Now it’s on to the helm station.
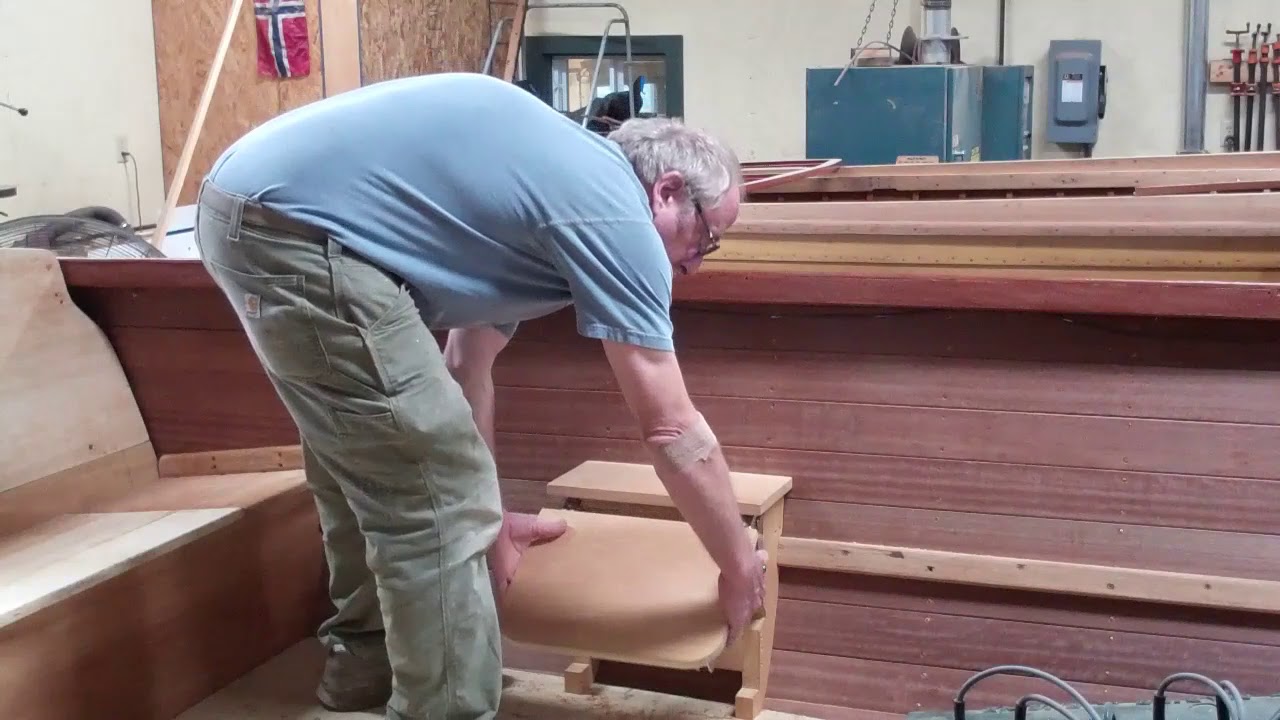
John is in the process of doing his magic with wood once again.
Her owners challenged him to design and fabricate a pair of folding boarding steps that doubles as jump seats mounted to the 1957 23’ Lyman Runabout’s port and starboard hullsides just aft of the engine box.
As with mocking up the new pass-through helm seating and locker configuration, John reached for cardboard. We left him alone.
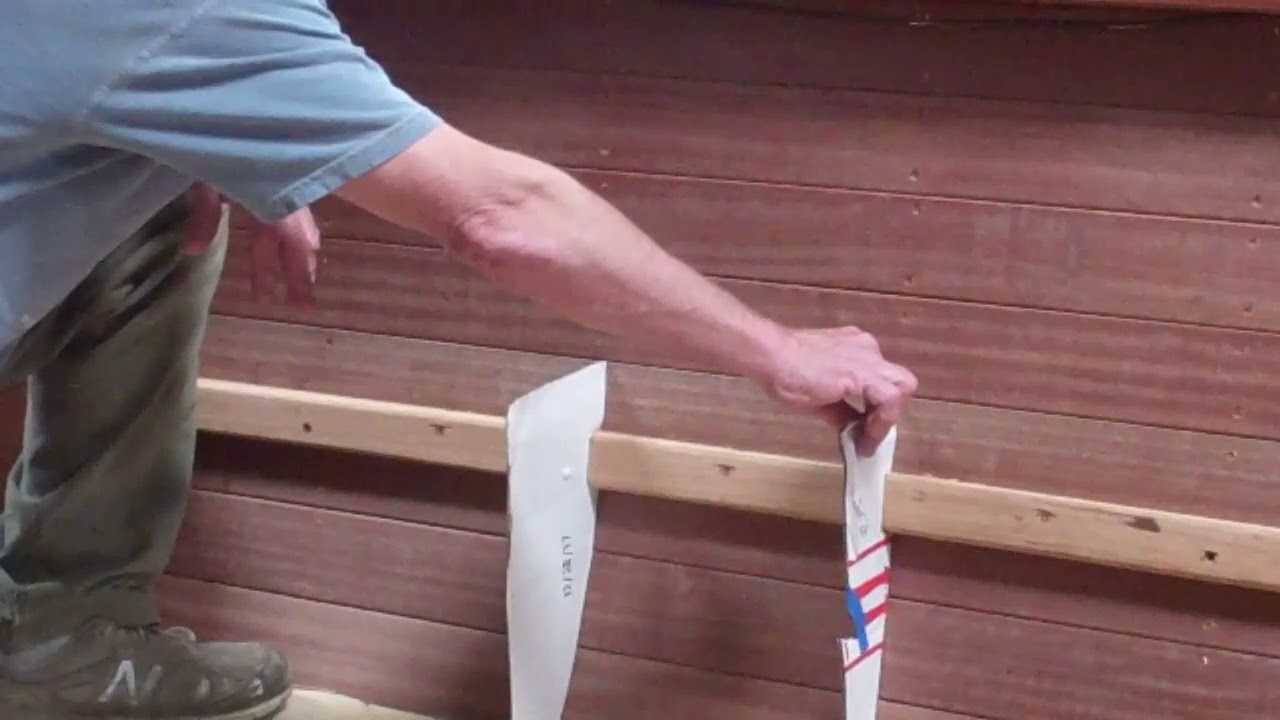
That the hullsides are somewhat concave both vertically and horizontally, meant that he could not simply fabricate a matched pair of mahogany wall mounts. The aft mount is thinner; its shape is different, as is the required bevel needed so the mount lands flush against the hullsides. John attacked the port mount early this morning, and by late this afternoon had roughed out a structure that works.
But, rather than steal his fire, I will hand it off to John ….
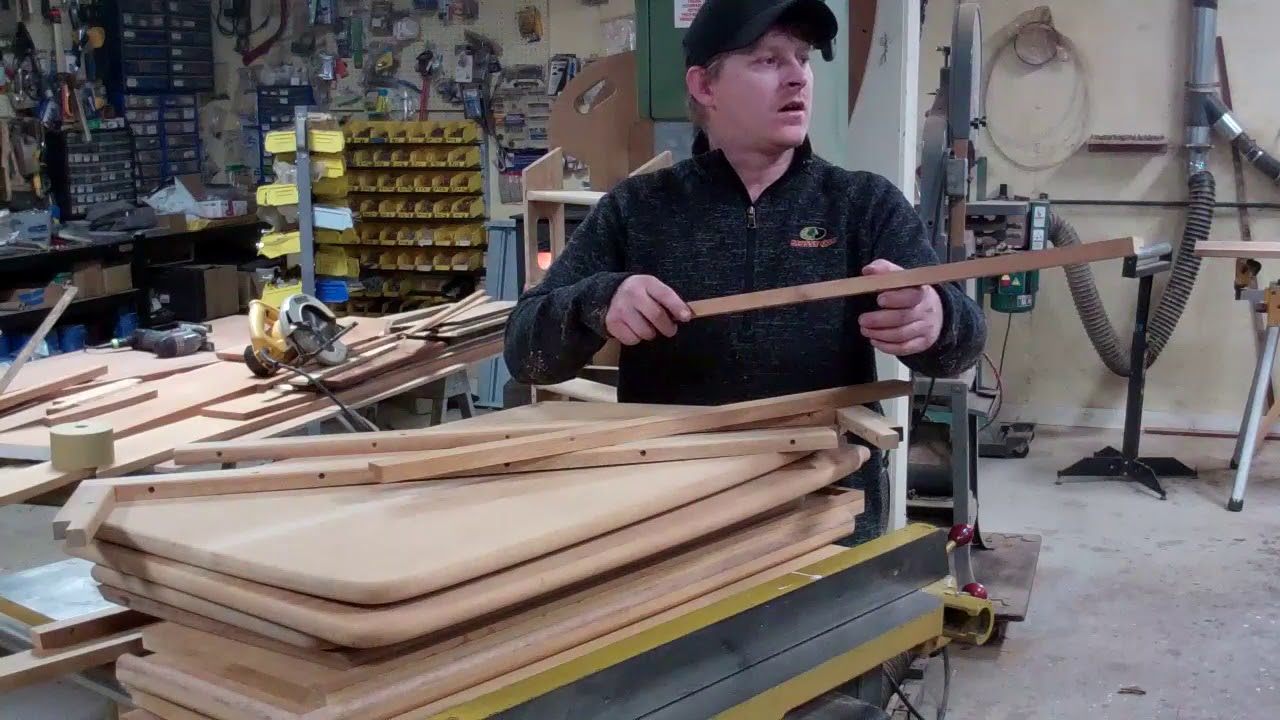
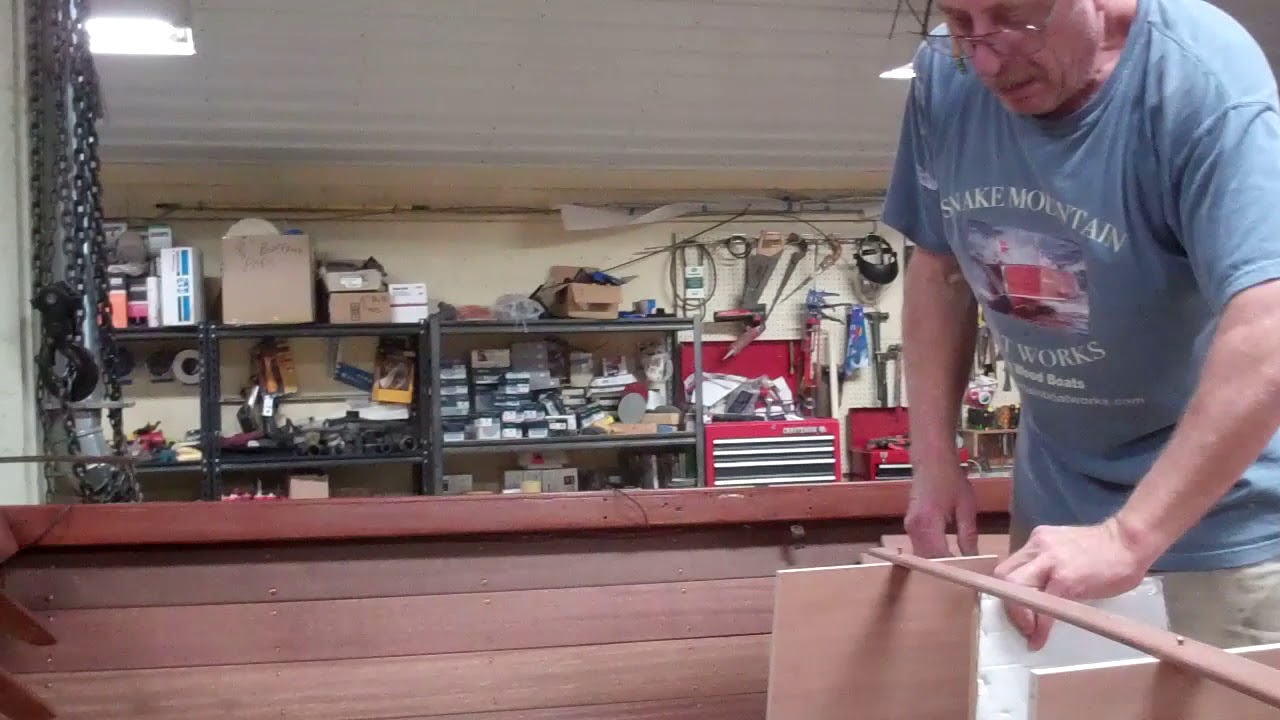
Under John’s eye and steady hands, sheets of half-inch ribbon-cut marine plywood are slowly being transformed into what will be a commodious helm station, complete with a flat floor from the forward end of the engine to the firewall.
That John is in his element, muttering measurements and angles to himself is evident. That he needs his space and wants to be left alone is even more evident. “Helpful” kibitzing is verboten. Prior to launch this slow, exacting process, John and RJ finished fabricating and installing the balance of her new ceilings. With the ceilings in place, John knows precisely the arcs and spaces before him.
It will likely take him the better part of a week to complete the new seating configuring, at which time we must release all of it, including all of the ceilings so they can be finish sanded, bleached, stained and sealed with three coats of Clear Penetrating Epoxy Sealer (CPES). (The lockers will likely be assembled ahead of time so that we can attend to plugging countersinks ahead of bleaching, staining and sealing.
We will apply fifteen coats of Pettit Hi-Build varnish before installing everything for good. We received the final batch of hardware and hinges back from D & S Custom Metal Restoration yesterday.
Shauna Lawrence, Kocian Instruments, expects to ship the preserved gauge cluster in a few weeks. Weather is our major frustration at present. We sourced some beautiful, air-dried Honduran mahogany, which will be transported on an open flatbed trailer. Given the good things that multiple years of air drying has done for the lumber, transporting it through the driving monsoon-like rains we are now suffering is not OK and will not happen.
Looks like a dry window is opening the first half of tomorrow. Guess who will be on the road well before the first glimmer of sunrise emerges over the Green Mountains?
Yes, the sky is blue and the sun is out, but it is November 15, so the sun is not very high in the sky and the “heat wave” 42 degrees Fahrenheit does not help much once he gets wet, which is inevitable.
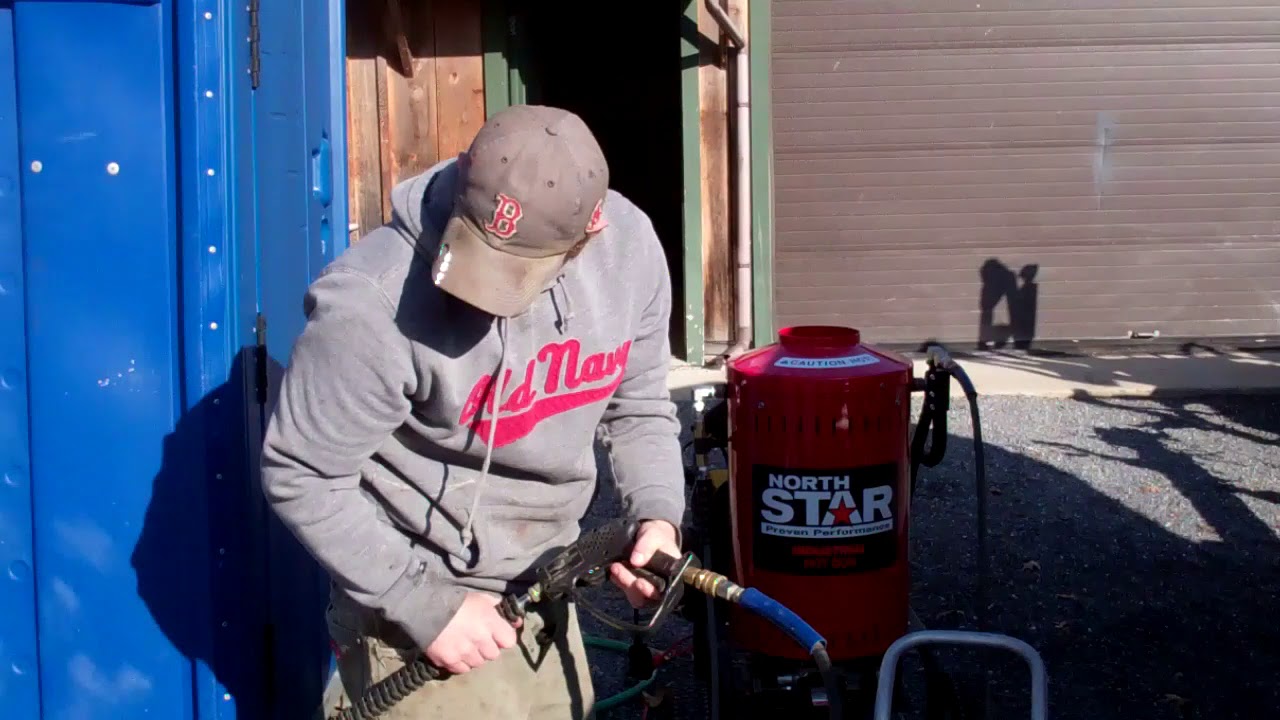
At the suggestion of her owner, I purchased a North Star industrial water heater, which is designed to “plug” into the outlet valve on the pressure washer and the spray hose. It heats water to 200 degrees Fahrenheit, which materially increases the pressure washer’s effectiveness. “We” begin by applying hot Simple Green Industrial Degreaser, diluted with water to the entire surface and let it steep for 5 – 10 minutes.
Then RJ installs the 25 degree nozzle and goes at it, bathing himself and the bilge with steam in the process.
The entire process took 4 hours, compared to the 10 – 15 it would take us were we using our old school hand scrubbing method.
She’s back in the shop, where we will brace her hull and flip her so we can focus on stripping bottom paint, addressing issues, sealing all surfaces with CPES and painting her anew.
Guess what? The 1940 Lyman yacht tender is waiting for steam cleaning, which RJ will engage shortly.