1946 Chris Craft Brightside U22 Stained!

1946 chris craft brightside u22 stained

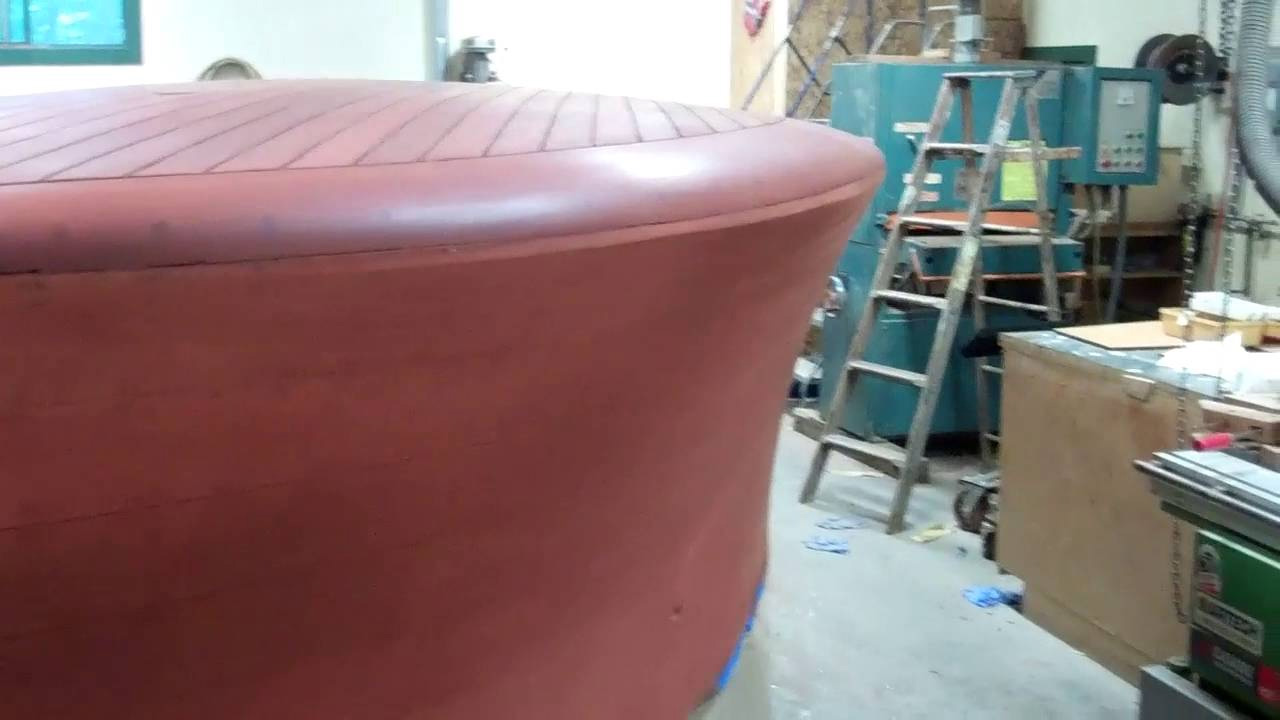
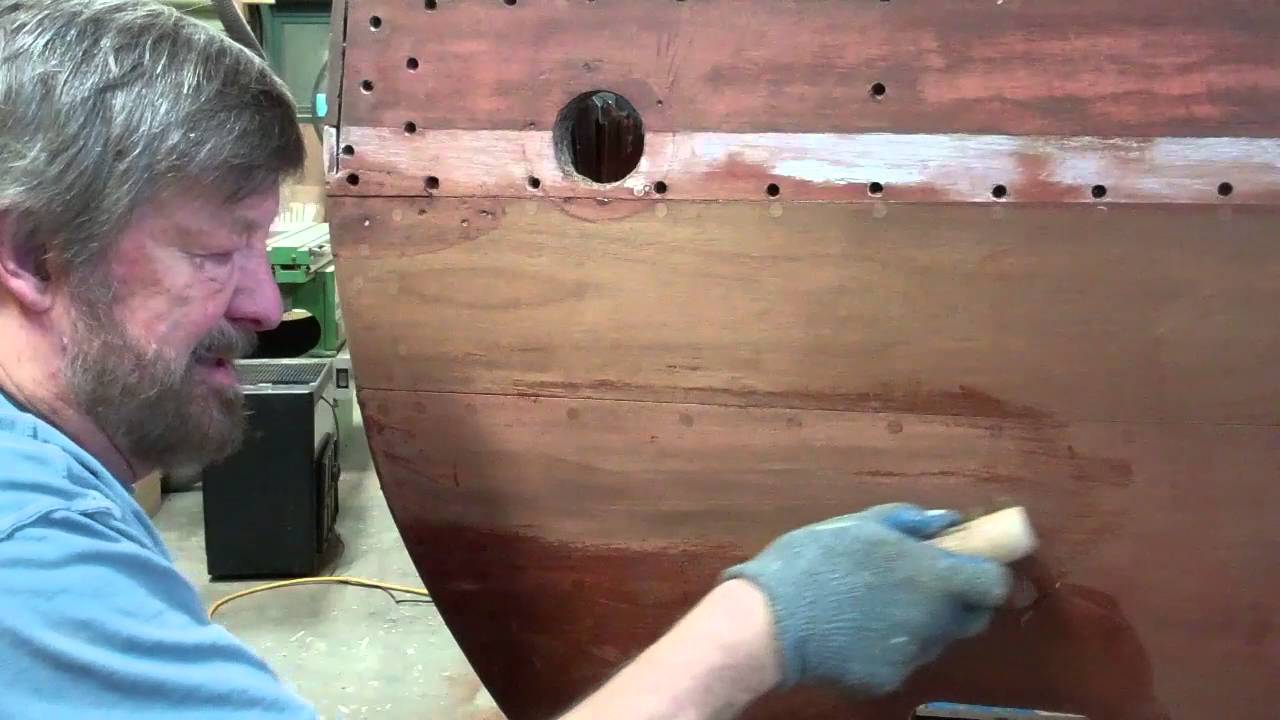
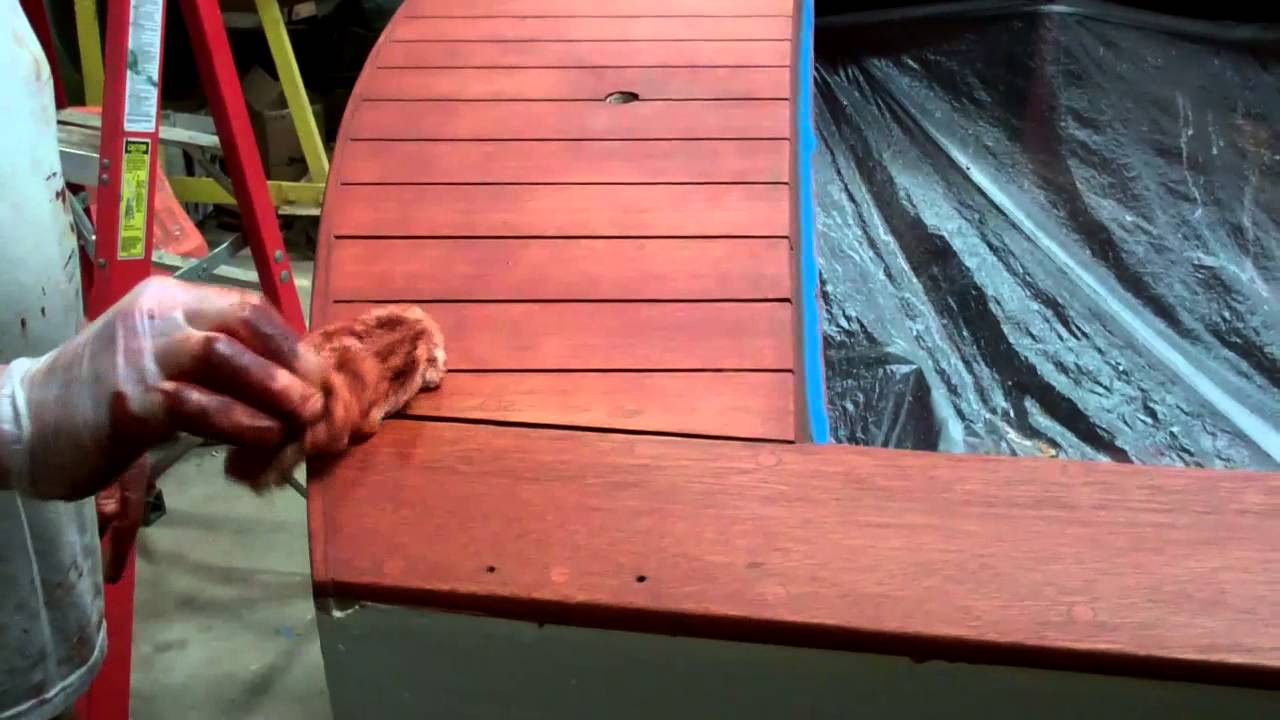
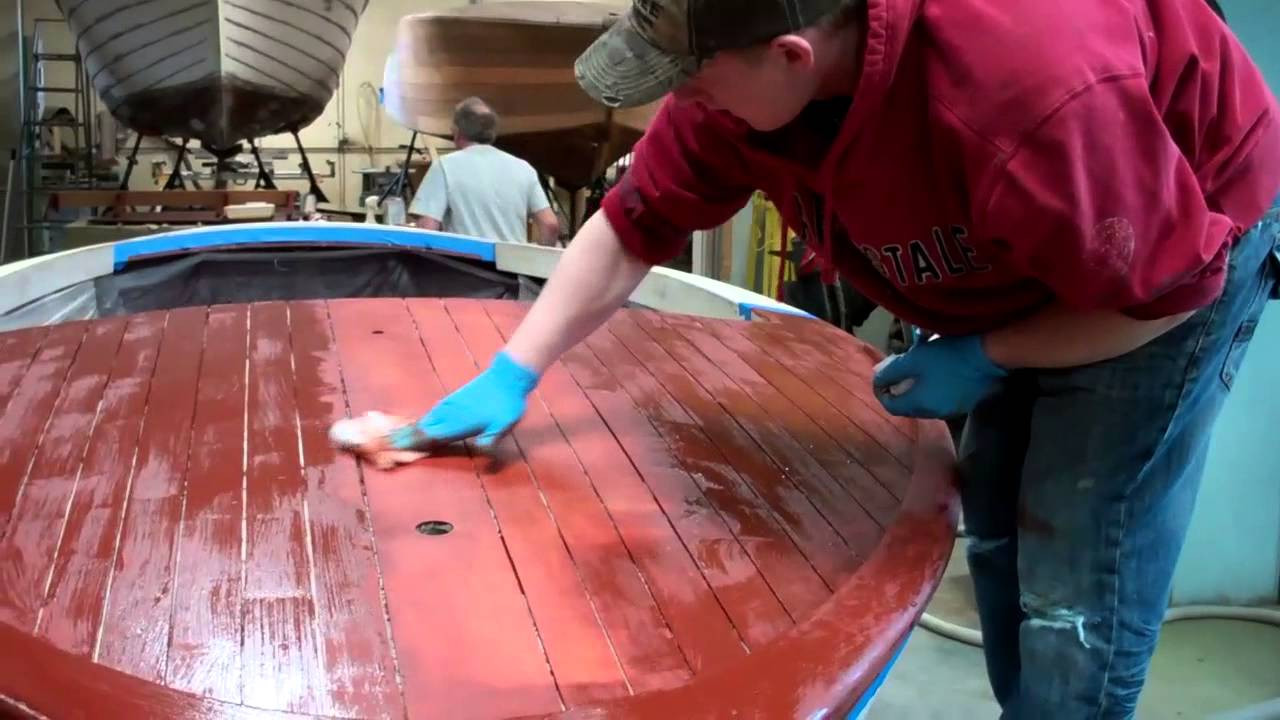
Finally! The 1946 Chris-Craft Brightside U22 is all but completely stained.

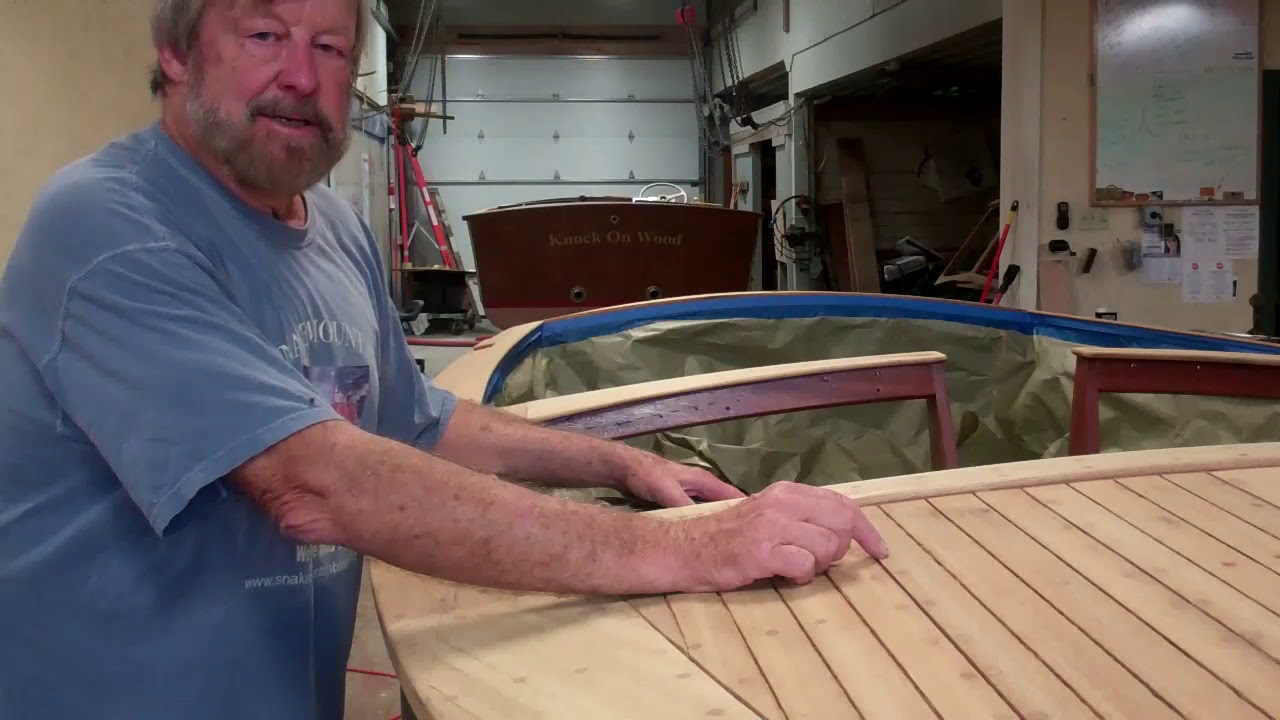
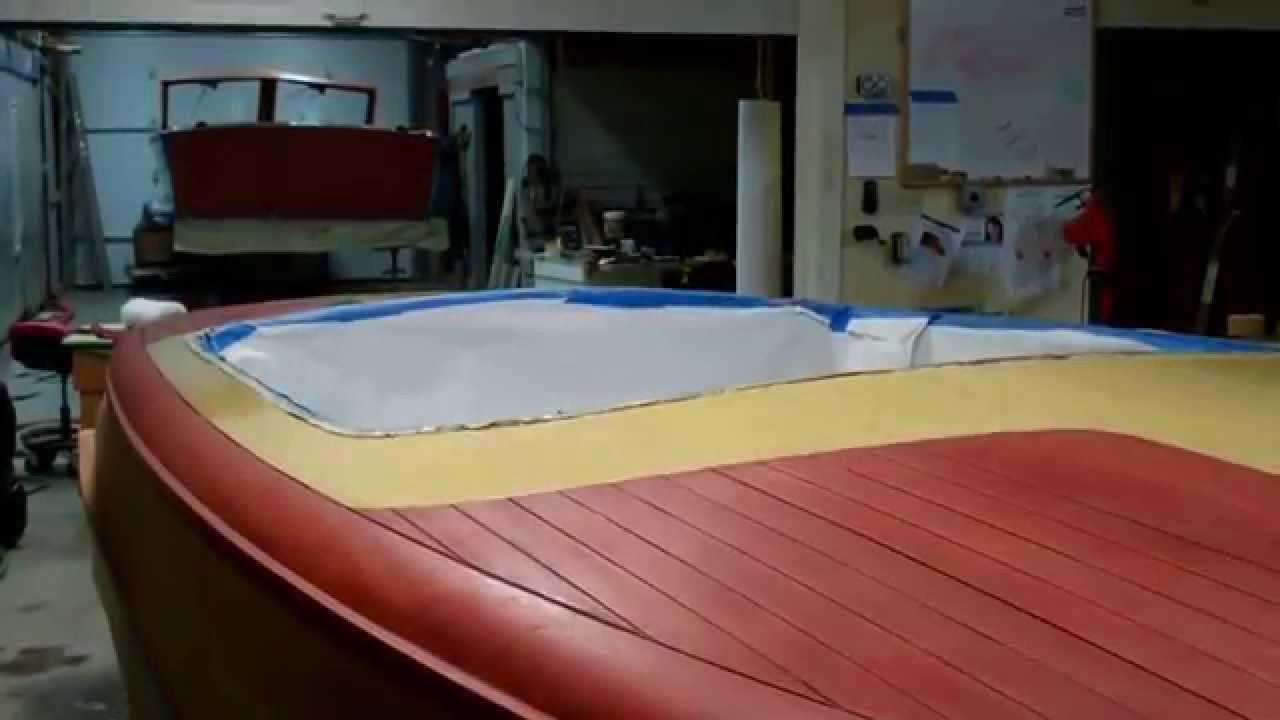
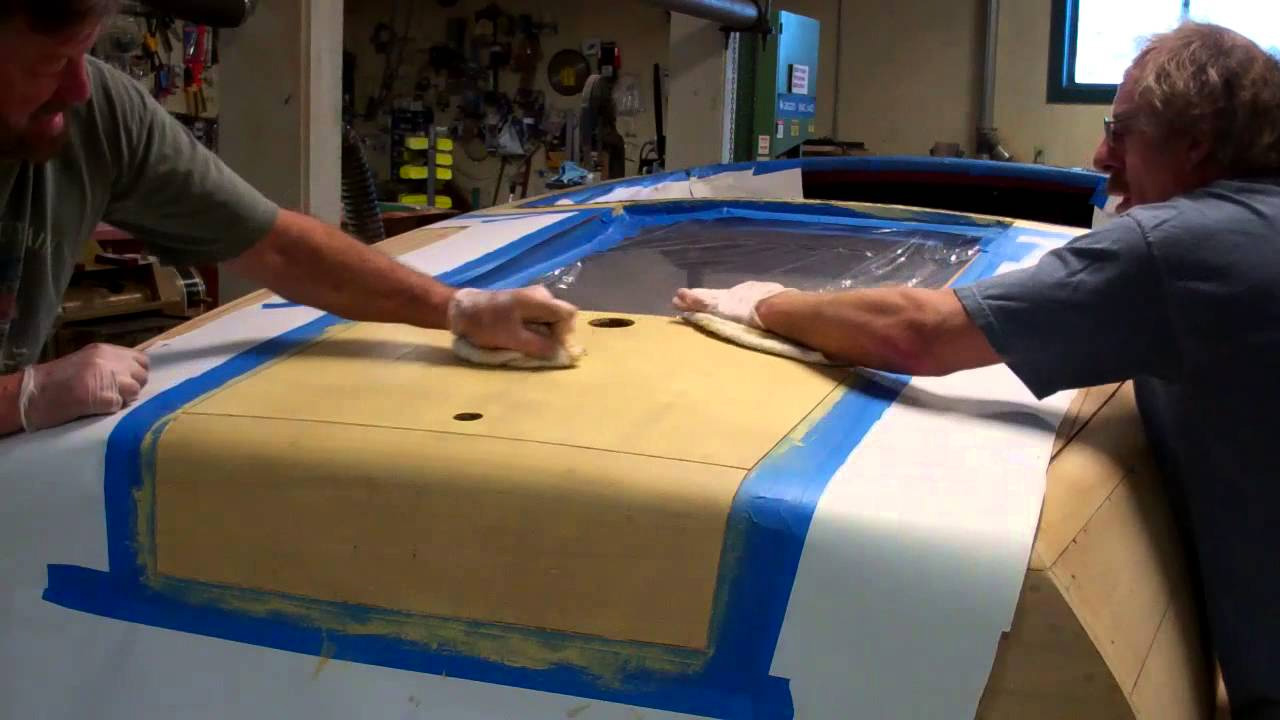
Our SMB staining methodology has delivered an absolutely uniform result. What a sight for sore eyes, and especially sore shoulders! Several staining details remain. The dash was modified at some point. The original horizontal chrome strips that were inset into it at Algonac were replaced by marquetry-like blonde wood stripes. These must remain blonde, so John masked them off and stained them with Sandusky Paint Company’s Chris-Craft Corina Blonde stain, let it dry in, and then taped it off along with the rest of the dash. (Since would not be staining the mahogany portion of the dash today, protecting against flying flicks of stain was a must.

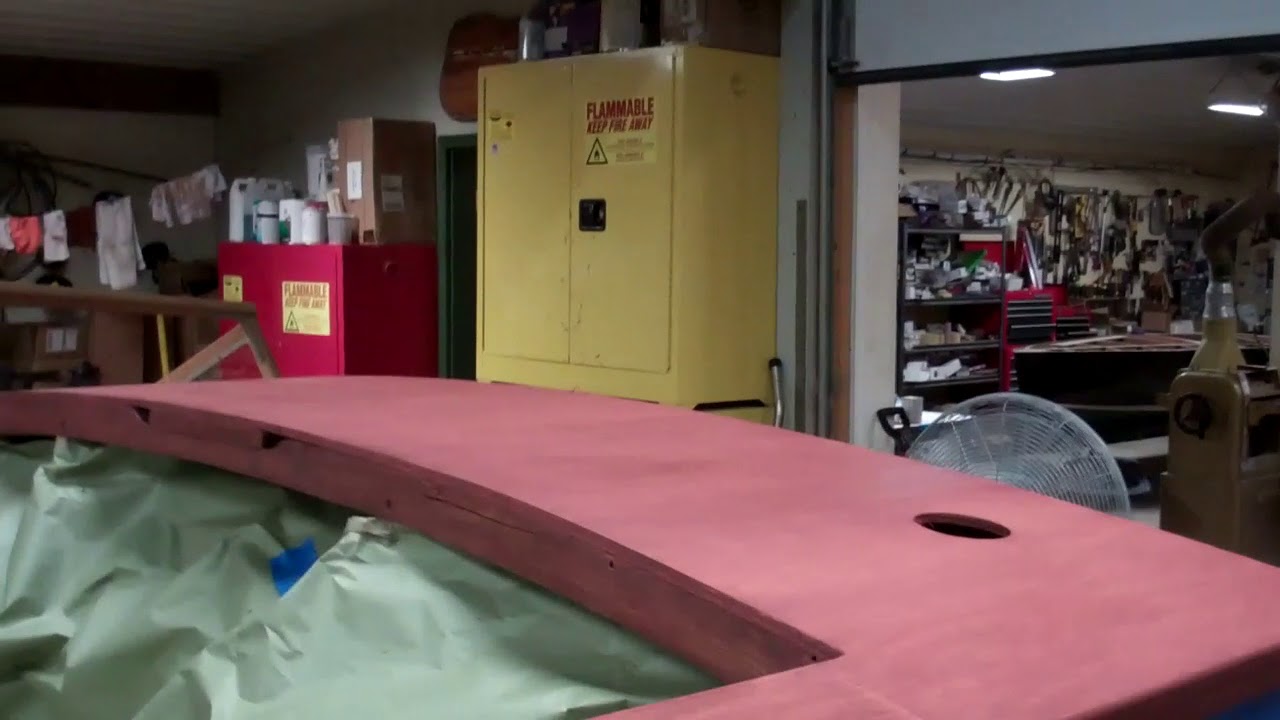
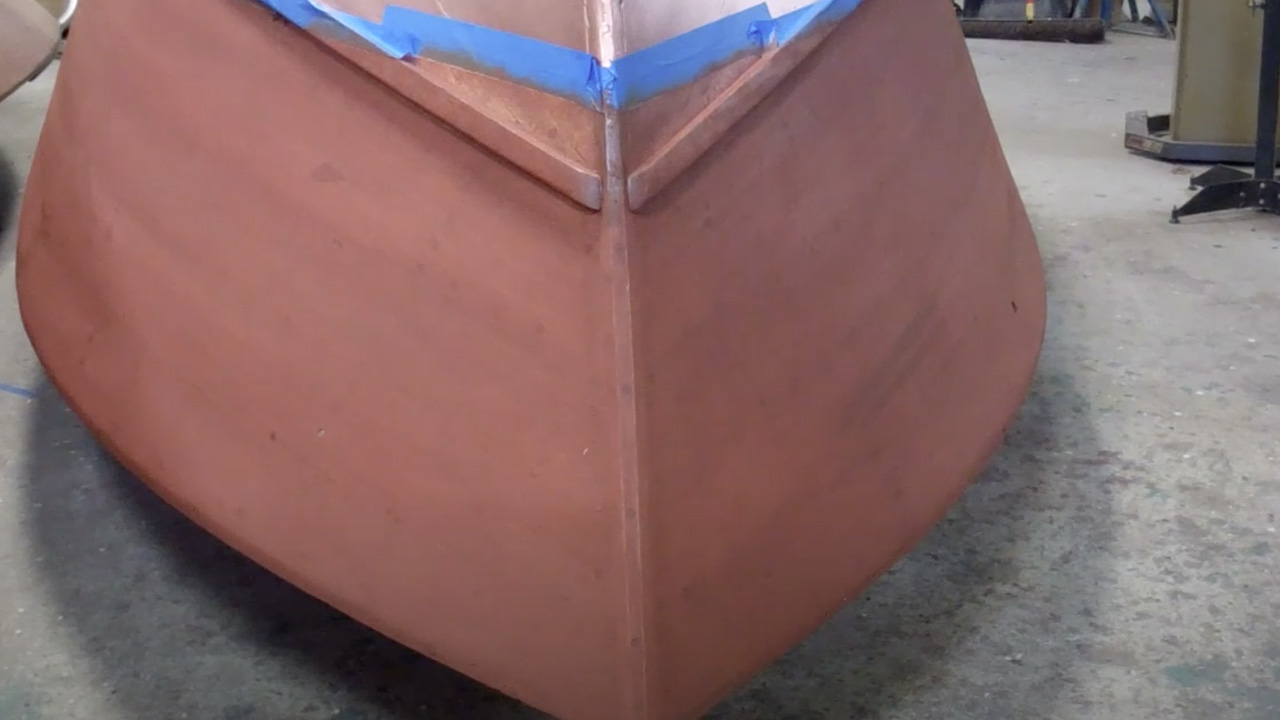
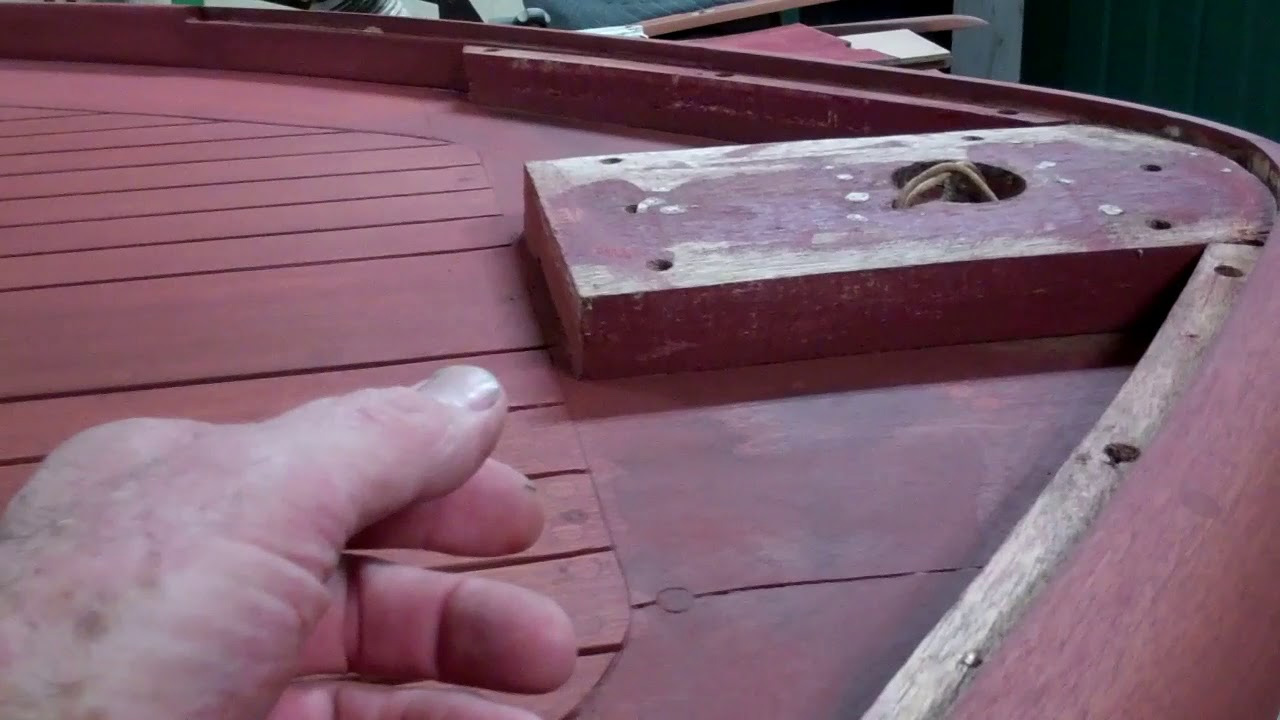
Additionally the U22’s bow terminates in a very pleasing pair of triangular planks and a vertical support plank into which the hull number was stamped at the factory. These will be stained and installed after we have applied CPES to and Sikaflexed the foredeck’s (and aft deck’s) seams. For now she will sit for several days, while her newly applied stain is curing. Then we will seal the entire hull with multiple applications of CPES.

The varnish has been ordered.

Yes!

1968 20-foot Lyman Runabout Time For Stain

What a difference stain makes in her appearance!

One caution when using the Sandusky Lyman Mahogany Filler Stain. It flashes to a near hard surface very quickly. We dealt with this reality by staining the decks and covering boards one at a time.

But now she is stained, and on Monday we will seal her and then begin applying varnish. What a nice way to end the week!

1959 Chris Craft Sportsman Time to Stain

1959 Chris Craft Sportsman Time to Stain

Today’s bleaching update follows yesterday’s by a bit over 24 hours. We kept the ’59 Chris-Craft 17-foot Sportsman bathed in bleach from a bit after noon through midnight yesterday.

Even though the surface feels dry to the touch, our moisture meter pegged well above 30 percent everywhere on the decks and covering boards. The wood must gas off much more moisture before we can stain it. As it does, the color becomes more and more uniform.

The bleaching process raises grain while it bleeds the tannin out of the fibers, leaving thousands of little feathers, which must be removed to achieve a uniform color when stain is applied.

The challenge is removing the feathers without cutting through the very, very thin layer of bleached mahogany. Sandpaper, even a very fine grit, is just too aggressive, so we reach for coarse Circa 1850 scuff (Scotch Brite) pads from Jamestown Distributors.

A light scuffing, being sure to only do so with the grain, quickly releases the feathers, and subsequently vacuuming using a bristle tool removes them sufficiently. (You might use a tack cloth, but only if you purchase those that are devoid of wax or oil. Depositing either on the surface guarantees seeing a blotch form because the stain cannot penetrate the deposit. But for now we will wait until our moisture meter reads no higher than 15%.

Then the blonde elements will be stained with Sandusky Paint Company Chris Craft Corina Blonde Filler Stain, followed by a mixture of brown and red mahogany Interlux Interstain.

Be sure to allow several days for the stain to cure, lest your application of CPES pulls the stain and kills color uniformity in the process.

1959 Chris Craft 17′ Sportsman Stained!

1959 Chris Craft Sportsman Stained

Stained! Finally we see an early hint of here elegance. Yes, the hull’s surface is deadly dull right now, but only until we begin applying Clear Penetrating Epoxy Sealer.

Because we used Interlux Interstain Wood Filler Stain, we will give it a full week to cure. When we have not done so, we fought the CPES, which pulled the semi-cured stain out of the wood. Brushing the CPES on created the worst problems.

Allowing the stain to cure for a full week stopped the bleeding.

Yes, we have experimented with Interlux Wood Sealer, but, as Don Danenberg has said, it is just not CPES in terms of its performance. Even worse, we tested masking by applying various tapes – blue painter’s, Frog, and even gaffer – to test panels that had been sealed with the Interlux product. In way too many cases, pulling the tape took the sealer with it, leaving dull declivities behind.

That said, we will begin sealing her hull next Monday, applying the first two coats one immediately after the other, per Danenberg’s recommendation.

We may apply a base coat of varnish before flipping her right-side-up, but that’s a decision for some time next week.

Right now, as the Dutchmen begin disappearing with the staining application, it is just super to see her coming back to where she was many decades ago.

1953 Shepherd Model 110 S Staining the Hull is in Her Wake

1953 shepherd sportsman 110s sportsman hull staining

Bleaching is in our wake. Now the real fun begins. Bleaching is easy. Apply it over and over, keeping the surface wet. Let it dry. Lightly sand it with 320 grit. Call it good.

Staining? Get ready for exhausted shoulders, arms and especially hands and fingers! We used Interlux Interstain Wood Filler Stain, 2 parts of Chris Craft Red Mahogany (0573) to 1 part of Brown Mahogany (042), thinned to the consistency of thick house paint using Interlux Brushing Liquid 333

The 22-foot Shepherd’s seemingly endless expanses of mahogany presents two challenges when staining. The thinner tends to gas off, causing the working stain to become ever more viscous. We found ourselves thinning the “soup” anew multiple times as we applied stain.

The real challenge, however, is controlling the degree to which the stain is flashing in front of us as we worked, always cross-grain, rubbing the stain into the valleys while removing it. (We use cheese cloth here.) Getting anxious and scrubbing away too soon produces a very weak, almost totally transparent outcome.

Waiting too long and the stain flashes to being nearly dry to the touch, which renders that stain virtually impossible to scrub into the grain and off the surface.

Even though we had masked off all but three boards along ta seam on the topsides, we found ourselves racing against flashing …. and losing. (It was uncomfortably hot in the shop and we had a fan running, which only compounded the rate at which we were losing the race against excessive flashing,

No amount of swearing, scrubbing or sweating made any difference. What to do? In desperation I wet a new shop towel with 333 and went at if. Voila! The stain liquefied just enough so I could scrub it into and off the surface. (My shop towel was wetted to the point of being damp, not dripping with the 333. While I have not experimented doing so yet, my gut tells me that applying too much 333 risks washing the stain away prematurely and excessively.)

In any case, after a long, long day that ran well into the evening, she is stained.

What a great way to celebrate my birthday!

1953 Shepherd Sportsman 110S Extracting Stain From Planking

There is no glory in pulling residual penetrating filler stain out of planking. However the returns for doing so are worth the drudgery and elbow grease involved. Sandpaper does not fill up as quickly, and subsequent bleaching delivers a materially more uniform result.

Our tools for the job: sandvik scraper with forward hand hold, heavy duty stainless steel scrubber, stiff-bristled brass brush, and Circa 1850 Heavy Duty Paint and Varnish Remover. I have experimented with several scrubbers, but the one that we find most effective is available from Amazon.com. Search for “Heavy Duty Stainless Steel Scrubbers, 3.5” large Diameter…” A pack of twelve is $12.99 on Amazon Prime.

I had previously made four passes, mostly with the scraper and brush, and one with the scrubber on the transom in the clip. Now I continue with one additional scraper and brush passes and two scrubber passes.

My hope is that the camera picked up the increasing difference between the area worked and that surrounding it. An additional plus is that, after seven or eight passes, we become intimately familiar with the planking, its fasteners and bungs, which also renders discovering blemishes or damage needing Dutchman repairs quite straightforward.

Once the cleaning is complete, we will flat board the topsides and transom with 80 grit, making sure we do not leave any cross-grain scratches, before we proceed to bleaching, staining, sealing and varnishing.

1946 Gar Wood Ensign Staining Complete

Staining day for the 1946 Gar Wood Ensign is complete.
Our aggressive bleaching, which involved keeping the wood well-soaked with bleach for 19 hours, created the perfect palette for the Interlux Interstain we scrubbed into the wood today.
That the process has worked as planned is clear from the homogeneity of the color across all surfaces, from the decks to the covering and then to the combing boards.
Notice the absence of any telltale dark rings around any of the bungs, and that the bungs, all of which are new, match the hues of the wood surrounding them perfectly.
Sealing is next, and here I will correct a misstatement I made in the previous Gar Wood staining day clip. While not always, and likely due to a chemical incompatibility between them, our occasional experience is that applying Smith’s CPES over Interlux Interstain seems to lift the stain here and there, but the result is absolutely unacceptable.
For that reason we use only two-part Interlux Clear Wood Sealer Interlux, a fast drying urethane used for priming wood prior to application of single part varnishes or two component urethane finishes, over Interlux Interstain.
The first coat of Pettit High-Build Varnish will be rolled and tipped on Friday!

1946 Gar Wood Ensign Staining Day

It is staining day for the 1946 Gar Wood Ensign.
Once we confirmed using our moisture meter that the wood is back to about 15% or less moisture content, we lightly hand sanded the entire surface with 80 grit dry paper, vacuumed it and then washed it down with Interlux 202 thinner.
As Ensigns were originally much browner than we are used to in the case of Chris-Craft boats, we mixed a 1:1 ration of two Interlux Interstain filler stain, Chris-Craft Mahogany (573) and brown mahogany (42). (Our customary Chris ratio is 2 red to 1 brown.)
We masked both covering boards at their intersection with the foredeck so we’d have more control over the process.
As with other projects, a full coat of stain is applied using a chip brush after which it is allowed to flash – become almost dull in appearance. Then cheesed cloth is used to scrub, and I mean really, really scrub, across the grain until we can discern a sheen across the surface.
We will complete the staining process by day’s end. The first of three coats of CPES will be applied tomorrow morning.
Varnish is not far away!

1952 Chris Craft Riviera Runabout Staining Complete

1952 chris craft riviera staining complete

We passed a significant milestone on the 1952 Chris-Craft Riviera runabout 18’ with completing staining the entire hull.
The blonde sections had been stained, sealed and received an initial two coats of Pettit Hi-Build gloss varnish before we began staining the remainder of the decks, covering boards, transom and topsides this afternoon.
We applied Interlux Intersatin, 2 parts #573 to 1 part #42, Don Danengerg’s favorite combination. After allowing the stain to flash, a process by which the initially shinny and greasy surface morphs into a dull matte finish.
Then the fun begins as the thinner continues gassing off and scrubbing cross-grain with cheese cloth and terrycloth towels becomes ever-more difficult with each passing minute. For this reason, we always stain large boats such as the 18’ Riviera in sections.
You will arrive at a moment where you feel, “Finally, we are done.” Probably not. Grab several sheets of cheese cloth folded into a polishing pad and do a final buffing over the entire surface. The cloth stays pretty clean while the surface becomes lustrous. Now you are done.
Applying three coats of CPES tomorrow morning is next. It will be followed by a very light scuff sanding with 120 grit, and then the boat moves to the paint room where we will begin building what will eventually be at least 15 coats of Pettit Hi-Build varnish.

52 Chris Craft Riviera Runabout 18 Staining Deck Corina Blonde

1952 chris craft riviera staining deck corina blonde

We tested early this morning and the hull’s moisture content has dropped to a pretty uniform 15%, so staining can commence.
With the blonde aft deck, king plank and covering boards fully masked off against spatter, we apply Sandusky Paint Co. Chris-Craft Corina Blonde Filler Stain diluted about 10% with mineral spirits, which produces a consistency of house paint.
It took about 15 minutes for the stain to begin flashing, at which time we begin sharing the fun of working exclusively cross-grain, scrubbing excess stain off and filling the valleys in the process.
We will now allow the stain to cure for 24 hours before sealing it with three coats of CPES, after which we will apply a first coat of Pettit Hi-Build gloss varnish as insurance against adulteration of the blonde wood with the Danenberg Interlux Interstain mixture that will be applied to the balance of the hull.