1953 Shepherd Model 110 S Time for Sikaflex and Varnish

1953-Shepherd Model 110S Sikaflex Varnish

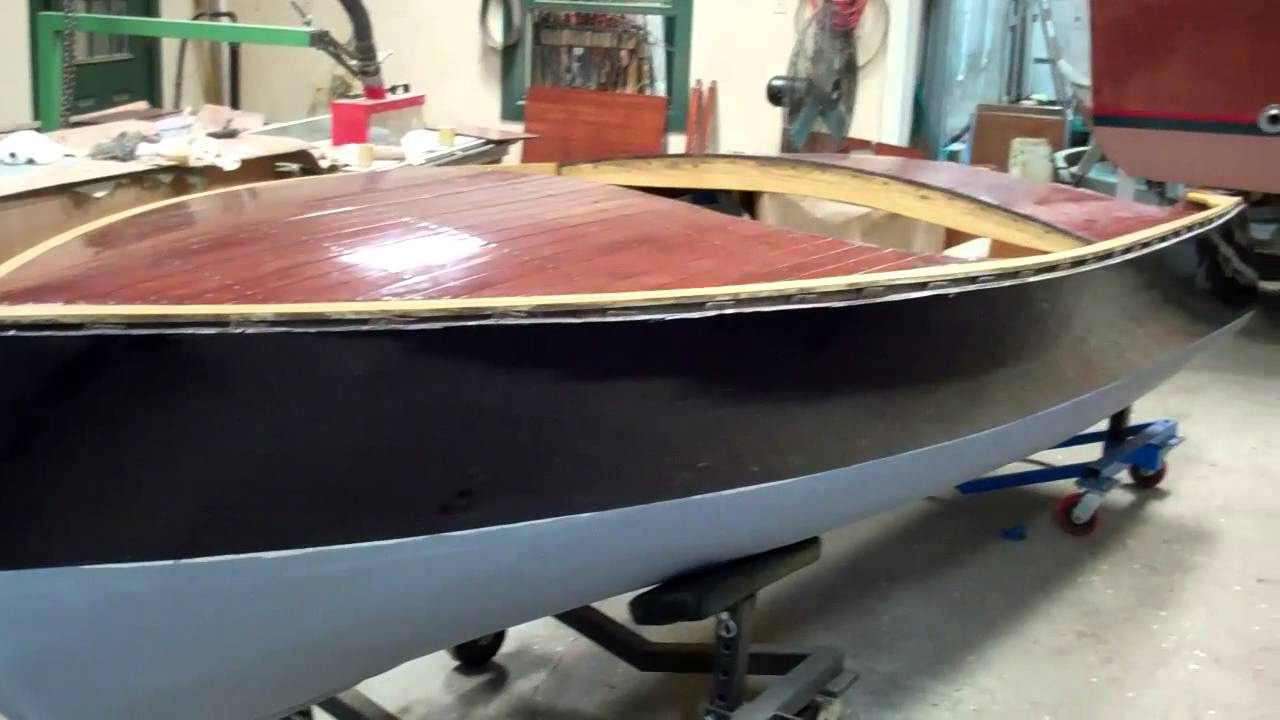
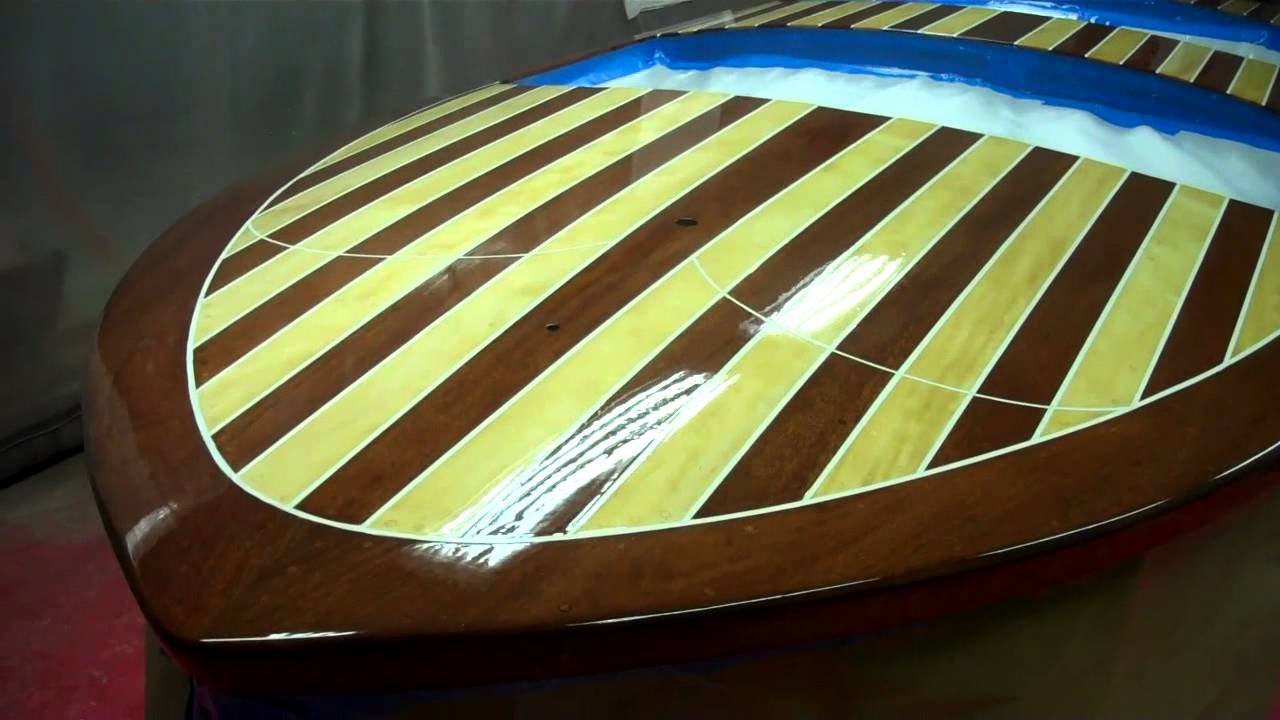
With the entire hull sealed with three coats of clear penetrating epoxy sealer (CPES), one more milestone is fading in her wake.

No matter how many times we go through this bleach, stain, seal process, I still find myself unimpressed by the lusterless presentation that staining the hull delivers. But what will be a full-bodied, robust presentation, with a hint of luster that grows with each application and curing of CPES always produces smiles and exclamations, “Wow!”

The 1953 Shepherd is no different, as I suspect you will agree by comparing last week’s post-staining milestone video with this one.

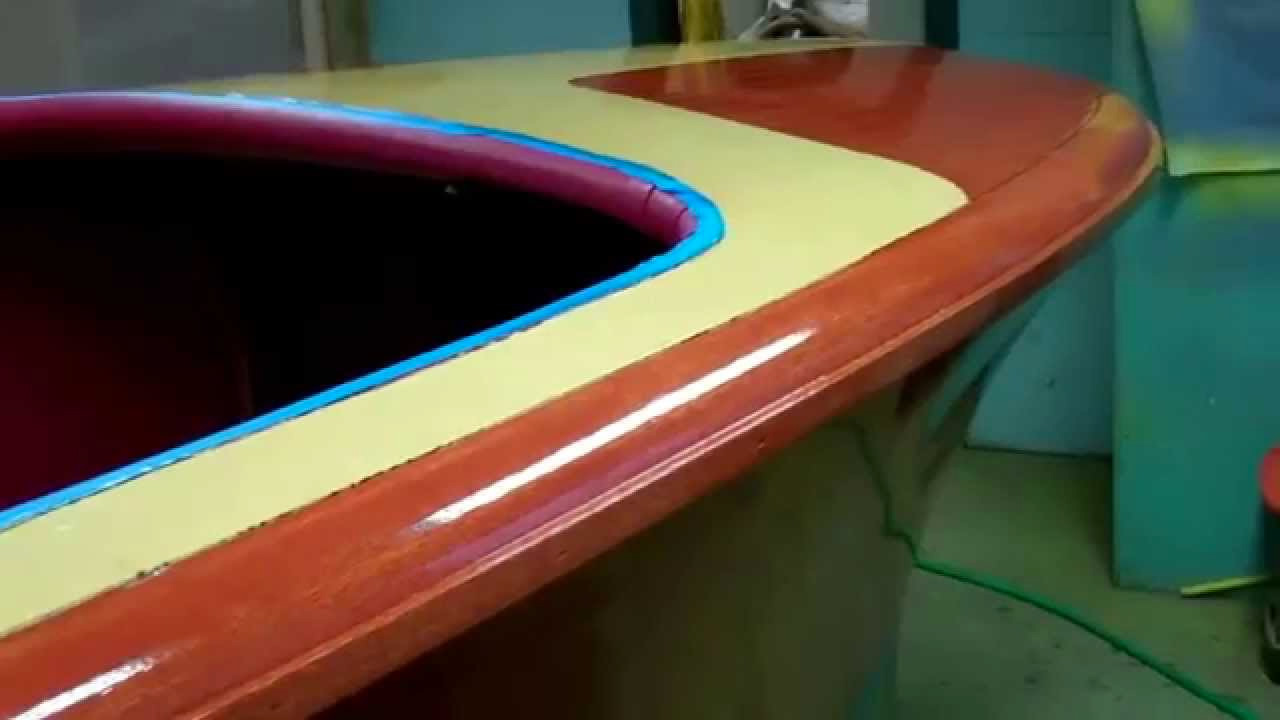
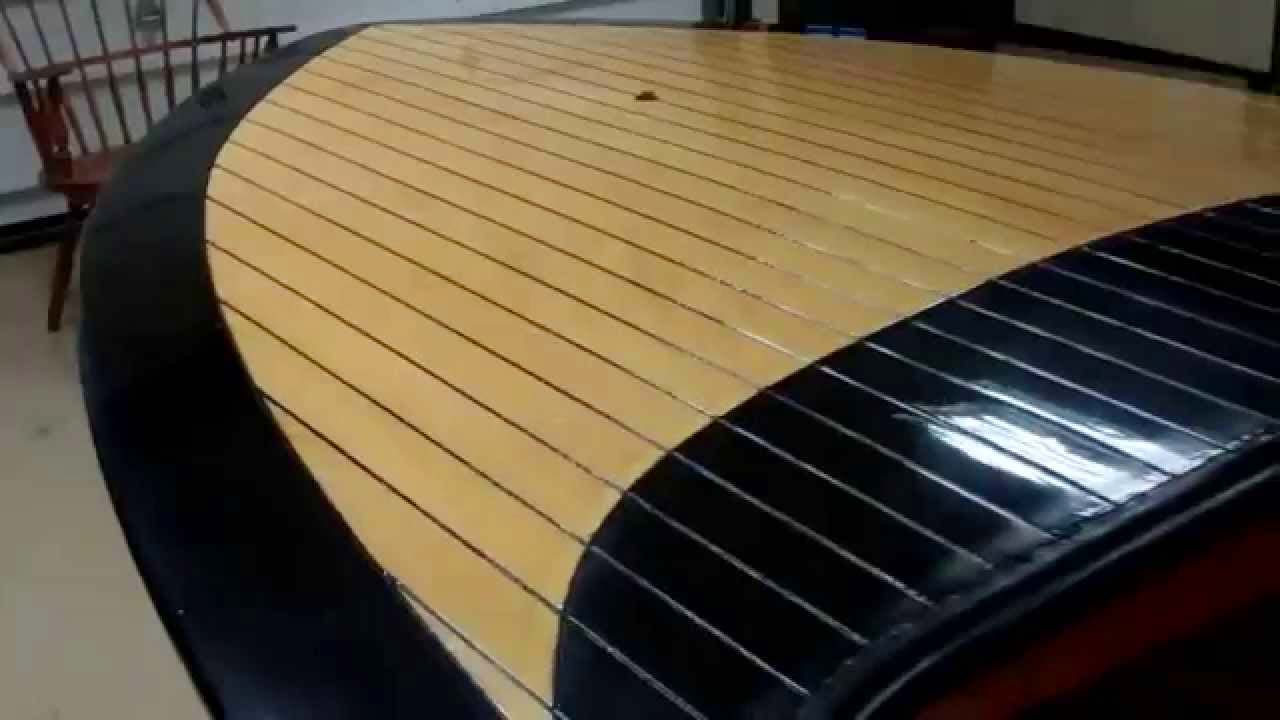
Next we begin filling the deck seams. At least in 1953, Shepherd Model 110-S runabouts had a yellow filled circumferential seam that runs along the covering boards and across the engine bay bridge. The deck seams, by contrast, were open, with waterproofing achieved by filling the very bottom of each seam with a mahogany caulk. We will use mahogany Sikaflex for this purpose.

Here is a case of cure times dictating the pace of the project. We cannot wait to begin varnishing, but doing so before the Sikaflex has cured means going on a fool’s errand. We will wait a solid three days, and maybe four.

So it is seam-filling on Monday, which means we might roll and tip the first coat of varnish on Friday of the coming week.

1955 Penn Yan Commander Aristocrat Finish Painting

1955 penn yan commander aristocrat painting

Epifanes asserts that its Monourethane One-Component hard high gloss paint “provides incredibly hard urethane abrasion and chemical resistance with outstanding gloss, durability, color retention and U.V. protection. It can be brushed or rolled with the application ease of an enamel.”

Our experience is absolutely consistent with that claim. We selected dark blue for the topsides and, as is correct for the Commander Aristocrat model, she will be light oyster below her spray rails.

We have continued our practice, one that is urged by Don Danenberg, of applying five coats of Interlux Interprotect 2000E barrier coat below the waterline, but have also applied three coats to the topsides to absolutely inhibit any water infiltration.

As Epifanes Monourethane explicitly forbids direct application over an epoxy primer, which 200E is, we followed the barrier coat application with two coats of Jamestown Distributors’ TotalBoat Topside Primer.

The existing finish on the splash, rub rails and coaming proved to be beyond saving, so we have stripped and bleached, stained and have begun varnishing them.

Happily we will be able to save the original finish on the fore and aft decks. A light sanding with 320 grit will be followed by 6 – 8 coats of Pettit Easy Poxy Hi-Build varnish.

The existing finish on the hull’s interior and bilge will be saved as well. We will clean vigorously with a brass brush, sand all surfaces lightly and then apply several coats of Sikkens Cetol Marine varnish.

1952 Chris Craft Riviera: Buffing Varnish Triumph

1952 chris craft riviera buffing varnish

RJ and John rolled and tipped coat number 14 of Pettit High-Build onto the decks and gunwales of the 18’, 1952 Riviera Runabout, and the results seemed to check all the boxes, but not for RJ, “Allow me to see what I can do with my sanding/buffing system, and you will know why what is good now will be great on the other side.”

And he did. I will just let RJ and his body of work tell the story, save for adding some materials details.

Dry sanding with 1500 grit came first. Yes, yet another snow field, but this one was different as a definite luster showed through the haze. Wet sanding with ever-finer grits followed. Having other customer-related things that required my attention, I left. That was Thursday afternoon.

When I arrived this morning, the hatch cover immediately commanded my attention, “BUFFED” said the paper tag taped to its leading edge. What I beheld literally stopped me in my tracks. The gloss is truly 10 miles deep and completely without blemishes. Walking into the shop where the Riviera sits immediately told me the “rest of the story.”

RJ had to have worked into the night. By this afternoon he had “finished the initial stages.” He’d dry and wet-sanded the entire surface, and had begun applying our Ultra Buffing System from Presta to the project. “All that remains are the next two steps, buffing with Ultra Crème Light and then Ultra Polishing Crème, followed by washing, and then she will be just like the hatch cover.” I cannot wait ……

Wood Boat Varnish Buffing – RJ’s Clinic

wood boat varnish buffing clinic

The last coat of varnish has been oh so carefully rolled and tipped. The mahogany gleams, but up close you see a bit of dirt, or maybe even lots of dirt has been trapped on your otherwise gleaming surface.

Using a pneumatic sander set at about half-throttle, RJ begins the buffing and polishing process wet sanding through five increasingly finer grades of wet/dry paper: 1000, 1200 1500, 2000 and 3000. His goal here is sanding every scratch out of the surface without cutting through the built-up layers of varnish.

After carefully wiping the surface dry, first with dry paper towels and then with Acetone, it is time to begin buffing the surface using our Makita buffer set at approximately 2,000 RPM and the Presta Buffing System.

The first two grades of buffing compound, Ultra Cutting Crème and Ultra Cutting Crème Lite, are applied with an 8-inch wool cutting pad. The final step, using a 9,000 grit foam pad, uses Polishing Crème to bring the surface to a brilliant shine.

Getting a fantastic gloss is all about achieving a flat surface, one that is completely devoid of scratches and even tiny hills and valleys. Compare your reflection in a cheap big box store mirror against it in a high-end mirror. The first can be wavy and even distorts the image you see, while the high-end mirror reflects all that stands in front of it perfectly.

Our goal is transforming that varnished surface into one that is as close to that high-end mirror as is humanly possible. Do it well and you see a face smiling back at you as you peer into its surface.

1952 Chris Craft Riviera Runabout Varnish Update

1952 chris craft riviera varnish

Varnishing the Chris-Craft 18’ Riviera Runabout began last Monday. Today, after RJ lightly hand-sanded the entire hull with 400 grit, he and John rolled and tipped the fourth coat of Pettit Hi-Build Gloss Varnish onto her.

As you can see in the reflection of the lights, the surface is not completely flat yet, and the gloss we are after will not begin emerging unless and until it is perfectly flat.

Two more coats will be applied tomorrow and Saturday, and then she will be moved out into the shop and sanded with a pneumatic random orbit using 400 grit dry paper until RJ has achieved as uniformly white a “snow field” on all surfaces as he can without cutting completely through the cured varnish.

Sanding will be followed by a wipe down with acetone, and then she goes back into the paint room, where the next two coats will be applied followed by the same relocation, sanding and wipe-down process again.

We will continue the back and forth until we hit 14 coats, at which time we will evaluate the situation. One issue we must deal with is that all of the seam grooves are also filling with varnish, and might require careful cleaning to remain deep enough to hold the white Sikaflex.

We will be back to you with updates next week.

Thanks again for viewing our videos and please weigh in with comments, ideas and, yes, criticisms. That’s how we learn. 

1956 Century Cowhide Palomino Hull Preserved!

1956 century black cowhide palomino hull preservation

She arrived from Long Island, NY last fall, incredibly original throughout, even if a bit tattered cosmetically. As I began deconstructing her, and found the cockpit and bilge fasteners virtually impossible to back out, it quickly became apparent that the seats, ceilings, gauges and floor panels were being removed for the first time since she left Century Boat Company’s factory in Manistee, MI in 1956.

We have saved her original cowhide upholstery, save for the seat cushions and ceilings, and the latter were fabricated using a bolt of NOS cowhide fabric sourced through A&A Marine. Her original 1956 30 HP Johnson Sea Horse was really stuck hard, but we freed it up and have learned from the fellow restoring it that the power head is in great shape. We will end up with a completely restored, numbers-matching engine.

Here Avodire decks, aft hatch and transom were stripped to bare wood, even though doing so was a difficult decision. This boat came to us still in her original varnish, but even applying every finish restoration technique I learned in my decades restoring antique American clocks could not overcome the fact that the finish was just too tired to save.

We sanded the topsides and covering boards flat, primed them with four coats of Jamestown Distributors’ new TotalBoat topside primer. Sanding between coats gave us a perfect foundation for the 9 coats of black TotalBoat Wet Edge Topside paint we rolled and tipped onto the hull. Jamestown has hit the ball out of the park with this new line of paints!

The Avodire decks and mahogany transom were bleached three times, stained and sealed with three coats of CPES before we began rolling and tipping 12 coats of Pettit Hi-Build varnish. Here she is, with hull # P5652 still punched into her glistening transom, and her deck seams painted with our topside paint, as Century had done some 58 years ago.

ll the hardware is back from New England Chrome Plating and American Metal Polishing.

We are chafing at the bit to begin putting her back together. Be sure that we will update you when we do.

1958 Cadillac Seville – Interlux Perfection Plus Two Coats

1958 cadillac seville interlux perfection plus varnish

We are nearing completion of a thorough preservation of this early example of cold-molded plywood hull technolong. The 1955 Cadillac Seville sports double cockpits, complete with double windshields. Leveraging a deal they made with GM at the time, she also is adorned with gleaming Caddy chrome trim and the Caddy crown crest. Here we have just finished applying the second of an eventual seven coats of Interlux Perfection Plus varnish.