Bedding the bottom planking in a 1/8” thick layer of 3M5200 without making a huge mess and without creating even more work cleaning it up, is perhaps the most critical component of the last “woodworking” step in fabricating a True 5200 Bottom.
Yes, I know we have covered this topic earlier, but it bears repeating. “Frosting” the plywood inner layer with a full 1/8” thick layer of 5200 is critical, as doing so ensures that there are no voids, and that, when fastened down, the squeeze out will fill the seams between the planks.
Fill the seams, yes, but do so without also filling the fastener countersink, as fairing the surface once the 5200 has cured requires that the countersinks be filled with 3M Premium Marine Filler.
Every, and I mean every spec of 5200 must be removed from the countersinks once the fasteners have been driven home.
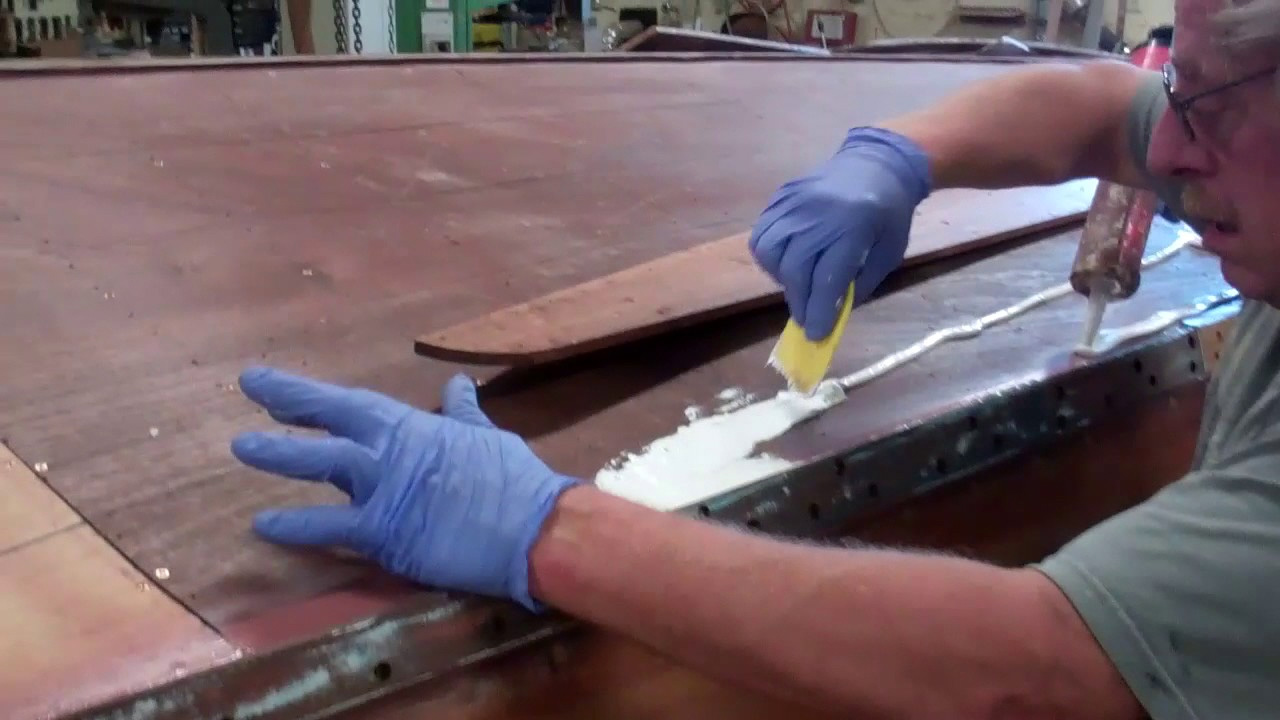
Our method results in minimal infiltration of 5200 into those countersinks. You will need multiple cases of 5200 on hand. Use mahogany 5200 for forward planks that run upward through the waterline. White, which is much less expensive, if fine elsewhere. My rule of thumb for estimating cases needed is 40 – 60 percent of Length Overall (LOA). Since beam, and therefore the width between chines grows with LOA, I plan on closer to 60 percent for a 22-foot boat like this U22. (I am planning to use 12 cases for her.) In response to the many questions the community has sent my way, here is the “chronology” followed at Snake Mountain Boatworks: • Dry fit and fasten all of the planks with a dozen or so fasteners each; • Drill every pilot hole/countersink now; • Remove the planks one at a time, starting at the keel; • Using a permanent marker, draw an outline of each plank – one side and the butt – before it is removed; • Use these outlines to guide frosting one plank area at a time with a 1/8” thick layer of 5200; • Have at least four boxes of latex or, better, nitrile exam gloves and have a large garbage can nearby; • Apply the 5200 using a pneumatic caulking gun in a closely spaced squiggle pattern; • Spread the squiggles into a uniform layer using plastic spreaders; • Lay that one plank in place and begin inserting silicon bronze wood screws by hand, sinking just enough of them as you go to hold the plank in place; • Begin at the forward end of the planks terminating at the stem, using the length of that plank as the lever to slowly bend it into the correct shape; • Once there is a screw in every pilot hole, each of which has been screwed about 90 percent of the way home, drive all of the screws home; and, finally • Make a first pass using plastic scrapers along the plank’s open edge, and along its seam with the previously-installed plank, scooping all the squeeze out from the surface; • Using Interlux 333 Special Liquid – sometimes called special thinner, and lots of rags, clean and clean and clean until all squeeze out is gone. Time to install the next plank ….