Following this morning’s video update on the Dutchman repairs John is executing on the port topsides of the 1946 Chris-Craft Brightside U22, he reached for a heavy, 1-inch chisel and began shaving each repair and its associated TotalBoat Thixo Wood 2.0 two-part squeeze-out until it was fair with the topside planking.
He then ensured there will be zero voids in the seam around each Dutchman.
John release the bungs using a Rota Broach, which increased the diameter of several countersinks, so, rather than using Gorilla Glue, which is cures blonde, he used the same tinted Thixo Wood 2.0 as the adhesive.
He will shave the bungs fair using a Japanese cabinet makers saw, at which time the port topsides will be ready for final longboard sanding.
Once he has completed Dutchman repairs on starboard and sanded it fair, we will flip her over and strip the decks, covering boards et al, sand these surfaces fair and be ready for bleach.
So … you have the slots dadoed and the Dutchmen shaped and trimmed to a perfect fit, all 14 of them on the port topsides in our 1946 Chris-Craft Brightside U22.
Using Jamestown Distributors’ Total Boat Thixo Wood 2.0 two-part epoxy, it is now time for gluing them in place. (We rely on Thixo Wood for all such applications. It contains wood fibers, mixes easily, and issues from the 10 oz. caulking tube in a hue that mimics unstained mahogany incredibly well. (We do add a bit of Interlux Interstain Filler Stain while mixing, which ensures that it disappears when we stain the hull.)
That Thixo Wood 2.0 delivers incredibly strong bonds seals the deal for us.
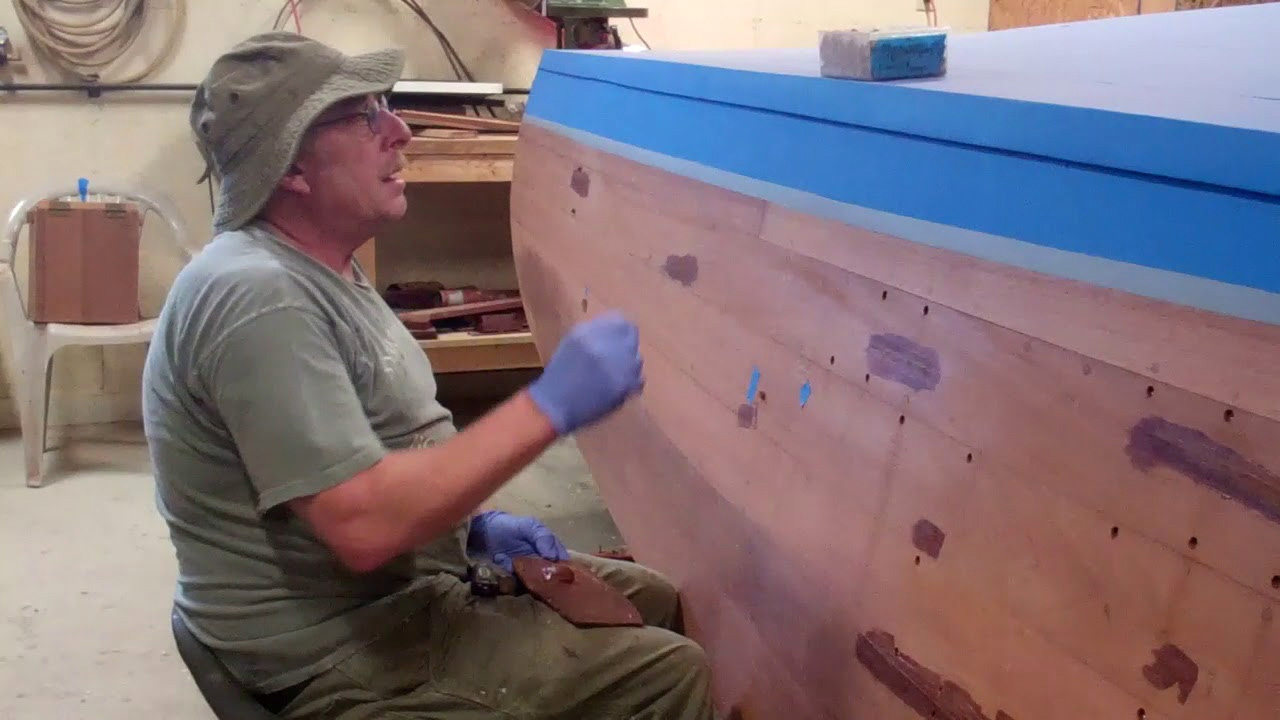
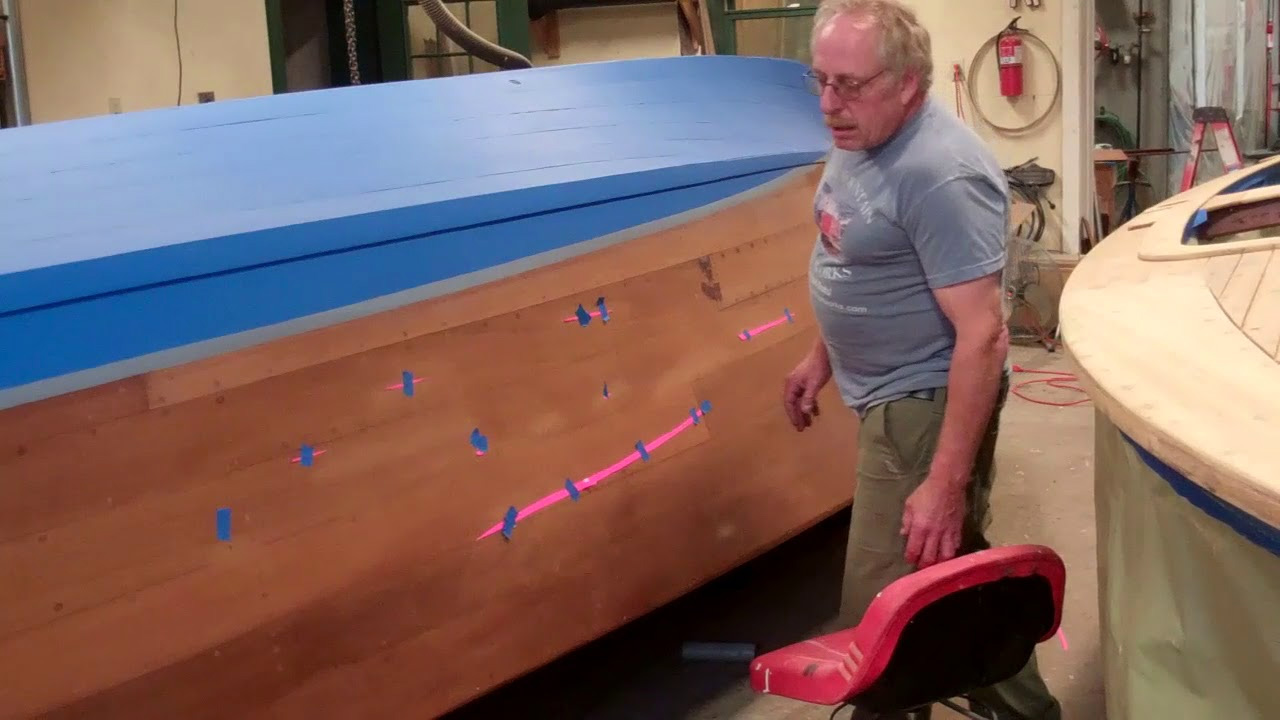
But how are all those Dutchmen secured in place while the epoxy cures? Standing before you is the broad, smooth expanse of the U22’s port topsides. The bottom paint has been applied and cured. These Dutchmen must be clamped tightly into their slots for a permanent repair.
I will ask again, “But how? Ever resourceful, John released selective bungs and fasteners around each Dutchman and then reached for paint stirring sticks and longer #8 wood screws.
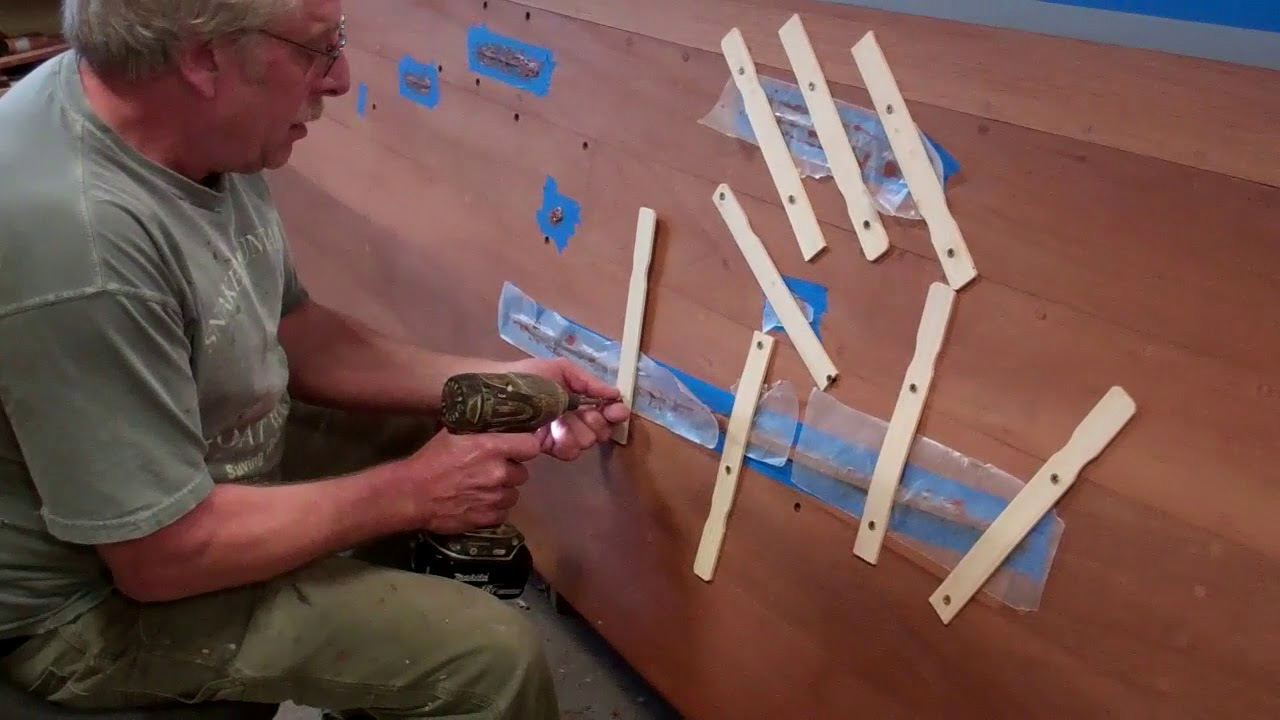
As you see in the clip, after he carefully masks the topsides around each slot, John applies the Thixo Wood 2.0 to the Dutchman and drives it home with a rubber mallet. He then secures each Dutchman with a series of “stitches,” having first placed a sheet of wax paper between the Dutchman-epoxy surface and the wood paint sticks.
The repairs are allowed to cure for at least eight hours, at which time all the stitches are removed.
New silicon bronze screws are driven home and bungs are glued into the countersinks that were released for stitching purposes.
With the wax paper released, John will next carefully chisel each Dutchman, which are fabricated to be proud of the topside surface, until it is fair with that surface.
Now final sanding can begin, followed by flipping her upright.
Once we have stripped the decks and covering boards, bleaching, staining, sealing and, yes, varnishing (!) will follow.
For now John still faces executing five or so Dutchman repairs on the starboard topsides. In the end, though time-intensive, insisting on using a Dutchman strategy, allows us to save every plank on her topsides, transom, decks and covering boards. Every plank that someone replaces is a bit of originality and history lost forever. We save old wood boats rather than transforming them into new “old” boats.
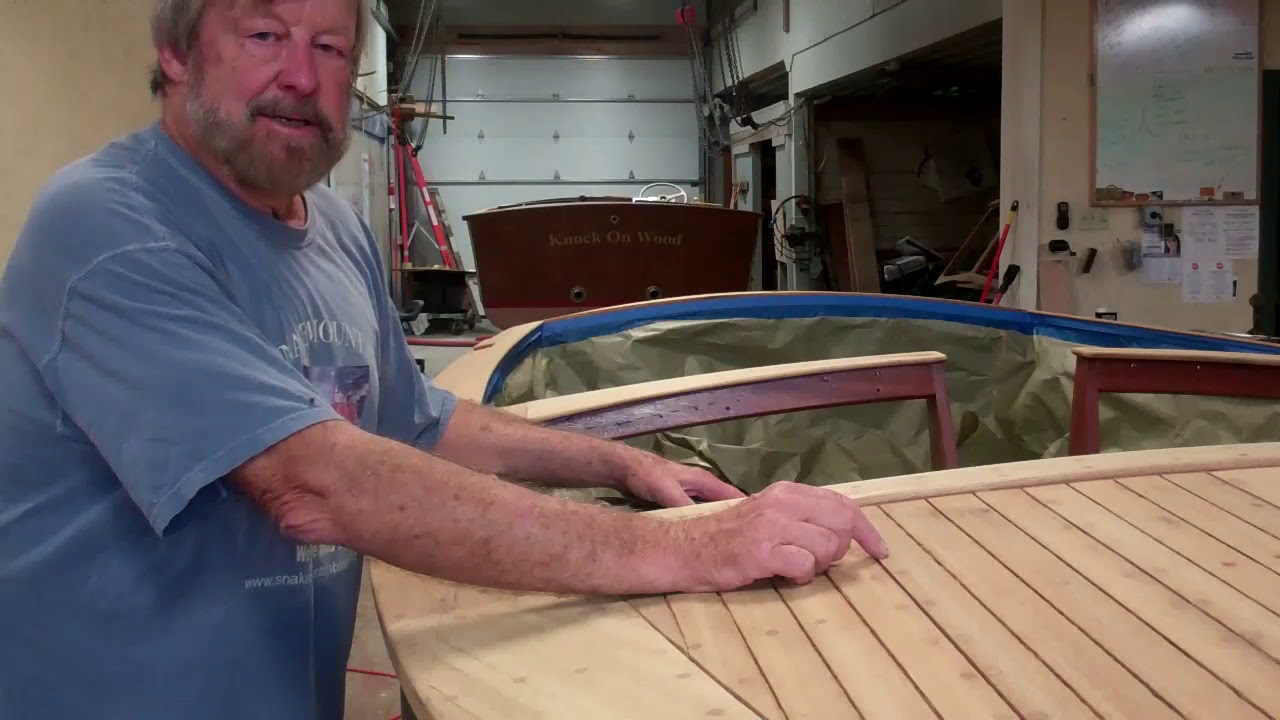
One caution when using the Sandusky Lyman Mahogany Filler Stain. It flashes to a near hard surface very quickly. We dealt with this reality by staining the decks and covering boards one at a time.
But now she is stained, and on Monday we will seal her and then begin applying varnish. What a nice way to end the week!
Today’s bleaching update follows yesterday’s by a bit over 24 hours. We kept the ’59 Chris-Craft 17-foot Sportsman bathed in bleach from a bit after noon through midnight yesterday.
Even though the surface feels dry to the touch, our moisture meter pegged well above 30 percent everywhere on the decks and covering boards. The wood must gas off much more moisture before we can stain it. As it does, the color becomes more and more uniform.
The bleaching process raises grain while it bleeds the tannin out of the fibers, leaving thousands of little feathers, which must be removed to achieve a uniform color when stain is applied.
The challenge is removing the feathers without cutting through the very, very thin layer of bleached mahogany. Sandpaper, even a very fine grit, is just too aggressive, so we reach for coarse Circa 1850 scuff (Scotch Brite) pads from Jamestown Distributors.
A light scuffing, being sure to only do so with the grain, quickly releases the feathers, and subsequently vacuuming using a bristle tool removes them sufficiently. (You might use a tack cloth, but only if you purchase those that are devoid of wax or oil. Depositing either on the surface guarantees seeing a blotch form because the stain cannot penetrate the deposit. But for now we will wait until our moisture meter reads no higher than 15%.
Then the blonde elements will be stained with Sandusky Paint Company Chris Craft Corina Blonde Filler Stain, followed by a mixture of brown and red mahogany Interlux Interstain.
Be sure to allow several days for the stain to cure, lest your application of CPES pulls the stain and kills color uniformity in the process.
According to Tom Koroknay, 893 23-foot Lyman Runabout were built from its introduction in 1957 until the end of 1960.
“The 23-foot Inboard Runabout was one of the best rough-water boats that Lyman ever made…. All of these inboard models were basically earlier versions that were stretched and widened until the desired length was achieved. Thanks to this trial-and-error method, the 23-foot hull was nearly the perfect combination of beam and length and featured the traditional Lyman soft entry, rounded chine, and slight dead rise in the stern…
“Standard inboard construction was used for this model also, but the ribs were increased to 1-1/8-inch with the standard 13/16-inch thickness, and placed on 6-inch centers.” (Tom Koroknay, Legend of the Lakes, p. 98)
It took less than a heartbeat to agree on the transaction when I learned from Dave Ramsey, Ramsey Brothers Restorations in Toledo, Ohio, that hull number E1083, powered by her Chrysler Crown M47, was available.
So I asked Trailer Outlet in Tilton, NH, my go-to source of Sea Lion trailers, to get an appropriately spec’d trailer to me. Joe’s son delivered it last Friday, and I left midday Monday for a trek that took me first to Toledo to load the Lyman and then to Marine City, MI and Robert Henkel’s engine shop, Peter Henkel Inc., to pull the engine for a total rebuild.
With 1,484 miles logged, the Lyman and I arrived in Vermont late last night.
The hull is in remarkably sound shape. That the keel is straight as an arrow is a huge plus. Her four-plank, solid-mahogany transom needs nothing more than stripping to bare wood, bleaching, staining sealing and varnishing.
We will know more once the paint is off the hull, but the crew and I went over it today. Other than the typical gripe-knee gapping, there is little to be worried about.
The foredeck will get most of our attention. The previous owners replaced the foredeck’s port panel with some sort of mongrel plywood. She will have a proper ribbon cut foredeck when we are through.
And the white pegboard ceilings? Happily Dave removed the one on port, but left to us the fun of releasing the one on starboard. (Fortunately these folks cut the peg board around all of the seating and bracing!)
I am certain other surprises await us. For now she’s in storage and in line to come into the shop, but I fully intend to have her on the water soonest after ice-out next spring!
That I began building a great relationship with Dave, his dad and brothers who comprise Ramsey Brothers was the best part of the whole trip!
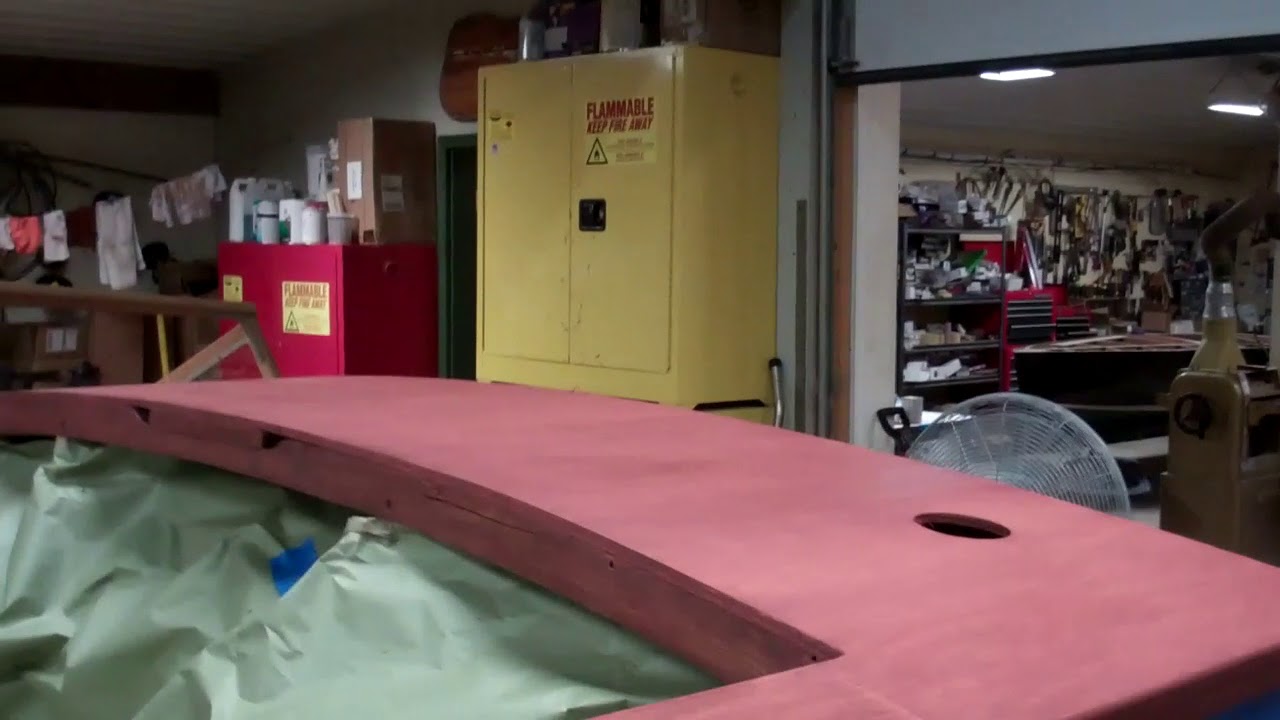
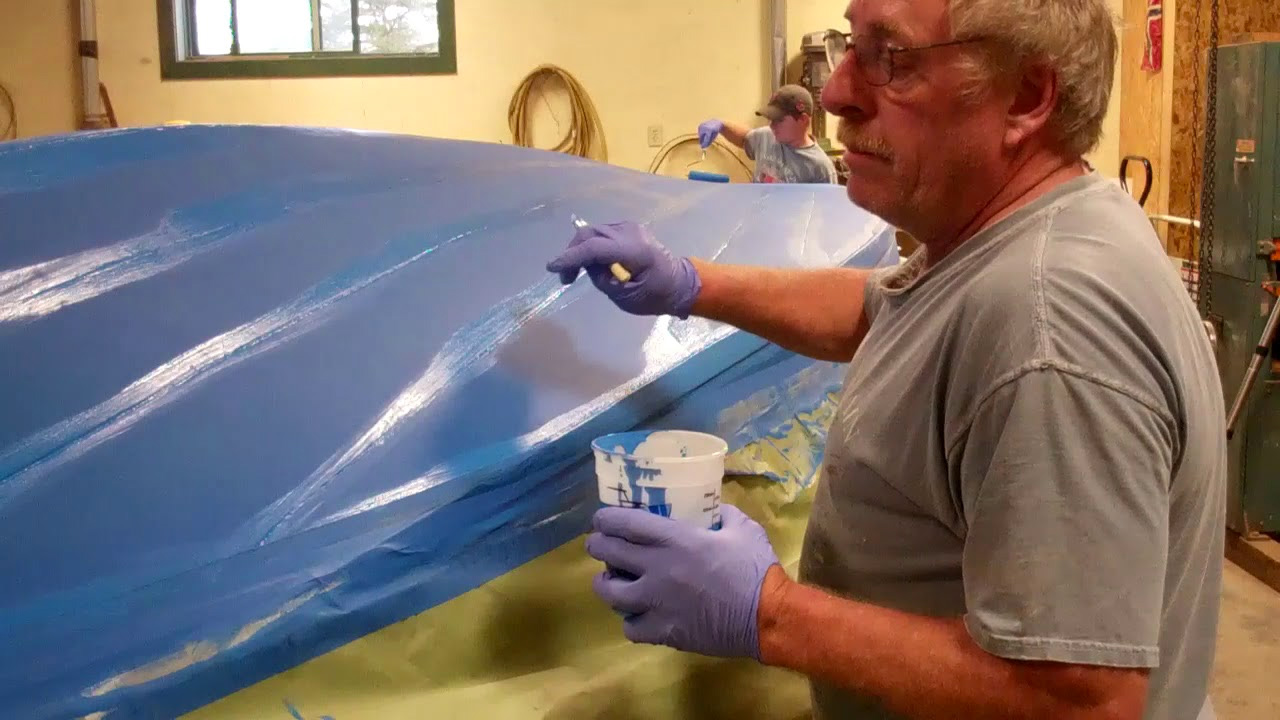
Since the last update video, we have applied five coats of Interlux 2000E two-part primer, followed by the requisite blue bottom paint, ePaint’s Ecominder Antifouling Bottom Paint in this case.
One more coat of ePaint Ecominder, a water-based one-part antifouling paint and this 1946 brightside U22’s True 5200 bottom is complete.
What is ePaint Ecominder antifouling paint? Here is what Jamestown Distributors answers:
New ePaint Ecominder is the greenest and most effective copper-free antifouling paint available.
Ecominder uses a copper-free, water-based, zero VOC paint formula that is safe and easy to apply. It keeps boat hulls clean using hydrogen peroxide generated from sunlight and the environmentally preferred booster biocide Zinc Omadine.
Designed for use on all rigid type surfaces including fiberglass, aluminum, and wood, it is compatible over other bottom paint systems, and can even be applied in cool ambient temperatures. It is very popular in the pontoon market due to its compatibility with aluminum substrates. Ecominder is available in a variety of colors including White, Gray, Green, Blue, and Black.
ePaints contain no tin or copper. Instead of following the age-old method of leaching toxicants that persist in the environment, ePaints employ a novel mechanism to control the attachment of fouling organisms. When immersed in oxygenated water, all ePaints photochemically generate minute levels of peroxides. The minute levels of peroxides make the surface inhospitable to the settling larvae of fouling organisms. Hydrogen peroxide is a potent, but short-lived chemical that has traditionally been used as an antiseptic. Peroxides have been demonstrated to be effective antifouling agents. The peroxides do not persist in the environment because they quickly decompose back into oxygen and water by natural ions dissolved in the water.
Because ePaints contains no copper, they are available in white as well as a variety of bright colors. The lack of copper also ensures that ePaints are compatible with aluminum and other metals in the marine environment. This is not the case with copper-based paints that promote galvanic corrosion with metal boats. ePaints are safer for you, your boat, and our environment.
With a home port of Ahmic Harbour in Magnatawan, Ontario, this U22 lives and plays on one myriad of lakes in Canada’s Muskoka lake region where the water remains clear and pristine. By using Ecominder on her bottom, we ensure that, at least she, will introduce no additional copper to Ahmic Lake. That the paint is water-based, has zero VOCs is a plus for us while applying it in the shop. One more coat, then the paper comes off. One the remaining topside Dutchman repairs are executed and the entire surface, including the transom’s, is sanded fair, she will be flipped upright for the first time in over seven months.
We are just beginning to see a glimmer of the finish line peeking over the horizon!
Paint! I could claim that it seems like only yesterday when we launched the preservation of the mahogany (Brightside) 1946 Chris-Craft U22, but I can’t. In truth it’s been a long, long, and sometimes frustrating slog.
As we replaced most of the bottom and transom framing, both chine frames, and most of both chines; and worked to remove the corkscrew and hog from the hull, days, weeks and months flew by. Were we making progress? Yes, but it was so difficult to see and feel any.
Not now! Her True 5200 bottom is complete to the point of applying her Interlux 2000E InterProtect Primer and her Econominder, copper-free, Chris-Craft blue antifouling paint.
The last of four coats of Clear Penetrating Epoxy Sealer has been applied. Tomorrow, after it has cured, we will hand sand the bottom lightly, thereby preparing a smooth and uniform surface for the first coat of 2000E, which I will apply later today.
We apply the first coat from the keel to the top of the boot stripe, let it cure 24 hours and then mask the boot stripe so we do not build layers beneath the Interlux Brightside Enamel we will use for the boot stripe. Brightside adheres better to Interlux PreKote than it does to 2000E in our experience. PreKote in turn adheres tenaciously to the 2000E.
Four additional thin coats of 2000E will be applied, followed by four coats of Econominder antifouling paint.
Then comes a truly BIG day. We will flip her upright and begin stripping varnish off and bleeding old stain out of the decks and covering boards.
Next comes sanding fair, bleaching, staining and, yes, varnish! Now that will be the day to smile.
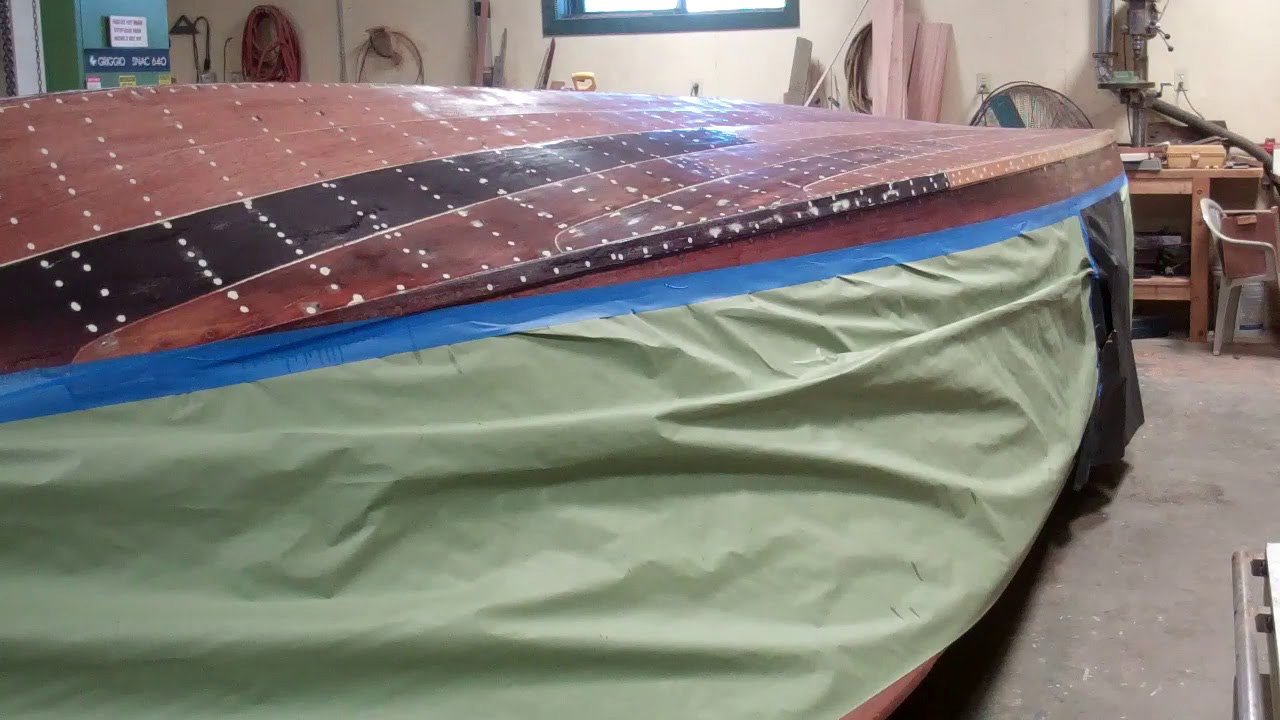
With our 1946 Chris-Craft Brightside U22’s bottom paint is fully cured, our attention turns to the topsides and transom.
Dutchman repairs of dings, dents and gouges will be followed by sanding the surfaces fair, bleaching, staining and sealing with multiple coats of CPES.
Then we will flip her upright and proceed to stripping the decks and covering boards, sanding them fair, bleaching, staining and sealing them with CPES.
Then, finally, finally, finally, we can move towards building what will be 20 coats of varnish.
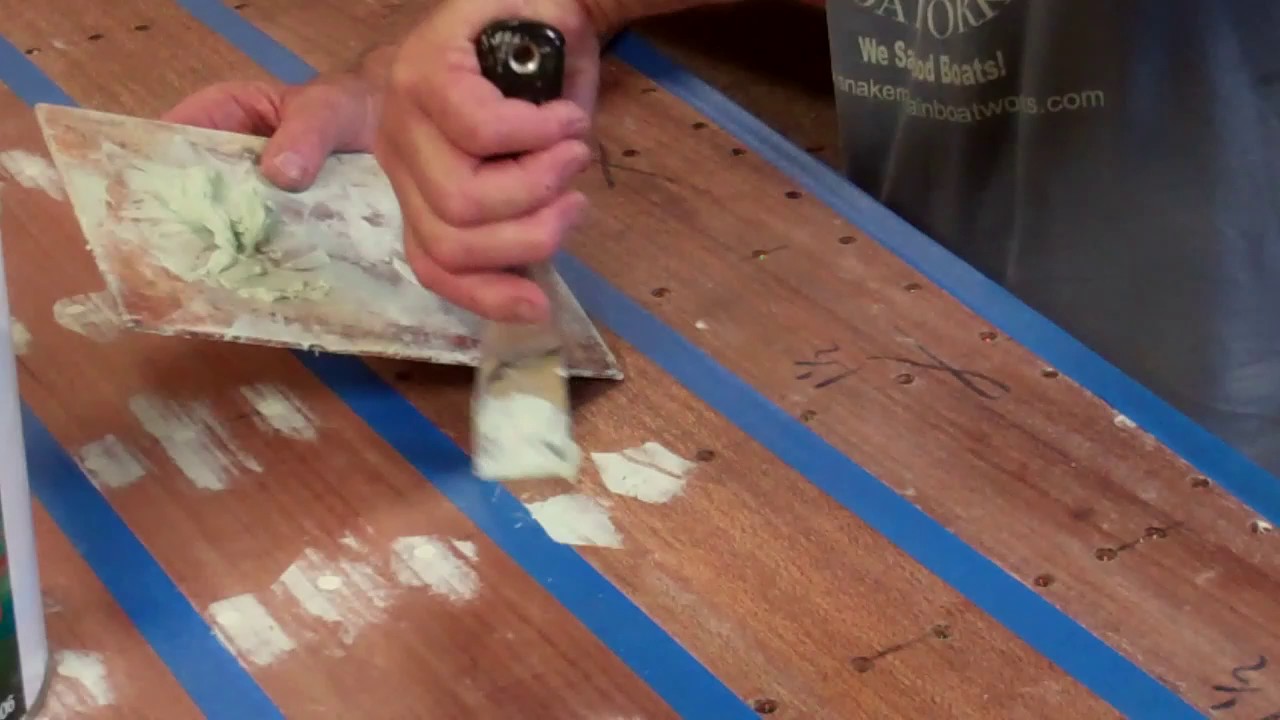
Time to fill a few – thousand – countersink holes!
We use 3M Premium Marine Filler and its associated crème hardener for this purpose.
A caution. Mix the filler in small quantities, maybe about half the size of a golf ball, and drizzle a small dollop of the hardener on it. (If you mixture is noticeably bluish, get spreading NOW because the pot life will be a scant few minutes – 3 – 4.)
John and RJ prefer a yellow body compound spatula to my flexible putty knife, but either can apply the material to the hole.
In theory you make a first pass laying material into the hole, followed by a second one back and 90 degrees from the first. In fact you will, or at least I do, soon discover that three or four swiped removes the excess from the surface surrounding the hole while also filling the hole flush with the surface.
We mask off the seams with narrow blue painter’s tape to ensure that the Premium Filler does not find its way onto the 3M 5200 lying therein. Yes, it will appear to adhere, but be forewarned, it will not and your subsequent “beautiful” bottom paint will end up have splotches everywhere that the 5200 shed the filler.
Allow the first coat to cure, apply a second, and then remove the tape, which reveals more rows of empty countersinks. Yes, the fun is near endless.
Once both sides are filled, fair with a longboard sander and 80 grit, seal all of it with at least two coats of CPES, and begin laying on what will be five coats of Interlux 2000E Two-Part Epoxy Primer (Barrier Coat), followed by the bottom paint of your choosing.
3M5200, signals a major, major milestone fading into our wake, as we work towards completing this 1946 U22’s True5200 bottom.
Just as this one disappears over the aft horizon, a new one has popped up ahead of us – filling and fairing thousands of fastener countersinks with 3M Premium Marine Filler.
But first we will allow the 5200 to cure, while the Acetone we’ve applied to the seams and butt joints following cleaning with Interlux 333, accelerates the curing process.
Before that can happen, however, each seam and joint must be masked with blue painter’s tape, lest the Premium Filler finds its way onto the 5200. The filler will not adhere well to the 5200, which guarantees flaking paint down the road.
In our experience filling the countersinks requires three applications with sanding between the first and second, and thorough fairing after the third will cure.
But for now she will just sit, and then my fun begins.