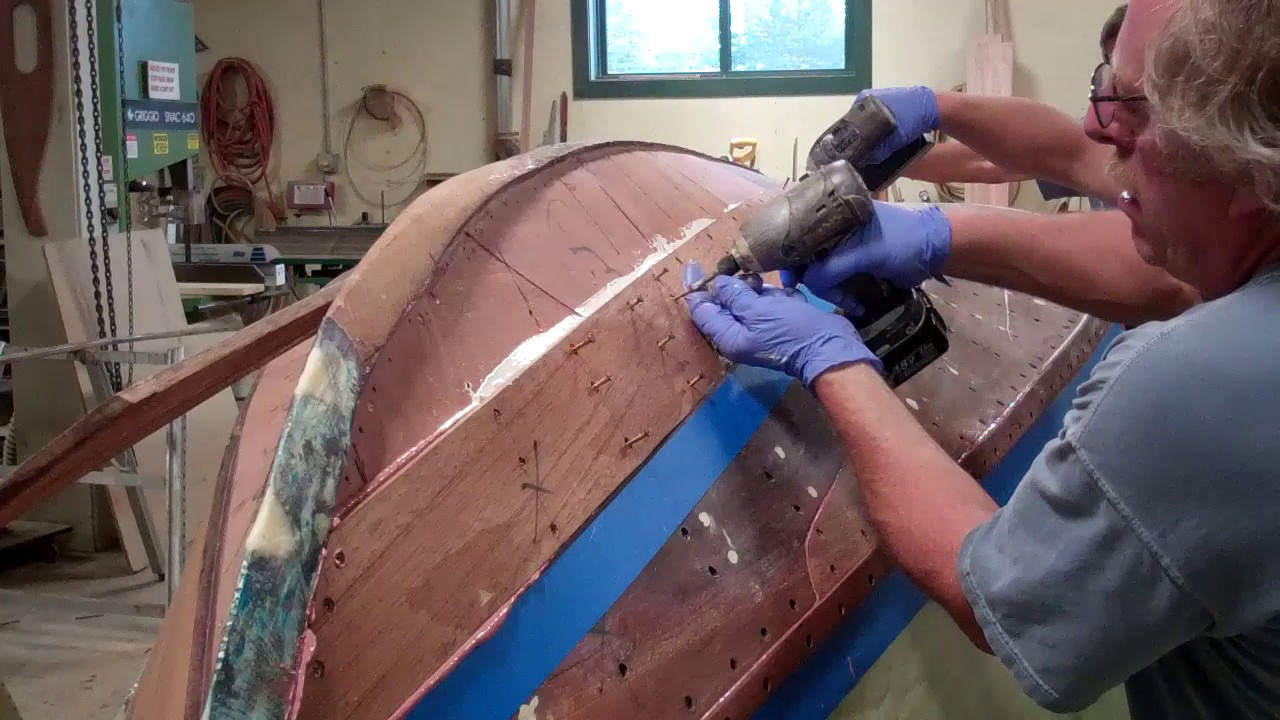
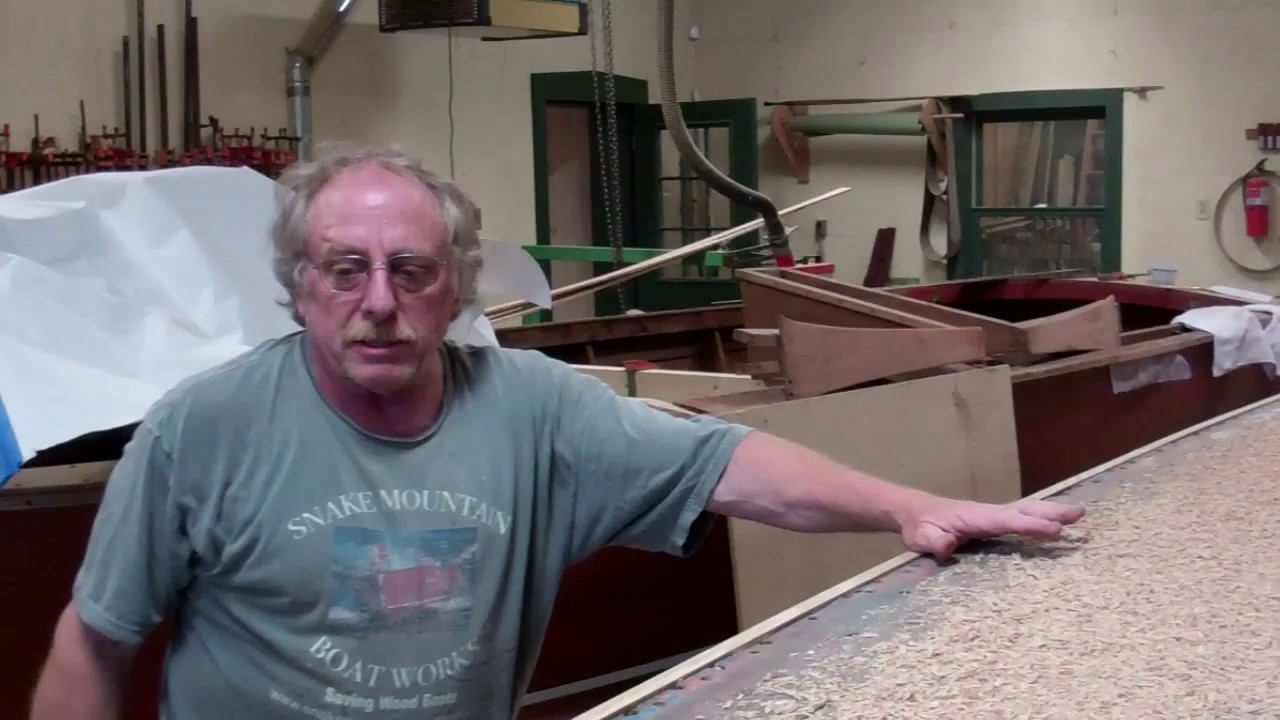
This update continues following as we install the starboard bottom planks to our 1946 U22.
Notice the blue painter’s tape we use to mask the seam edge of each installed plank.
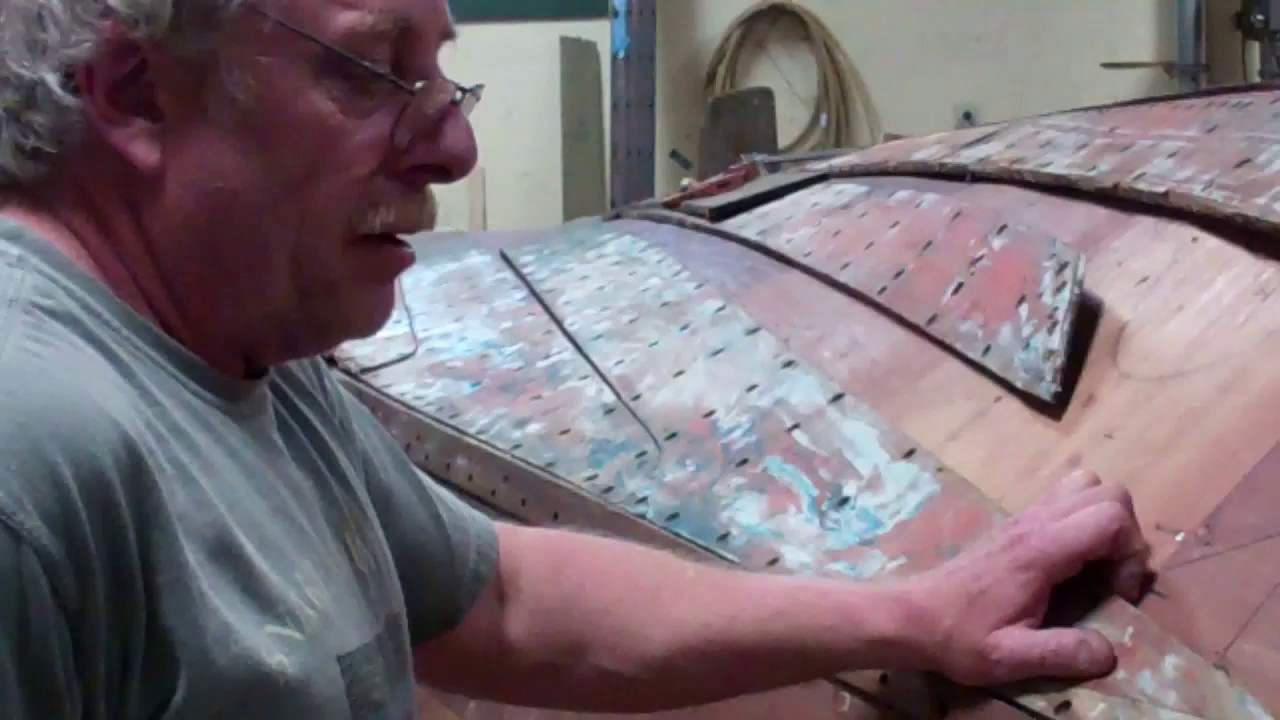
Doing so allows the squeeze out from the seams flow onto the tape rather than an already-cleaned and fully-installed plank. We have one partial and one full plank left to install on starboard. We have consumed a bit over 5 cases of 3M5200, four boxes of nitrile exam gloves, 2 gallons of Interlux 333 and over 1,000 fasteners by this point.
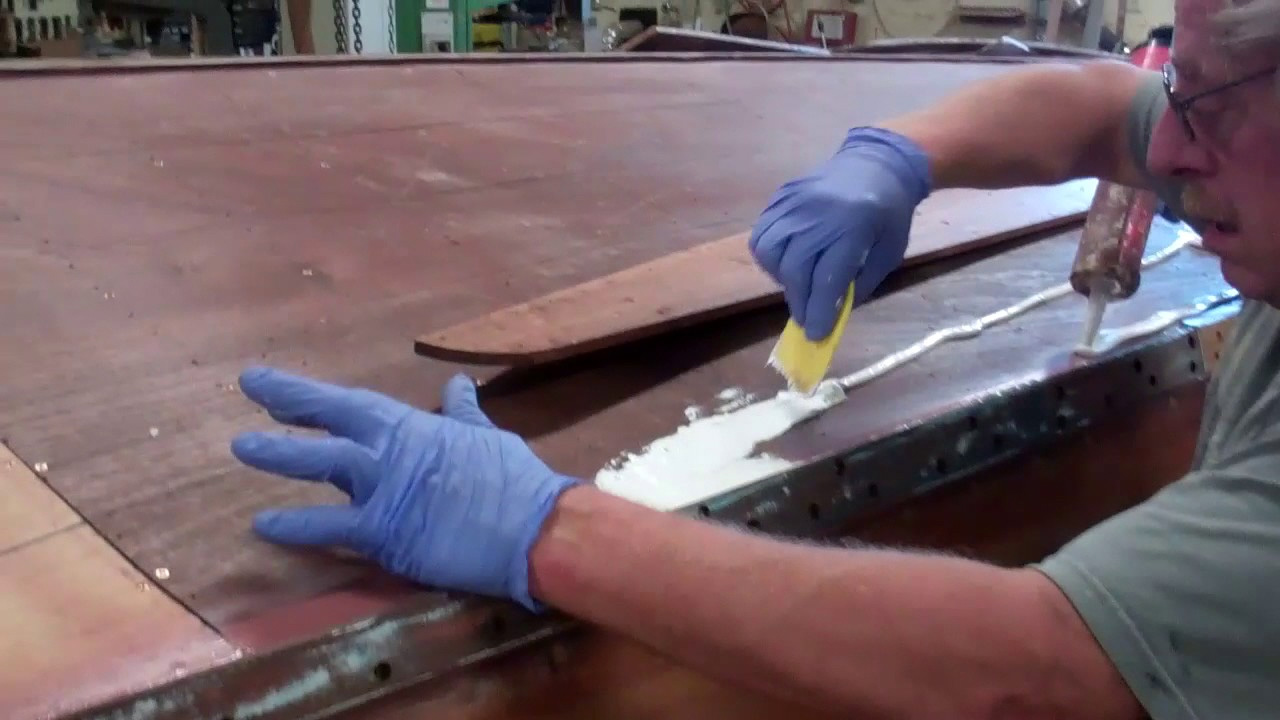
Bedding the bottom planking in a 1/8” thick layer of 3M5200 without making a huge mess and without creating even more work cleaning it up, is perhaps the most critical component of the last “woodworking” step in fabricating a True 5200 Bottom.
Yes, I know we have covered this topic earlier, but it bears repeating. “Frosting” the plywood inner layer with a full 1/8” thick layer of 5200 is critical, as doing so ensures that there are no voids, and that, when fastened down, the squeeze out will fill the seams between the planks.
Fill the seams, yes, but do so without also filling the fastener countersink, as fairing the surface once the 5200 has cured requires that the countersinks be filled with 3M Premium Marine Filler.
Every, and I mean every spec of 5200 must be removed from the countersinks once the fasteners have been driven home.
Our method results in minimal infiltration of 5200 into those countersinks. You will need multiple cases of 5200 on hand. Use mahogany 5200 for forward planks that run upward through the waterline. White, which is much less expensive, if fine elsewhere. My rule of thumb for estimating cases needed is 40 – 60 percent of Length Overall (LOA). Since beam, and therefore the width between chines grows with LOA, I plan on closer to 60 percent for a 22-foot boat like this U22. (I am planning to use 12 cases for her.) In response to the many questions the community has sent my way, here is the “chronology” followed at Snake Mountain Boatworks: • Dry fit and fasten all of the planks with a dozen or so fasteners each; • Drill every pilot hole/countersink now; • Remove the planks one at a time, starting at the keel; • Using a permanent marker, draw an outline of each plank – one side and the butt – before it is removed; • Use these outlines to guide frosting one plank area at a time with a 1/8” thick layer of 5200; • Have at least four boxes of latex or, better, nitrile exam gloves and have a large garbage can nearby; • Apply the 5200 using a pneumatic caulking gun in a closely spaced squiggle pattern; • Spread the squiggles into a uniform layer using plastic spreaders; • Lay that one plank in place and begin inserting silicon bronze wood screws by hand, sinking just enough of them as you go to hold the plank in place; • Begin at the forward end of the planks terminating at the stem, using the length of that plank as the lever to slowly bend it into the correct shape; • Once there is a screw in every pilot hole, each of which has been screwed about 90 percent of the way home, drive all of the screws home; and, finally • Make a first pass using plastic scrapers along the plank’s open edge, and along its seam with the previously-installed plank, scooping all the squeeze out from the surface; • Using Interlux 333 Special Liquid – sometimes called special thinner, and lots of rags, clean and clean and clean until all squeeze out is gone. Time to install the next plank ….
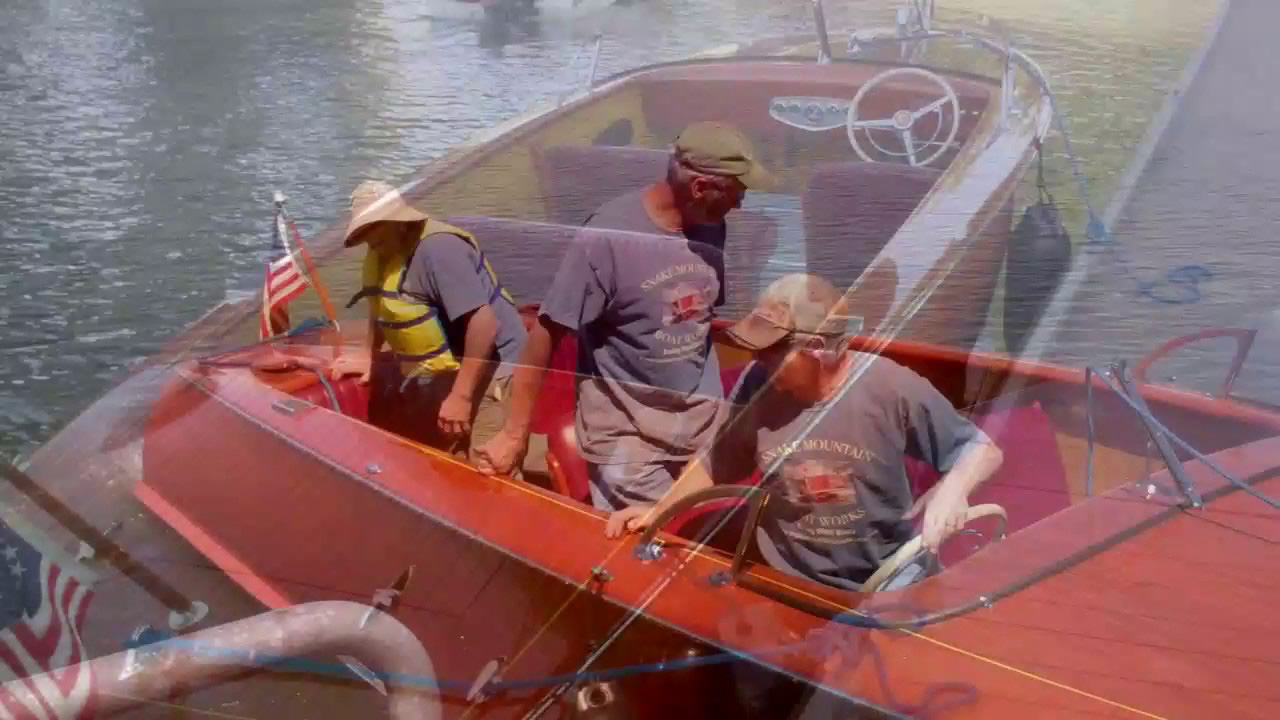
Here we are at the Lake Champlain ramp, ready to launch Voodoo Child for the first time in at least 17 years. Yes, my heart is racing just a bit in anticipation.
Fran Secor, Otego, NY, the northeast US’ foremost outboard preservation pro, and a great personal friend of all of us, drove the 200 miles that lie between us to be here, “I would not miss this opportunity for anything.”
Yes, the resulting clip is brief, mainly because the video guy’s Flip HD gratuitously stopped recording during the up-close drive by’s. I decided to post it anyway. Yes, a couple of minor issues cropped up, like a balky shift linkage and a too-loose rudder stuffing box, which we will correct, and then take her out again.
The one slightly frustrating reality is that the Hemi is now a new engine. The rings, valves, bearings, etc. must be broken in, which translates into 2500 max RPMs, and continually raising and lowering the throttle between 2000 and 2500 RPMs. No full throttle… Yet.
What almost startled all of us is that John had set the idle at 300 RPMs as a starting place. I expected stumbling and loping, but no, the Hemi just purred. And, when RJ hit the throttle, the RPMs increased smoothly as Voodoo Child leapt forward.
So… she ran well. All systems, save for the balky shift linkage, functioned perfectly.
Time to tweak her a bit and get her back out on the water!
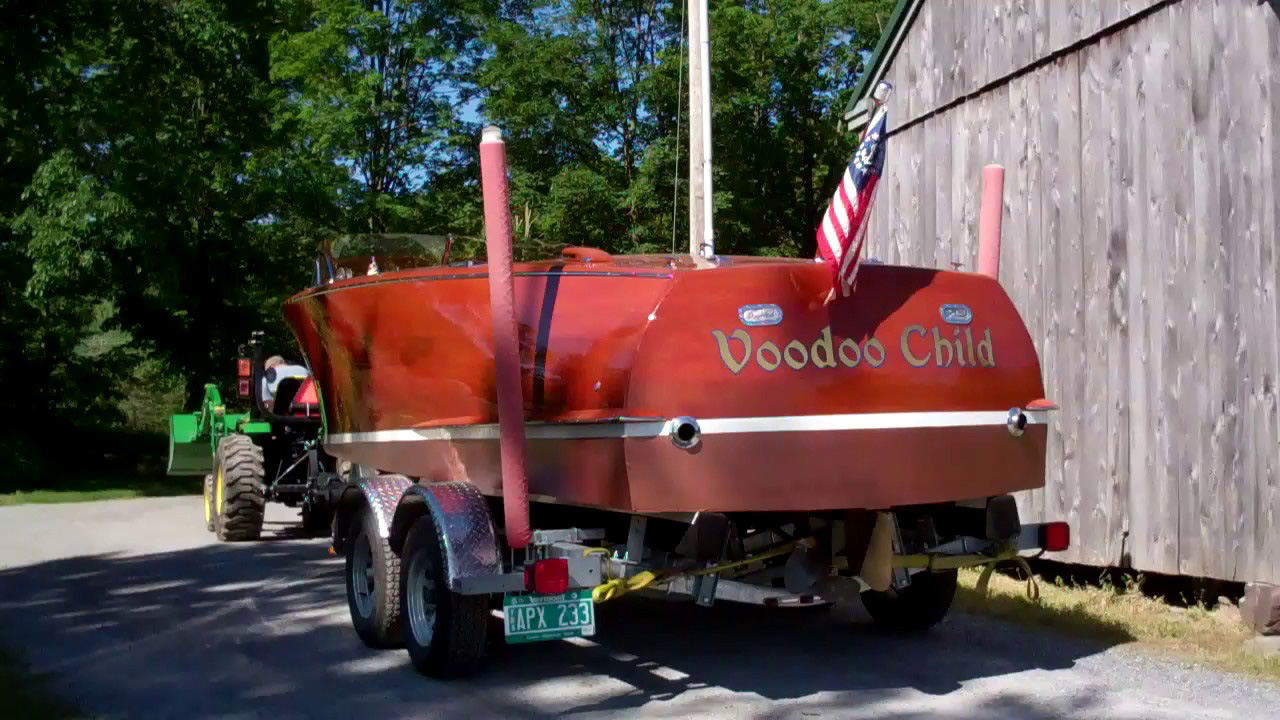
Voodoo Child arrived here from Pointe au Beril, Ontario, CA on October 27, 2015. Now, some twenty months later, she is leaving her comprehensive preservation process in her wake.
Save for a new RAYCO tank, new bottom inner skin and updated upholstery, nothing from her Model 110-S, dual quad four, 331 cubic inch, V-drive Hemi to the smallest piece of hardware has been replaced.
Her preservation included:
Every piece of wood, inside and out, was stripped bare and sealed with three coats of CPES.
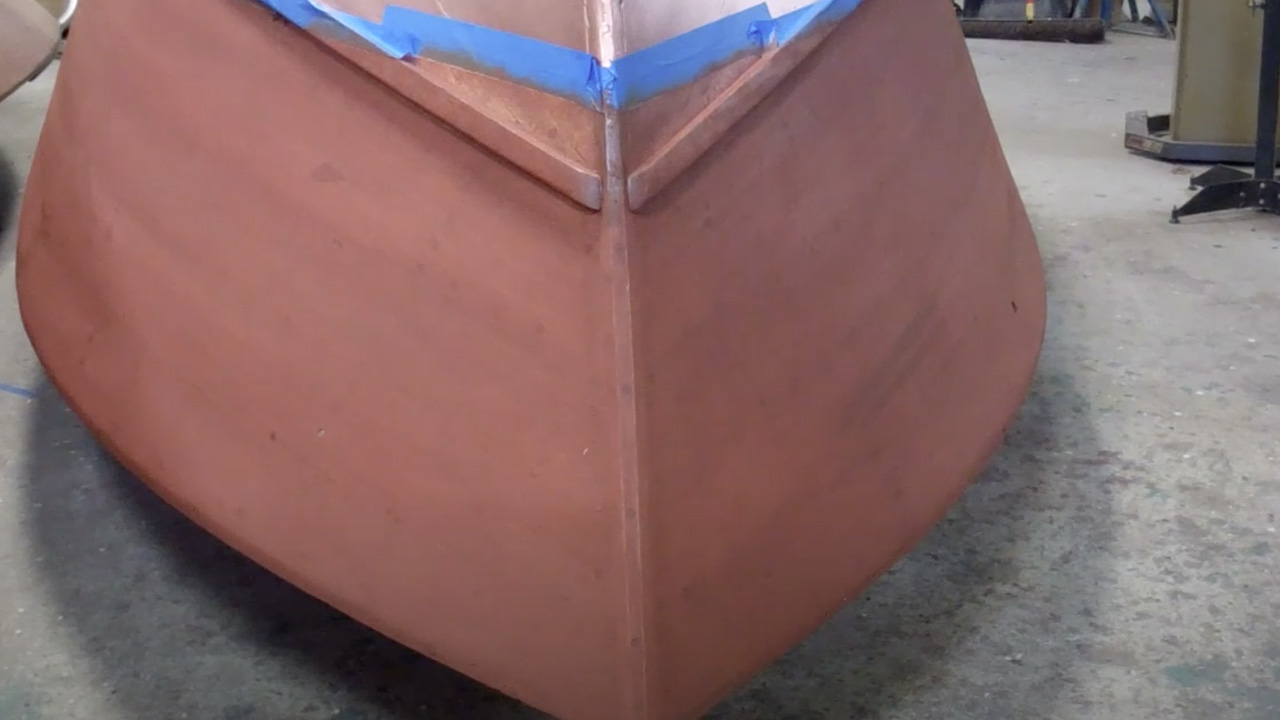
She received a True 5200 Bottom. While she now sports a new inner skin of 1/8” Aquatek marine plywood, her original bottom planking was in perfect condition and is now back in place. Five coats of Interlux 2000E Two-Part Epoxy Primer (barrier coat)
Robert Henkel, Peter Henkel, Inc., Marine City, MI, executed a complete mechanical and cosmetic tear-down and re-build.
Mickey Dupuis, Custom Metal Restoration, Holyoke, MA, transformed her hardware into jewelry, as is his only standard.
Shauna, Kocian Instruments, MN, restored the gauge panel and gauges to show quality without switching out any of the gauges.
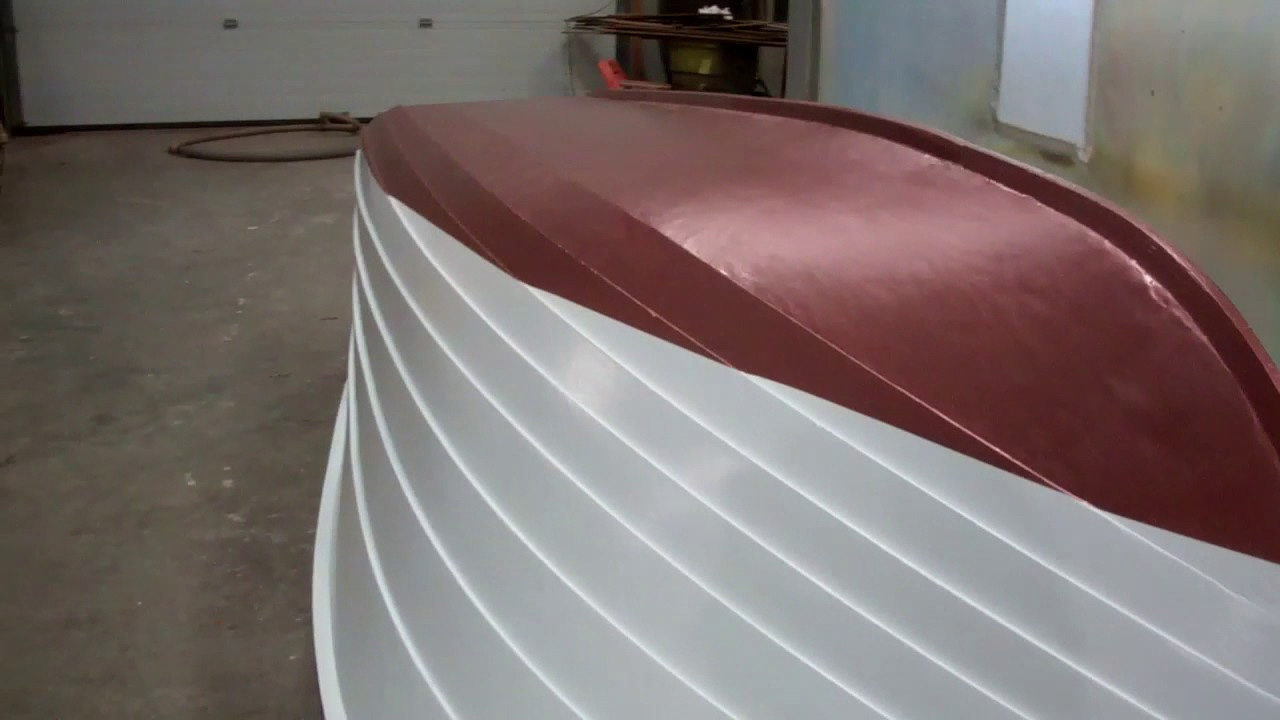
We stripped her hull to bare wood, sanded it fair and applied a new finish, the final step of which was buffing her twenty coats of Pettit Hi-Build varnish.
Soon she will live on her new ShoreStation lift that is complete with a vertical shade panel so that she need not roast under a mooring cover.
“All” we need to do now is test her, execute some final tweaks and correct any issues that pop up during her sea trial, oh, and finish assembling the lift.
Haven’t seen it snow white oak before? Well now you can as flakes fly off the newly fabricated chine under John’s power plane.
The chine must be trimmed to being fair with the bottom planks. John uses the power plane to take the surface down to within 1/8” of the planks. Then he reaches for his favorite “finishing” took, a 3” x 8” Makita belt sander.
By the end of today, he will be finished fairing the new chine. Tomorrow we will work with him as we begin fabricating new bottom planks. (We are saving and reinstalling the three mahogany planks the forward ends of which sweep upward through and terminate above the boot stripe. These have been carefully cleaned, sanded and have had their back sides sealed with CPES.
Additionally, the garboard planks will not be fabricated until all other planks are in place.
That way we can scribe these planks to the actual width and shape remaining after all others are in place. Meranti is our go-to material for bottom planking. Click here to appreciate why and how it differs from genuine mahogany and Sapele.
Working from the chine inward, each plank will temporarily installed, and the garboard plank will be rough cut and then scribed to fit.
All of them will then be released and sealed with three coats of CPES, with the second coat being applied immediately following the first, which delivers enhanced adhesion between coats, and enhanced penetration into the plank’s fibers.
Final installation involves copious amounts of 5200, a continuous layer at least 1/8” thick is required, which translates into cases and cases of 5200. I will be sure we have ten cases on hand, along with at least 1,200 silicon bronze wood screws.
Well, you will see what I mean when we get to that point, but very soon, this elegant girl will be sporting a brand new bottom, on its way to becoming a True 5200 Bottom once we’ve applied five coats of Interlux 2000E Two-Part Epoxy Primer (barrier coat.)
With all painting completed above and below the waterline, save for the boot stripe, our 1960 Cruisers Inc. Seafarer preservation project has her finish line in sight.
Below the waterline:
Once we had stripped, sealed and installed the keel, we sanded her fair and sealed her with three coats of CPES.
Three coats of Pettit Tie Coat Primer were applied, with hand sanding between coats – 100, 120 and 180 grit in succession, followed by a thorough cleaning with Pettit T120 solvent thinner.
Three coats of Pettit Hard Racing Bronze Enamel were rolled and tipped, which left the surface smooth and glossy.
Above the waterline:
Her strakes were sanded fair and sealed with three coats of CPES.
Three coats of Interlux Pre-Kote Primer were applied, with hand sanding between coats – 120, 220 and 320 grit in succession, followed by a thorough cleaning with Interlux Special Liquid 333.
Three coats of semi-gloss white Interlux Premium Yacht Enamel were rolled and tipped. Hand sanding with 320 grit between coats assured us of a flat, slightly glossy surface.
We will give the paint a few days to cure before masking off and applying her fire red Interlux Brightside boot stripe.
With the stem and transom stripped, sanded fair, stained and sealed, we will shortly be applying the first of at least ten coats of Pettit Easypoxy Hi-Build Varnish, again hand sanding after coats 4 and 8, and possibly 10, before we apply the final coat.
With her trailer having been converted from rollers to bunks, as is correct for wood hulls, fitting the trailer to her will conclude our work.
Then she will return to Lake Placid, NY, where her eminently capable owners will enjoy completing a cosmetic freshening of the decks, gunwales and interior.
Stained! Finally we see an early hint of here elegance. Yes, the hull’s surface is deadly dull right now, but only until we begin applying Clear Penetrating Epoxy Sealer.
Because we used Interlux Interstain Wood Filler Stain, we will give it a full week to cure. When we have not done so, we fought the CPES, which pulled the semi-cured stain out of the wood. Brushing the CPES on created the worst problems.
Allowing the stain to cure for a full week stopped the bleeding.
Yes, we have experimented with Interlux Wood Sealer, but, as Don Danenberg has said, it is just not CPES in terms of its performance. Even worse, we tested masking by applying various tapes – blue painter’s, Frog, and even gaffer – to test panels that had been sealed with the Interlux product. In way too many cases, pulling the tape took the sealer with it, leaving dull declivities behind.
That said, we will begin sealing her hull next Monday, applying the first two coats one immediately after the other, per Danenberg’s recommendation.
We may apply a base coat of varnish before flipping her right-side-up, but that’s a decision for some time next week.
Right now, as the Dutchmen begin disappearing with the staining application, it is just super to see her coming back to where she was many decades ago.
The 1959 17’ Chris-Craft Deluxe Sportsman passed several critical milestones this week. All Dutchman repairs, and there were many of them, including replacing half of the stem, have been executed.
Two of the most challenging repairs involved the framing at the top of both aft corners of the hull. Extensive rotted material was released with new framing fabricated and installed. Dutchman repairs on both corners completed the task.
John replaced well north of two-hundred fasteners that had failed, each of which has been bunged anew.
Sanding the transom and topside planking fair and flat followed, and proved to be a bear of a challenge. The boat has been sitting and exposed to the elements for some decades, during which time the topside planking expanded and contracted, and became bowed in the process. John was able to save every plank and deliver a completely flat outcome. Doing so, however, required starting with 40 grit paper and sanding cross grain with our longboard, inline sander. (Sanding with the grain would only perpetuate the rolling side planking.)
Once the high surfaces were sanded flat, John sanded with the grain, starting with 40 and progressing through 60, and finishing with 80 grit.
As shown in the addendum to the initial video, we then began bleaching these surfaces in the early afternoon on the 20th, using Daly’s Two-Part Wood Bleach, and kept the wood wet with repeated applications until about 7:00 PM that day.
The second half of this video shows you the results.
Next we will sand lightly with 320 grit, just enough to knock off any feathers raised by the bleaching process, and then stain using Interlux Interstain Wood Filler Stain, two parts brown to one part Chris-Craft red mahogany stain.
We will give the stain four days to cure before sealing these surfaces with CPES, after which we will apply one sealer coat of Pettit Easypoxy Hi-Build Varnish, and flip the hull right-side up. Such a satisfying way to end the week!
We have two goals for this video: provide an update on our 1959 17’ Chris-Craft Deluxe Sportsman preservation project, as well as an, albeit compressed, clinic on topside Dutchman repairs. As is clear in the clip, the bottom painting milestone has evaporated far into our wake. Applying five coats of Interlux 2000E Epoxy Primer – barrier coat – was followed by applying three coats of Pettit hard Racing Bronze Enamel.
Why three coats when Pettit recommends only two? We always sand the first coat thoroughly, even to the point that the 2000E “ghosts” through over much of the bottom. Yes, doing so costs time and, on this boat, an extra quart of bottom paint, but sanding also improves adhesion and results in a flatter surface.
The entire subject of the pros v. cons of employing Dutchman repairs to preserve the maximum-possible amount of original planking is much like asking five economists to predict next year’s inflation rate. You get at least seven conflicting forecasts and explanations for same from the economist, and at least as many from those taking various positions on the Dutchman.
Simply put, since we are preservationists first and foremost, we have and will continue reaching for one of John’s magically-disappearing Dutchmen whenever doing so saves a plank.
As is clear from this clip, John is saving many planks on both port and starboard for this classic 1959 Chris-Craft’s topsides.
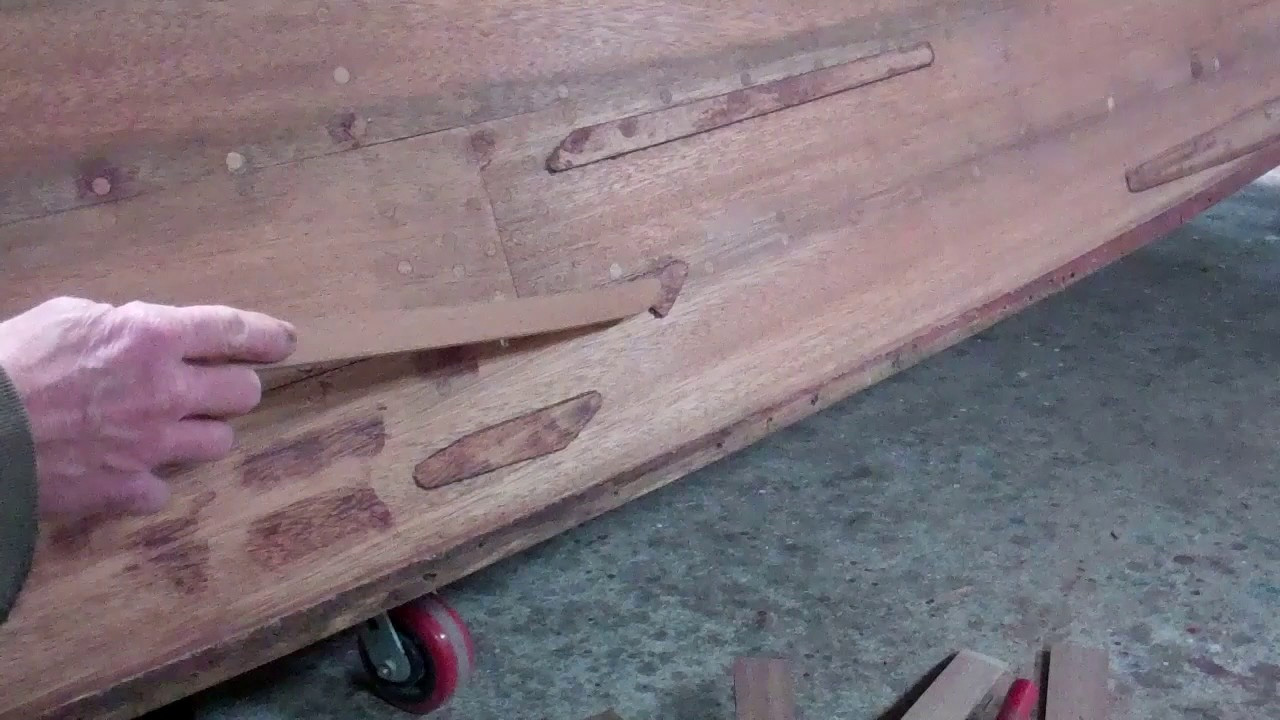
Our 1946 Chris-Craft Mahogany (Brightside) U22 project enters the bottom planking fabrication stage today. We will replace all existing planking, which is mostly cedar, with newly fabricated mahogany.
Yes, we abhor being unable to save the original planking, but most of it is just too oil-soaked, split and broken. Not replacing these planks means a bottom that is not well adhered to the 3M5200, and cannot hold paint from amidships aft.
John and I are dry fitting the original planks in place, and will scribe them on the plywood skin. Given the structural work this hull has received, especially removing the twist and hog from it, means that some of these planks, and especially those running to the stem, must be sanded in to fit.
Once we are confident we have a perfect set of pattern planks, we will scribe them to new mahogany.
The new planks’ faces and edges will be thoroughly sealed with CPES before we begin laying them down.
Following a final application of CPES to all exterior surfaces, we will begin applying the first of five coats of Interlux 2000E barrier coat, followed by three coats of period-correct blue antifouling paint.