1955 20′ Lyman Runabout Topsides and Bright Work Nearing the Finish Line

1955 lyman runabout topsides bright work

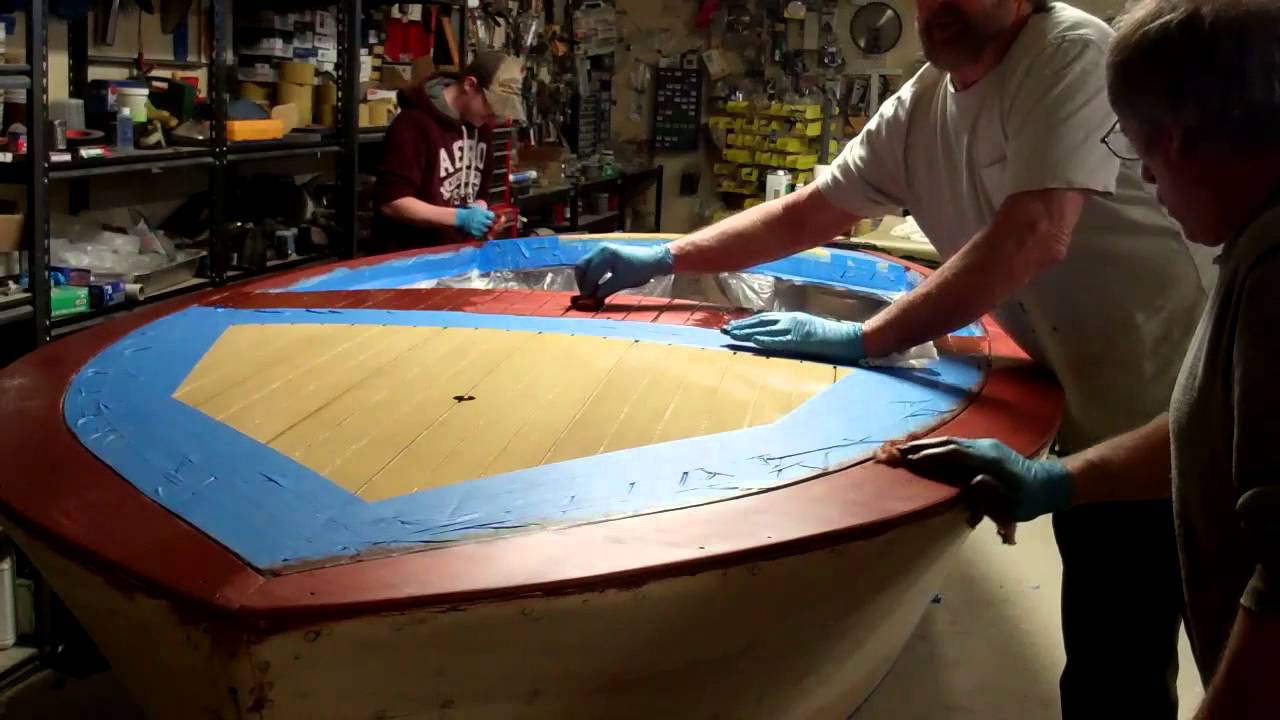
We are at the most enjoyable point in each of our restoration projects. Every bit of stripping and deconstuction is behind us. The lapstrake topsides and boot stripe have received their final coat of Totalboat Wet Edge polyurethane paint.

We could not be more pleased with the new-to-the-markiet paint line from Jamestown Distributiors’. Wet Edge is positioned to challenge Interlux Brightside. We have tested it on half a dozen topsides by now, and will standardize on this paint, one which trumps Brightside by every criterion, but especially in terms of gloss and a curing process that leads to a virtual complete absence of brush marks. (We roll and tip this paint, and have applied three coats over three of the primer.)

The bottom was scraped completely clean, before 3M 5200 was applied to seal every seam. She then received three coats of Pettit Tie Coat Primer, followed by three of Sandusky Lyman Tan Antifouling paint.

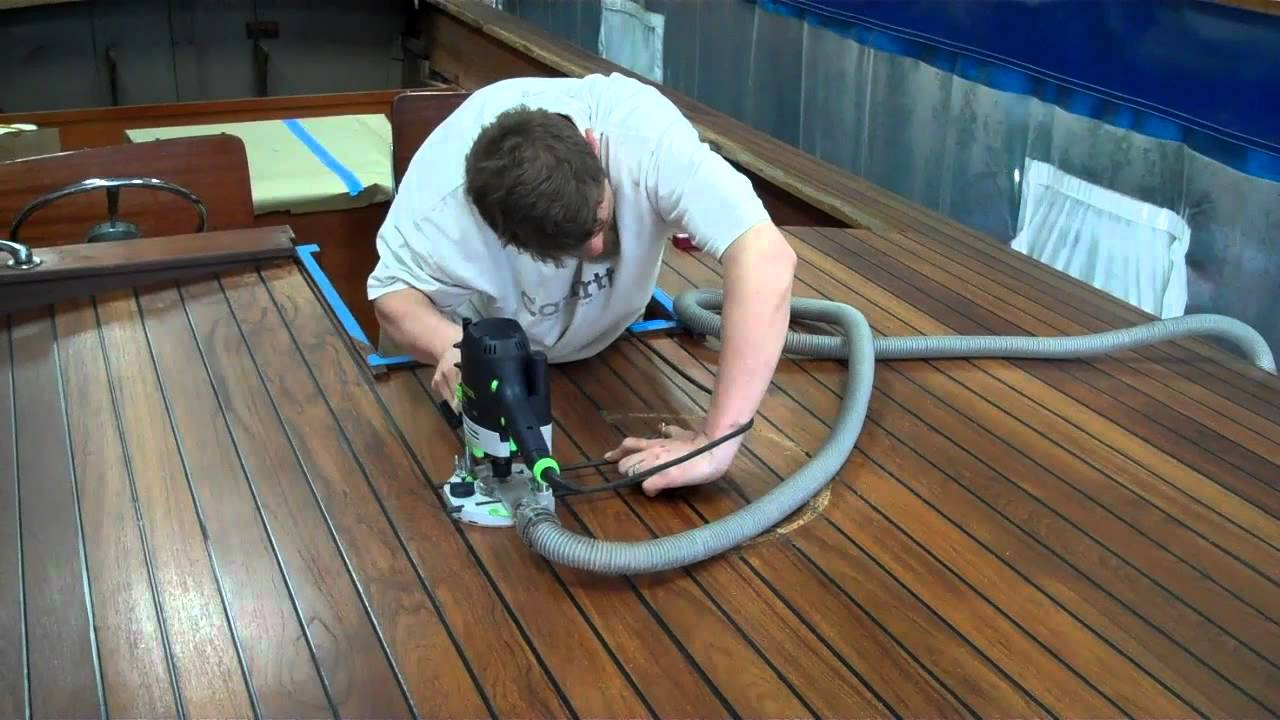
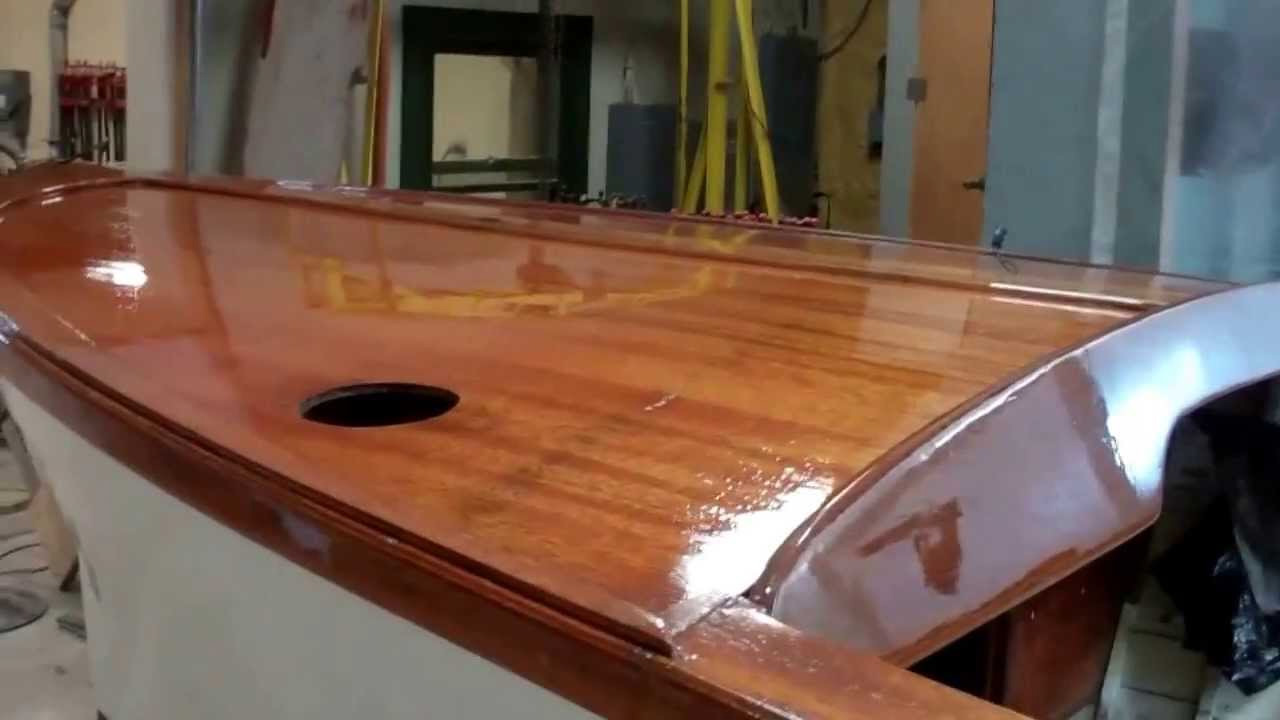
We have four coats of Captain’s Varnish Ultra Clear 2067 on the transom and two on the decks and covering boards as I type. The ceilings are next.

Using Captain’s grows out of conversations with several well-respected Lyman owners whose judgement I respect. Since she is a SMB-owned boat, she’s become our test vessel for purposes of bright work.

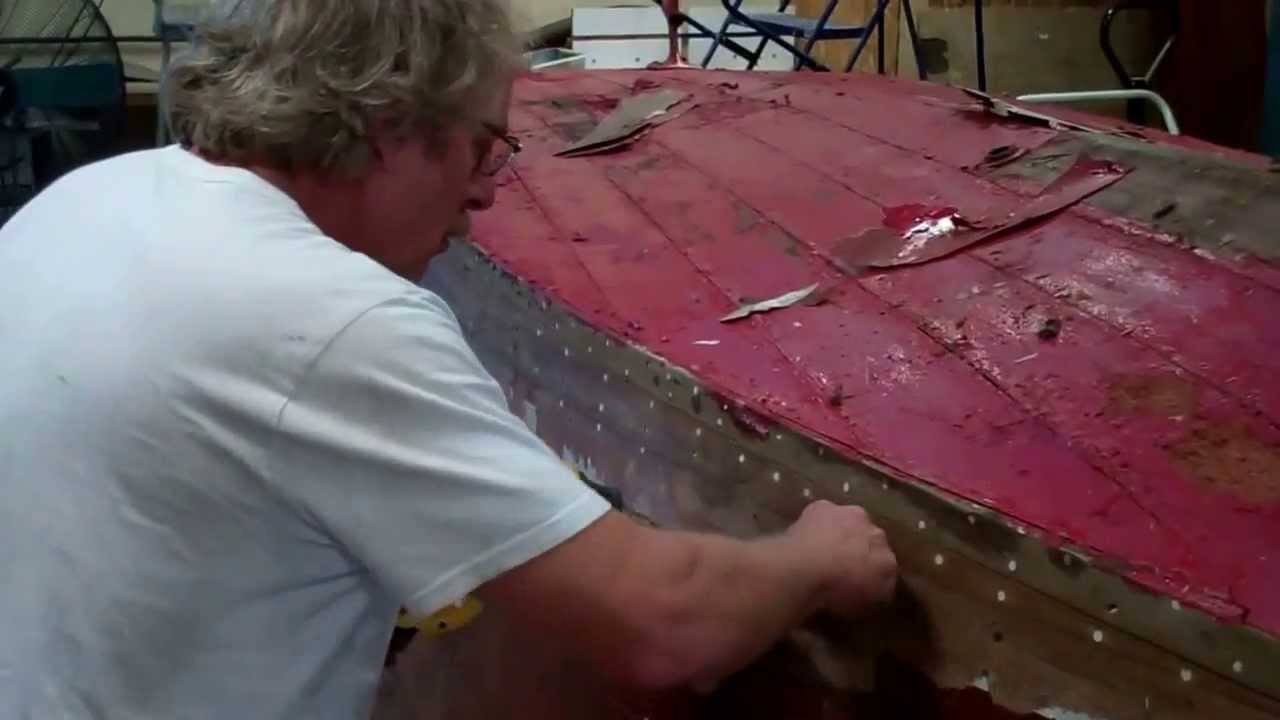
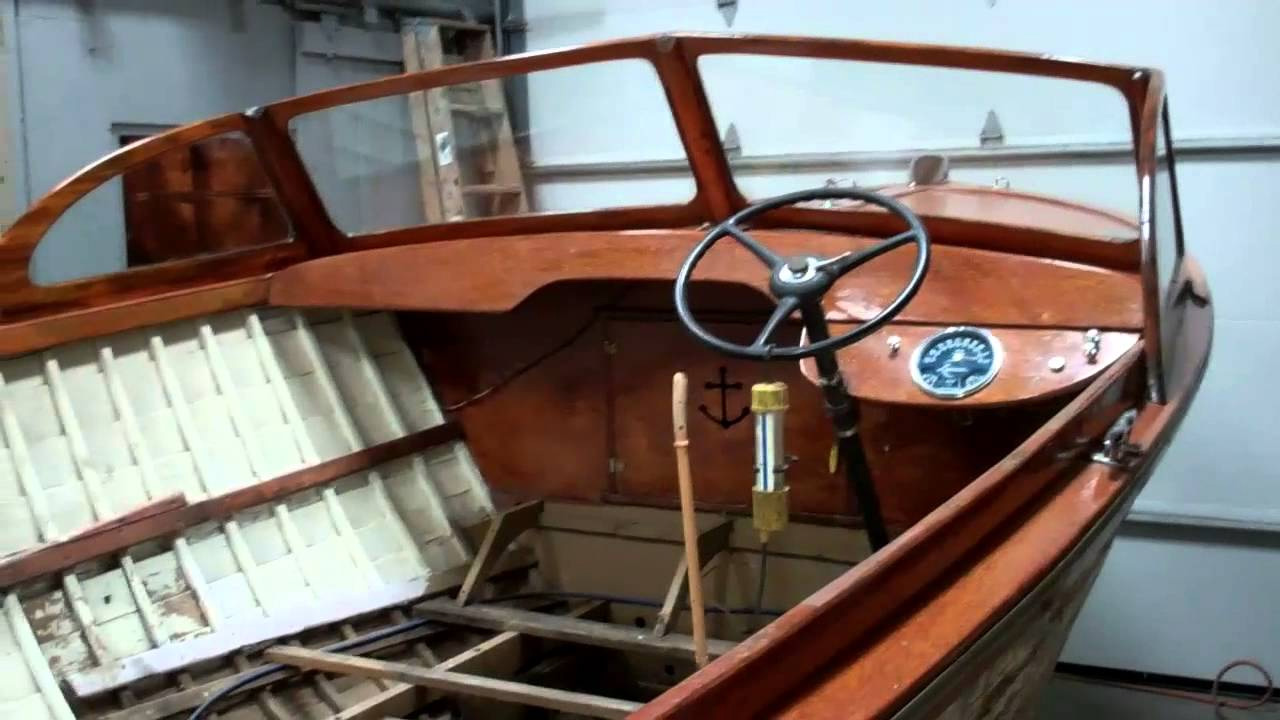
If you search back through the clips we’ve posted to this challenge, you will see the same boat being stripped of what ended up being 95 pounds of paint from the topsides alone. She was just as “crusty” below the waterline, but collecting and weighing those “leavings” proved impossible.

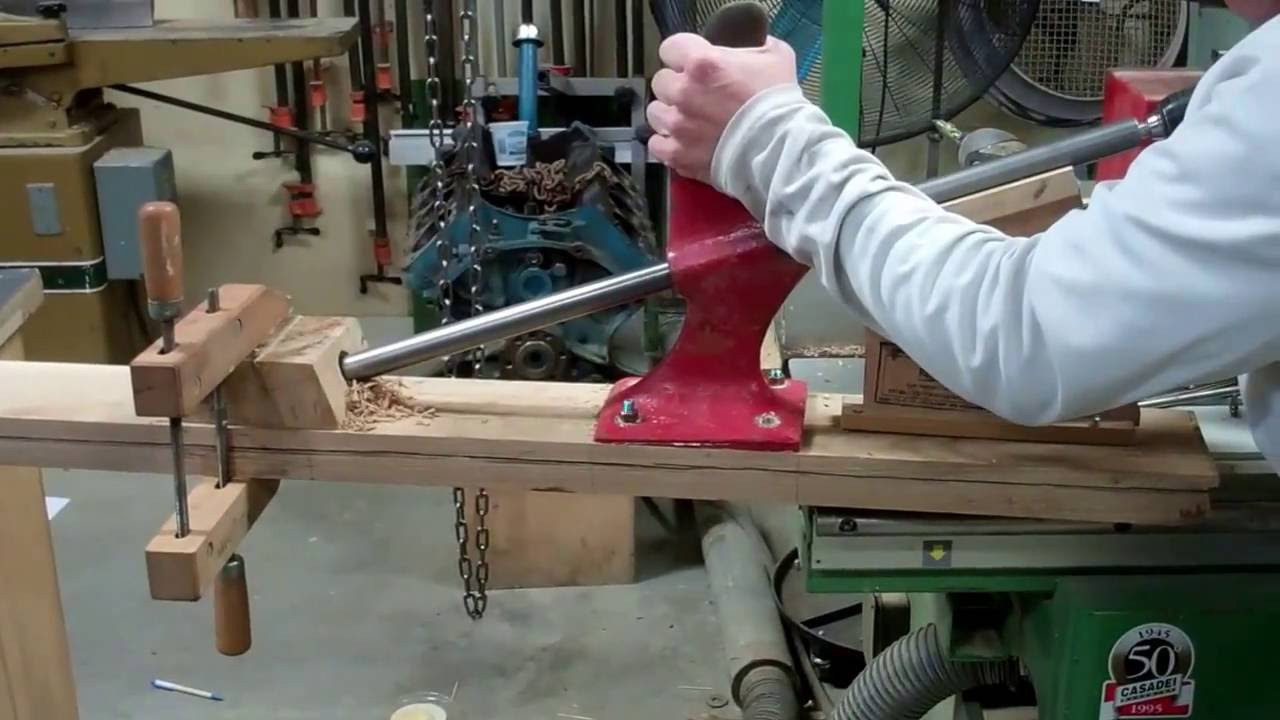
Stay tuned for more updates. Once we have the ceilings installed, her completely rebuilt Chrysler Crown engine will be installed, followed by her floor panels, which have been updated with new Nautolex in natural.

We are racing against the onslaught of winter, and it looks like winter will win. The sea trials we hoped to run this fall will likely wait until the ice leaves Lake Champlain next spring.

1946 Gar Wood Ensign Please Do NOT Fiberglass Wood Boats!

1946 gar wood ensign fiberglass hull

Here is the next installment on our 1946 GarWood Ensign restoration project. With everything removed from the hull, we have flipped her onto boat dollies in preparation for removing the planking, repairing all the failed, rotted and broken framework beneath them and then installing a 5200 bottom.

This boat spent most of her life on Squam Lake or Little Squam Lake in New Hamspire.

That these lakes have a well-earned reputation for unforgiving, rocky bottoms is evidenced by all the damage that this hull has suffered below the waterline. Indeed, the previous owner(s) installed iron strapping along the stem and forward sections of the keel. Then there is the through-and-through fracture of the keel just forward of the prop shaft tunnel.

Removing the fasteners and these straps was simple.

But then comes the fiberglass. Yes, someone fiberglassed the entire bottom, the chines and up the topsides as much as 8 inches. We “get” to remove all of it. Not doing so makes removing bungs and bottom plank fasteners all but impossible, never mind the fact that we are doing our utmost to preserve the original planks.

We have tried using chisels, which worked well along the keel and garboards, where sheets of fiberglass peeled off with relative ease.

However, the fabric-infused resin remained, and presents us with a challenge of much greater magnitude. It will be incredibly tedious and time-consuming, but using a combination of heat guns and sharpened putty knives seems to be the best solution. The challenge here is not gouging 60 year-old wood with the hot, sharp putty knife. We are also running into large areas of rot where water managed to breach the fiberglass skin and soaked the wood in a largely anaerobic environment.

We will soldier onward, but want to make a plea to all woody owners and preservationists, “Please, please do not fiberglass your wood boats!” Doing so is a lose-lose proposition, especially for these irreplaceable artifacts of the past.

SOLD 1948 18′ Chris Craft Utility Deluxe

Offered at $19,500: 1948 18′ Chris Craft Utility Deluxe  Hull # U18-550

Little Chief is on her way to Salzburg, Austria, where her new owners will enjoy her for years to come. 

We prepped her ahd her transport trailer for the voyage on October 30, 2013.

Little Chief’s loading into her 20′ sea container on November 12, 2013.

Best of Show, Utilities, 2012 VT Antique & Classic Boat Show

  • Watertight, 3M 5200 bottom
  • All fasteners released and replaced with silicon bronze
  • Sixteen coats of hand-rubbed Epifanes varnish
  • Original CC 95 HP Model K engine rebuilt by Restoration and Performance Motorcars of Vermont
  • Original hardware chromed by Mickey Dupuis D&S Custom Plating, Holyoke, MA
  • New, custom-built Sea Lion Trailer

Watch Little Chief’s post-preservation debut on YouTube:

1955 20′ Lyman Runabout Deconstruction Continues

1955 lyman runabout deconstruction

She is a 1955, 20′ Lyman Runabout, Hull #1028 that we are told was at one time used as a commercial fishing boat off the coast of Maine. The intriguing aft steering mechanism supports that contention.

If you have ever seen a steering unit like that detailed in this video, please let me know! We have everything but whatever protruded through the floor and functioned as either a tiller or a steering wheel.

But she had been in Vermont for almost 20 years when we found her; at least 10 of which were spent sitting on a wood cradle crammed into a barn.

She is the Lyman introduced in an earlier clip that reported us having stripped over 85 pounds of paint from her topsides.

That was then. We are well into the deconstruction phase of her preservation, what with another 18 pounds of paint having been removed and virtually everything having been stripped from the hull’s interior.

We will offer periodic updates as the preservation project continues.

1958 Cadillac Seville Emerges From Preservation

1958 cadillac seville vintage boat preservation

Cadillac Marine & Boat Company of Cadillac, Michigan started in September 1953 as a wholly owned subsidiary of Wagemaker Company. Boat builder Wagemaker of Grand Rapids, Michigan also owned U.S. Molded Shapes, Inc. and Mr. Raymond O. Wagemaker was president of all three firms. The Cadillac Chamber of Commerce was instrumental in luring the boat firm to the city. Across town was a branch plant of Chris-Craft that opened up in 1941. Cadillac made aluminum fishing boats and runabouts. U.S. Molded Shapes made molded veneer boat hulls for Wagemaker which finished them and marketed the boats as Wagemaker Wolverine. Cadillac also made wooden boats with hulls from U.S. Molded Shapes. During 1958-1960, the Company designed and produced a small number of wood-hulled boats, and at the top of the line was the double-cockpit, “Model 505”. The Cadillac Seville. She is a 15′ molded plywood runabout powered by a special edition, 30 HP Evinrude outboard engine. We acquired this boat out of a barn in late 2010, and began actively preserving her in late 2011. That process was completed today, May 2, 2013, as she, perched on her 1959 Tee Nee tilt trailer, emerges from the Snake Mountain Boatworks’ preservation shop and moves into our showroom. She is hull number M5883, which tells us that she was the 83rd boat produced by Cadillac Marine and Boat Company in 1958. While the video’s narration suggests that she is the 83rd of 87 Cadillac Sevilles produced in 1958, further research informs us that, at a price of $1,245 FOB the plant in Cadillac, MI, very, very few orders were made for this then super-expensive little boat. So M5883 was the 83rd boat delivered by the company in 1958, but that included total production of mostly aluminum and very few molded plywood hulls. True to her name, Cadillac Seville, she is long on luxurious adornments, from her fantastic cutwater to her bold “Cadillac Seville” name plate. Even the floor-mounted shifter and throttle are unusual. Enjoy meeting this fantastic example of what was considered “haute design” for vehicles of all sorts in the late 1950’s.

1955 Lyman Utility C-1028 Please Strip the Old Paint First!!!

Maintaining and preserving antique and classic wood boats can be hyper-expensive. Doing it correctly improves performance and saves money and anguish over the long run.

Lapstrake boats are an excellent case in point. The topsides have a huge amount of surface area, which makes stripping and repainting them on the recommended five-year cycle both time-consuming and expensive.

I understand constraining cost wherever is possible without compromising the outcome. Painting topsides is not a candidate for doing it without proper preparation.

Yes, if the existing paint is in excellent condition, and if it was not applied on top of layer after layer of paint, sanding it flat, priming it and applying several coats of topside paint is fine.

This video offers an up close and personal view of what happens when correct procedures are sloughed aside in favor of “Just tossing on a couple more coats.”

As of April 19, I have removed 80 pounds of topside paint from the strakes. Yes, 80 pounds! And we are about 80% of the way to clean wood.

Please, please, please. Strip it long before there are 10+ layers of paint on the hull. Your performance, as in speed and acceleration, will improve. And, stripping the paint completely off every third round of repainting will expose emerging issues before they become serious, and before addressing them involves a major structural as well as cosmetic repair.

1957 Century Palomino Applying Filler Stain

1957 Century Palomino Applying Filler Stain

We achieved a major milestone in our 1957 Century Palomino preservation project today. The hull is now stained in the traditional two-tone Palomino manner. Blonde Avodire (African white mahogany, graces both the fore and aft decks, save for the crescent just aft of the windshield, which is stained to match the covering boards. We used Interlux IInterstain thinned about 10% and applied it with plain old chip brushes. Besides being thinned to a consistency that approximates house paint and applying it liberally on the surface, t here are two keys to achieving a stained surface that is uniform and free of blotches.

First, is being patient, but not too patient. Way too many stain teams assign application to one person while the rest follow immediately behind scrubbing stain off the surface. Doing so prohibits the stain from penetrating the wood fibers. As hard as it might be, wait until the stain “flashes,” at which point the surface begins taking on a dull look. Do not wait too long, however, as the stain continues curing, and if you wait too long, scrubbing the surface clean becomes a nightmare.

Now it is time to begin scrubbing across the grain, not with the grain. A filler stain is designed to fill the valleys in the grain left by sanding with the grain to 80 or 100 grit. (Sanding the surface smoother than 100 grit max robs the surface of the ridges and valleys — the teeth — that the stain will fill.)

Scrub, scrub, scrub. Change your cheese cloth or terry cloth toweling when it becomes caked with residue. (Be sure to drape the used rags over a close line, or something similar to avoid spontaneous combustion. They are safe to discard only when they become stiff as a board.) How do you know you are finished? The surface will begin feeling smooth and almost slippery. And your towels will come away nearly clean when you burnish across the grain with them.

Staining is anything but glamorous, but nothing can do more harm to your project than scrubbing too soon or too little. The varnish will amplify every blemish and every blotch a hundredfold.

How to Bore a New Prop Shaft Hole – 1946 Gar Wood Ensign

1946 gar wood bore prop shaft hole

The original keel in this 1946 16′ Gar Wood Ensign had failed completely as we have chronicled in earlier clips on this project. Drilling new rudder shank and propeller shaft holes, and especially the latter, represent a particularly daunting task. If the prop hole is misplaced and/or misaligned, the shaft log will not receive the prop shaft symmetrically, and only bad things follow there from.

Today John and RJ decided that the moment had come, and, with John narrating, this clip introduces you to how we meet these challenges at Snake Mountain Boatworks.

What you will not see in the video is John’s rather ingenious solution to the reality that the Forstner bit tends to cut a tunnel having somewhat ragged and rough walls. John produced silky smooth walls by wrapping the prop shaft, first in progressively finer grits of sandpaper, beginning with 40 and ending with 100

The keel blank is now ready for shaping and fitting to the hull, which we will share with you in the coming days and weeks.

How to Make a Deep Gouge Disappear with a Dutchman

how to repair deep scratch with dutchman

Green Mountain Buoy “bumped” into something at some point that left an ugly gouge – almost 3 inches by 1 inch by 3/8 inch deep about mid-way along her port side. Using a plunge router, we were able to create an purposely irregular shape that would be filled with what is called a Dutchman patch – a piece of wood that is shaped and shaped until it fits precisely into the declivity we have created with the router.

Fitting the Dutchman perfectly would have been much easier had we simply routed out a uniform rectangle with straight sides and 90-degree corners. But such a patch would be virtually impossible to hide.Selecting a piece of planking that had been removed from the topsides for replacing allowed us to select wood of the same age and similar grain and coloring characteristics, which is a great strategy for hiding the patch even further.

Here we follow John LaFountain as he first patiently shapes the insert, glues it in place and then sends it in a day later once the Gorilla glue has cured.

Yes, the patch IS still visible at the end of the clip, but once we have bleached, stained and varnished Green Mountain Buoy, I will challenge you to find the Dutchman.