Ceilings – hull-side mahogany planking – and helm seating with a center pass-through and storage lockers fixed to the aft side of the forward seatbacks were available options on the 1957 23-foot Lyman Runabouts.
Her original owners opted for the stripped-down configuration, no ceilings and basic seating. The latter included a wide, solid seatback centered in the helm station with two short hinged wings at each end.
Her owners are opting for the upgrades, including a pair of lockers, complete with silhouetted anchors in the doors. Even better, once finished, our optional seating configuration will include a flat floor from stern to firewall, and a small step-up to each helm station seat.
We will fabricate and install the ceilings and mock-up the seating and lockers while her owners are on the east coast. Presenting our concept to them in person helps us reach a joint decision, which must translate into a superior results for all.
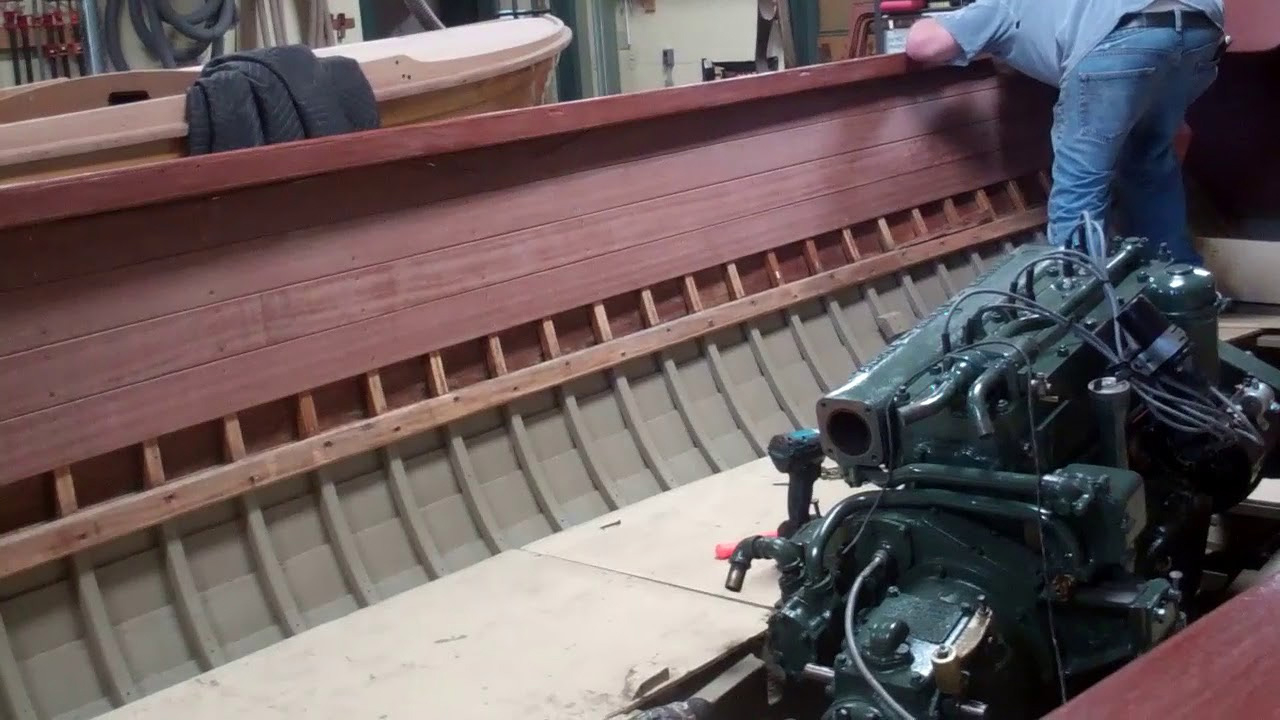
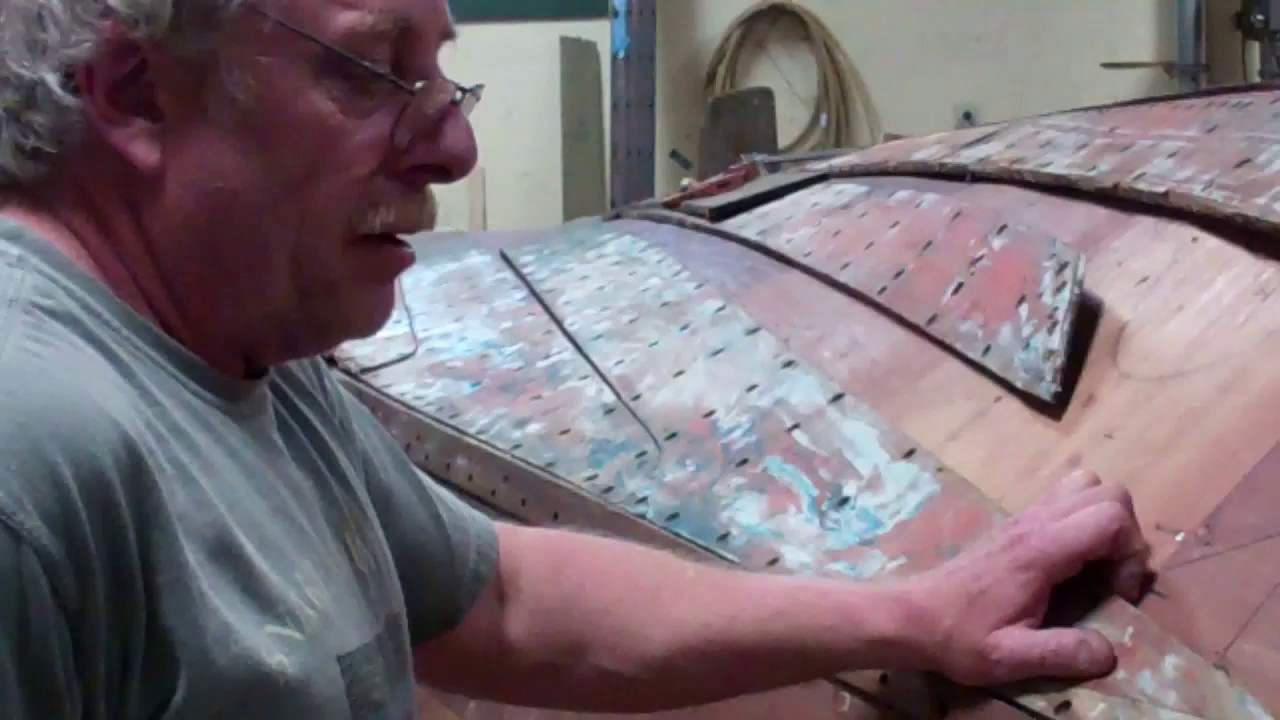
Frustration dominates the shop this afternoon. Why? Whoever last stuffed this 283 into her bilge failed to align the engine and driveline properly, or even at all.
As is clearly evident in the video, we now understand why her original prop shaft was so badly scored and had actual, almost inch-wide grooves worn into it. The shaft log is worn completely out of round as well.
The shaft log can be used, but the prop shaft will be replaced with a stainless one.
You simply cannot just drop the engine onto its mounting wedges, crank down the mounting bolts and then bolt the mating faces of the transmission and prop shaft couplers together with a long ratchet handle. Yes, you can force – distort – them until they appear to mate by reefing on the coupler bolts.
But all you have really accomplished is initiating destruction of the strut bushing, the prop shaft, and the shaft log, while also visiting potentially high-wear forces onto the transmission and engine.
Once properly aligned, and before any bolting begins, alignment is a hands-only process, with the wedges being tapped this way and that, and the engine being teased laterally back and forth until it is impossible to insert a 4 mm feeler gauge between the coupler plate faces when the latter are held in place by hand.
Repeat all the way around 360 degrees while holding the plates in place. If the feeler gauge can be inserted anywhere, the engine is not properly aligned.
Spin the prop shaft and its coupler. When correctly aligned, inserting that gauge remains impossible.
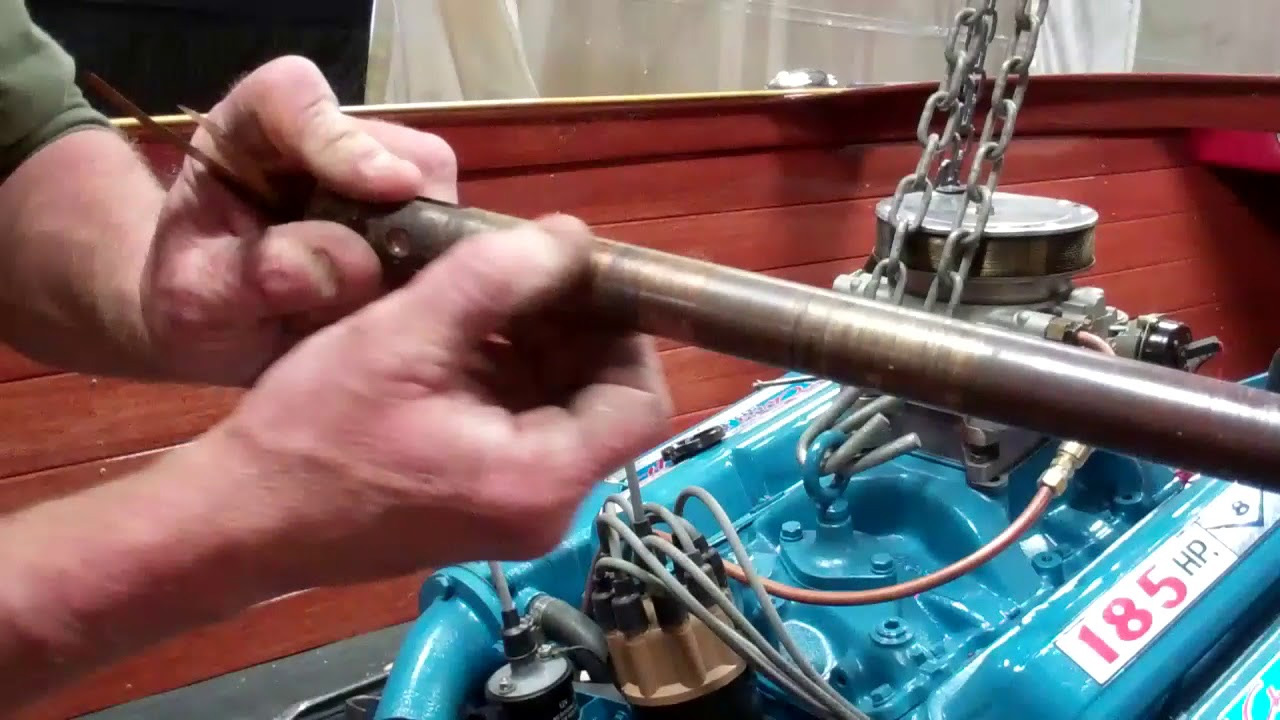
That the original prop shaft was polished along the section passing through the shaft bore as well tells us the latter was bored slightly too small, so we cleaned it out using a Forstner bit on the drilling shaft John fabricated to open the bore until the prop runs without touching any wood once the engine is aligned.
Yes, alignment is a slow and at times incredibly frustrating process, but oh is executing it properly critical to achieving rated horsepower output as well as to the long run viability of your engine and driveline.
John, who spent decades building high-performance engines for mud racers, knows of what he speaks on this front.
Her topsides were sanded to 80 grit, faired with 3M Marine Premium Filler, final sanded with 80 grit, and then received two coats of Interlux PreKote primer.
Her transom received two Dutchman repairs, was sanded fair using 40-, 6- and 80-grit paper, stained and sealed with three coats of CPES.
Her remaining mechanical components were released and readied for preservation.
All interior hull surfaces and all framing were cleaned, sealed with CPES and received an initial initial coat of Sandusky Lyman Sand Tan Bilge paint.
Her new foredeck and aft deck panels and her king plank were fabricated using correct ribbon-cut mahogany marine plywood.
Most of her hardware was packed and sent to chrome.
Her Iva-Lite returned fully preserved.
Once John reaches for surface putty and repairs a series of dings that the primer revealed, we will be applying Interlux Premium Yacht Enamel to her topsides.
We will shortly seal her deck and gunwale framing with CPES, and then we can move to installing her decks and covering boards bedded in 3M5200.
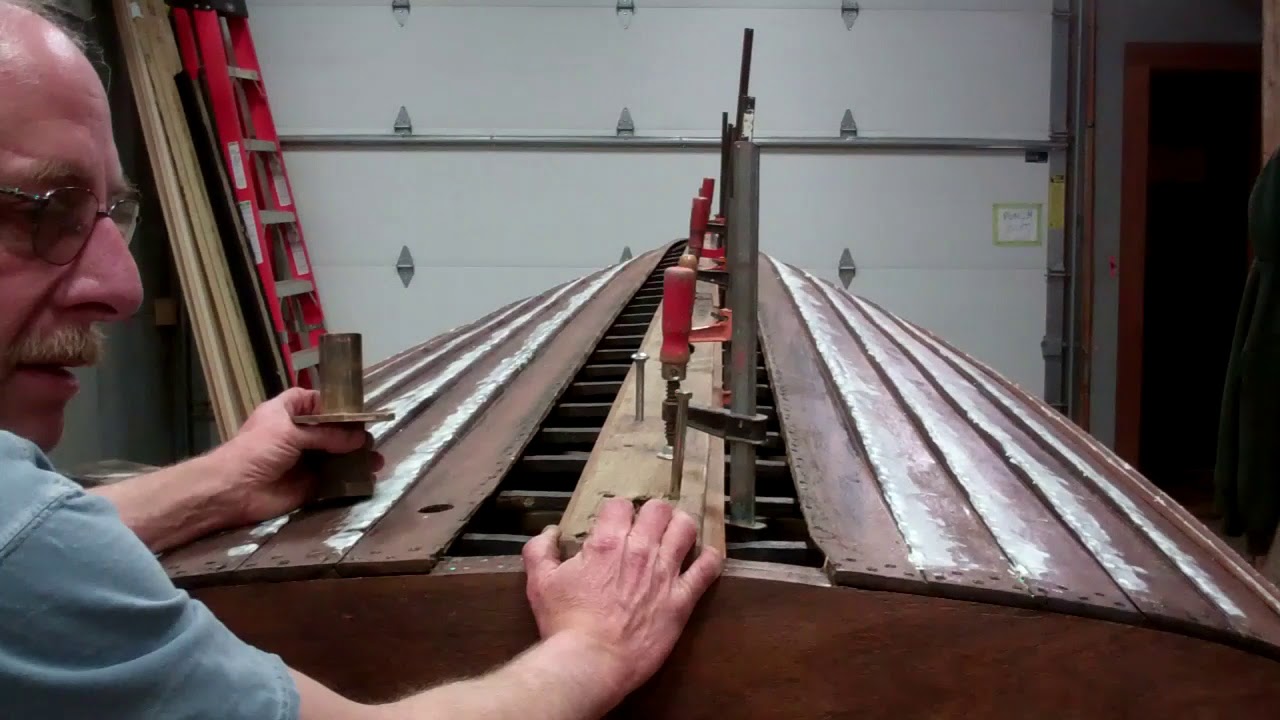
This update affords us an opportunity to remind one and all of us to take great care when we tighten lifting ring assemblies. You fail to do so at your peril, as is clear from this clip. Someone must have trotted out a long bar to have extra leverage while securing the assembly. The result is a concavity around the deck’s center rather than Lyman’s characteristic and elegant crown.
We will address the issue using vertical bracing between the keel and the two deck frame members just forward and aft of the lifting assembly. Carefully applying upward pressure removes the hollow, but we will go slightly beyond fair so that the deck is properly convex once the panels are installed, the bracing is removed and the surface settles slightly.
From now to her post-conservation review sometime in May, she will blossom, becoming ever so much more elegant day-by-day and week-by-week. Yes!
With only applying SANPACO Lyman Copper Bronze Antifouling paint to the jack stand paddle areas ahead of us, RJ and I lowered the 1957 23’ Old Style Lyman Runabout onto a pair of boat dollies this morning.
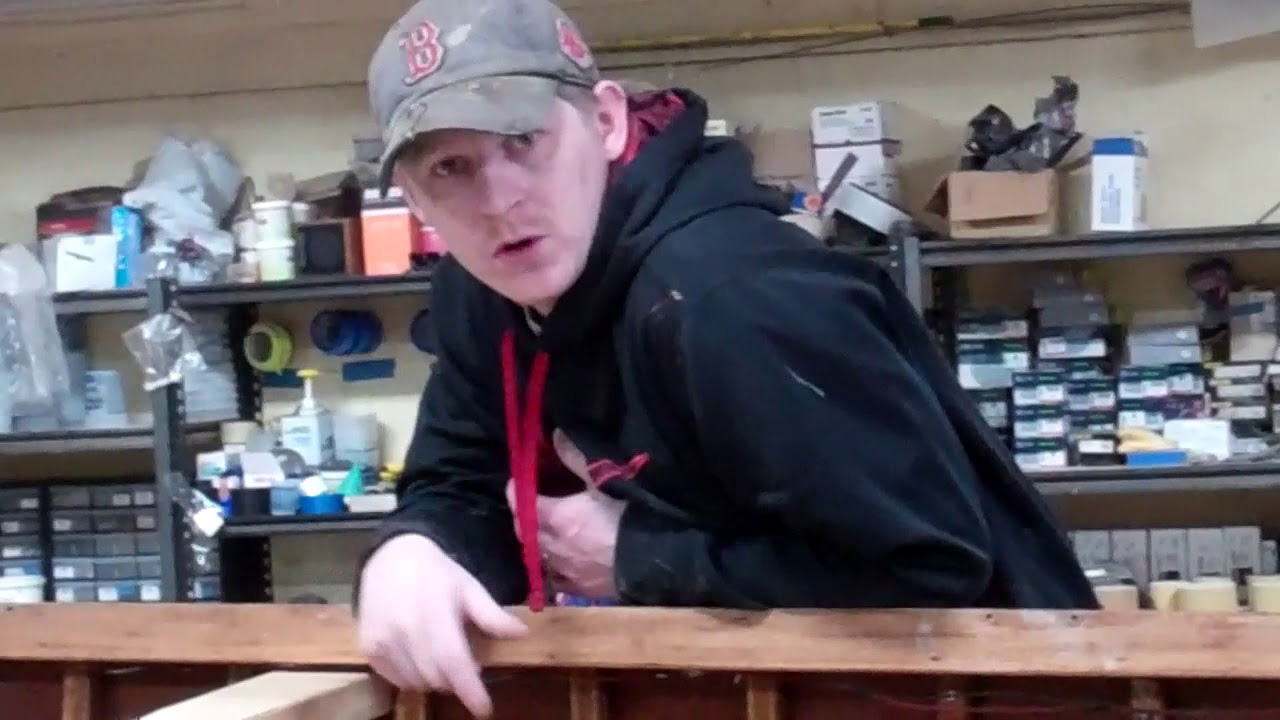
He’s totally cleaned the interior of the topsides and bilge of all old paint, varnish and what have you. Now it is time to attack replacing the foredeck, toe rails and aft deck, and to release and refinish the covering boards between them.
The starboard foredeck panel was replaced at some time, along with the toe rails on both sides. Rather than use ribbon cut mahogany plywood, which is correct, the new panel is what we call totally incorrect swirl-grain plywood. That it is thicker than the portside panel does not help at all. I express the hope that we can save the toe rail material in the video, but, having released both of rails now, it is clear that major plywood delamination has assaulted both of them. I quickly stripped a section of the king plank, only to discover that it too is fabricated from swirl-grain plywood. The one positive is that whoever did this work was super lazy, or just did not know. Nothing is sealed on the back sides. Nowhere is there any evidence of adhesive having been applied between the decking material and the frames. All of the delamination we have discovered is the “reward” for taking such shortcuts. We will seal aggressively, and will set everything bedded in adhesive. We have no choice but to replace the king plank and both toe rails using correct, and likely slightly thicker ribbon cut plywood.
The aft deck plywood panels will be replaced as well thereby allowing her to present uniformly from stem to stern.
Once the deck and gunwale framing is exposed, it will be cleaned and then sealed on all sides with three coats of CPES. Why?
We spend incredible money and time staining, sealing and varnishing exterior surfaces, but so many of the boats arriving in our shop present completely raw interior surfaces. That raw wood is like a sponge that continually takes on and releases moisture, causing the wood to expand and contract beneath the wonderful varnish we have so lovingly applied.
For a while the varnish is elastic enough to expand and contract with the wood, but as it continues curing, it also loses elasticity, begins breaking down and ultimately fails.
We seal every piece of wood on every side we can get to. Bilges receive three coats of CPES and then three coats of the best bilge paint we can buy. If the boat is outfitted with ceilings, that bilge paint is applied from keel to gunwales.
The framing is doused with CPES, as are the underside surfaces of all deck and covering boards. Once sealed, the wood becomes very stable and finishes survive much, much longer.
Yes, all this sealing costs money and time, but once again, price and cost diverge. Just think of how much you save if your woody’s varnish fails in 3-5 years instead of 5 – 8 years!
Susan, our 1940 16’, Cypress Lyman Yacht Tender’s bottom has reached a critical milestone. Reconstruction followed deconstruction that included releasing the keel, garboards and keelson was followed by fabricating and installing a new keelson.
As of this morning everything is back in place. The keelson and keel were installed bedded in 3M5200. The garboards were secured to the keelson using #6 x 1” Frearson head silicon bronze wood screws. 3M5200 was applied to the seams formed where the garboards and first strakes meet. Then RJ and I, happily with RJ running the clenching iron inside the hull, clenched the seams from transom to bow.
The bottom was faired using four applications of 3M Marine Premium Filler and sanded between coats. John hand sanded all of the strakes, garboards, keel, gripe and stem by hand until the bottom was absolutely fair.
We then applied the fourth coat of Clear Penetrating Epoxy Sealer from the waterline down. Why so much? Three coats were applied ahead of the Marine Premium Filler, but with everything sanded between coats, applying the fourth coat post-fairing buys additional insurance against water absorption and accumulation attacking paint adhesion and thereby facilitating rot.
From the Smith’s Web site: (CPES) creates a tough, flexible resin system that moves with the wood. It allows the wood to “breathe” so excess moisture does not accumulate behind it, promoting paint-failure and ultimately rot.
We then caulked all of the seams, those where two strakes meet, along the garboard-keel seam and that between the strake tails and the transom.
Milestone reached, Susan is poised for priming, and in our case the primer of choice is Interlux Interprotect 2000E Two-Part Epoxy, five coats of which will be applied over the next two days. Once we reach the target film thickness of 10 mils, Susan’s bottom will be protected against water absorption and it will be time to apply her bottom paint. (Since she will most likely be trailer or lift sailed, we may opt for Pettit Hard Racing Copper Bronze bottom paint in place of the traditional Sandusky Lyman Copper Bronze Antifouling paint, since the latter is designed for vessels that live in the water.)
Our 1940 16’ Lyman Yacht Tender’s spine transplant is complete, and the patient is doing quite well. The new keelson and the keel’s underside received three applications of Clear Penetrating Epoxy Sealer (CPES). Following Danenberg, who insists that doing so delivers deeper penetration and more thorough sealing, the second coat was applied immediately following the first coat. The third coat was applied twenty-four hours later.
After fitting the keelson and keel to the boat and each other, and sinking a series of temporary position-holding screws through the keelson and into the keel, John bored the rudder and prop shaft bores. He also drilled the holes for the machine-threaded bolts that will secure the lifting ring, yes it is fixed to the keel/keelson and shaft log.
Confident that we could reassemble the pair and still have them matching, we separated them and frosted the mating surfaces with white 3M5200. (White is much less expensive than mahogany 5200 and delivers the same bonding strength. Since the bottom will be primed and painted, spending the extra that mahogany 5200 costs is just wasting money. However, be patient with the white as it takes as much as fifty percent longer to set up than the mahogany.)
After reassembling the now monolith-to-be and driving screws through the keelson into the keel, we installed it on ribs bedded with mahogany 5200. (Any squeeze out here will be visible in the bilge. Even though it will be thoroughly protected with Sandusky Paint Company Lyman sand tan bilge paint, we do not want to risk that a scuff or scrape exposes white 5200 beneath the paint.
John has also completed his knee semi-transplant, a truly complicated Dutchman, as well as fashioning Dutchman repairs to the forward end of the gripe. Once everything is sanded in and sealed with CPES, the bow will be ready for primer.
We will focus on installing both garboards, which will also be bedded in white 5200, over the next several hours, followed by securing the aft tails of the bottom strakes to the transom.
Then Michael “gets” to spend the rest of today and this weekend applying and sanding 3M Premium Marine Filler fairing compound to the countersinks. After a final application of CPES to the entire bottom, and caulking the strake-to-strake seams with 5200, Susan’s bottom will be ready for priming and painting.
John has fabricated and is now focused on installing the 1940 Lyman Yacht Tender’s new keelson. One hint if/when it is your turn to do so. Since the keel, and the keelson are bowed, they must be joined on the hull. While the difference in radii may appear small, there is a difference that will keep the rudder shaft, prop port and other components from lining up if the bores and fastener pilot holes are drilled and fasteners are driven in while the assembly sits on flat surfaces like work tables or saw horses.
John and I first positioned the keelson correctly along the ribs’ lower extremities and drove a half dozen or so temporary screws through the ribs and into the keelson. We then laid the keel in place, clamped everything together and drove position-holding screws through the keelson and into the keel.
Only then were we able to bore rudder shaft and other ports through the new keelson. We then removed the temporary screws passing through the ribs and into the keelson, which released the entire assembly.
It will be separated, receive a final application of CPES and then the keel and the keelson will be joined, yes, again on the hull, with a generous layer of 5200 “frosting” troweled on between the two planks.
Installing the garboards completes the replacement process, but cannot happen until all remnants of the old clench nails are removed.
We will finish fairing her below the waterline and John will complete the work needed on her stem and knee, and it will be time for Interlux PreKote primer.
Three coats of Sandusky Paint Company (SANPACO) Lyman Copper Bronze Antifouling paint
That we learn every day and with every boat we lays hands on makes wood boat conservation incredibly enriching.
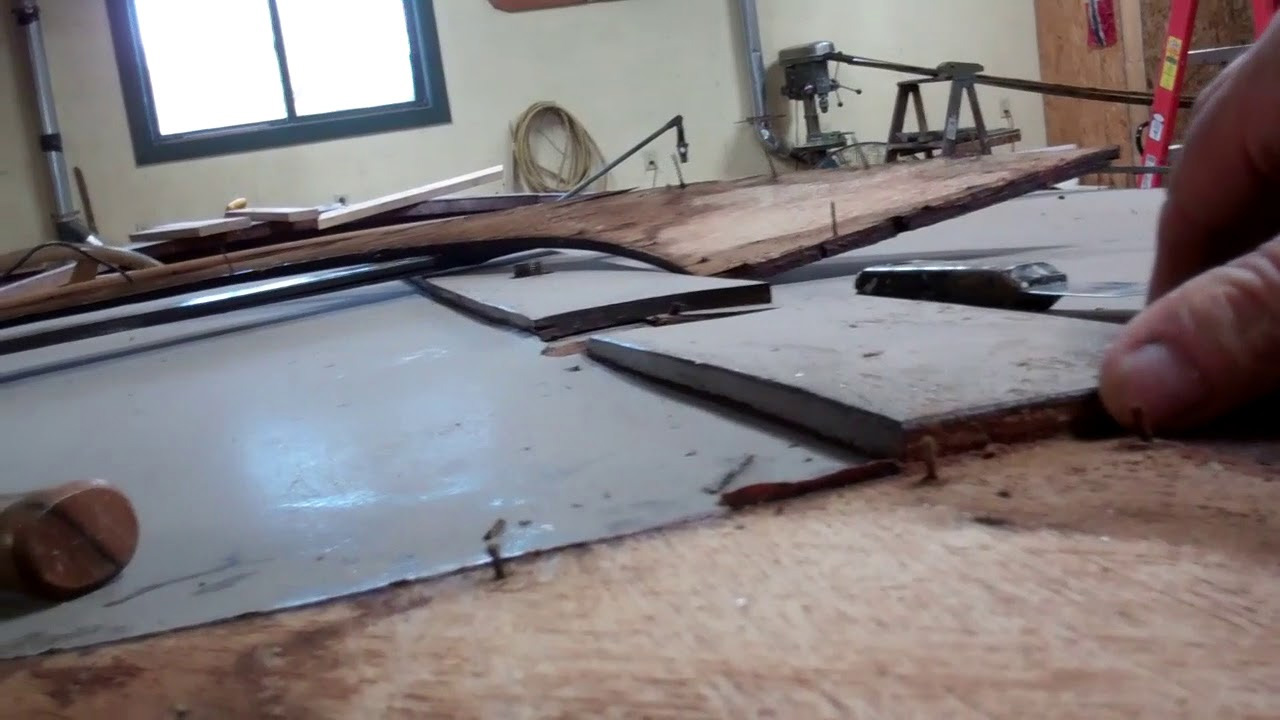
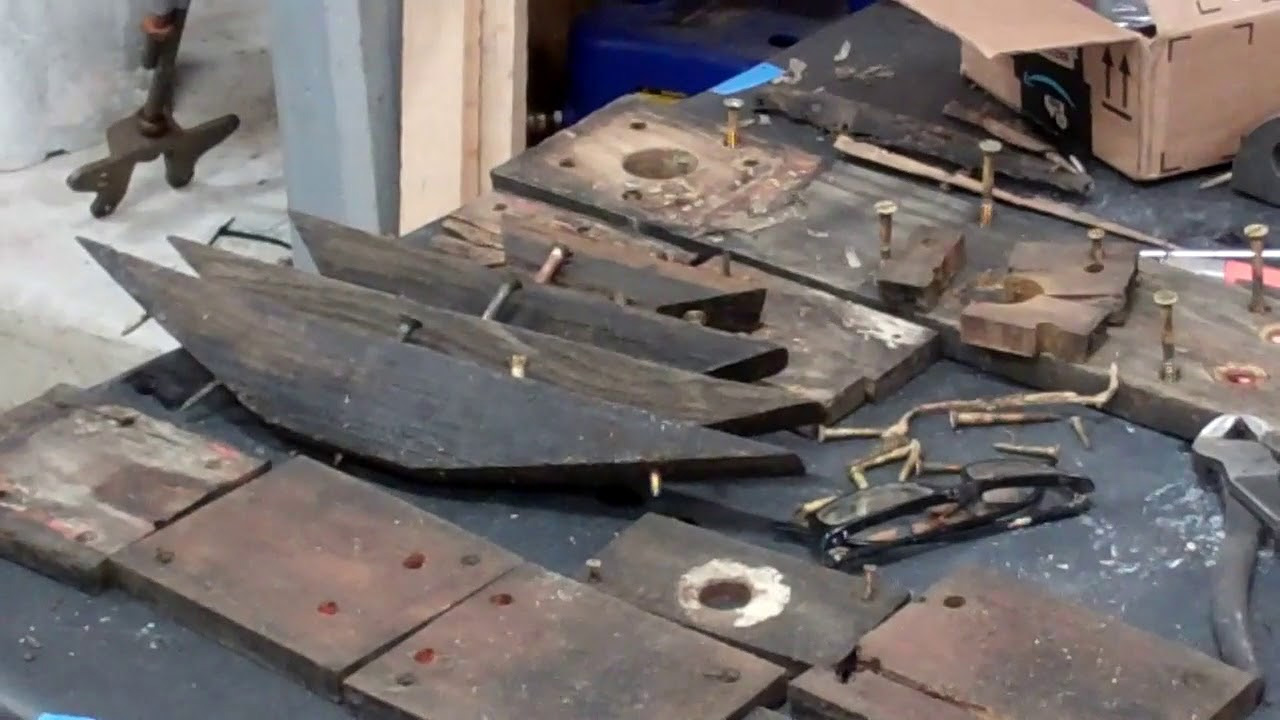
Our 1940 16’ Lyman Yacht Tender, “Susan” has been our latest teacher since RJ and I began setting the below-waterline clench and rivet nails last Friday. (That RJ offered to “drive” the clenching iron while I popped each nail head with a bunch and dead blow hammer was a huge plus for me.)
We began at the waterline and worked strake-by-strake towards the keel. It was then that Mr. Murphy’s reared his ugly head. “Hey! We have a problem! I can see lots and lots of light coming through between the garboard and keel. It looks like the keelson is broken and split.”
Next came backing out what must be one hundred or so screws and then cutting through all of the starboard garboard’s clench and rivet nails. Yes the very ones we had just so carefully tightened!
Out came the garboard, exposing the garboard’s, formerly chamfered starboard edge, or in about forty percent of it, what was left of same.
Sure. We could rip that chamfered edge off wherever it had failed and fit pieces in place. Then, using many tubes of 3M5200 and lots of bilge paint on the other side, we could have hidden our “repair.” It might have even held for a while, but unlikely longer than a season or two at most. Releasing and installing a newly fabricated, white oak keelson is the correct solution, and for us the only one we will put our names on.
So, with the port garboard having joined its starboard counterpart on a wall rack several hours later, it was time to release the keel and keelson.
I believe you will agree that, having viewed what we released in the clip, consigning the original, now 78 year old, keelson to the scrap pile is the best path forward.
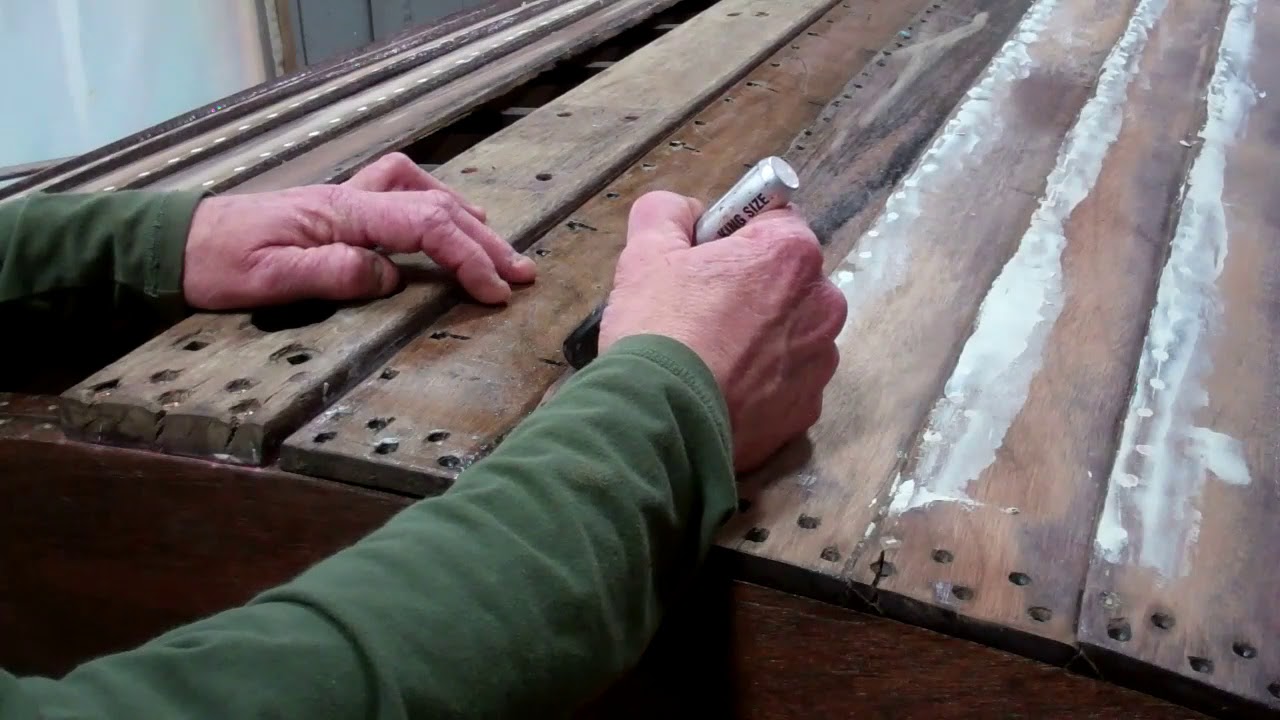
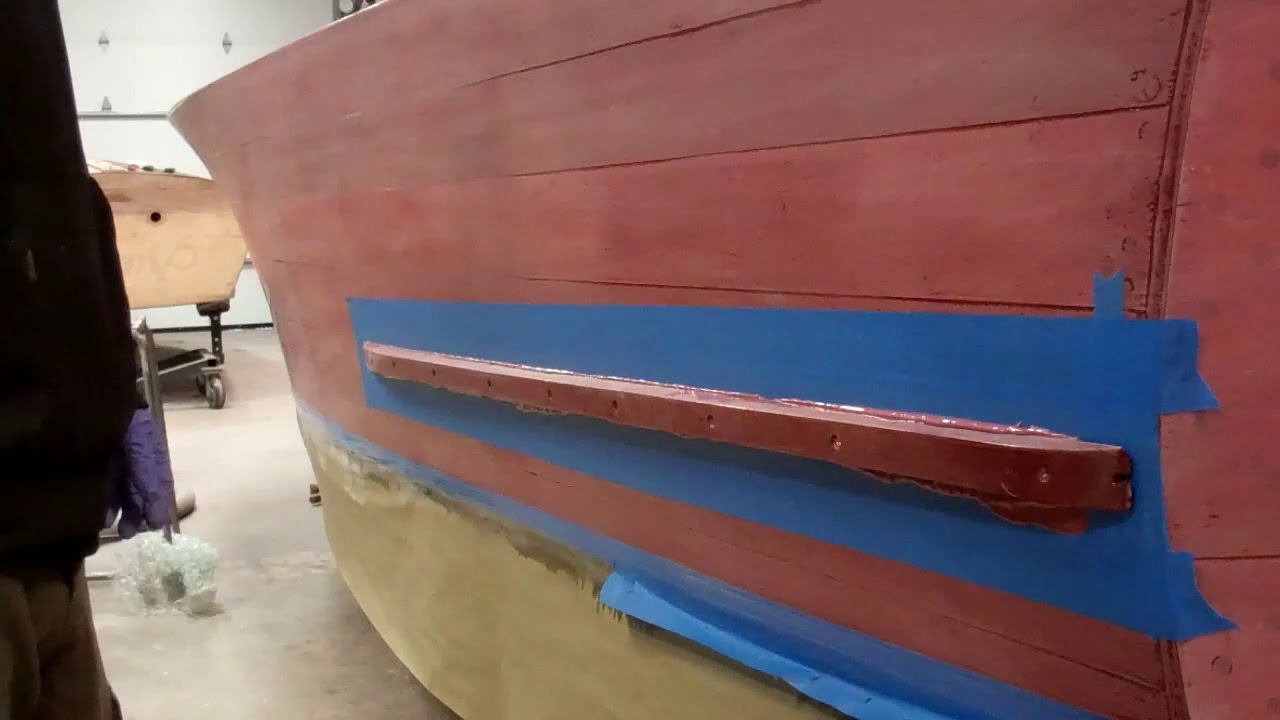
Thank you for the several requests that we record how we install the splash rails on the 1946 Chris-Craft Brightside U22.
Since we must avoid screws punching through into the hull’s interior at all costs, we carefully recorded the length of each fastener as we removed them over a year ago now. That record guides RJ and John as they select and lay out the fasteners to be used in the order they will be sunk through the rails and into the hull planks, battens and frames.
Note in the clip that the rails are varnished. Indeed, we varnish all freed components as we varnish the hull. Therefore, all of them have had seven coats applied at this point. The rails will be sanded flat sometime next week before coat number eight is applied.
We bed the rails in generous beds of 3M5200. Why? Rotted splash rails, the planks behind them, and sadly, in several instances, the hull framing within have also been rotted. Sealing the rails with CPES and bedding them in 5200 guarantees that our U22 will not ever suffer this fate again. (We had to fabricate the rails anew because they had begun rotting. Happily the planks behind them were OK.)
Yes, yes. I know that those rails are all but permanently installed. However, Practical Sailor magazine has recently run tests of adhesion breaker materials that worked well freeing up joints that had been joined with 5200
Our 1946 Chris-Craft Mahogany (Brightside) U22 project enters the bottom planking fabrication stage today. We will replace all existing planking, which is mostly cedar, with newly fabricated mahogany.
Yes, we abhor being unable to save the original planking, but most of it is just too oil-soaked, split and broken. Not replacing these planks means a bottom that is not well adhered to the 3M5200, and cannot hold paint from amidships aft.
John and I are dry fitting the original planks in place, and will scribe them on the plywood skin. Given the structural work this hull has received, especially removing the twist and hog from it, means that some of these planks, and especially those running to the stem, must be sanded in to fit.
Once we are confident we have a perfect set of pattern planks, we will scribe them to new mahogany.
The new planks’ faces and edges will be thoroughly sealed with CPES before we begin laying them down.
Following a final application of CPES to all exterior surfaces, we will begin applying the first of five coats of Interlux 2000E barrier coat, followed by three coats of period-correct blue antifouling paint.