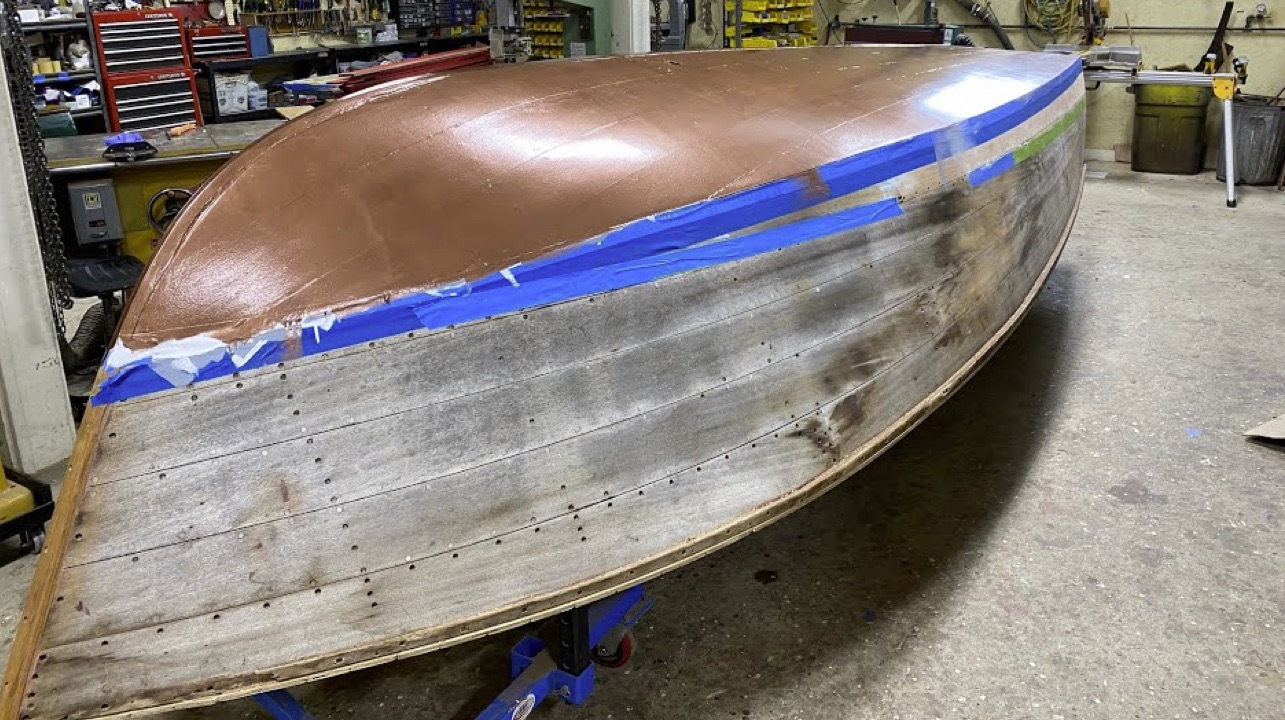
Priscilla, our 1940 17-foot Barrelback became our lab rat today as we tested what we are calling a New Day at Snake Mountain Boatworks when installing a truly True 5200 bottom.
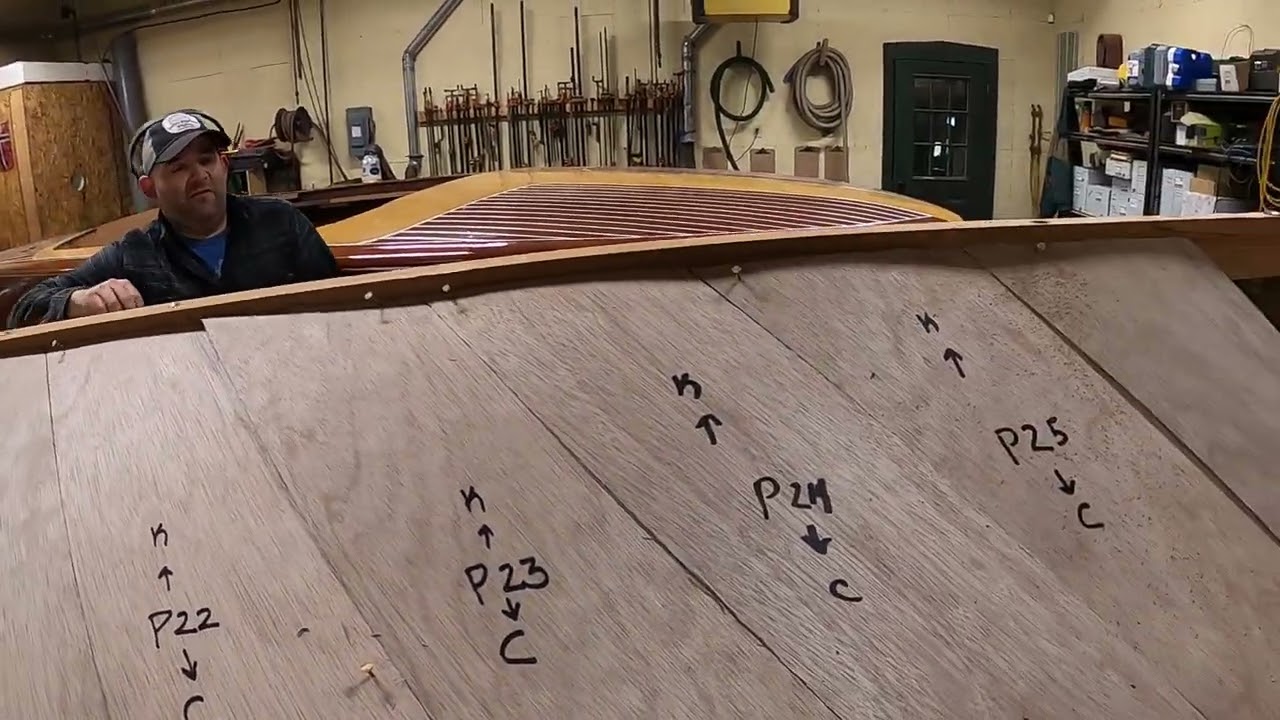
Rather than install her inner skin using 6 mm plywood panels, we are reverting to what is a truly very old school alternative: replacing the inner skin using 6mm strips of planking laid at approximately 45 degrees to the keel.
In so doing, we are able to deliver a bottom, the inner skin of which precisely matches that installed in Algonac in 1940.
Once we have dry-fitted each, approximately 5-3/4”-wide plank, everything will be sealed with four coats of Smith’s CPES, and we have applied three coats of Chris-Craft mahogany bilge paint to the inner surfaces, we will then install these planks bedded in mahogany 5200 using #6×1” Frearson-drive, flathead silicon bronze wood screws.
Once finished, the bilge will present exactly as it did when Priscilla left Algonac in 1940.
We will then proceed as we do with all SMB True 5200 bottoms, installing the outer mahogany planks bedded in white 5200 using #8×1-1/4” Frearson drive, flathead, silicon bronze wood screws.
Planking the inner skin produces a tighter, more rigid skin that follows the bottom’s contours precisely. Any interior squeeze-out will be removed using nylon putty knives before it, too, receives three full coats of Chris-Craft mahogany bilge paint.
Post this new day, SMB will make individually planking inner skins our standard for SMB True 5200 bottoms.
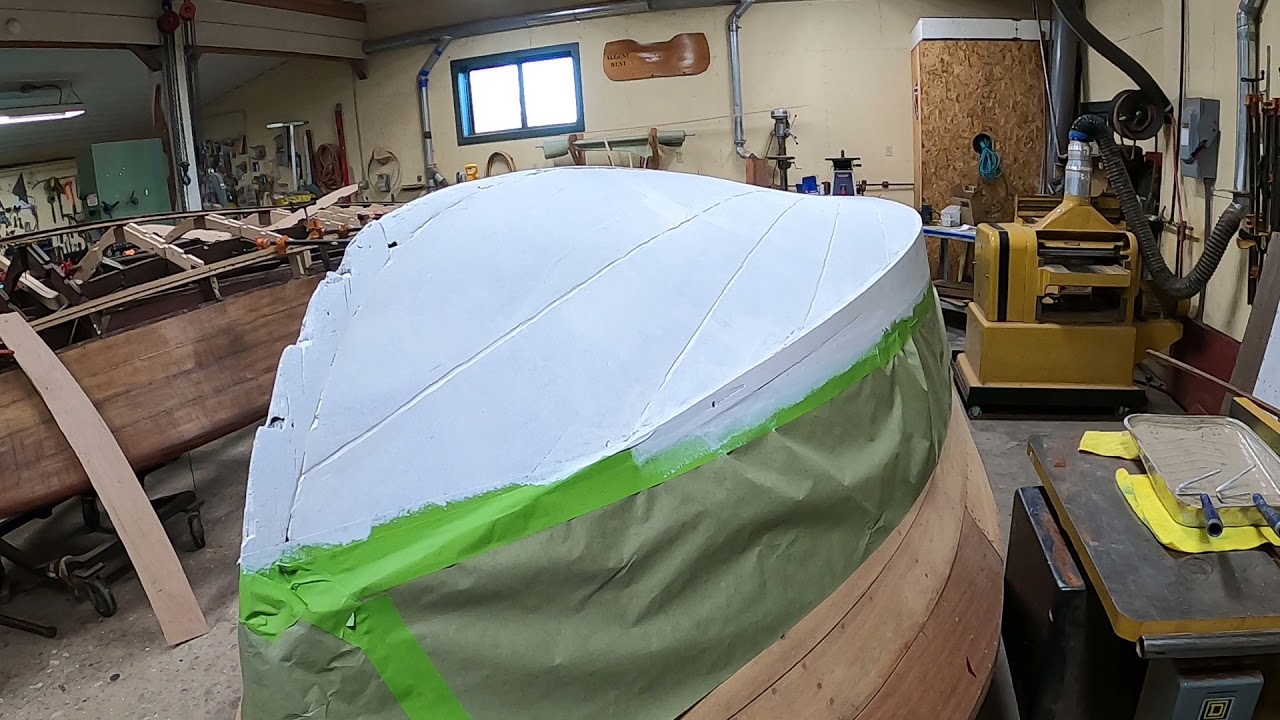
Our 1950 18-foot Chris-Craft Riviera is well on her way to having a new True 5200 bottom.
We achieve that goal by using 6mm Aquatek Meranti Maring Plywood for the inner skin, after which we fabricate exterior planks patterned on her original planks using 3/8-inch Meranti FAS grade mahogany.
The ply is first is sealed with three coats of CPES, inside and out and then painted with three coats of Chris-Craft red Sandusky paint Company bilge paint, and then installed using mahogany 5200 bedding on the frames and the battens.
The exterior planks are sealed with three coats of CPES and then bedded in a uniform, approximately 1/8-inch-thick bed of white 5200, save for the outermost plank, that is bedded in mahogany 5200 where is sweeps above the waterline. They are installed using #8 x 1-1/2 flathead silicon bronze screws.
The final result is a rock-hard, super-stiff bottom.
We then apply three more coats of CPES to the bottom planking before priming it using five coats of Interlux Tow-Part 2000E Barrier Coat Epoxy Primer, alternating between gray and white as we build coats.
Finally, her bottom will receive three coats of Pettit Hard Racing Bronze bottom paint, and we will then resume focusing above the waterline.
Yes, it is Memorial Day, but we have a boat needing a new bottom, so have dropped all else to make some real progress, but also to discover what is or is not lurking beneath that plywood. Our 1959 Chris-Craft Ski Boat must get back to her owner ASAP, so we are on task.
The good news is that, save fore one of them, her frames are sound; yes, grease-sodden, but solid. Joe was able to sister the one port side forward frame that had broken.
We will not attempt applying bilge paint to the frames as the grease and oil has penetrated to the point it would not adhere. We will scrape and then sand all of the plywood inner skin landings on the frames.
Remember my endless comments about how these venerable ladies keep secrets beneath their skirts? Well, this lady’s secret is that what we have been removing is anything but her original bottom. Indeed, independent of what the owner was told then, whoever is the villain of this piece should be dragged and quartered.
Why? Just imagine using 3/8” A/C construction plywood for the bottom of a wood boat! It has delaminated everywhere. Once again, thank the Lord that she and her owner did not find the bottom!
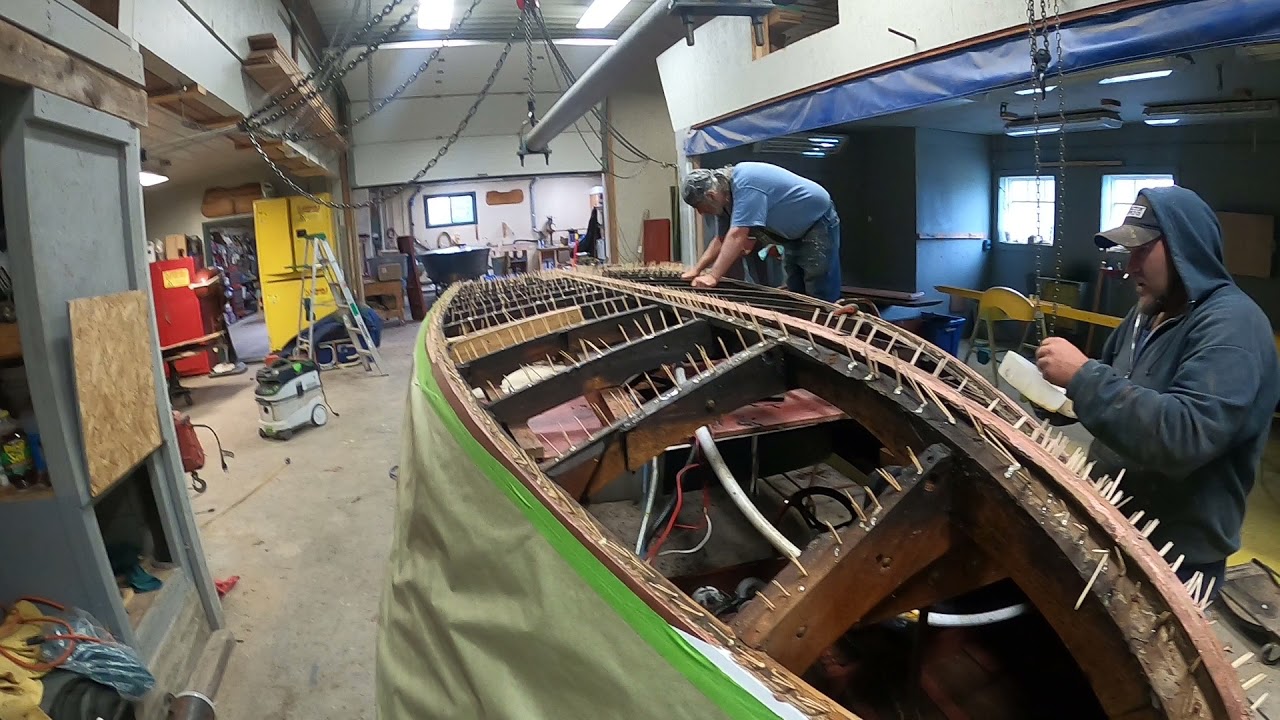
At this point we are “porcupining,” which involves filling every empty screw hole with three to four hardwood toothpicks and waterproof Gorilla glue. Once all of them have been inserted, Joe and Rick will spray the bottom lightly with water. Doing so accelerates curing while strengthening the bond formed between the oak frames and hardwood toothpicks.
Remember, you can access all the materials we use and their sources by navigating to our Materials and Sources page.
Next, we will use our Fein MultiMaster tools to skim off the toothpicks, at which time the landings will be ruthlessly scraped, sanded and treated with three full coats of Smith’s – and only Smith’s Clear Penetrating Epoxy Sealer.
Following will be fitting the Meranti Aquatek Marine plywood bottom panels, sealing them with CPES and applying three coats of Sandusky Paint Company Chris-Craft Mahogany Bilge Paint.
None of the bottom planks, several of which just might be other than mahogany, can be saved. While the 5200 in which the plywood panels are bedded cures, we will be using the released planks as patterns and then sending them to the transfer station for recycling.
As always, you can delve much, much deeper into the what and how of a True 5200 Bottom by navigating to our True 5200 Bottom page.
She will be roaring across her home lake well before our promised July 4 delivery.
Our 1956 19-ft. Chris-Craft Capri has had a tough life, what with being assaulted by inept and worse “restorers” a decade or so ago.
We have recently reported on the travesties visited upon her decks, stem and engine hatch. Now that she’s been flipped, are we surprised to discover additional assaults perpetrated against her bottom?
The good news is that, save for needing refastening and a few minor repairs, her bottom planking is in excellent condition.
That said, and other things equal, she still needs a True 5200 bottom. However, as so often happens in life, other things are not equal. While her owner agrees that there is a True 5200 bottom in her future, given all we must preserve elsewhere on her hull and engine, it will not happen now, a decision we agree with based on our detailed and extensive examination of her bilge and its inner bottom planking.
The real issue in the bilge is lots of grease, oil and grime. Yes, that layer is pretty much gone directly beneath the engine, so we will release and execute repairs there. After we remove endless strings of useless cotton roving in some seams, roving that was not sealed with any sort of caulking compound, and yards and yards and yards of failed 5200 in others, we will refasten large parts of the bottom and then apply four coasts of Clear Penetrating Epoxy Sealer – CPES. We will then pay the seams with Jamestown Distributors’ TotalBoat ThixoFlex and sand the bottom fair.
Following applying three more coats of CPES we will prime with Pettit Tie Coat Primer and then apply three coats of Pettit Copper Bronze Hard Racing Bottom Paint.
Now that Methyl Chloride has been banned, and we can no longer source “good” paint stripper, we have turned to TotalBoat TotalStrip Paint Stripper. No, it is not what Circa 1850 was, but it is user friendly and we are adjusting to applying it and then coming back 24 – 48 hours later. It is still wet and has liquefied many layers of paint, even bottom paint, by then.
Finally, we’ve all faced challenges stripping concave hullsides. Using a standard, straight-bladed scraper risks leaving skid marks at each end of the blade while the center floats above the wood. A good friend suggested we try an Allway Tools 2-1/2-Inch 4-Edge Metal Tubular Wood Scraper, the blade edges of which are slightly convex. At only about $8 for a handle and 4-edge blade, why not? Bingo! It works beautifully … nary a skid mark appears behind each stroke.
We are just two coats of Pettit Old Salem Copper Bronze Hard Racing Enamel away from completing installing a True 5200 Bottom on this 1956 17’ Chris-Craft Special Sportsman.
While the Interlux Interprotect 2000E Barrier Coat Epoxy Primer cures for re-coating in five hours, the Pettit bottom paint wants sixteen hours at seventy degrees Fahrenheit. Since our shop stays in the mid-sixties, we will wait twenty to twenty-fours, or until midday tomorrow, to apply the second coat.
Her bottom will receive a third coat, but not until the balance of this preservation project is behind us. All of her topside and transom planks must be released. We do no know until then how many, if any, can be saved, and re-stacking of the topside planks is an absolute must, as is replacing at least one transom plank.
That said, on next Wednesday we will flip and load her onto her trailer, and place her in our storage facility until we and her owner agree on the path forward. His history with her – she was bought new by his family. He grew up with her as the core of family activities each year. She was sold and then banished to lying beneath a tree with a deteriorating canvas tarp as her only protection from the elements for forty years until he finally found her three or so years ago.
Those strong family and emotional ties are driving him towards investing himself in the balance of her preservation. We understand and anticipate a warm and compassionate conversation with him in the coming months.
But the best news is that, with her True 5200 Bottom in place and all structural elements now sound, we saved her. Mission accomplished!
As is typical of all Chris-Craft utilities and runabouts, this 1938 19’ Chris-Craft Custom Runabout, Flyin’ By’s hull is comprised of a series of heavy frames to which the bottom is fastened. A series of battens run athwart between the frames, thereby adding substantial stiffness to the bottom.
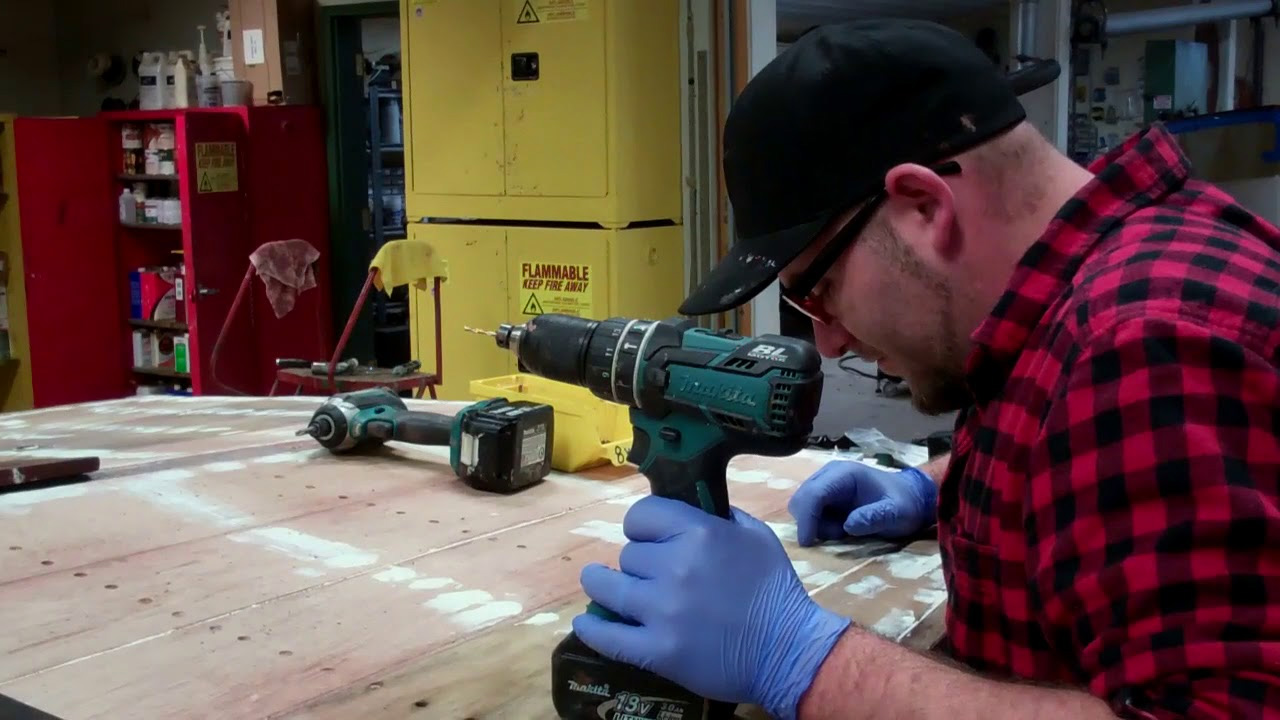
Simply put installing battens is a thankless, two-person challenge. Here are the steps for installing one batten at a time, followed by filling the countersinks, fairing the bottom, sealing, priming and applying bottom paint. The process is described for one batten, one that will be repeated for all of them:
Installing the Battens.
From the inside, drill two pilot holes towards the ends of the batten. • Using a straightedge and pencil, scribe a line between the pair of holes.
Drill holes along the line, about 1.5 inches apart using a countersink pilot drill.
Dry fit the batten and, while the guy underneath presses it in place, drill two holes from the outside in through two of the countersinks.
Sink screws through those two holes. We use #6 x 1 or x 1-1/4, depending on the thickness of the inner plywood skin plus the exterior planks.
Stand the remaining screws through the remaining holes and drive them home.
Release all of those screws for now.
Butter the batten’s bottom face about 1/8” thick with 3M 5200 – mahogany.
Hand it to the guy beneath the boat, who presses it in place.
Starting with the two end screws, and remembering to stand screws in all of the holes, drive all of them in place. (Standing the screws in the holes first ensures that fountains – volcanoes? – of 5200 do not squirt though the other screw holes as you work along the batten.)
Repeat for all battens on both bottom faces. Flyin’ By has twenty of them per face.
Filling Countersinks and Fairing the Bottom.
Filling countersinks and fairing the bottom is next. We use 3M Premium Marine Filler, available from Jamestown and elsewhere, to fill and fair the countersinks.
Three applications are required. We sand using 80 grit and one of our Festool random orbit sanders after the first coat, just to knock down ridges and what I call overspread.
Once the last application has cured – about 4 – 6 hours – we sand the entire bottom fair using 80 grit on our pneumatic longboard sanders. Declivities may show themselves at this stage, which requires interrupting the sanding as Premium Filler is applied to them. Sealing, Priming and Bottom Paint.
Once the bottom is fair, apply three coats of Smith’s Clear Penetrating Epoxy Sealer. Danenberg recommends applying the second coat immediately after the first, so we apply the CPES to one entire face and then return to where we began and apply a second coat.
I know there are other penetrating sealers available, and we’ve tested most of them. Let me just say that we use Smith’s CPES, which is available at good prices from Star Distributing in West Mystic, CT: http://www.star-distributing.com/smit….)
Our go-to primer is Interlux InterProtect 2000E Two-Part Barrier Coat Epoxy Primer because it works
From Jamestown:
Interlux’s Micro-Plate formula creates an effective barrier against water permeation. 2000E may be used above and below the waterline as a universal primer for all surfaces. It is also an excellent primer for all metals and can be used as part of a no sand system.
From Interlux:
Two-part epoxy water barrier with Micro-Plates
Up to two weeks is allowed between coats of 2000E
Now available in two colors, Gray and White
Fast drying, easy application
Sag resistance to insure the elimination of sags and runs during application
Technically, InterProtect Micro-Plates provide millions of overlapping microscopic plates that create a barrier similar to shingles on a roof. These overlapping Micro-Plates eliminate any direct path for water migration and also improve the sag resistance of the epoxy making application easier.
We will have a gallon each of gray and white 2000E on hand for Flyin’ By’s bottom and chine plank – boot stripe included. Once we’ve applied five thin coats, we will have created an impenetrable barrier against water permeation.
Since Flyin’ By will be dry sailed by her new owners, we will apply three coats of Pettit Old Salem Copper Bronze Hard Racing Enamel, at which point she will sport a True 5200 Bottom.
Finally, she was in show ready condition, with over 20 coats of varnish having been applied and buffed when the moment to flip her arrives. No matter how careful any of us is, and no matter how many pads we placed strategically, Flyin’ By is heavy, and her hull shape presents long sweeping curves. And with three of us working around, under and even atop her, bumps and bangs are all but inevitable.
That said her varnish is scuffed in several places, so we will sand the entire hull flat anew and apply three or so coats of Interlux Perfection Plus Two-Part Varnish to her, and let it clear before she returns to storage.
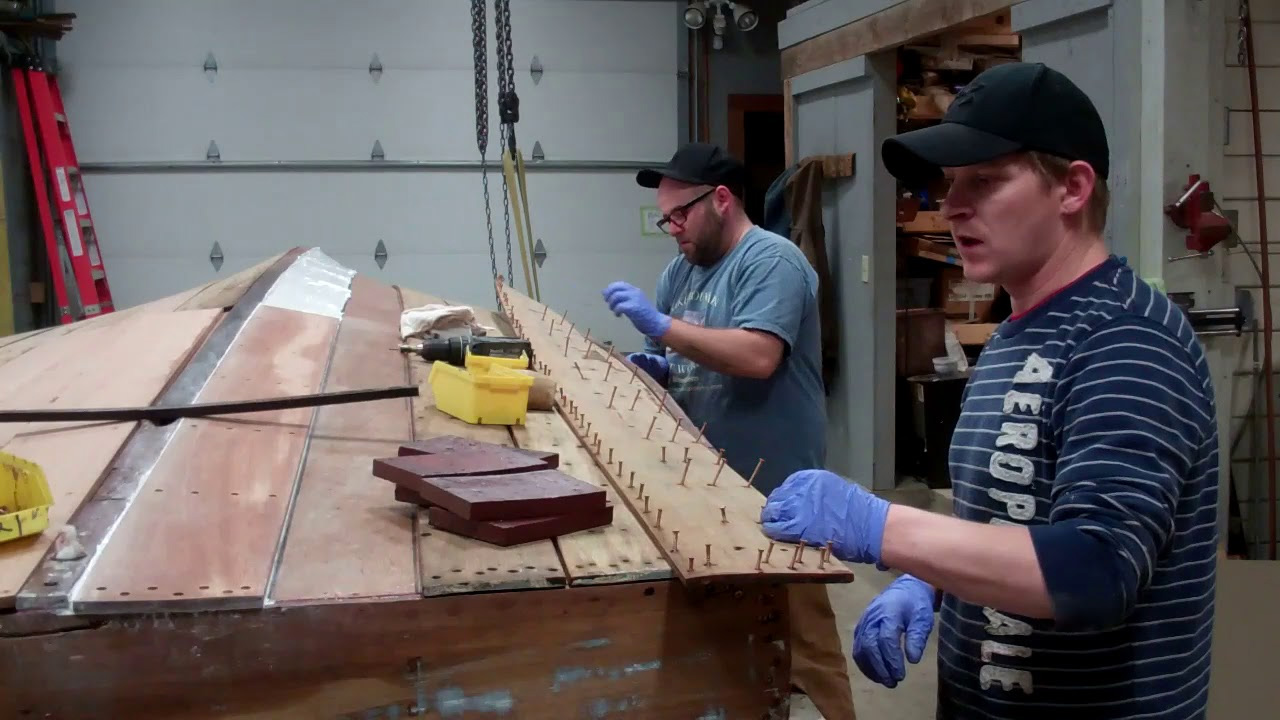
Installing the bottom planks can be tedious and is fraught with all manner of challenges.
First and foremost, unless the planks are dry-fit so that the seams between them are of uniform width, you will all but certainly experience and “Oh X$#%^!” moment when try to install the final, chine, plank.
I cannot tell you how many bottoms we’ve encountered that sport the telltale “skinny plank” along the chine. Failing to fit first, mark the edge of each plank heavily and then obey the lines usually translates into a super wide seam, sometime over an inch, and a plank that does not fit at the stem.
Once again we drop screws part way into all of a plank’s holes before setting it in place, and screw each of them in only part way thereafter. Once all the screws are down far enough that the shanks are in the plank’s holes, begin driving them home. (We work from the middle out, but given how narrow the planks are, you can also work from either, or both ends towards the middle.)
When you clean excess 5200 – that which squeezes out – work towards to ancillary goals. Keep the countersinks free of the 5200 so that the 3M Premium Marine Filler can make a purchase on wood, not on slipper adhesive. And, be sure that all seams are filled fair with 5200.
Clean with Interlux Brushing Liquid 333, and then wipe everything down with acetone, which will accelerate the curing process.
Finally, be patient. I do not care what Interlux says, 5200 can have a mind of its own around curing.
Sometimes waiting 2 – 3 days are fine, but we wait longer, at least a week, before we go at the bottom with sandpaper.
You will be helped with being patient as the countersink filling and bottom fairing process is might time consuming when done correctly. Remember, whether it is 3M Premium Marine Filler or some other fairing compound of your choosing, it shrinks as it cures. You want every countersink filled fair to the plank surface. Apply it twice and then sand everything as smooth as you can with 80 grit – no finer, before applying it a third time and sanding again.
Even though the planks were dosed with three coats of CPES before installation, you have likely sanded into the sealed layers, so applying three more coats is not overkill.
We prime all bottoms with five, not three or four – coats of Interlux 2000E Barrier Coat Primer before applying Pettit Hard Racing Copper Bronze Bottom Paint – three coats.
That Flyin’ By’s bottom was original to the boat is absolutely certain. How do we know for sure? After stripping her bottom’s port face bare, and finding nothing but an original inner layer of 3/16” mahogany laid on the bias, we inspected each frame searching for any evidence of extra screw holes or holes that had been filled during a bottom replacement. No such evidence exists.
Additionally, save for the aft garboard planks, the screw pattern, their sizes and lengths are precisely consistent throughout both bottom faces. The substitution of bronze Reed and Prince fasteners for the original brass slot-headed fasteners tells us that both aft garboards were removed and then reattached at some point.
Nowhere is there any evidence that the inner layer has deteriorated or been replaced. What remains of the original canvas interlayer is somewhere between some and none. Additionally, the original brass screws have been replaced along the keel edge of both forward garboards.
The aft garboards – the #1 planks – and the next ones outboard – the #2 aft planks – lie immediately beneath the engine and transmission, and are sufficiently oil-soaked that their ability to hold 5200 and paint is at best suspect. They must be replaced.
The balance of the original bottom planking is as hard and as sound as the day it left Algonac, MI in 1938. Releasing the screws fastening the bottom is a four-part sequence
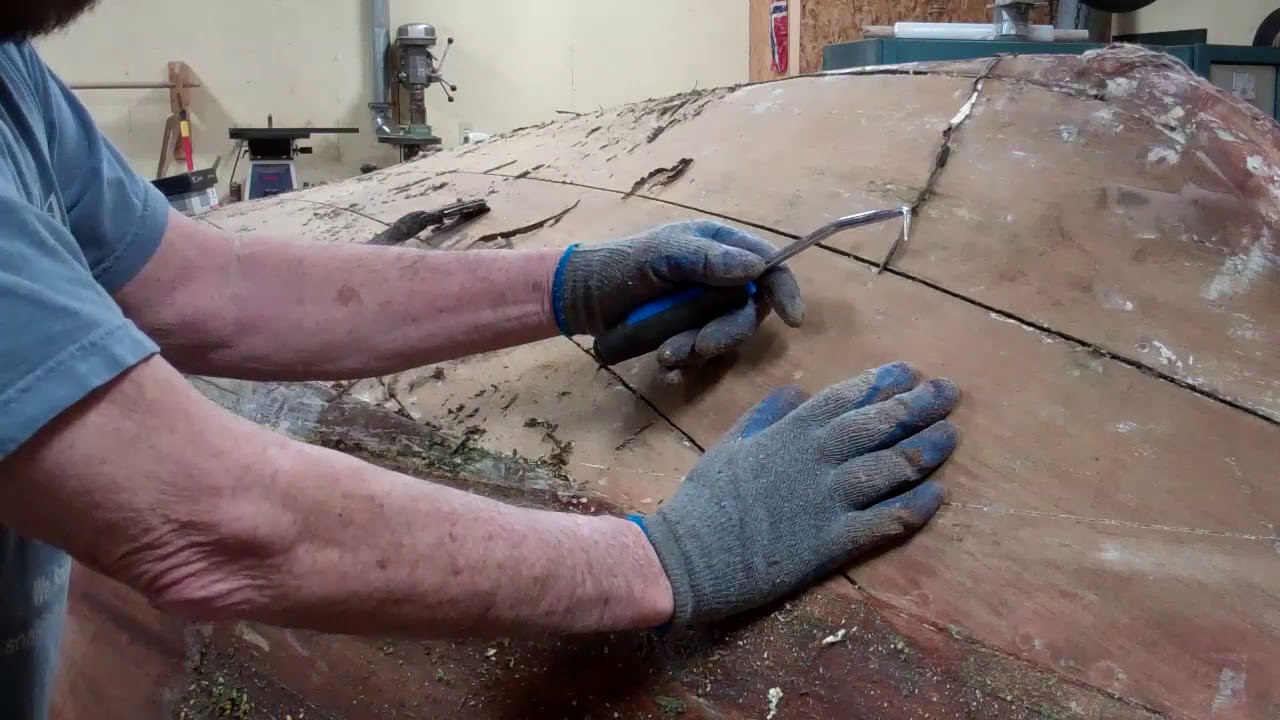
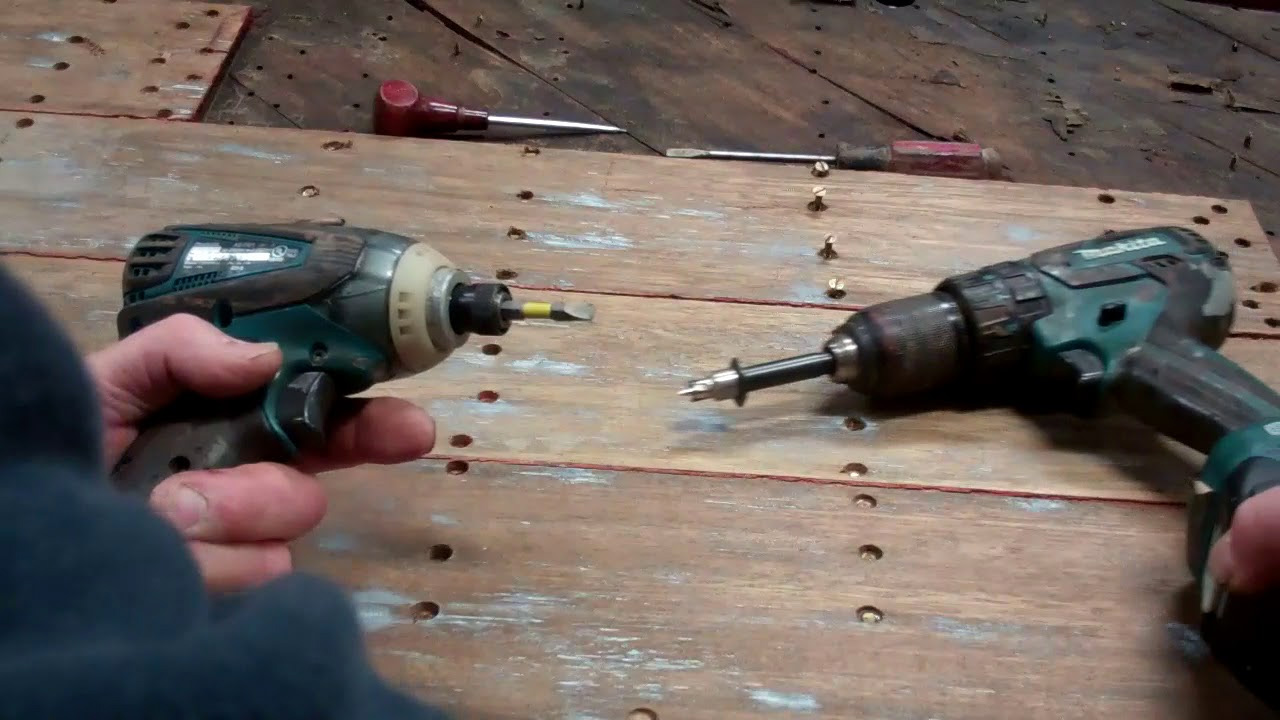
Using a 3/8” Rotabroach cutter and electric drill set at high speed, drill each countersink until you hear the telltale sound of the steel cutter grinding the head of the brass or bronze (or stainless) screw. Take care here. The Rotabroach is designed for grinding off excess spot weld. The cutters are super hard and super sharp. Applying too much down force or grinding for too long risks rounding off the screw’s head and erasing its driving slots.
Reach for a sharpened awl and clean each countersink, paying particular attention to the screw’s slot or R&P driver. Grind through these and you will “enjoy” extracting the screw using one of the damaged screw extractors available today.
Blast all residue out of the countersink with an air chuck and compressor delivering at least 110 PSI. (That’s why wearing safety glasses are absolutely required. The particles erupt from the countersink with surprising force.)
Using either a slot or R&P driver inserted in a variable-speed impact gun, carefully and slowly tease the screw as it begins backing out of the wood. Trigger control is critical lest you want to destroy the screw’s head and be reaching for the damaged screw extractor.
Voila’! One screw is released. You have only hundreds and hundreds and hundreds to go!
Every screw I’ve released to this point was dropped into a plastic paint pail that now weighs over 20 pounds!
We clean fastener countersinks using a Blair Equipment 11090N Rotabroach Cutter Kit, which is available from Amazon.com (https://www.amazon.com/Blair-Equipmen…)
Yes, even if a plank will be reused and is filled with either a wood or putty, we remove its wood bungs, but in this application always choose a cutter that is smaller than the diameter of the bungs being removed. The cutter bores through the bung without touching the countersink’s edges and is then cleaned using one of the awls we have on hand.
We are much less careful when releasing failed planking, and often use a cutter one size larger than the diameter of the countersink. The goal here is removing the plank without breaking it so it remains available to patterning.
The air chuck is key here, as RJ demonstrates in the clip. With our compressor set at 110 PSI, the chuck delivers a concentrated blast of air that (almost always) leaves the countersink bereft of waste material.
Finally, if you have a super steady hand, as RJ does, you too can back the screws out with an impact gun, not a hand screwdriver.
When stripping a bottom, be sure to remember RJ’s admonishment. Climb beneath the hull, or down into if she’s not flipped yet, and number the intermediate frames, sometimes referred to as battens.
While we will bed them in 3M5200 during final assembly, they are originally installed by driving screws from outside the hull, through the external planking and inner skin, and into the batten without any adhesive applied to the batten or inner skin.
Numbering these battens before they’ve dropped to the floor and skittered about will save endless time and frustration during reassembly.
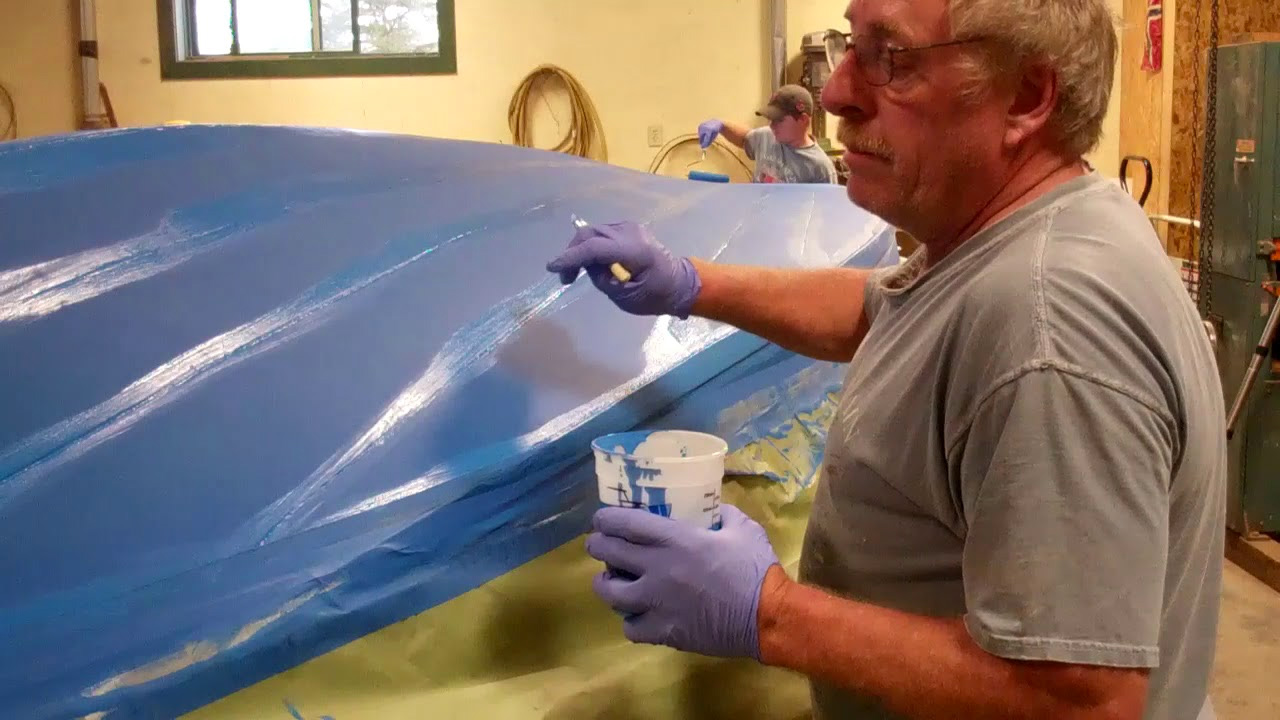
Since the last update video, we have applied five coats of Interlux 2000E two-part primer, followed by the requisite blue bottom paint, ePaint’s Ecominder Antifouling Bottom Paint in this case.
One more coat of ePaint Ecominder, a water-based one-part antifouling paint and this 1946 brightside U22’s True 5200 bottom is complete.
What is ePaint Ecominder antifouling paint? Here is what Jamestown Distributors answers:
New ePaint Ecominder is the greenest and most effective copper-free antifouling paint available.
Ecominder uses a copper-free, water-based, zero VOC paint formula that is safe and easy to apply. It keeps boat hulls clean using hydrogen peroxide generated from sunlight and the environmentally preferred booster biocide Zinc Omadine.
Designed for use on all rigid type surfaces including fiberglass, aluminum, and wood, it is compatible over other bottom paint systems, and can even be applied in cool ambient temperatures. It is very popular in the pontoon market due to its compatibility with aluminum substrates. Ecominder is available in a variety of colors including White, Gray, Green, Blue, and Black.
ePaints contain no tin or copper. Instead of following the age-old method of leaching toxicants that persist in the environment, ePaints employ a novel mechanism to control the attachment of fouling organisms. When immersed in oxygenated water, all ePaints photochemically generate minute levels of peroxides. The minute levels of peroxides make the surface inhospitable to the settling larvae of fouling organisms. Hydrogen peroxide is a potent, but short-lived chemical that has traditionally been used as an antiseptic. Peroxides have been demonstrated to be effective antifouling agents. The peroxides do not persist in the environment because they quickly decompose back into oxygen and water by natural ions dissolved in the water.
Because ePaints contains no copper, they are available in white as well as a variety of bright colors. The lack of copper also ensures that ePaints are compatible with aluminum and other metals in the marine environment. This is not the case with copper-based paints that promote galvanic corrosion with metal boats. ePaints are safer for you, your boat, and our environment.
With a home port of Ahmic Harbour in Magnatawan, Ontario, this U22 lives and plays on one myriad of lakes in Canada’s Muskoka lake region where the water remains clear and pristine. By using Ecominder on her bottom, we ensure that, at least she, will introduce no additional copper to Ahmic Lake. That the paint is water-based, has zero VOCs is a plus for us while applying it in the shop. One more coat, then the paper comes off. One the remaining topside Dutchman repairs are executed and the entire surface, including the transom’s, is sanded fair, she will be flipped upright for the first time in over seven months.
We are just beginning to see a glimmer of the finish line peeking over the horizon!