That Flyin’ By’s bottom was original to the boat is absolutely certain. How do we know for sure? After stripping her bottom’s port face bare, and finding nothing but an original inner layer of 3/16” mahogany laid on the bias, we inspected each frame searching for any evidence of extra screw holes or holes that had been filled during a bottom replacement. No such evidence exists.
Additionally, save for the aft garboard planks, the screw pattern, their sizes and lengths are precisely consistent throughout both bottom faces. The substitution of bronze Reed and Prince fasteners for the original brass slot-headed fasteners tells us that both aft garboards were removed and then reattached at some point.
Nowhere is there any evidence that the inner layer has deteriorated or been replaced. What remains of the original canvas interlayer is somewhere between some and none. Additionally, the original brass screws have been replaced along the keel edge of both forward garboards.
The aft garboards – the #1 planks – and the next ones outboard – the #2 aft planks – lie immediately beneath the engine and transmission, and are sufficiently oil-soaked that their ability to hold 5200 and paint is at best suspect. They must be replaced.
The balance of the original bottom planking is as hard and as sound as the day it left Algonac, MI in 1938. Releasing the screws fastening the bottom is a four-part sequence
- Using a 3/8” Rotabroach cutter and electric drill set at high speed, drill each countersink until you hear the telltale sound of the steel cutter grinding the head of the brass or bronze (or stainless) screw. Take care here. The Rotabroach is designed for grinding off excess spot weld. The cutters are super hard and super sharp. Applying too much down force or grinding for too long risks rounding off the screw’s head and erasing its driving slots.
- Reach for a sharpened awl and clean each countersink, paying particular attention to the screw’s slot or R&P driver. Grind through these and you will “enjoy” extracting the screw using one of the damaged screw extractors available today.
- Blast all residue out of the countersink with an air chuck and compressor delivering at least 110 PSI. (That’s why wearing safety glasses are absolutely required. The particles erupt from the countersink with surprising force.)
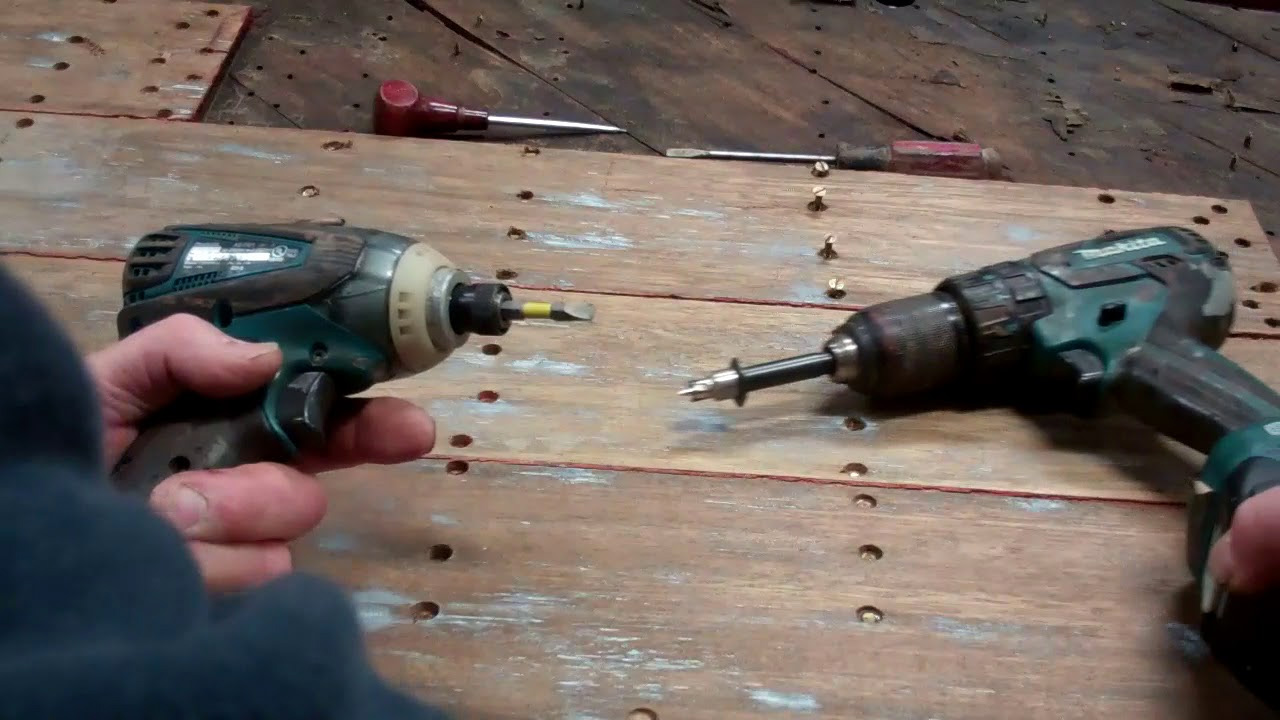
- Using either a slot or R&P driver inserted in a variable-speed impact gun, carefully and slowly tease the screw as it begins backing out of the wood. Trigger control is critical lest you want to destroy the screw’s head and be reaching for the damaged screw extractor.
Voila’! One screw is released. You have only hundreds and hundreds and hundreds to go!
Every screw I’ve released to this point was dropped into a plastic paint pail that now weighs over 20 pounds!
Only a hundred or so to go…