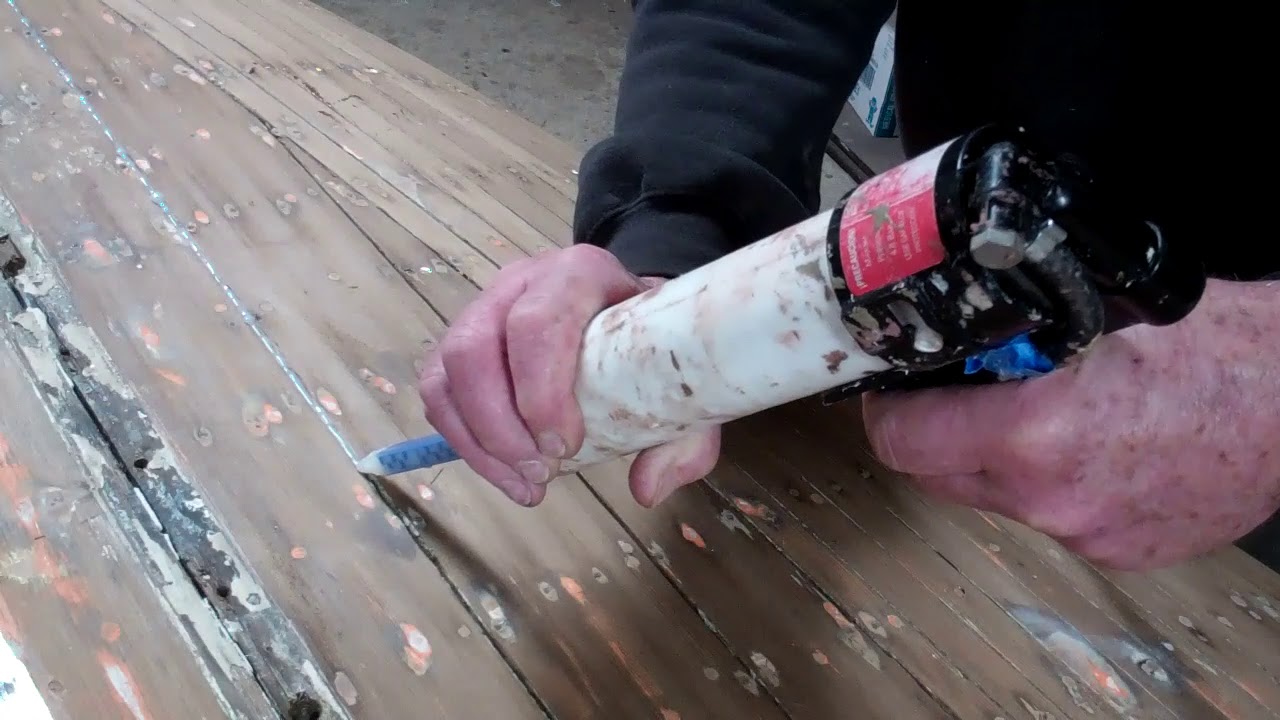
Sorry about the behemoth compressor firing up in the “background.” With five preservation projects fully engaged right now, I cannot simply shut the shop down when I shoot a video.
Finally, I am confident we have solved a chronic wood boat preservation conundrum, “My boat has an original bottom with open seams. I do not wish to, or in the case of a Striptite hull cannot, install a True 5200 Bottom. Nor do I typically drop her in the water where she lives all season. What are my options short of waiting for her to swell each time we launch and hope to use her?”
Hmmm …. Our stock answer has been, “Use Interlux Seam Compound for below water applications. It will remain elastic, compressible and able to withstand the swell-shrink cycle, even if the movement is miniscule, without overly compressing the wood on each side of the seam.” Save for two cases where a boat came back for new bottom paint and we found that some of the Seam Compound had become hard and brittle, I am still comfortable with it as a product that solves the problem. However….
OMG! Even when heated, it pays very, very poorly, and will fight you every inch of the way. What’s worse than all the time involved, Interlux recommends three applications.
There must be something better, especially in terms of ease and time cost of application.
I recently answered a query about the best material to use when sealing lapstrake topside strake seams with a small fillet. Our practice to date has been 3M5200, as long as the fillet is tiny, tiny in cross section, and any feathers beyond it are removed. One of you answered simply, “Use West G-Flex and you will be good.”
Hours and hours of subsequent research tells me that this person is correct. However, while two-part G-Flex is supplied in squeeze bottles and quart cans, Jamestown Distributors offers Thixo Flex, a TotalBoat brand version that is also two-part, satisfies G-Flex’s criteria for adhesion and lasting elasticity and is packaged in 10 oz. caulking tubes along with a mixing tip that delivers material in a fine stream that comes out having been mixed precisely.
Our tests, albeit only over several weeks rather than several years, and painfully small sampled, delivered a bond that is flexible and simply cannot be torn apart unless the wood fibers fail. After paying a seam’s worth, I use a super flexible putty knife to drive the material into the seam. (A plastic spreader may work as well, but I prefer the putty knife.)
The waste is scooped and spread into the next seam.
I should be able to finish the Captivator’s bottom spending about 2+ hours per side. Paying Seam Compound would take time measured in days, by contrast.
Once the Thixo Flex has cured, and after we’ve checked for any pin holes or holidays, we will sand the cured residue off the planks and seal the entire bottom with three full coats of Smith’s Clear Penetrating Epoxy Sealer.
Priming it with three coats of Pettit Tie Coat Primer 6627 will follow.
We must install the new transom bracing and transom before we can finish paying TotalBoat Thixo Flex into the bottom seams, however.
Step-by-step…


Please apply CPES ahead of Thixo so you get the best possible bond.
Bottom paint depends on the make and model. Please refer to the materials and sources document at the head of the How-To dropdown menu.
Michael,
Love all the info on the site its a big help.
Question.
After applying Thixo-Flex to the seams then the CPES and the primer.
What bottom paint do you recommend?
Thanks
Rick
Rick,
All the information you need on materials and their sources is available on my Website: https://snakemountainboatworks.com/materials-sources-for-vintage-wooden-boat-preservation/
I just ordered this product from Jamestown distributors I’m going to use it on the seams of my 1961 19 ft century resorter. I get different opinions on whether I should get the bottom wet to soak up some water to expand the boards before I seal and paint. I was wondering what you recommend. The boat has been upside down in my shop for 3 years now it’s very dry it’s completely stripped and sanded ready to go. The gaps and the seams vary from 1/8 inch to 3/8 of an inch wide
Thixo cannot bridge/fill 3/8″ gaps. I’d get out a garden hose and really wet it down, followed by covering with cheap plastic drop cloths. Rewet and wrap daily for at least a week, hoping …. but I doubt those huge gaps will shrink enough.
No. Seal the bottom with CPES – four coats fist. Thixo has lots of trouble bridging 3/8″ seam gaps.