1954 Penn Yan Captivator Aristocrat Preserved!

1954 penn yan captivator aristocrat preserved

Captivator is a 1954 Penn Yan Striptite Captivator Aristocrat who is fitted out with virtually every option Penn Yan offered on this model in 1954.

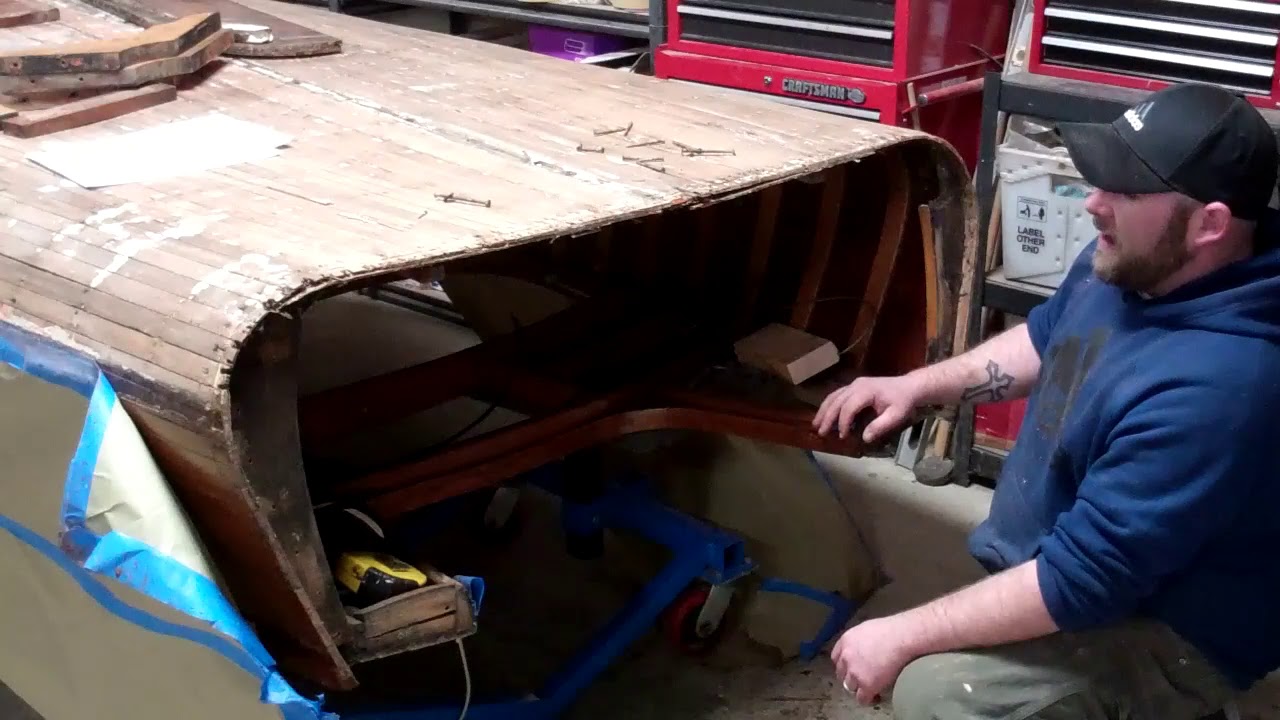
We faced some major issues upon her initial inspection. Her transom and transom framing were rotted beyond saving, so were replaced.

Someone had tried to caulk her inter-plank seams with a 3M5200-like material, most of which had long since lost its adhesion. Removing all this material using reefing hooks cost many hours, but in the end, her seams were clean.

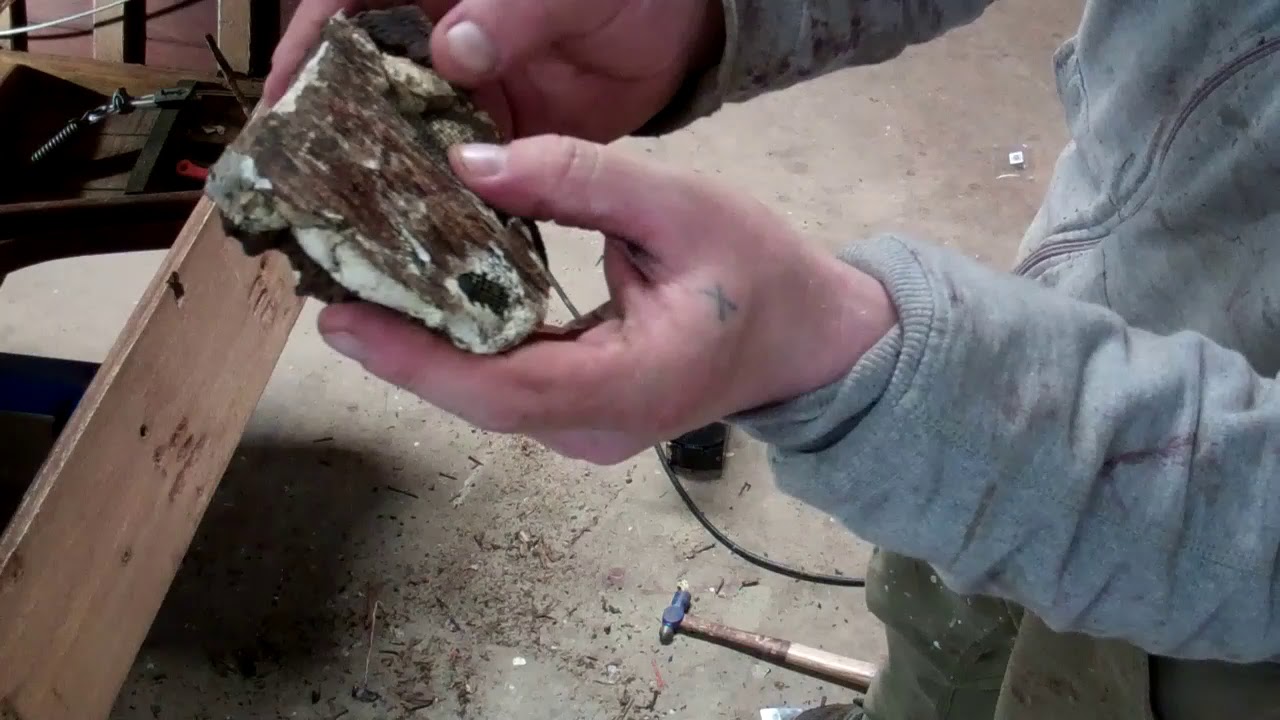
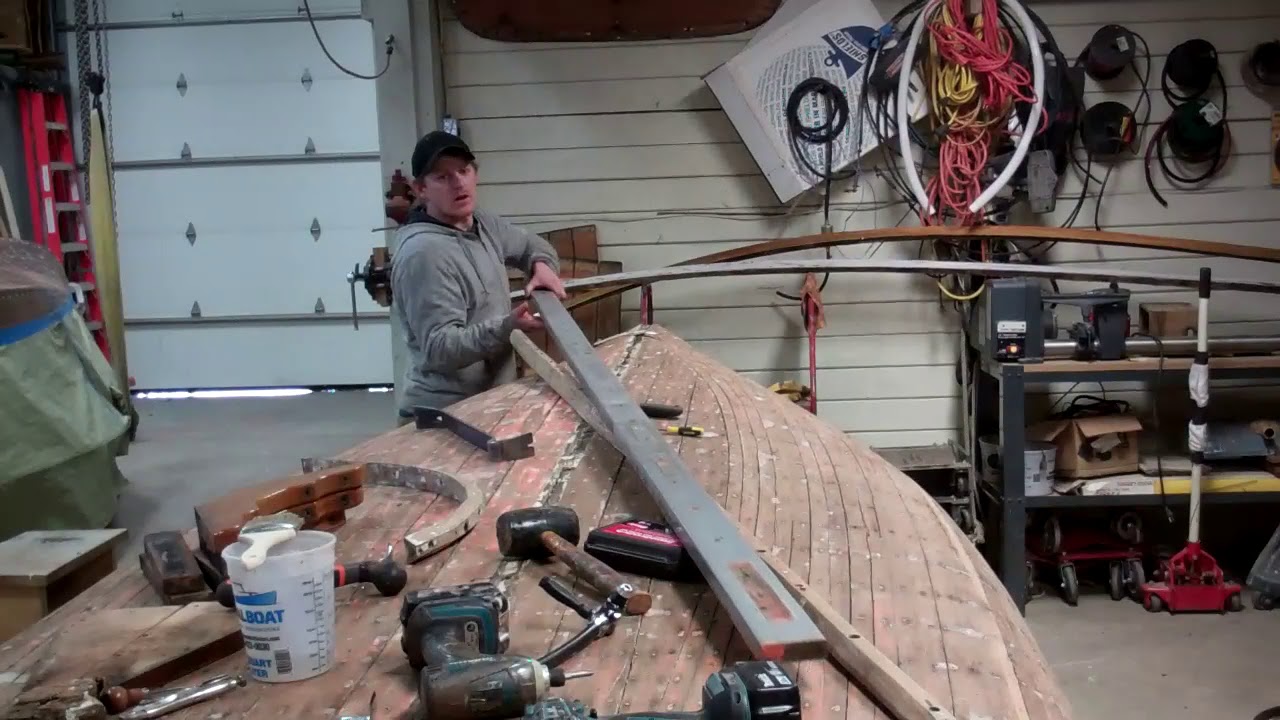
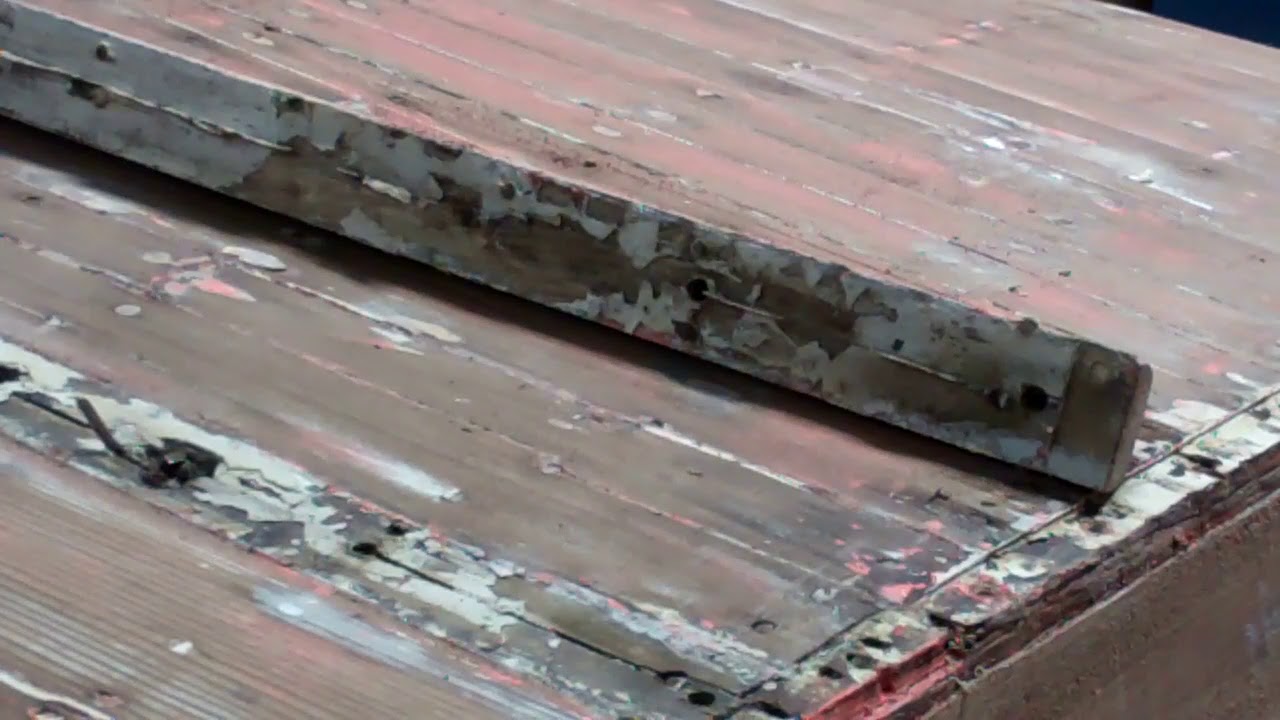
After removing her keel and keelson, which provided access to area internal to the keel, and inspecting the entire hull below the waterline, the only rot discovered lurked behind her improperly-installed spray rails.

Whatever was used to “seal” the spray-rail-hullside seams had long since failed, which allowed water to work down behind the rails and stay there. Rot was evident, and Joe’s foray into Dutchman repairs followed.

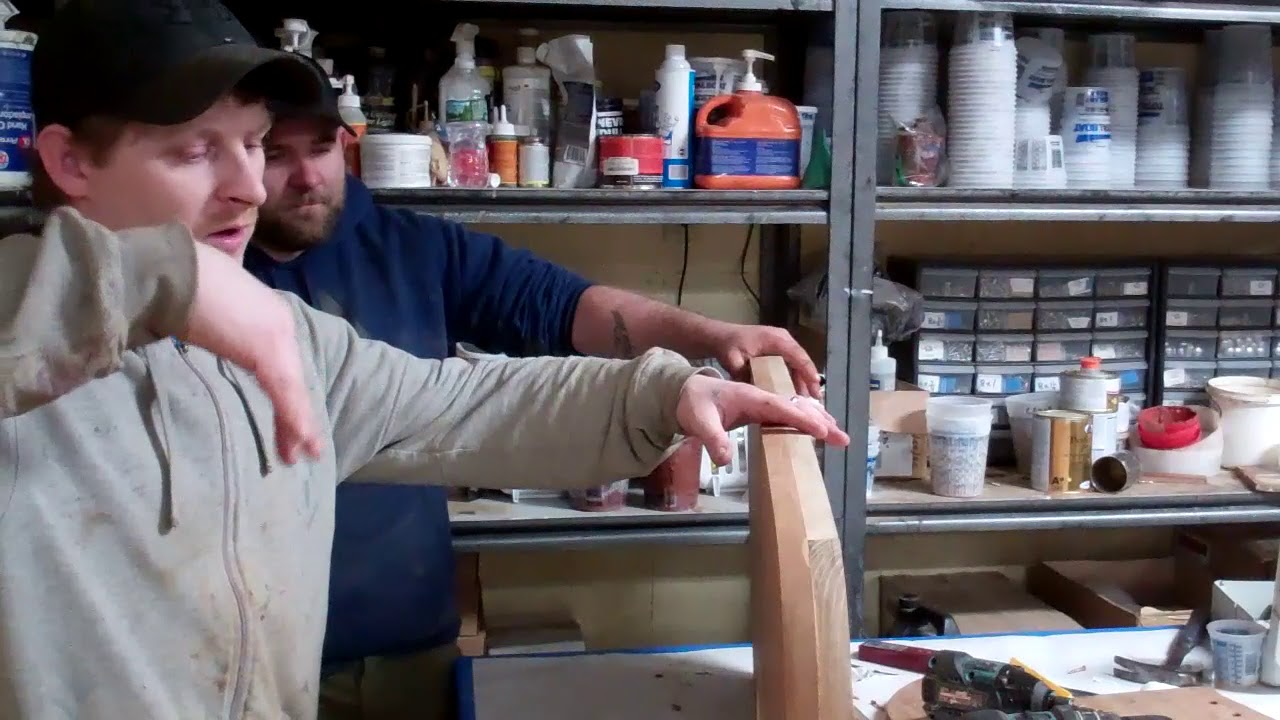
Save for saving the upright braces, Joe and RJ fabricated all new transom framing and then a two-plank transom blank, all of which matched the pattern pieces exactly. Many hours of fitting and sanding later, Captivator’s new transom was in place and the original brass protective strip had been reinstalled.

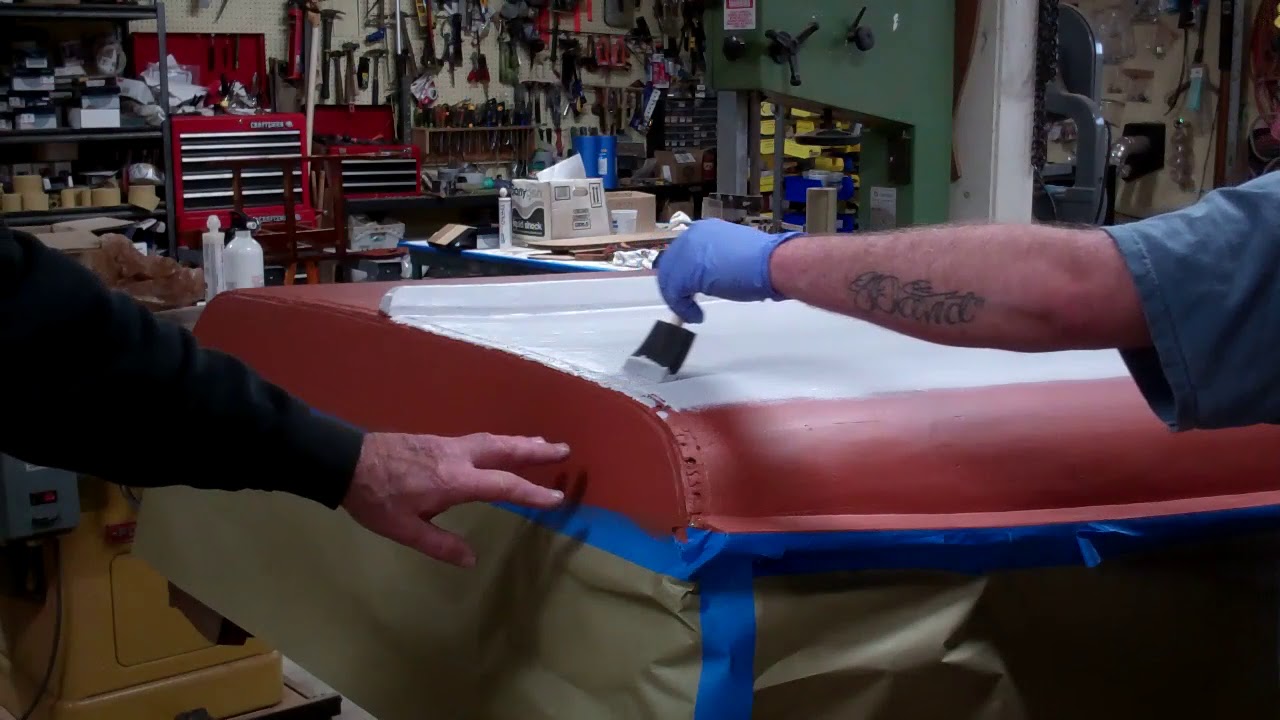
Once it was properly caulked-sealed using TotalBoat Thixo Flex, we flooded her hull below the waterline with three full coats of Clear Penetrating Epoxy Sealer (CPES) and allowed it to cure for 48 hours before applying three coats of Pettit Tie Coat Primer 6627. We finished the bottom by applying four coats of JD Select Ablative Bottom Paint in shark white.

We stripped her hullsides, decks and gunwales to bare wood using our trusty Circa 1850 Heavy Bodied Paint and Varnish Remover.

All that wood was sanded fair, stained using Mike Mayer’s, Lake Oswego Boat Co, post-war CC gel stain. (Mike can be reached at [email protected], or www.loaboat.com).

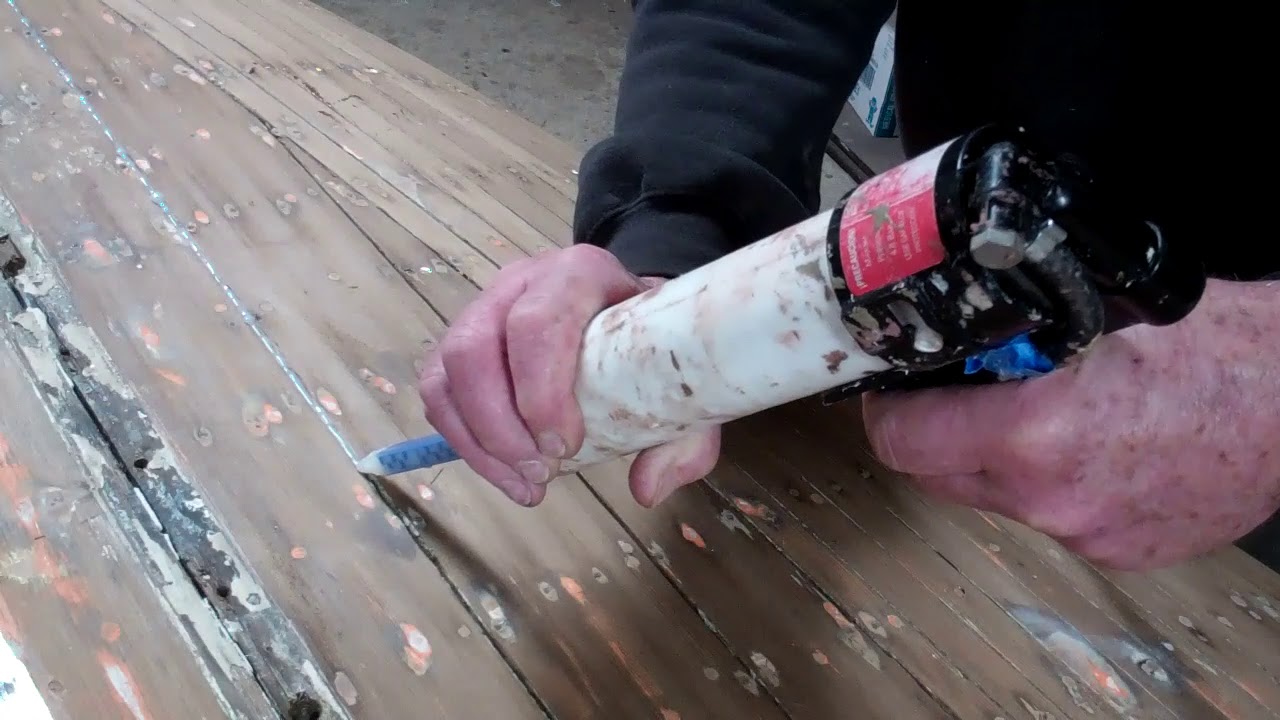
Her deck seams were payed with mahogany Sikaflex 290 LOT mahogany The standard sequence followed: CPES, scuffing and then varnishing. Her decks, hullsides and transom received 18 coats of Pettit Hi-Build followed by 3 coats of Pettit Captain’s Ultra Clear 2607. Hand (block) sanding with increasingly fine grit until the final sanding was executed every 5 coats or so until she received her final coat.

Interior surfaces received 18 coats of Hi-Build.

Reassembly followed, and now she’s ready to go home.

1954 Penn Yan Captivator Aristocrat Bleaching Milestone

1954 penn yan captivator bleaching

With her bottom repaired and having received two coats of Clear Penetrating Epoxy Sealer, we sealed her below-waterline seams using TotalBoat Thixo Flex, sanded the entire surface fair and applied four additional coats of Clear Penetrating Epoxy Sealer.

Why so many coats of CPES? Once stripped bare, her bottom planking was, to invoke the cliché, dry as a cork. The CPES simply all but disappeared as it was applied, which does not contribute to adhesion.

Once the splash rails were installed imbedded in 3M 5200 and their bottom sides sealed with CPES, we applied three coats of Pettit Tie Coat Primer, followed by four more of JD Select shark white antifouling paint.

While some folks varnish splash rail undersides, we always prime and bottom paint them, thereby better-protecting wood that so often comes into the shop rotted into the rail and sometimes well into the hullside planking.

We then stripped and sanded her hullsides fair with 80 grit, and now have flipped her upright so we can focus on bleaching, staining, sealing and varnishing the hullsides, decks and gunwales.

Almost immediately we encountered a major issue. The coaming strips that encircle both cockpits had been released and then installed bedded in gobs and ribbons of 3M 5200. Since finishing the decks would be all but impossible with their grain running into the coamings. (The latter stand almost 3.8” proud of the decks.)

Not a problem. We will simply release the screws and off they will come. NOT! We had to literally slice them off using our FEIN MultiMaster, and eventually off they came. We will clean the residue 5200 using Circa 1850 Heavy Body Paint and Varnish Remover, scrapers and, yes, likely the FEIN tool.

Joe and RJ stripped the decks and most everything attached to them and then reached for reefing hooks, which are available from Jamestown Distributors.

We have half a dozen or more of them, each one of which has been ground to a different thickness, which we use to remove the “white stuff” from deck seams. (This video we shot in 2016 shows RJ cleaning seams with a reefing hook). Be sure to read the write-up that accompanies the clip for more guidance and information.

Bleaching begins now, and we should be leaving this milestone on our wake by tomorrow morning. Then her elegance begins reemerging once we’ve scuffed the bleached surfaces to remove the hairs that the bleach stands up, and stain her.

Yes, we will keep on keeping you in the loop!

1954 Penn Yan Captivator Aristocrat Bottom Paint Preservation

1954 penn yan captivator bottom sealing

Captivator’s bottom challenged us in so many ways. Save for fewer than a dozen, the bottom fasteners were both sound and tight. We found only one plank with a very small bit of rot on it. There was a small rotted area along her spine, right where the keel transitions into the stem, that appeared once we released her keel and keelson.

We caulked/sealed the Striptite below the waterline with Jamestown Distributors’ TotalBoat ThixoFlex, a product that was new to us, but came highly recommended by other shops that had extensive experience with it.

Bottom line. ThixoFlex is now our go-to product for any application that requires aggressive adhesion combined with maximum elasticity. I recommend it in place of Interlux Seam Compound, which, even when heated, is a vexing, frustrating, difficult-to-pay material.

Once sealed with the ThixoFlex – first three passes, Joe sanded the entire bottom fair using 60 grit followed by 80 grit paper on a Festool inline sander.

We then sanded the new transom fair and stained it with Wood-Kote Brown Mahogany Jel’d Stain. Why would we stain the transom before we seal the bottom? A small section of the transom lies below the waterline, so it must be sealed with CPES ahead of priming and painting. We know from experience that, CPES migrates where it wants to go, even when masked using Frog Tape heated with a heat gun set at a low temperature.

Once it passes under the tape, it continues drizzling down the bare transom leaving a series of stalactites where the CPES has soaked into the mahogany. Now you have hell to pay and worse. Bleaching the transom will not pull the CPES out of the grain. Stripper does a little, but the lines will still be quite evident after staining.

Staining the transom first allowed us to seal the entire area all at once. No masking needed, and no risks of generating stalactites confront us.

Three full coats of Clear Penetrating Epoxy Sealer (CPES) followed.

We primed with two coats of Pettit Tie Coat Primer 6627.

Joe began blowing through the bottom painting milestone this morning when he applied the first coat of TotalBoat Shark White JD Select Ablative Bottom Paint.

From Jamestown Distributors:
TotalBoat JD Select is a single-season, water-based ablative antifouling bottom paint that provides incredible results for a very low cost. It is low in VOCs, very easy to apply, and cleans up with just soap and water.

JD Select can be brushed, rolled, or sprayed then burnished for a smooth, fuel-efficient finish. With the exception of VC17, JD Select can be applied over aged antifouling coats without fear of lifting. Available in Black, Blue, Green, Red, Shark White & Teal. We will apply three coats now, and recommend that Captivator’s owner apply one coats per season in the future.

Flipping her aright cannot happen soon enough!

1954 Penn Yan Captivator Aristocrat Transom Bottom Preservation

1954 penn yan captivator transom bottom preservation

Penn Yan Striptite hulls’ below-waterline plank seams are notoriously difficult to render watertight. We have used Interlux Seam Compound For Underwater Applications in the past. No longer. Once in place, the Seam Compound is pretty good at 3M 5200 is not. In fact, because it becomes increasingly hard and inelastic post-curing, 5200 tends to tear the wood fibers along the seams, or at least lose adhesion. This earlier video on the Captivator Aristocrat illustrates why 5200 is NOT the answer. Henceforth we will reach for TotalBoat Thixo Flex, which pays easily, adheres tenaciously and remains flexible when cured.

Here is the video I shot while paying the Thixo Flex.

We use a piston-driven pneumatic caulking gun for this purpose, and not one that is air-driven.

Why? The Thixo Flex is packaged in two compartments in its tube to which a mixing tip supplied with the product has been attached. Since one component is much more viscous than the other, an air-driven gun tends to dispense the lighter component first, and therefore in proportions that keep it from curing.

A piston-driven gun, much like an hand-activated gun, dispenses the two components in precisely the correct proportions, such that the payed material is semi-cured in 24 hours or less, depending upon the ambient temperature.

Bottom line. If you will use a pneumatic caulking gun for dispensing Thixo Flex, be sure it is piston-driven.

One additional caution. Because it remains flexible post-curing, Thixo Flex is hellish difficult to sand and tends to load sandpaper quite quickly. RJ and Joe spent the afternoon sanding the bottom with six-inch random-orbit sanders and 80 grit paper, and went through one-and-a-half boxes to reach a clean, fair surface.

Not surprisingly, we discovered multiple holidays – air bubbles, mostly – that we will fill in a final pass across the bottom.

Transplanting a new transom into the hull has also passed a major milestone. The new transom and its interior framing have been fabricated. Its interior surfaces have been sealed, stained and varnished, and it is ready for mounting on the hull.

First, however, we had to deal with the thin strip of mahogany that is attached to and runs along the interior surface of the planking tails. Much of it was rotted and came out with the failed transom. We had to excise the rest of it using a MultiMaster, followed by fabricating, steam bending and inserting a new strip in place.

Once the 3M 5200 has cured, probably several days from now, we will release the forest of clamps and mount the new transom.

With her topsides already stripped and ready for sanding, staining, sealing with Clear Penetrating Epoxy Sealer and varnishing, the pace should pick up over the coming weeks.SHOW LESS

1954 Penn Yan Captivator: How to Seal Bottom Seams using Thixo Flex

1954 penn yan captivator seal seams

Sorry about the behemoth compressor firing up in the “background.” With five preservation projects fully engaged right now, I cannot simply shut the shop down when I shoot a video.

Finally, I am confident we have solved a chronic wood boat preservation conundrum, “My boat has an original bottom with open seams. I do not wish to, or in the case of a Striptite hull cannot, install a True 5200 Bottom. Nor do I typically drop her in the water where she lives all season. What are my options short of waiting for her to swell each time we launch and hope to use her?”

Hmmm …. Our stock answer has been, “Use Interlux Seam Compound for below water applications. It will remain elastic, compressible and able to withstand the swell-shrink cycle, even if the movement is miniscule, without overly compressing the wood on each side of the seam.” Save for two cases where a boat came back for new bottom paint and we found that some of the Seam Compound had become hard and brittle, I am still comfortable with it as a product that solves the problem. However….

OMG! Even when heated, it pays very, very poorly, and will fight you every inch of the way. What’s worse than all the time involved, Interlux recommends three applications.

There must be something better, especially in terms of ease and time cost of application.

I recently answered a query about the best material to use when sealing lapstrake topside strake seams with a small fillet. Our practice to date has been 3M5200, as long as the fillet is tiny, tiny in cross section, and any feathers beyond it are removed. One of you answered simply, “Use West G-Flex and you will be good.”

Hours and hours of subsequent research tells me that this person is correct. However, while two-part G-Flex is supplied in squeeze bottles and quart cans, Jamestown Distributors offers Thixo Flex, a TotalBoat brand version that is also two-part, satisfies G-Flex’s criteria for adhesion and lasting elasticity and is packaged in 10 oz. caulking tubes along with a mixing tip that delivers material in a fine stream that comes out having been mixed precisely.

Our tests, albeit only over several weeks rather than several years, and painfully small sampled, delivered a bond that is flexible and simply cannot be torn apart unless the wood fibers fail. After paying a seam’s worth, I use a super flexible putty knife to drive the material into the seam. (A plastic spreader may work as well, but I prefer the putty knife.)

The waste is scooped and spread into the next seam.

I should be able to finish the Captivator’s bottom spending about 2+ hours per side. Paying Seam Compound would take time measured in days, by contrast.

Once the Thixo Flex has cured, and after we’ve checked for any pin holes or holidays, we will sand the cured residue off the planks and seal the entire bottom with three full coats of Smith’s Clear Penetrating Epoxy Sealer.

Priming it with three coats of Pettit Tie Coat Primer 6627 will follow.

We must install the new transom bracing and transom before we can finish paying TotalBoat Thixo Flex into the bottom seams, however.

Step-by-step…

1954 Penn Yan Captivator Aristocrat: How to replace the Transom

1954 penn yan captivator replace transom

We are almost there. Beginning with two raw boards yesterday morning, Joe and RJ have fabricated all the parts to Captivator’s new transom.

We allowed the glue in the tongue-and groove joint between the two transom planks to cure for 24 hours before removing the clamps.

Today they fabricated the interior transom frame using oak for the bottom bow and two side frames and Honduran mahogany for the center frame.

The individual oak components and the transom blank were cut to shape using the old material as patterns.

What cannot be patterned simply are the bevels and continuously-changing radii of the transom blank’s ends and the oak framing that runs up the hull sides. Sanding in with a belt sander is both tedious and exacting, and requires continual test fitting.

With the individual components fitting well, RJ and Joe assembled the new transom temporarily before final fitting ensues.

Once we have an excellent fit, the components will be released, final sanded, bleached, stained with Jel’d stain and sealed with three coats of CPES.

Sometime early next week Captivator’s new transom will be in place, bedded in 3M5200.

1954 Penn Yan Captivator Aristocrat: How to Fabricate a new Transom

1954 penn yan captivator fabricating transom

Happily for her and her owner, we have been saving the last Pattern Grade Honduran mahogany plank from an order I made ten years ago for just the right application. It had been held in inventory for over two decade at the many small furniture shops that fell victim to the Great Recession of 2008-2009. The planks had been sawed, stickered and begun air drying a decade or so when purchased by the shop’s owner.

While our 1954 Penn Yan Captivator Aristocrat is losing her original transom, her “new” one will be fabricated using wood that is almost as old as she is.

It took a bit less than a nanosecond for us to agree that we will use that plank for Captivator’s transom planks and center frame member.

The original transom planks were glued up employing a splined joint – grooves cut in the two mating surfaces are joined by a thin strip of mahogany, aka the spline. However, we will mate the two boards using a tongue and groove joint.

Why? Joe, who spent years managing a commercial precision woodworking – custom window and door design and fabrication, has experience with, and has tested, both mating systems. His experience argues for the tongue-and-groove rather than the splined joint as stronger and better able to survive flexing and expansion/contraction cycles.

Joe cut the tongue in one and groove in the other soon-to-be transom plank using a table saw. Two pieces of scrap from the same planks were used for setup.

Finally, once they had been run through the jointer, Joe and RJ will set up a half-dozen pipe clamps, with three spaced along each side of the plank. Wax paper will be laid beneath the joint and copious amounts of Titebond III Ultimate Wood Glue will be applied to all surfaces. (https://www.amazon.com/Franklin-Titeb…)

Even though Titebond stipulates an 8-hour dry time, we will wait a full 24 hours before breaking the clamps down.

We will focus on her bottom once we’ve installed her new transom and its associated framing.

Happily, our worst fears, that we’d discover extensive garboard rot beneath the keel, did not happen. Despite the open seam along both sides of the keel-garboard joint, there was nothing but a tiny bit of rot way forward where the keel and stem join.

That said, once we have tightened fasteners where needed, sanded the bottom fair and applied three full coats of Clear Penetrating Epoxy Sealer to both the keel and bottom planking, keel installation will be upon us.

We will treat the keel installation exactly as we do when installing external bottom planks in a True 5200 Bottom. Fifty-Two-Hundred will be troweled into the entire area beneath the keel, and to an about 1/8″ thickness. Then, as we sink the fasteners from the inside out,, we will be certain that the entirety of the mating surfaces are entombed in 5200.

We will clean the squeeze-out with Interlux Brushing Liquid 333 and then wipe the seam down with acetone, which will accelerated the curing process.

Then the real fun begins as all the seams between Striptite planks must be caulked using Interlux Seam Compound For Underwater Applications.

Why not 5200? Once cured it will not compress. Any drying and shrinking of the planks either breaks the adhesion, as we saw with this bottom initially. Any soaking-up and subsequent plank expansion threatens crushing the planks.

1954 Penn Yan Captivator Aristocrat Releasing the Transom (pt 2)

1954 penn yan captivator releasing transom

Part II continues chronicling our woeful discoveries.

Not only were our worst fears, implicitly expressed in Part I of this pair of clips, confirmed, I was blown away by the fact that the bottom “bow,” pronounced “beau,” were not only severely rotted, they were also quite wet. Honest! She has not been in the water since last fall, has been in dry cold storage since then and, yet, the bottom bow pegged our moisture meter and more.

As soon as we release the bottom transom plank and the framing, RJ will begin fabricating a new one. Replacing the transom’s interior framing was not in our scope of work, as we hoped against hope that the dark wood we observed during our initial observations might “only” be a bit of surface rot.

Not! This situation adds complexity to our project elsewhere as well. The two transom frames running behind the topsides are secured by copper nails driven from outside through the topside planking and into these frames.

Sadly the forward of the two courses of fasteners run through topside planking that is finished bright. We will do our best, but now fear that stripping and finishing the topsides anew has been added to the SOW.

RJ will fabricate and then he and I will temporarily install the bottom plank, the one we have just released, first, which will ensure the hull retains its proper shape.

1954 Penn Yan Captivator Aristocrat: How to Release the Transom

1954 penn yan captivator release transom

With the keel, outer stem and splash rails released, and having cleaned all of the 5200-like material out of the bottom plank seams, our attention turns to the transom.

The transom is two planks that have been fixed to both the topside and bottom planking, but also to a series of frames. Individual frames run along the bottom, sitting on the bottom planks, across the top and down the sides of the transom. A pair of inverted “V” frames stiffen the transom’s center.

Upon initial inspection RJ and I were troubled by what appeared to be very poorly conceived and executed repairs to the center and port frames. The “Dutchman” attempted at the bottom of the pair of center frames not only created a powerful water trap, the rot growing there propagated and destroyed the bottom bow – “beau”.

Part II continues chronicling our woeful discoveries.

1954 Penn Yan Captivator Aristocrat Post Stripping Findings

1954 penn yan captivator stripped hull

Yesterday we stripped her transom, flipped her, released her splash rails and stripped her bottom. Happily the splash rails are in excellent condition. They only want to be stripped, have some minor “bodywork” executed and refinished.

Today we released the keel and began releasing the keelson and the transom framing.

While the keel is in excellent shape, both in terms of being straight and sound, it has been off the boat at least once and sealant was given short shrift when it was last installed. As a result there is some rot, not so much that it cannot be repaired, on the garboards where they lie beneath the keel and the keelson.

Her owner informs me that the keel was not released by the shop that worked on her in 2007-08, but the myriad of plugged mounting holes tell us that it was released sometime prior to that work being done.

The paucity of sealant means that water will find its way into the bilge.

It will also sit in the bilge. That there is not more rot is testimony to the care given her by her current owner.

The rot we did find beneath the keel is far forward, and at the joint between the keel and the lower portion of the stem. That curved section runs from its joint with the keel up to the splash rails.

Once we have the keelson and garboards out of the hull, everything, garboards, keelson and keel, will be cleaned to absolutely bare wood. Once the components have been sealed and receive three coats of Clear Penetrating Epoxy Sealer, they will be set aside.

Next comes the most fun. The failed transom, which we must replace, must be released from the hull. That it is secured with many, many copper nails, and not wood screws, makes this task particularly challenging, but doable using a FEIN MultiMaster and the thinnest, narrowest blade we have. (That they are copper, and therefore quite soft, should translate into the MultiMaster zipping right through the nails leaving a clean surface behind.