1956 Chris Craft Capri Bullnose & The Art of Toothpicking

1956 chris craft capri bullnose plank rot

As is so often the case with antique and classic wooden boat preservation, vessels tend to keep secrets. Our 1956 19′ Chris-Craft Capri Runabout gave no hint of what previous butchers had done to her and the horrific water trap they created in the process.

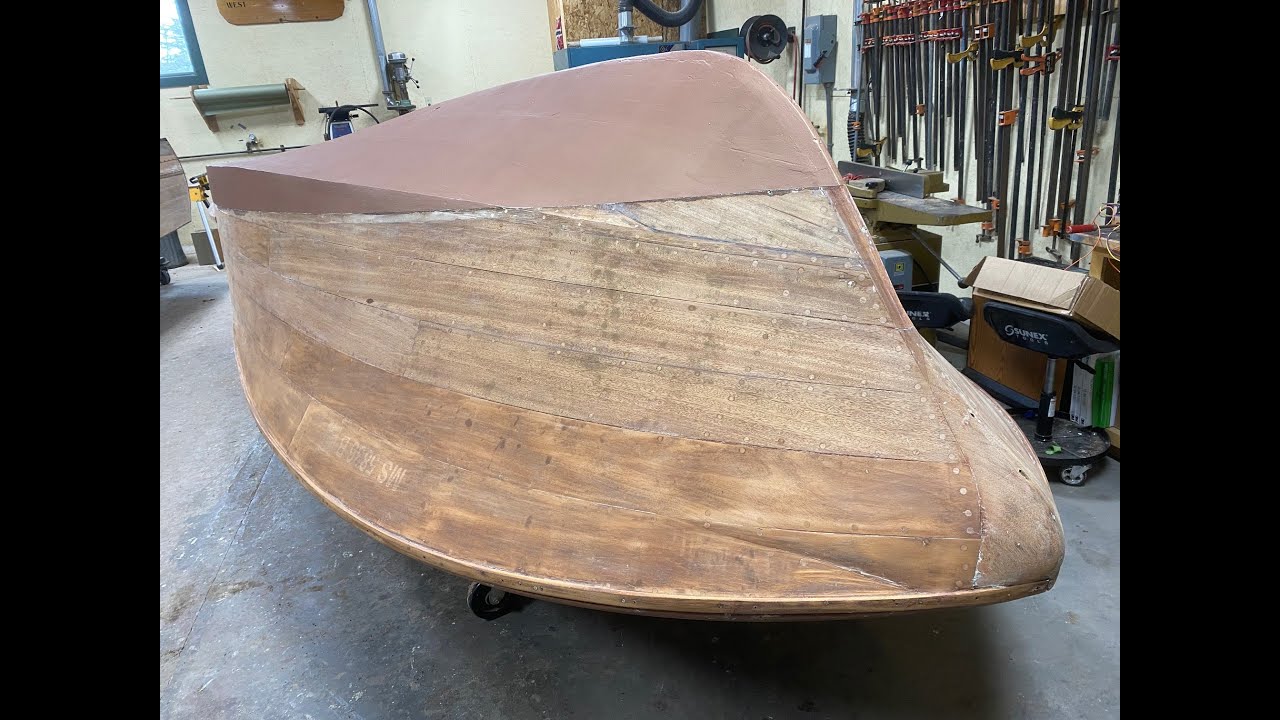
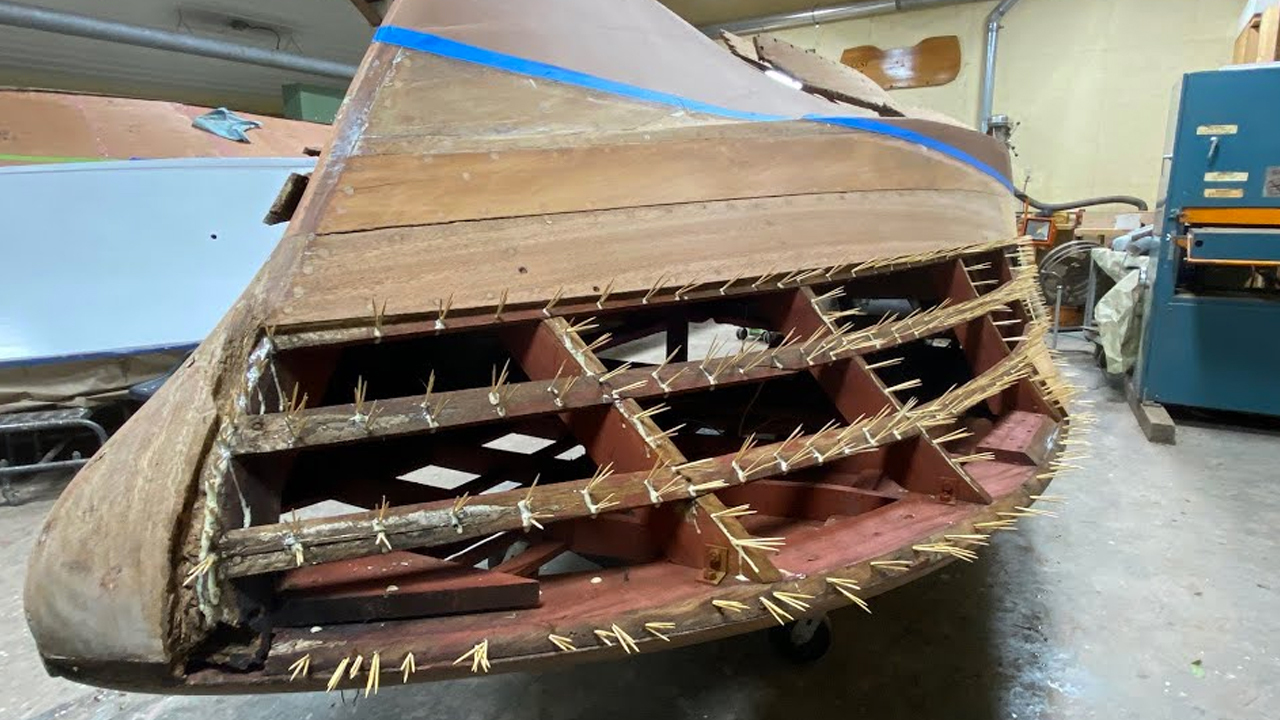
She let us in on this secret yesterday as Joe was finishing sanding her topsides fair. “We are almost to bleaching! I have only the last four or so feet to do on each side and I will be at the bow.” Right. Then his inline sanded started throwing up chunks, and suddenly, he had broken through a plank just aft of the bullnose bow.

Careful probing told the story. Our Capri’s bullnose is severely rotted along its starboard margin, as are the forward ends of the top three planks. One plank on port is rotted through as well. All of it is because the butchers were too lazy to address foredeck framing issues properly, by releasing planks rather than reaching for a circular saw and simply making an athwart cut through them all the way across the deck.

A sloppy athwart seam butt joint “repair” failed, of course. The seam opened at some point, allowing water to infiltrate and keep the planks and bow wet. Talk about a perfect storm for rot! As I explain in the clip, Joe will address the bullnose rot using a Dutchman repair. Then the offending planks will be replaced, which is both best for the boat and likely also best for her owner as it’s a least-cost path relative to trying to scab new planking onto the ends of the existing and rotted planks.

Now that I have released the damaged planks, I am tooth-picking, filling each and every screw hole in the frames and battens with three white ash toothpicks and Gorilla Glue. It is a tedious, gooey task, but is the only right way to go. (Toothpick source: https://cibowares.com/products/plain-round-toothpicks)

Replacing the #8 with #10 screws is absolutely the wrong way to go. The holding power of that aged wood is compromised, and, since the #10’s have larger heads than the #8’s, larger countersinks must be driven, which, in turn requires inserting larger bungs, if you can find them. Go the lazy way and you “earn” weak fastening and wood bungs that are noticeably larger than all the others on your boat. UGHHHHH!

1956 Chris Craft Capri Topside Fairing

1956 chris craft capri topside fairing

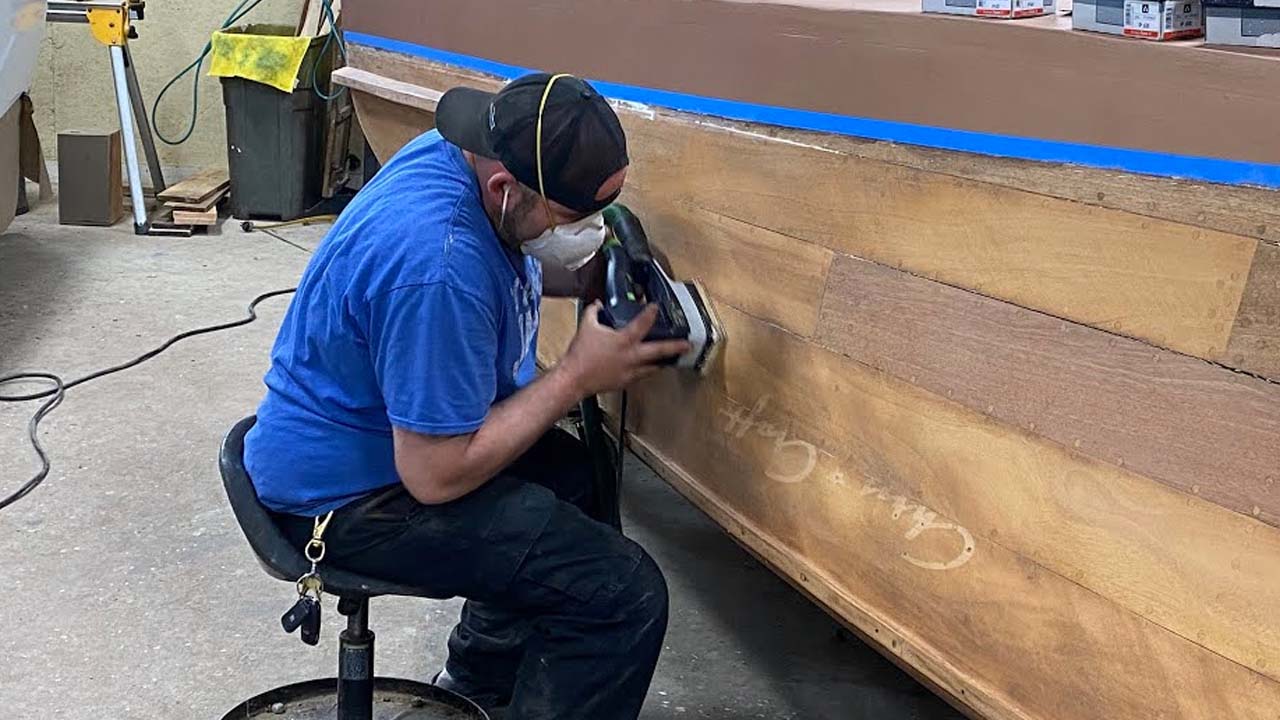
How I wish that wood boat enthusiasts and self-styled restorers never discovered orbital or random orbit sanders! Why? There is no better way to transform reasonably fair planking into a moonscape. Sadly the guys who butchered this 1956 19’ Chris-Craft Capri Runabout were not satisfied with destroying her foredeck, her engine bay hatch cover and so much more. Nope. They also felt a need to have their way with her using orbitals.

We have her topsides stripped, and I began doing some sanding while we were closed, but Joe is our go-to guy for fairing hullsides, decks, transoms and more. Now that we are open and working behind locked doors, Joe can turn his attention to fairing her hullsides to perfection.

Doing so, however, is hugely time consuming. Using only an inline sander, Joe begins by drawing slanted pencil lines every few inches along the hull. If the surface is fair, the sander follows the surface and the line evaporate uniformly. However, the damage the butchers wrought was immediately evident when we began sanding and only bits and pieces of lines sanded away. He will sand across the grains, guided by the lines until he reaches the stern and has the entire hullside absolutely fair. But now he must sand with the grain until all the deep 40 grit scratches are gone.

(We would normally reach for our Hutchins 16” longboard pneumatic sanders for this task, but, thanks to Mr. Murphy, all three of ours decided to fail today. A new one is on its way and it will be used for the next stage of Joe’s fairing process.)

That will be accomplished by first sanding with the grain using 60 grit, followed by doing so one more time with 80 grit.

Then it will be bleaching time, and bringing out the Daly’s A & B Bleach, which we mix 3:1 B:A, which achieves an absolutely white snow field once the wood dries after being kept wet continuously for at least six hours.

Staining is just peaking its head over the horizon. Soon ………..

1947 Chris Craft Cedar U22 Topsides Update

1947 chris craft U22 topside priming painting

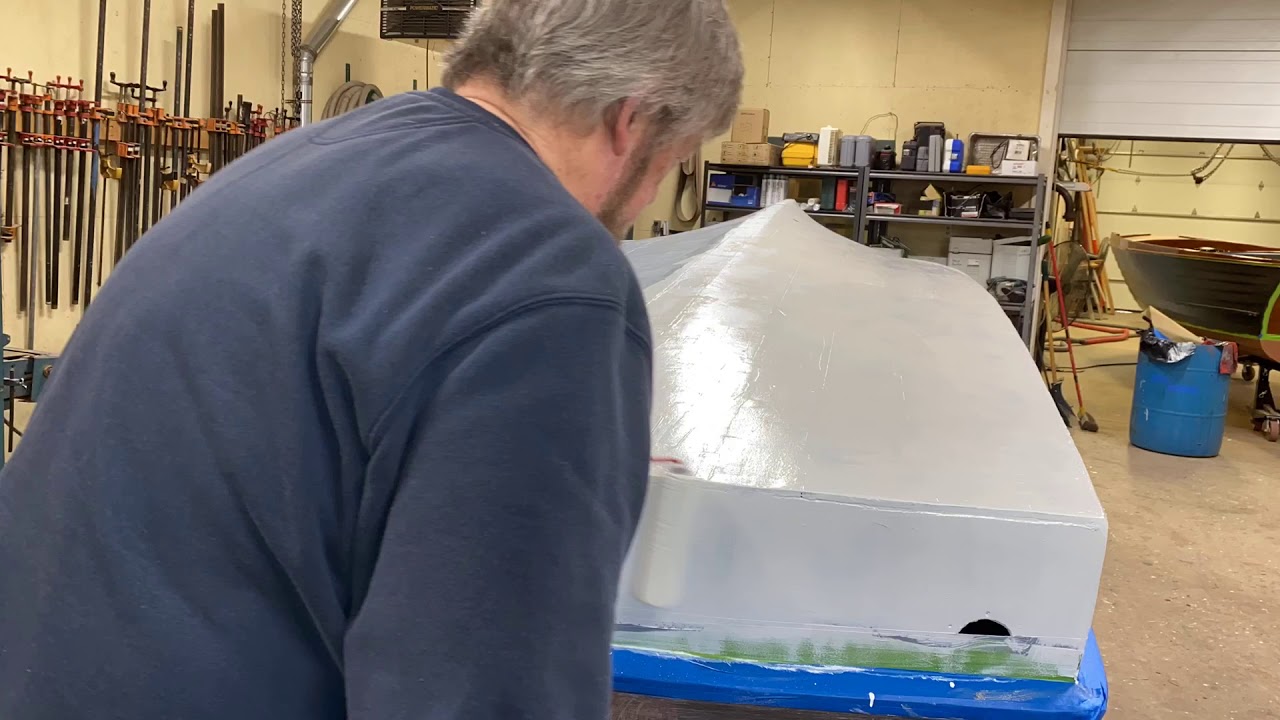
We re-opened, well sort of opened, this morning. The doors remain locked. Each of us is masked and gloved, and working in a separate room. At least the crew can complain together about sagging paint, cranky bolts that break and bead blasting in our outdoor shack at 37 F! Stay safe! After a final sanding of the Pettit Tie Coat Primer, and a first coat of topcoat applied on Saturday, I am applying the second base coat of semi-gloss white Interlux Premium Yacht Enamel on the topsides of our 1947 Cedar-planked U22.

I am rolling the paint on with an Arroworthy Mighty Mini 4” foam roller, and then tipping it immediately with a 3” foamy, the end of which I keep full of paint.

Why such a short roller, and why this one? We’ve tried 7” yellow foam roller covers, but the fit is terrible with surfaces like a wood boat’s topsides. The ends of the cover tend to leave tracks of extra paint, which makes uniform application very challenging.

I like this roller because its domed foam outer end is great for teasing paint into spray-rail-topside joints as well as those between the topsides and chines.

I work two planks at a time, roll the paint on from one end of the bull to the other, tipping as I go. We will apply four base coats with sanding using 200 grit after the second and fourth coats. Doing so exposes the declivities, which will remain slightly glossy against the post-sanding matte finish elsewhere, and fill-and-fair them with 3M Marine Premium Filler.

Each faired spot will be primed with Pettit Tie Coat Primer and hand block sanded, and then two more coats will be rolled and tipped.

Next comes a final sanding with 220 or higher grit, after which any remaining declivities will be filled, faired, primed and spot painted.

After one more sanding pass, we will apply the final two coats, at which point her topsides will be truly stunning.

1947 Chris Craft Cedar U22 Topside Primed!

1947 chris craft U22 topside primed

May Day 2020 is also Cedar Topsides Paint-Prep Milestone Day for our 1947 Chris-Craft U22. She has been:

Her topsides have been worked on before, probably multiple times over her 73 years, and in at least one of the times that the topsides have been repainted, someone tried to fill all the planks seams with a material that I simply could not remove without tearing wood fibers and creating ragged edges.

Perhaps then, or at some other time, she was also assaulted by a random orbit or orbital sander, because the topside planking was replete with undulating hills and valleys. While they were nowhere as severe as we’ve seen on other boats, and they really weren’t that evident until I began applying CPES, but there they were.

The remedy involved first sanding across the grain at an approximate 45 degree angle with 80 grit, followed by sanding with the grain. I then applied two more coats of CPES and sanded again once it cured.

Next I applied the final coat of CPES and the first coat of Tie Coat Primer, and, albeit significantly less apparent, some hills and valleys were still evident under a strong shop light.

I sanded, applied two more coats of Tie Coat Primer, sanded again, applied another coat and spot sanded a final time. Today I blew through the topside prep/priming milestone as I applied the fifth and final coats.

Later this afternoon I will apply the first of at least five coats of semi-gloss white Interlux Premium Yacht Enamel.

Applying five coats allows for sanding with 180 and then 220 grit following the second and fourth coats.

1956 Chris Craft Capri Bottom Preservation Milestone

1956 chris craft capri bottom preservation

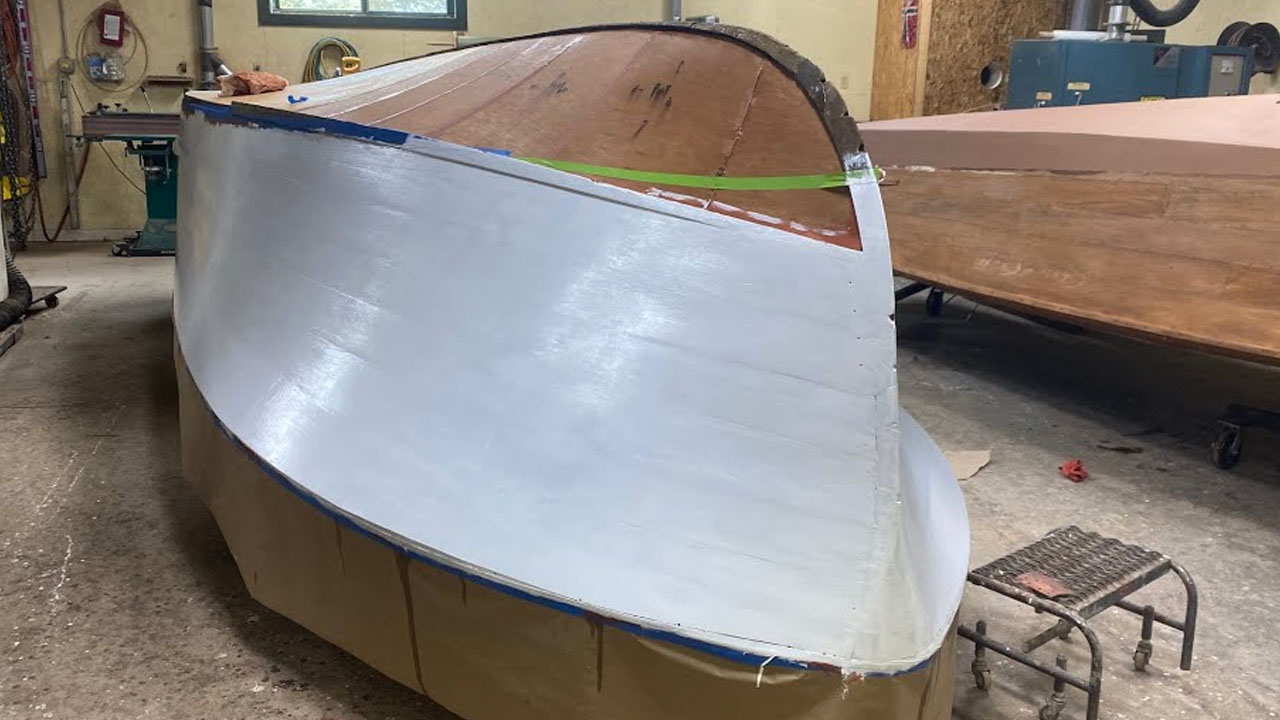
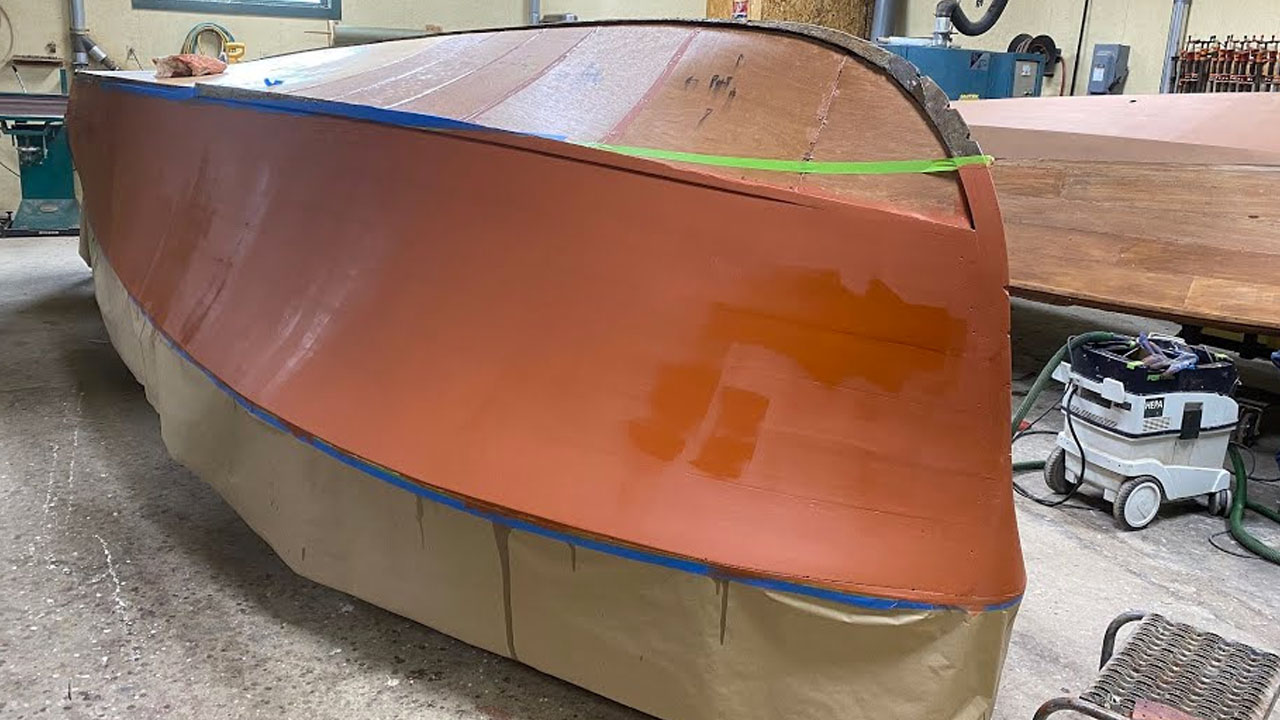
Our 1956 Chris Capri 19’ runabout’s preservation roared past a major milestone today. Her bottom is

• Filled the countersinks using 3M Premium Marine Filler and then faired the bottom again using 80 grit paper

• Applied an additional coat of CPES

• Primed with five coats of Interlux Interprotect 2000E Barrier Coat Epoxy Primer

• Painted with two coats of Pettit 1933 Copper Bronze Antifouling Bottom Paint

Her chines and from the bow back about four feet, I applied a third coat of the antifoul to compensate for the extra scrubbing action water racing by the hull imparts in those areas.

We also used Frog Tape, which we warmed to achieve a knife-edge line between the bottom paint and what will be the white boot stripe.

And next? As is clear from the thumbnail photo at the front of this clip, sanding her topsides fair and then bleaching them with Dalys A&B Bleach mixed 1:3 parts A and B to maximize bleaching await me.

And to think my dear wife was concerned I would not find enough to do to keep me occupied during our extreme isolation!

I know all about the fallacy of composition, and, yes, it is but one data point, but the fact that I had to mow 6” tall grass today, on April 19, way up here in northern Vermont makes me even more concerned about Climate Change … Just sayin’.

1956 Chris Craft Capri – Interlux 2000E Bottom Coating

1956 chris craft capri bottom interlux coating

Here is a bit of fun – My first attempt at a time lapse video as I apply the third coat of Interlux 2000E Barrier Coat to the bottom of the 1956 19′ Chris-Craft Capri.

Tools:

  • Disposable roller tray
  • Seven-inch yellow foam roller cover
  • West System Epoxy roller covers are not required as I can apply a coat to the entire bottom using one low rent cover
  • Three-inch chip brush
  • Long sleeves for me and good rubber or latex gloves

Way too much fun …………………

1956 Chris Craft Capri Bottom Preservation

1956 chris craft capri bottom repair

Our 1956 19′ Chris-Craft Capri is today’s lab rat for a virtual clinic focusing on bottom work. Here is what is involved, or at least our standard materials list and sequence. No, I am not asserting that our way is the only or the best way. What follows below is what currently works for us today. However, preserving wood vessels is an evolving journey along which best practices and best materials evolve continually.

Remember that there was a day when paying 5200 into bottom plank seams was dogma! But flexible marine epoxy products were not even a glimmer on the researcher’s bench then.

Now, ALL we must hope for is that we are all safely on the other side of the COVID-19 Pandemic in time to have her in the water at least once this season!

PLEASE STAY HOME AND PLEASE STAY SAFE!

1956 Chris Craft Capri 19′ – How We Do Bottom Work

1956 chris craft capri bottom repair

Here is what is involved when we do bottom work to repair or replace a traditional bottom. No, I am not asserting that our way is the only or the best way. What follows below is what currently works for us today. However, preserving wood vessels is an evolving journey along which best practices and best materials evolve continually. Remember that there was a day when paying 5200 into bottom plank seams was dogma! But flexible marine epoxy products were not even a glimmer on the researcher’s bench then. 

No well-informed restorer would ever, ever, ever pay 3M5200 into bottom planking seams today. 

Why? Watch our Why Filling Seams With 3M5200 Is Forbidden video.

Following is our sequence, particularly the materials and methods we use and where you can get them:

Hard if the boat is dry sailed – Pettit Old Salem Copper Bronze Hard Racing Enamel.

1940 Lyman 16′ Yacht Tender Preserved!

1940 lyman yacht tender preservation complete

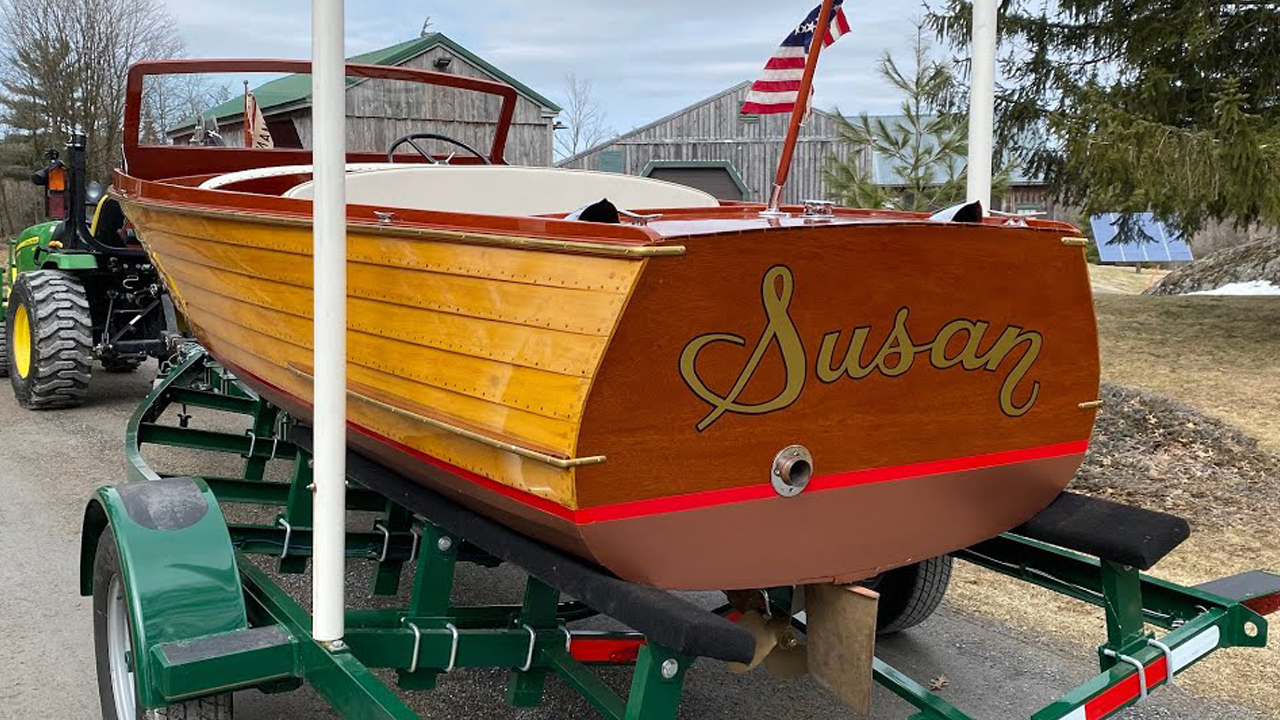
Susan is now a fully-preserved 1940 16-FT Lyman Yacht Tender with her telltale aft-facing aft cockpit.

We spared no expense while investing ourselves completely in executing a museum-quality preservation of this quite unusual and completely-original Lyman.

Yes, we did execute a few very minor Dutchman repairs, but that was it. Her old-growth Cyprus topsides are both original and gleam under 30+ coats of Pettit Hi-Build varnish.

Pulling her out of the shop and into the sun today is all the reward I need for ll those hours I spent beneath the hull stripping way too many layers of crud, paint and varnish; and then applying four coats of Sikkens Cetol Marine varnish. As a result, while her bilge and hullsides glisten, they retain all their evidence of being a well-used vessel for almost 80 years.
Shauna Whiting, Kocian Instruments, invested herself incredibly in researching and then restoring Susan’s quite unique dash panel to both the highest possible standard and precisely as it was when Susan left Sandusky, OH in 1940.

Once again Robert Henkel transformed her original Nordberg engine from a rusty pile of cast iron into a unit that runs like a watch.

Mickey Dupuis, D&S Custom Metal Restoration, Holyoke, MA, cringed when I delivered Susan’s hardware. As always, he returned a collection of jewelry to us.

Megan Meisler and her family, who own and operated Loadmaster Trailer Co. Ltd. Did it again. Susan’s trailer fits like a glove, as she rides on a generous bunk system that both support her in every possible way and will be a dream for launching and retrieving her.

Maybe best of all, save for a brief hiatus decades and decades ago, Susan has lived on Lake Champlain. That her new stewards live among the islands of northern Lake Champlain means that she will live on her home waters for many decades to come.

1956 Chris Craft Capri Bottom & Stripping

1956 chris craft capri bottom stripping

Our 1956 19-ft. Chris-Craft Capri has had a tough life, what with being assaulted by inept and worse “restorers” a decade or so ago.

We have recently reported on the travesties visited upon her decks, stem and engine hatch. Now that she’s been flipped, are we surprised to discover additional assaults perpetrated against her bottom?

The good news is that, save for needing refastening and a few minor repairs, her bottom planking is in excellent condition.

That said, and other things equal, she still needs a True 5200 bottom. However, as so often happens in life, other things are not equal. While her owner agrees that there is a True 5200 bottom in her future, given all we must preserve elsewhere on her hull and engine, it will not happen now, a decision we agree with based on our detailed and extensive examination of her bilge and its inner bottom planking.

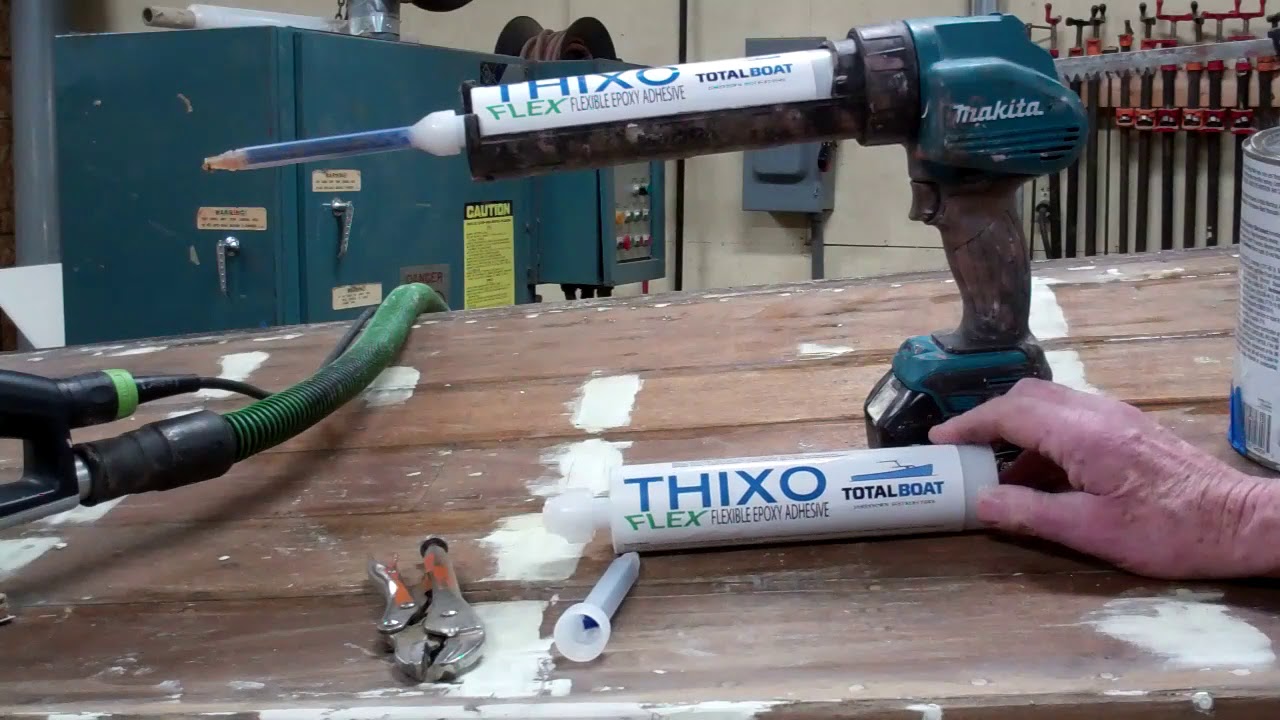
The real issue in the bilge is lots of grease, oil and grime. Yes, that layer is pretty much gone directly beneath the engine, so we will release and execute repairs there. After we remove endless strings of useless cotton roving in some seams, roving that was not sealed with any sort of caulking compound, and yards and yards and yards of failed 5200 in others, we will refasten large parts of the bottom and then apply four coasts of Clear Penetrating Epoxy Sealer – CPES. We will then pay the seams with Jamestown Distributors’ TotalBoat ThixoFlex and sand the bottom fair.

Following applying three more coats of CPES we will prime with Pettit Tie Coat Primer and then apply three coats of Pettit Copper Bronze Hard Racing Bottom Paint.

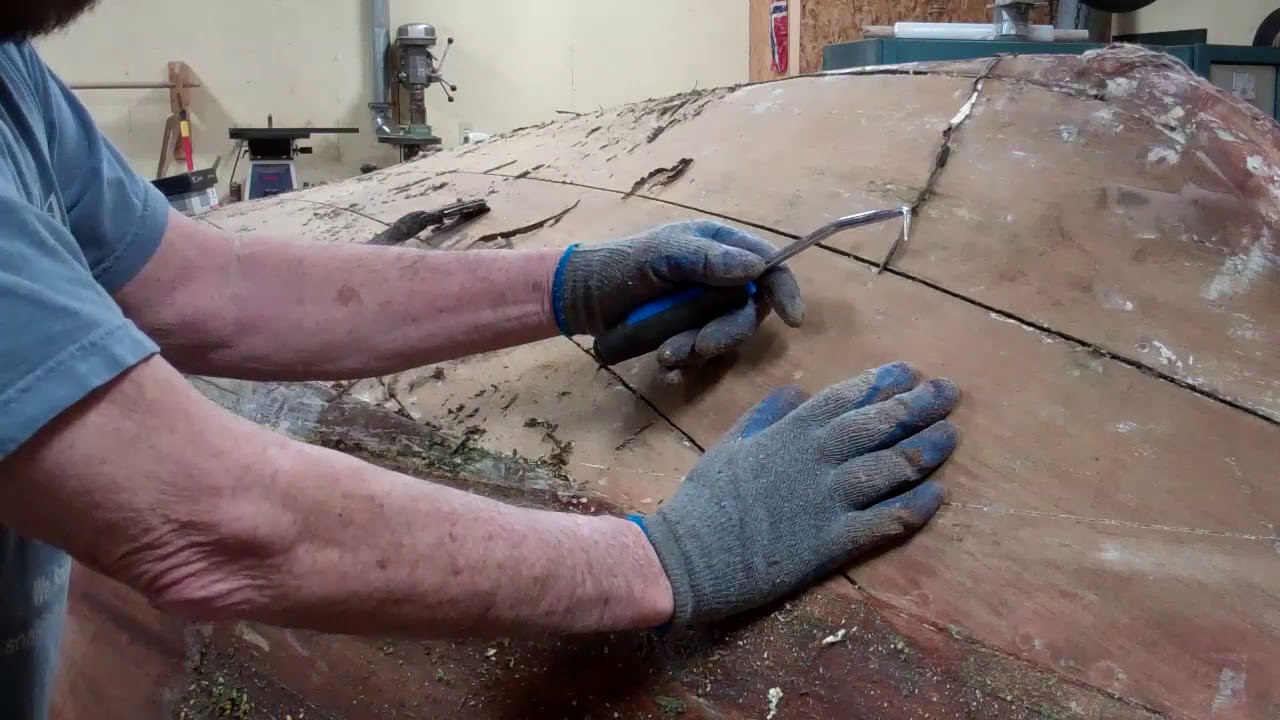
Now that Methyl Chloride has been banned, and we can no longer source “good” paint stripper, we have turned to TotalBoat TotalStrip Paint Stripper. No, it is not what Circa 1850 was, but it is user friendly and we are adjusting to applying it and then coming back 24 – 48 hours later. It is still wet and has liquefied many layers of paint, even bottom paint, by then.

Finally, we’ve all faced challenges stripping concave hullsides. Using a standard, straight-bladed scraper risks leaving skid marks at each end of the blade while the center floats above the wood. A good friend suggested we try an Allway Tools 2-1/2-Inch 4-Edge Metal Tubular Wood Scraper, the blade edges of which are slightly convex. At only about $8 for a handle and 4-edge blade, why not? Bingo! It works beautifully … nary a skid mark appears behind each stroke.

It is available from Amazon.