It has taken you hours and hours of scraping, swearing, swearing some more and scrubbing the old finishes from your woody. Finally, all that old varnish is gone and you are down to “bare” wood.
Really? No, you are not down to bare wood because it will still be adulterated with wood stain. Bleeding that old stain out of the wood is a critical component of achieving a blemish- and blotch-free new finish.
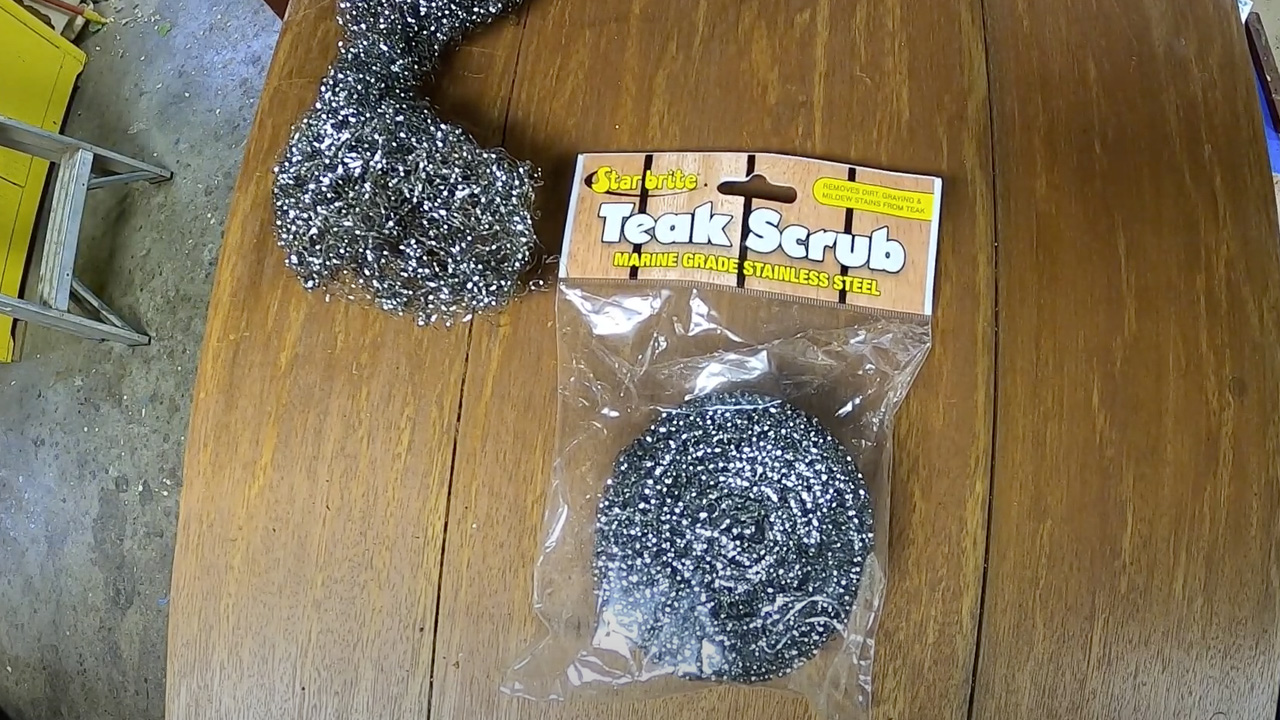
We tried and rejected Scotch Brite pads, in favor of have always used kitchen-grade stainless pot scouring pads here, but they take forever and tend to load up very quickly. They are cheap, however; just $13 for a 12-pad bag of them.
The cheap pads are great for scrubbing varnish and paint, but borderline maddingly limited for bleeding stain out of the wood. I was searching – my wife calls it trolling – Amazon at the end of January, when up popped the Star-brite Teak Scrub marine-grade, stainless scrub pad that is designed for refinishing wood.
Star-brite claims these pads “remove dirt, graying & mildew stains from teak. There is a catch, however. They will cost you $13.34 EACH!
Guess what? These puppies also bleed filler and J’eld stain out of mahogany, oak and white cedar! As such, and even at $13.34 each, they will henceforth be our go-to tool for this no-fun job.
We will still reach for the cheap, old-school pads for removing finishes, but leave them on the shelf when it is stain-bleeding time.
Our 1957 15-Ft Lyman Runabout is progressing nicely. Joe and Rick have stripped the hull and transom from the gunwales down. Her clench nails have been, well, clenched anew. The one bit of rot discovered in the transom has received one of Joe’s trademark Dutchman repairs. The transom is in the process of being bleached ahead of staining, sealing and varnishing.
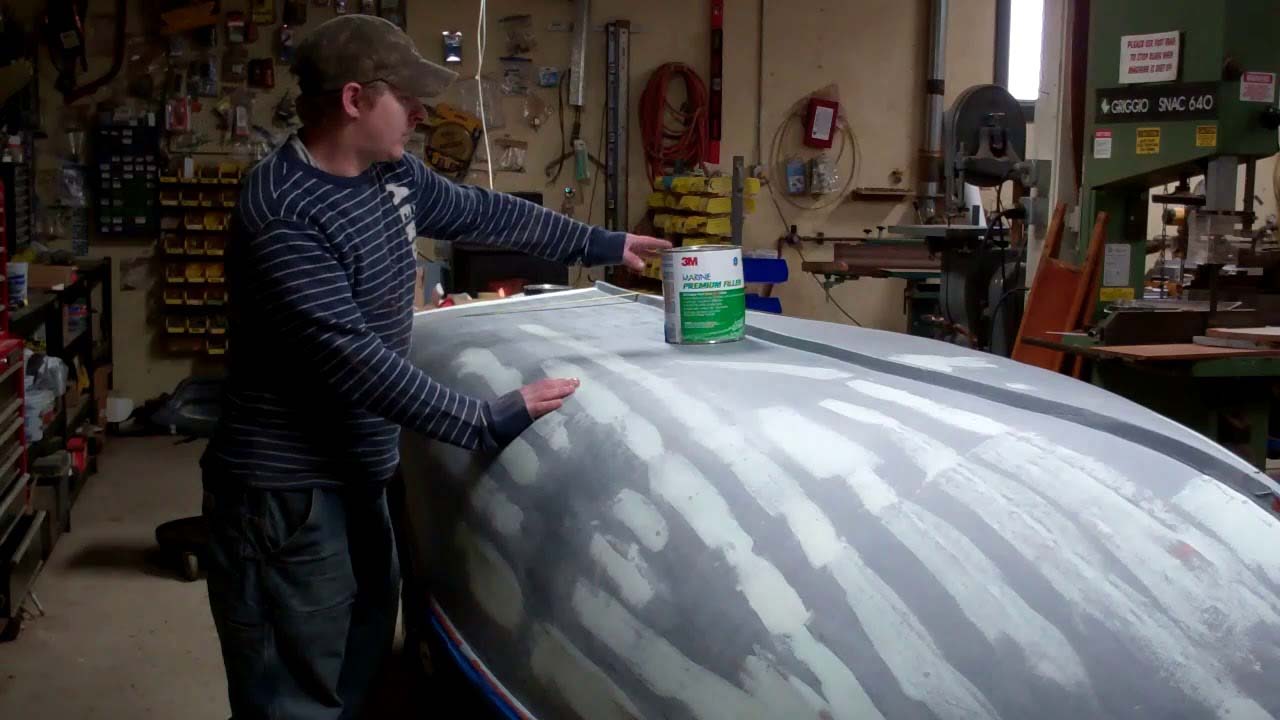
With the strakes sanded initially fair and having received two initial coats of Smith’s CPES, Joe and Rick are now paying every strake with multiple applications of 3M Marine Premium Filler and sanding between coats.
Once the final coat has cured, Joe will sand the entire bottom truly fair, ensuring sharp edges along each and every strake.
We will then apply three more coats of CPES, allowing it to cure for several days ahead of applying multiple coats of Pettit Tie Coat Primer, followed by three coats of Lyman copper bronze antifouling bottom paint.
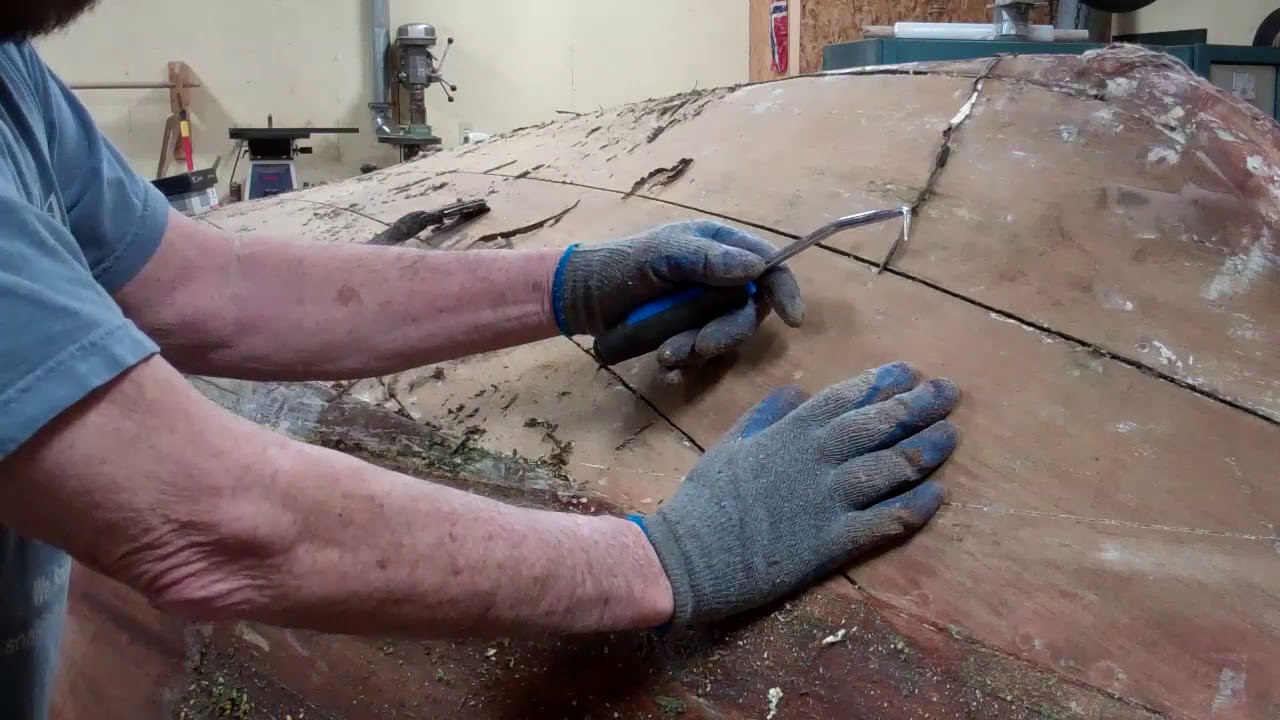
Having emptied her innards and flipped her, we are hard at removing decades of paint, some sort of Bondo-like material, West epoxy and more from our 1959 16.5’ Lyman runabout hull’s exterior. The image is anything but pretty, as you should have noticed by the thumbnail at the front end of this clip.
Much of what is on the hull is over 3/16” thick with some sort of West Epoxy layers between layers of paint. As of shooting this clip, we have consumed six gallons of industrial paint stripper. She is severely hogged. Her failed keel, keelson and multiple ribs must be replaced. Multiple strakes’ aft tails are rotted through and through. Her keel is gone and must be replaced. The spray rails are gone, having been poorly repaired and partially replaced at some time. Her strakes are fastened with an array of screws and clench nails.
We will aim at de-hogging her, if that is a word, and repairing/replacing much more. In my world, this little runabout is among Lyman’s most iconic family models. We must save her, but the hill we must climb doing so will be steep and long.
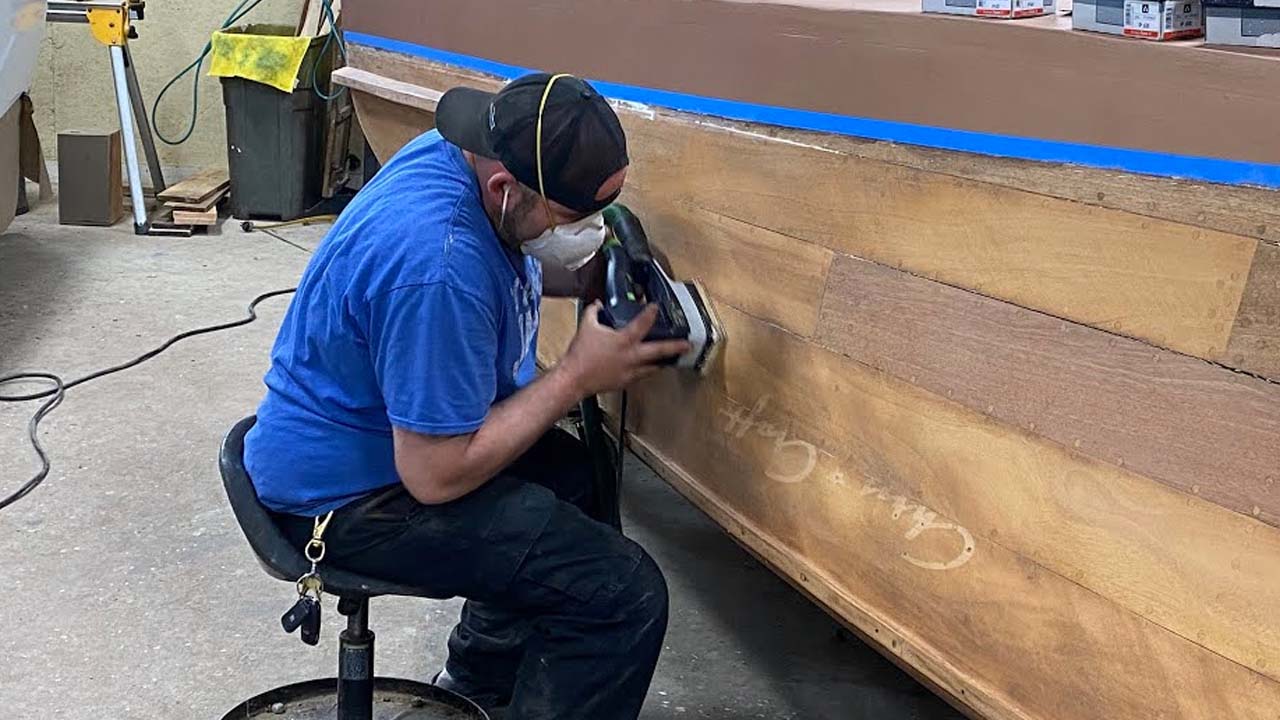
How I wish that wood boat enthusiasts and self-styled restorers never discovered orbital or random orbit sanders! Why? There is no better way to transform reasonably fair planking into a moonscape. Sadly the guys who butchered this 1956 19’ Chris-Craft Capri Runabout were not satisfied with destroying her foredeck, her engine bay hatch cover and so much more. Nope. They also felt a need to have their way with her using orbitals.
We have her topsides stripped, and I began doing some sanding while we were closed, but Joe is our go-to guy for fairing hullsides, decks, transoms and more. Now that we are open and working behind locked doors, Joe can turn his attention to fairing her hullsides to perfection.
Doing so, however, is hugely time consuming. Using only an inline sander, Joe begins by drawing slanted pencil lines every few inches along the hull. If the surface is fair, the sander follows the surface and the line evaporate uniformly. However, the damage the butchers wrought was immediately evident when we began sanding and only bits and pieces of lines sanded away. He will sand across the grains, guided by the lines until he reaches the stern and has the entire hullside absolutely fair. But now he must sand with the grain until all the deep 40 grit scratches are gone.
(We would normally reach for our Hutchins 16” longboard pneumatic sanders for this task, but, thanks to Mr. Murphy, all three of ours decided to fail today. A new one is on its way and it will be used for the next stage of Joe’s fairing process.)
That will be accomplished by first sanding with the grain using 60 grit, followed by doing so one more time with 80 grit.
Then it will be bleaching time, and bringing out the Daly’s A & B Bleach, which we mix 3:1 B:A, which achieves an absolutely white snow field once the wood dries after being kept wet continuously for at least six hours.
Staining is just peaking its head over the horizon. Soon ………..
Our 1956 19-ft. Chris-Craft Capri has had a tough life, what with being assaulted by inept and worse “restorers” a decade or so ago.
We have recently reported on the travesties visited upon her decks, stem and engine hatch. Now that she’s been flipped, are we surprised to discover additional assaults perpetrated against her bottom?
The good news is that, save for needing refastening and a few minor repairs, her bottom planking is in excellent condition.
That said, and other things equal, she still needs a True 5200 bottom. However, as so often happens in life, other things are not equal. While her owner agrees that there is a True 5200 bottom in her future, given all we must preserve elsewhere on her hull and engine, it will not happen now, a decision we agree with based on our detailed and extensive examination of her bilge and its inner bottom planking.
The real issue in the bilge is lots of grease, oil and grime. Yes, that layer is pretty much gone directly beneath the engine, so we will release and execute repairs there. After we remove endless strings of useless cotton roving in some seams, roving that was not sealed with any sort of caulking compound, and yards and yards and yards of failed 5200 in others, we will refasten large parts of the bottom and then apply four coasts of Clear Penetrating Epoxy Sealer – CPES. We will then pay the seams with Jamestown Distributors’ TotalBoat ThixoFlex and sand the bottom fair.
Following applying three more coats of CPES we will prime with Pettit Tie Coat Primer and then apply three coats of Pettit Copper Bronze Hard Racing Bottom Paint.
Now that Methyl Chloride has been banned, and we can no longer source “good” paint stripper, we have turned to TotalBoat TotalStrip Paint Stripper. No, it is not what Circa 1850 was, but it is user friendly and we are adjusting to applying it and then coming back 24 – 48 hours later. It is still wet and has liquefied many layers of paint, even bottom paint, by then.
Finally, we’ve all faced challenges stripping concave hullsides. Using a standard, straight-bladed scraper risks leaving skid marks at each end of the blade while the center floats above the wood. A good friend suggested we try an Allway Tools 2-1/2-Inch 4-Edge Metal Tubular Wood Scraper, the blade edges of which are slightly convex. At only about $8 for a handle and 4-edge blade, why not? Bingo! It works beautifully … nary a skid mark appears behind each stroke.
This 12’ 1953 Penn Yan Swift CZT, hull number CZT 251, continues to impress us with her originality and excellent condition. We have yet, and now will not, sighted any rot anywhere in the hull.
While the exterior paint could not be saved, and simply began flaking off down to the canvas as soon as we touched it with 100 grit sandpaper, her canvas is in excellent condition, is tight on both the hull and transom, and appears to be original.
We stripped the paint and filler using Jamestown’s Circa 1850 Heavy Body Paint and Varnish Remover, a process that loosened the canvas a bit as it was wetted by the stripper, but once dry, it is drum tight over the entire hull and transom.
As she is the first canvassed Penn Yan Swift we’ve preserved, I reached out to Charlie Santi, who is renowned for his preservation of Finger Lakes, NY region boats, including scores of Penn Yans, for guidance in filling and fairing the canvas Penn Yan used.
Based on his advice, we are priming the hull and its canvas with TotalBoat Topside Primer. Fairing with 3M Marine Premium Filler, followed by two to three more coats of the TotalBoat primer will complete the topcoat preparation. Her owners, who live in Seattle, WA, chose a very rich British Racing Green for her hull. As I type, George Kirby, Jr., George Kirby, Jr. Paint Company, New Bedford, MA, which is renowned for its marine paints, is custom mixing semi-gloss marine topside paint that match the owners’ choice for us. (You should think about Kirby the next time you need paint. George and his wife, Sheri, offer a wide array of modern and classic colors, and are simply fantastic to work with).
We will have her ready for topcoat painting as soon as George can get the paint to us. We will keep you in the loop as we progress toward the day we can flip her over and continue working on her decks and interior. (We have cleaned and scuff-sanded her bilge and interior hullsides, and applied the initial coats of Sikkens Cetol Marine varnish to them, but must wait until she is upright to complete these tasks.
We continue with the most unpleasant elements of wood boat preservation, stripping, sanding sealing and varnishing the hull’s interior – so many ribs! And doing the same with the myriad of parts released during deconstruction.
Joe has fabricated and steam-bent the new transom’s mounting strip. He has fabricated the new transom blank along with framing elements we could not save. All of it has now been stripped (saved elements), sanded, bleached, stained, sealed and received all but it final coat of varnish. Anthony, helped by RJ, spent a tortuous week stripping the hull’s entire interior. By today he and RJ have sanded all surfaces of every rib and interior hull planking. The entire area has received two coats of Smith’s Clear Penetrating Epoxy Sealer and its initial coat of Sikkens Cetol Marine. By early next week, it will be all hands on deck as we install the mounting strip and the fully assembled transom. The latter will be bedded in 3M 5200.
Soon, we can flip her upright and get on with the most enjoyable part, bleaching, staining, sealing, varnishing and painting.
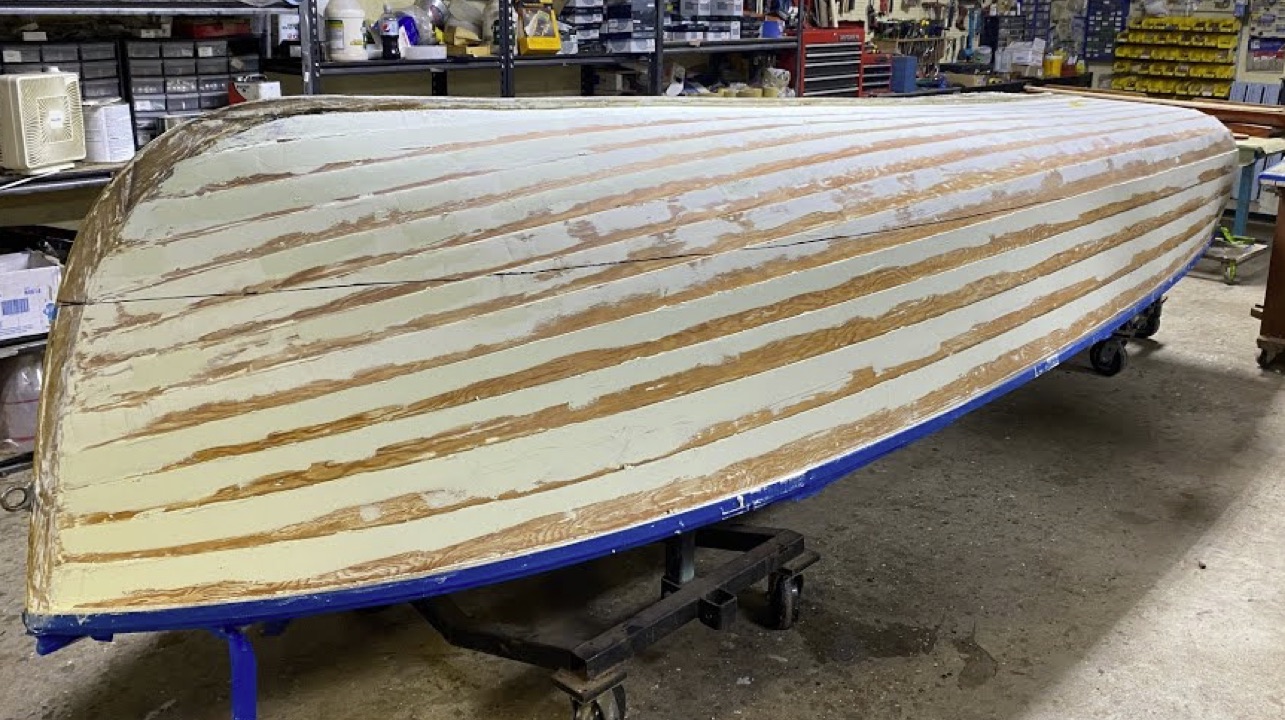
Our 1937 20-foot Lyman runabout is still planked in her original Philippine mahogany that has become as hard as any exotic tropical hardwood I have ever seen over her eighty plus years. Step aside Cocobolo and Bubinga!
Her hull has been stripped to bare wood from keel to gunwales and stem to stern. RJ and I then worked along each strake searching for loose rivet fasteners. We found two; yes, only two. However, she’s tangled with all manner of docks, trailers and possibly lake bottoms over those eighty years, so her strakes have been dinged and gouged, leaving a myriad of declivities and ragged strake edges that must be faired.
First, however, I reached for a pneumatic longboard sander and 80 grit paper, and got to work. OMG! Not only is most of this work well above my head, I might as well have been sanding our concrete floor! Well, not quite, but progress was all but nonexistent until I reached for the 60 grit. Once the surface was reasonably smooth and free of feathers and other waste, it was time to begin fairing with 3M Marine Premium Filler.
Our first pass, which focuses on all declivities, and is behind us, will be followed by sanding every strake as fair as is possible before we apply a second and final coat.
We will then sand again, first with 60 grit, followed by 80 grit, and, at least above the waterline, her hull will be ready for sealing with three coats of Clear Penetrating Epoxy Sealer (CPES).
Then we can focus on the below-waterline strakes that, while the wood is sound, will require substantial filling and fairing before we seal the strake-overlap seams with fillets of TotalBoat Thixo Flex.
She’s a tough old bird whose elegance is slowly reappearing. She will surely turn heads once she returns to Lake George in New York!
After raising her five feet above the floor, RJ and I have been fully enjoying applying copious amounts of Circa 1850 Heavy Body Stripper – three coats in each area at a time before we begin removing what appears to be five to six coats of tired bottom paint between her boot strip and keel. The bottom planking is tight and the wood is in excellent shape, at least over the forward half of the bottom.
Our real disappointment erupted as soon as I began stripping the port garboard along the seam between it and the keel. The corner of my scraper blade caught the caulk payed into the seam and released about six feet of completely free material.
No, it was not 3M 5200. We found that imbedded all along the starboard garboard-keel seam. I’ve dealt with enough of this stuff bedding hardware on my sailboat. Boatlife Caulk it was. Adhered in any way to the wood anywhere it was not. A bit of tugging and long strings of this stuff literally just fell away.
That most of it exhibited a shiny, slick surface tells us that it most likely never adhered to the adjoining wood at all.
The seam is as much as a strong 7/16-inch wide in some places, and 3/8-inch wide along most of this distance. Properly addressing such seams is straightforward and involves first caulking them with cotton roving, which is then primed before paying the chosen caulking material begins.
All of that said, this experience, along with the arrival of this month’s issue of Practical Sailor and a heads up about a Wooden Boat Forum discussion on sealants got me to thinking.
While I am still researching, I believe there is value to you in sharing some of what I have learned to date.
Interlux Seam Compound v. Slick Seam Compound Albeit twelve years ago, The Wooden Boat Forum hosted what can only be described as impassioned exchange.
One contribution reporting that heating, and then thinning the Interlux product with mineral spirits results in a consistency that “trowels out like butter.”
“…trick I used to use with any brand is to get a hot plate and put the can in a shallow pan of water and keep it hot, goes in the seams like butter, deeper, cleans up easy, and stiffens back as it cools…saves the fingers, hands, and wrists…and makes the bottom go quicker…..and another plus is in the cleaning process when you knife off the excess flush, and then wipe with your cleaner soaked rag, you get a concave seam, which allows for a smoother look after the boards have swelled…….”
And then there were several experienced-base observations that in cold climates where she must live on the hard for six months annually and dries out as a result, the Interlux Seam Sealer tends to become brittle and break away from the wood.
Bottom line: Slick Seam adheres tenaciously and handles the swell-shrink cycle well, but its waxy consistency presents offsetting issues that may outweigh its adherence advantage.
Interlux Seam Compound when heated and even thinned, applies easily, but may tend to lose adhesion during the annual swell-shrink cycles our woodies must endure.
Practical Sailor Magazine, March 2019 Issue – Sealant Testing Results We tested a field of leading sealants including 3M 5200, 3M 4200 Fast Cure, 3M 4000 UV, Sika 291, Sika 295,Loctite PL S-40, Loctite PL Marine, Boat Life Caulk, Boat Life Seal, and Sudbury Elastomeric Sealant, for three years…. 3M 5200 Intended as a permanent bonding adhesive, not a sealant or bedding agent, 5200’s increased stiffness worked against it in the flexibility test. It took more than twice as much force to flex the samples, despite the fact that 5200 is thin and only about 50 percent as much material was present in the joint. To our surprise, 3M 5200 began losing bond strength by the third year. Bottom line: Recommended as an adhesive, but not as a flexible sealant.
SIKAFLEX 291 Sika 291 is Practical Sailor’s best buy of this group. “…(it) delivers more consistent bonding on a wider variety of materials. It came clean easier than most (of its competitors) and retained flexibility. Bottom line: A best choice for most applications. Missing in the results is any mention of Sika’s bonding to wood below the waterline.
BOATLIFE CAULK This sealant failed to bond effectively in our shear testing, and it failed the flexibility testing completely, debonding completely the first time samples were bent. While you may like a sealant that is easy to remove, we think bond failure is never acceptable. Bottom line: Not acceptable.
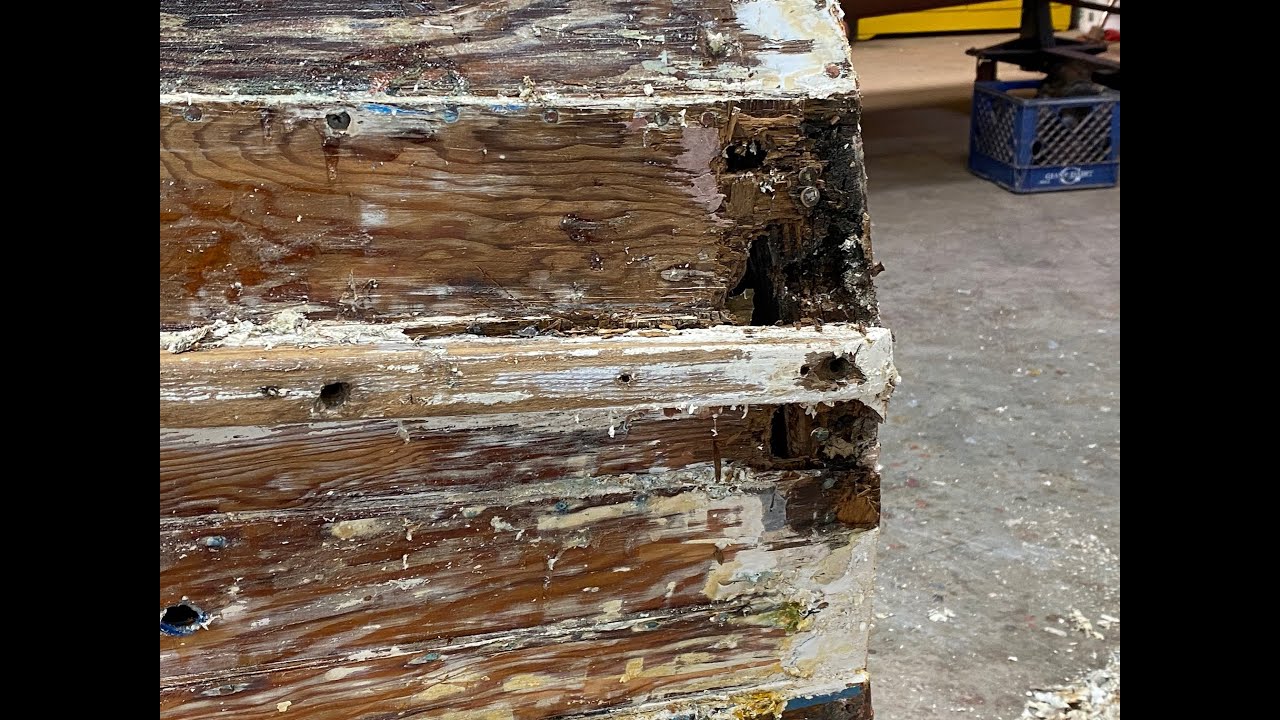
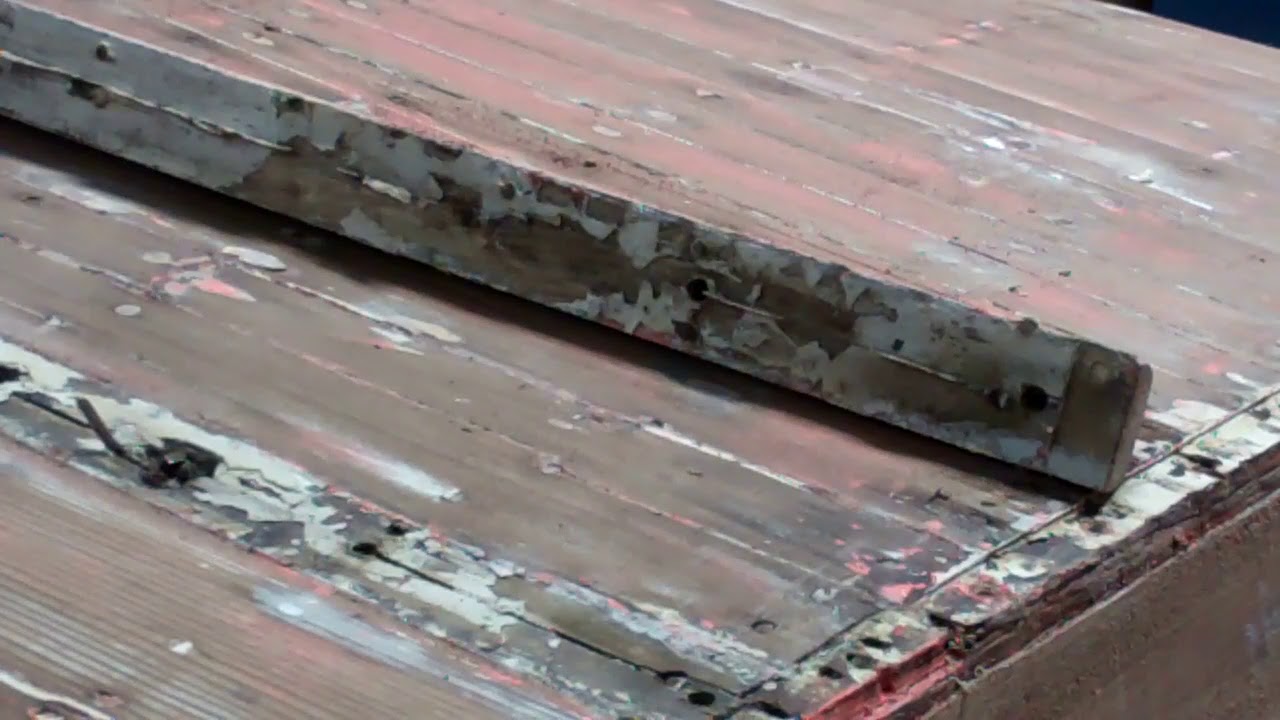
Yesterday we stripped her transom, flipped her, released her splash rails and stripped her bottom. Happily the splash rails are in excellent condition. They only want to be stripped, have some minor “bodywork” executed and refinished.
Today we released the keel and began releasing the keelson and the transom framing.
While the keel is in excellent shape, both in terms of being straight and sound, it has been off the boat at least once and sealant was given short shrift when it was last installed. As a result there is some rot, not so much that it cannot be repaired, on the garboards where they lie beneath the keel and the keelson.
Her owner informs me that the keel was not released by the shop that worked on her in 2007-08, but the myriad of plugged mounting holes tell us that it was released sometime prior to that work being done.
The paucity of sealant means that water will find its way into the bilge.
It will also sit in the bilge. That there is not more rot is testimony to the care given her by her current owner.
The rot we did find beneath the keel is far forward, and at the joint between the keel and the lower portion of the stem. That curved section runs from its joint with the keel up to the splash rails.
Once we have the keelson and garboards out of the hull, everything, garboards, keelson and keel, will be cleaned to absolutely bare wood. Once the components have been sealed and receive three coats of Clear Penetrating Epoxy Sealer, they will be set aside.
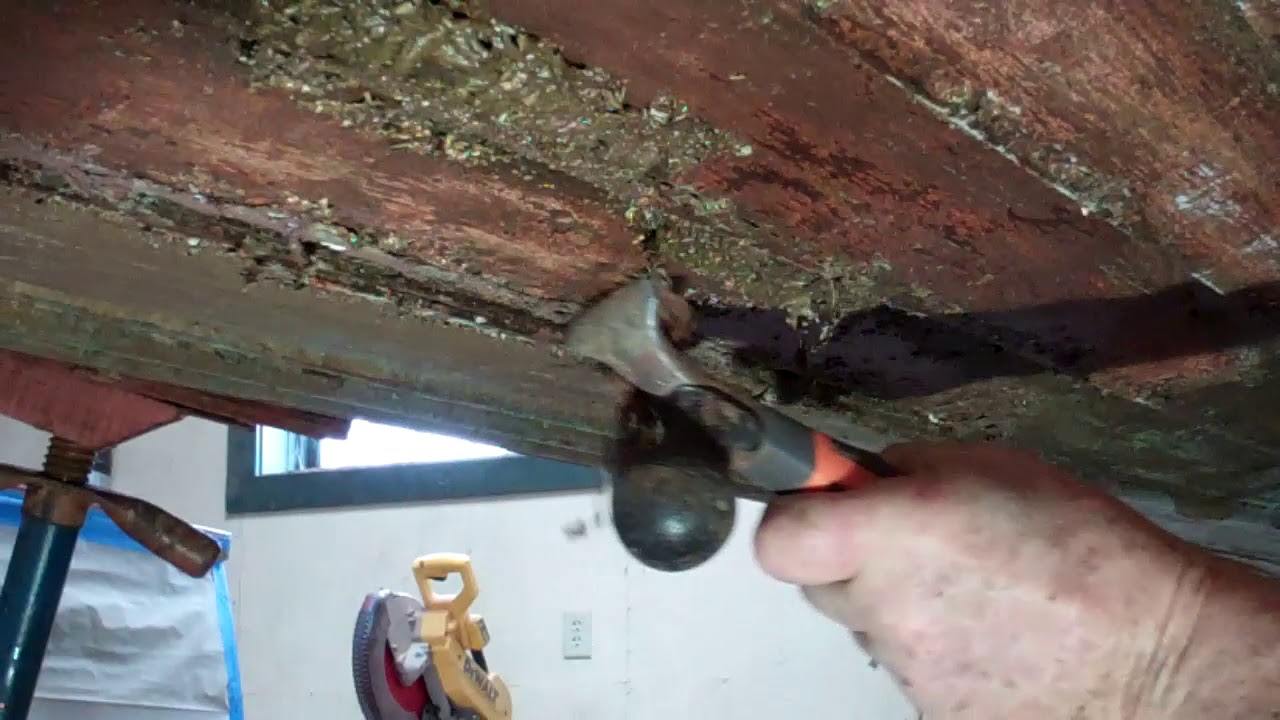
Next comes the most fun. The failed transom, which we must replace, must be released from the hull. That it is secured with many, many copper nails, and not wood screws, makes this task particularly challenging, but doable using a FEIN MultiMaster and the thinnest, narrowest blade we have. (That they are copper, and therefore quite soft, should translate into the MultiMaster zipping right through the nails leaving a clean surface behind.