1940 Lyman 16′ Yacht Tender – How to Paint Bottom & Bleach Topsides

1940 lyman yacht tender bhow to paint bottom and bleach topside

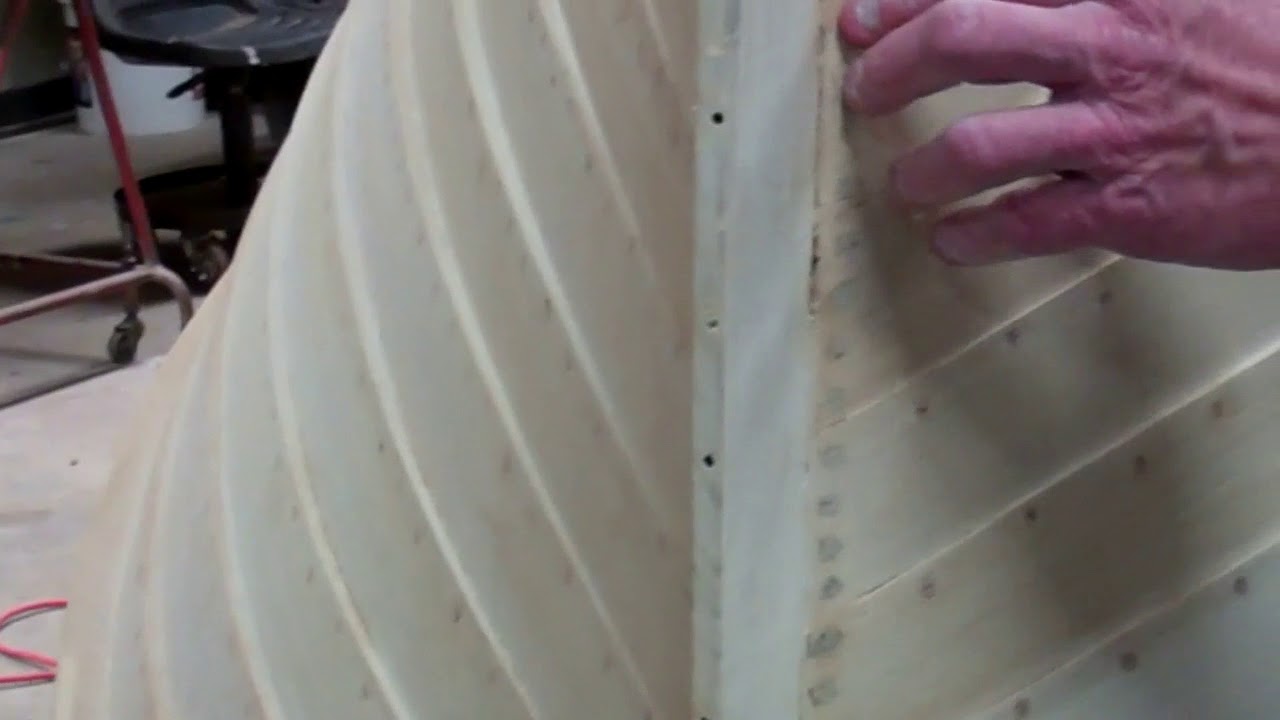
John texted me early this morning, “That little Lyman turned into an albino!” Yes she did.

He experimented with our customary bleaching process. Rather than just applying and leaving the Daly’s Wood Bleach be, during the 5-1/2 hours bleach was being applied, he periodically scrubbed the surface ever so lightly with Scotch Brite pads.

One data point proves nothing, but given the absolutely uniform results, John, RJ and I will be treating the transom of the 1957 23’ Lyman Runabout to the same process.

Yes, I know that choosing Pettit Hard Racing Copper Bronze for the bottom paint is an anathema to the Lyman world, but my decision was driven by the reality that she will be a trailer- and lift-sailed boat, for which antifouling paint is not well suited.

John has worked his usual invisible Dutchman magic, and the countersink filler he concocted using two-part TotalBoat Thixo 2:1 Epoxy, cypress sand dust and Sandusky natural filler stain 9805, is a nearly exact match. (We decided against using wood bungs as the countersinks along the stem and aft transom corners are way too shallow for glue to hold them in place.

Now it is time for the wood to dry down to about 12-15 percent, at which time we will stain the topsides and transom with Sandusky natural filler stain 9805, and then seal everything with three coats of CPES.

Soon she will be albino no more!

46 Gar Wood Ensign’s New Deck Milestone Reached Almost 2 13 2015

Friday the 13th turns out to be a near milestone day for the 1946 Gar Wood Ensign deck planking project.
As it opens, you can enjoy with John and me seeing all the planking, fasteners and bungs in place, and all of the deck seams having been routed out.
What remains? As we explained in earlier reports, both decks were flying loose and sagging where they met the gunwales. That droop hid the fact that the deck boards we removed were actually thicker than are the covering boards. As a result, the new planking is proud of the covering boards now that the framework has been completed.
John’s final challenge, one that begins with 40 grit paper on our longboard sander, and ends with 80 grit, is to sand the decks fair with the covering boards.
Bleaching will follow as will follow, which we will chronicle for the community.

68 Lyman 20′ Runabout Waterline Dry Rot Dutchman Repair 2 13 2015

In stripping off the boot stripe, to which muddy red antifouling paint had been applied, RJ unearthed about 15” of dry rot at the starboard waterline, just outside of where the helm station seat back attaches to the topside framing. The area around the rot is in excellent shape, so we are adopting a Dutchman strategy for addressing the issue.
As you see in the clip, RJ has routed about 3/8” into the strake’s face, save for the area in the middle of the cut where the rot passes all the way through. He will create a Dutchman having a raised area that will fit into the void, while the balance of the patch will mate to the remaining strake material. Placing a block inboard of the repair will afford us a solid mounting surface when we insert the Dutchman bedded in Thixo Thickened epoxy.
We will keep you up to date as these issues are addressed.

RJ has also finished scraping loose paint from the bottom edges of the topside planks, and discovered some separation that we could not close with using hammer and shoe to tighten the clinch nails. (They are uniformly very tight along the strake overlaps.)
So we have applied white 3M5200 to the entire topside strake overlap seams.

Lyman Runabout Transom Deconstruction at Finish Line

RJ has almost completed the deconstruction phase of preserving this 1968, 20’ Lyman Runabout’s transom.

As you see in this clip, while most of the repairs are below the waterline, we face the challenge of fabricating a fairly large Dutchman above it where the transom is finished bright. We have some mahogany plywood that has very similar grain, and will hide the vertical joint at the right end of the Dutchman behind the port exhaust flange.

RJ must first clean out the rot and fill what was a terrible water trap with Thixo Thickened Epoxy and repair the aft ends of the bilge stringers that had wicked up water and have rotted in a ways as a result.

We have sealed all of the new framing with three coats of CPES and are applying Sandusky Lyman sand tan bilge paint to them as I type. Once the new frame members are in place, we can begin fabricating, sealing and installing the two Dutchmen that will complete the transom repair.

46 Gar Wood Ensign Installing Aft Deck Planks 02 10 2015

John has installed the original covering boards, has rough-fit, fastened most of the foredeck planks temporarily, and is now focusing on installing the aft deck planking.
Here he is fastening the center plank, one that is devoid of seams, bedded in 3M5200. The balance of these planks have been sanded-in to fit. John will next fabricate the seams by running them through a fixed-place router before he screws them in place, also bedded in 3M5200.
Bleaching and staining are next, followed by building coats of Pettit High-Build varnish.
As always we encourage your comments, questions and reactions.

Saving a 1968 Lyman Runabout Transom Deconstruction Update 02 09 2014

Almost immediately following the last update on addressing the transom failure, and suggesting that we could save at least two of the vertical transom frame members, RJ ran a test. Will they hold fasteners? Nope. There was just no there there any longer, so RJ set about fabricating entirely new framework for the transom.
Now it is time for what is truly deconstruction. Our Dutchman will attach to that portion of the transom we are saving with a horizontal shiplap joint. Since it is his project, RJ “gets” to man the router.
Once we clean out about 3/8” of old material, we will have created the inner half of the shiplap. Yes, we’d rather have this joint reversed with the top tab on the outside half of the transom, but trying what you are about to see from the inside is beyond realistic. We will seal the joint with Thixo Thickened Epoxy and 3M 5200, thereby ensuring zero water infiltration into the joint.

46 Gar Wood Ensign Planking Upate 2 5 2015

Planking will begin in full speed tomorrow, even though full speed when it comes to planking is more like plodding through waist-deep snow. Thankfully having the original planking intact is helping us, but those boards are pushing 70 years old. Understandably, they have not held their original dimensions during that time.
And, despite our best efforts, the original king plank just could not be saved. As with the rest of the foredeck planking, it became badly cupped over time, probably due to the outer side having higher moisture content than the underside, which had been painted in the factory.
For now we’ve fabricated all the blanks, and have coated their backsides with two coats of Sandusky Chris Craft Mahogany Bilge Paint (part # 9605). The deck and gunwale framing has been similarly coated.
Once they have been provisionally positioned and temporarily fastened, we release and rout Sikaflex seams in the fore and aft deck planking, after which they will be bedded in 3m5200 and fastened down for good.

68 Lyman Transom Dutchman Update 2 6 2015

RJ hit a major milestone this morning when, after finally excising all the rotted material from the lower portion of Knock on Wood’s transom, he finished fabricating the new white oak bottom frame plank.
His attention then turned to the thee upright transom frame members, each of which was rotted at its lower end, indicating that, since they were not sealed with CPES, and given how fiberglassing the exterior and plugging the drain hole trapped it, water wicked up through the ends of the planks. Two can be saved, but be sure to pay attention to the third one.
Rap it with a hammer on the outside and you get a nice dead-hit response. Given all the rest of the rot in the area, RJ probed into the end of this third frame member. His drill bit, which he held in his hand, simply disappeared 8” into the plank. It might have gone further, but there was no point in further testing. This plank must be replaced.
Bottom line: the extent of the destruction and the repair cost visited on this transom by slapping fiberglass on its exterior is mounting exponentially.
Truly fiberglass is not the friend of wood boats or their owners!

68 Lyman More on Why Fiberglassing Wood Boats is Just Plain Wrong 2 4 2015

My goodness. That bottom edge was fiberglassed within the decade and look at it now.
We must literally claw out the rotted wood, mostly using hammer and chisel since there is too little space to attack it with our Fein Multi-masters. RJ is building an ever-higher mound of black rot on the floor beneath the transom.
We must remove the interior framing, which means releasing every fasteners passing through the bottom planking and up along the transom’s sides to the waterline.
Once the rotted frames have been excised, we must carefully remove the entire transom from starboard to port and from keel to waterline. We are good at the Dutchman repair, but will be expanding horizons on this one.
Bottom line, and I rest my case, please, please do not slap fiberglass onto your wood boat. What little you might gain now will be shocked a few years hence when the damage you are almost surely inviting now erupts.

1930 Dodge Runabout 5200 Bottom Update 2 2 2015

John is fully enjoying spending 6 hours per side sanding the 3M Premium Marine filler compound flat and then fairing the entire bottom. Starboard is finished. Port will be completed later today.

His process involves sanding cross-grain with the pneumatic longboard sander with 40 and 60 grit, and then sanding with the grain using 80 grit. To go further is to rob the surface of the “teeth” needed for paint to adhere.

While he sands, I will be employing a BAHCO scraper with our DeWalt, and carefully removing residual paint from the chines to the boot stripe. Once we are down to raw wood, I will sand the surface flat.
We will begin applying Interlux InterProtect 2000E Epoxy barrier coat tomorrow morning. Five coats later, we will begin rolling and tipping Interlux Perfection Mauritius Blue to the bottom. As always, our progress will be constrained by cure times.