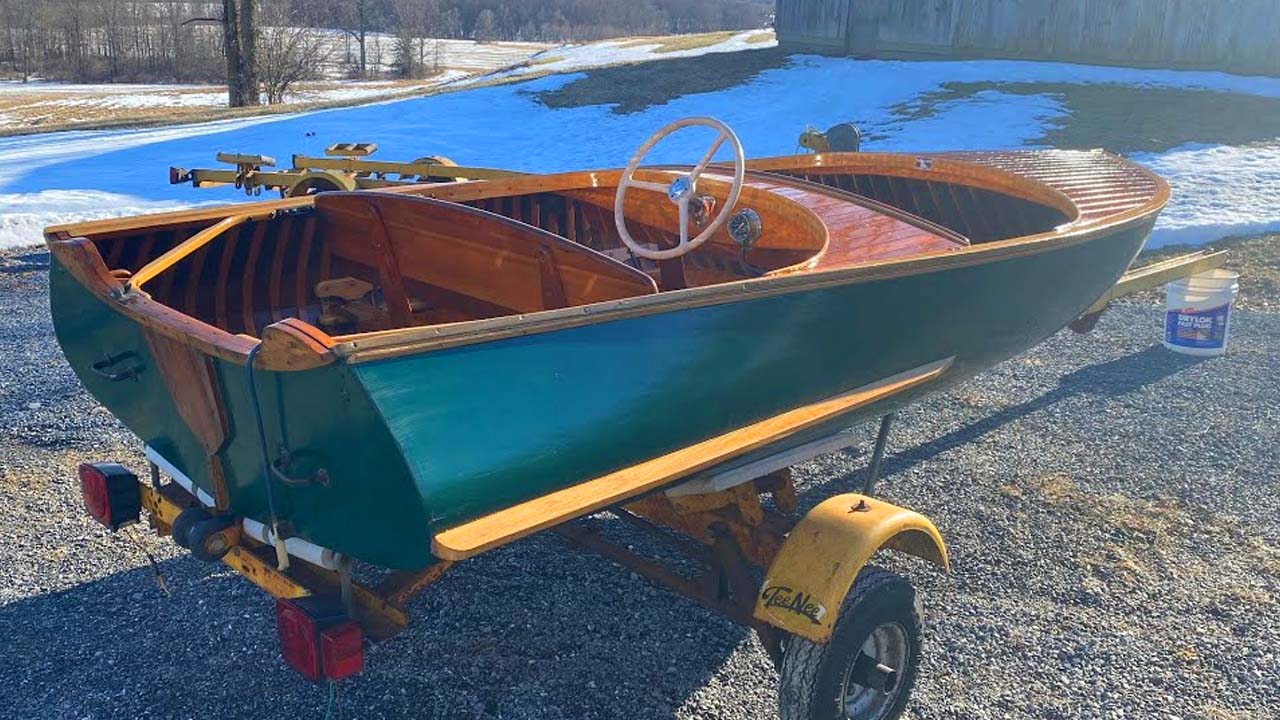
1951 Penn Yan 18′ President Preserved!

1951 penn yan president preserved

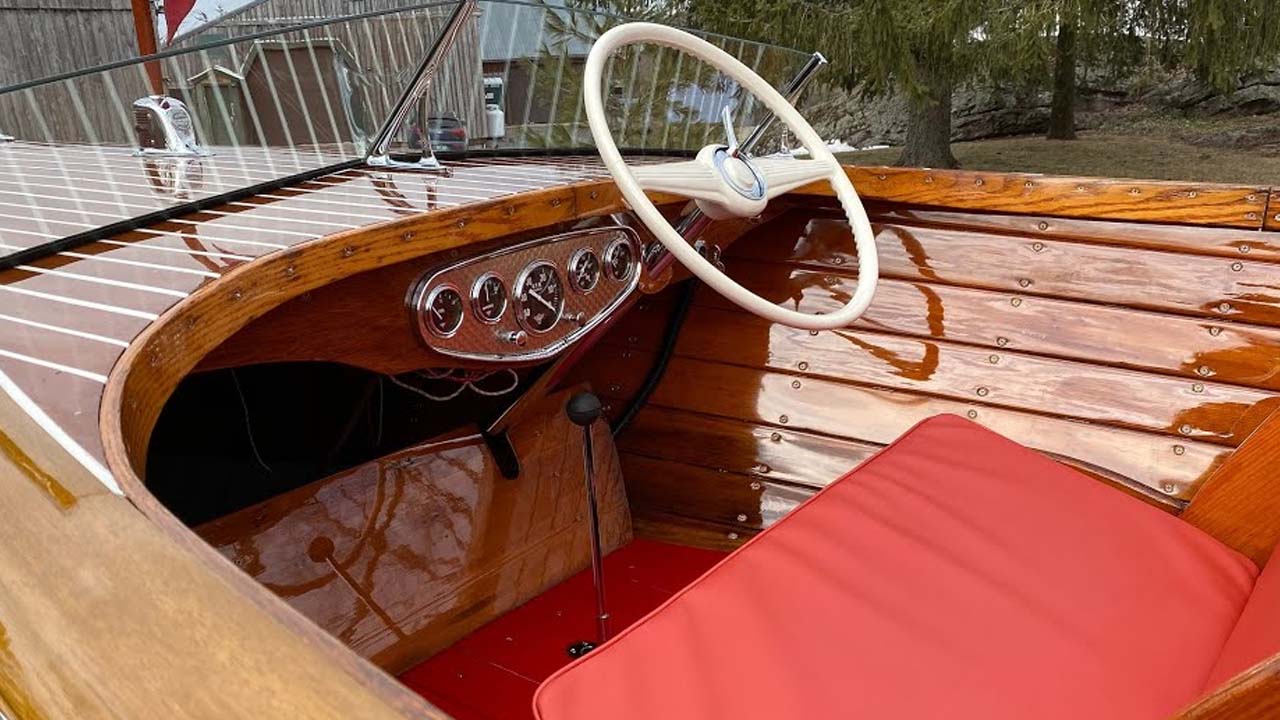
I walked around the house’s corner and there in the garage sat the most unusual inboard I have seen to date. The helm station seating looks as though it was borrowed from a local church as it is more like a pew than a helm station bench seat.

And it was perched way forward, which produced a truly tiny, all but out-of-proportion foredeck. What looked to be the engine box was attached to the amidships bench seat back.

Lifting this odd dog house exposed a Gray Marine Phantom SIX-112 with dual carbs.

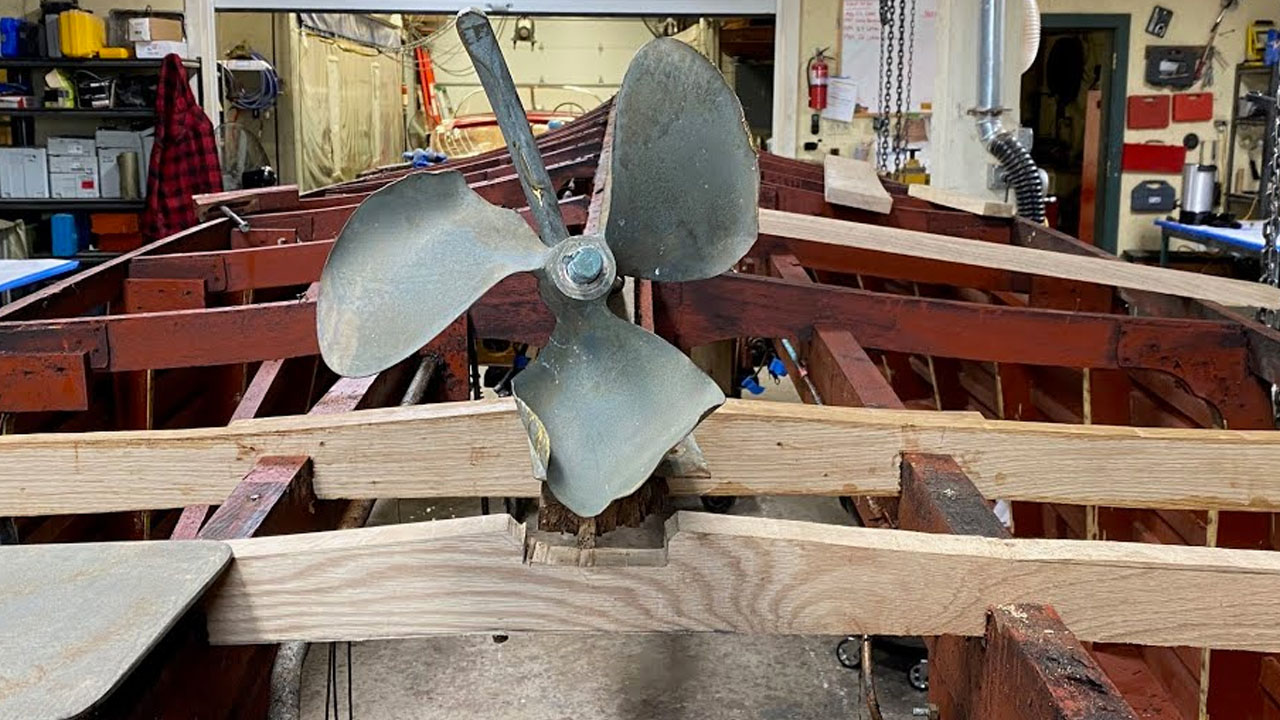
And then the owner/seller said, “Actually, you haven’t seen the most unusual part yet,” as he led me around the stern and brought this huge, cast bronze thing – the Penn Yan trademark Safety Strut into view.

I left there with her behind me. Today, some two plus years later, her complete preservation is finished. I can hardly wait for the 2020 ABM Boat Show and Auction because 1000 Island boats is this year’s theme. Our eighteen-foot Penn Yan President is registered for and will be in a covered slip at the show.

With so much super-generous guidance from renowned 1000 Island boat collector and restorer, Charlie Santi of Horseheads, NY, we have been able to return her to as close as we possibly could to the finishes, materials and color pallet she boasted the day she left the Penn Yan, NY factory in 1951. Thank you for both your generosity and patience, Charlie!

I will allow the clip tell you the rest of the story, but, first, here is a bit of history I dug up researching this oh-so unusual Penn Yan inboard, followed by an excerpt from the Real Runabouts, by Bob Speltz.

German-native Charles A. Herrman founded the Penn Yan Boat Company in 1921, with Headquarters in Penn Yan, NY.

Penn Yan produced a wide range of wooden powerboats, rowboats, canoes and sailboats at its founding, but switched to all fiberglass vessels in the early 1960s. No records are known to survive. The name Penn Yan is synonymous with the Car Topper, which it introduced in 1936. Designed to be light and narrow enough to fit on top of most cars of that era, Penn Yan marketed it as being easily lifted by two people Herrman was an innovator as well. Among his most notable inventions is the Tunnel Drive, which Penn Yan patented. Using a cavity that partially enclosed the propeller and drive shaft, Penn Yan’s tunnel drive system delivered higher boat speeds and hull stability. According to Bob Speltz (Real Runabouts), “A Penn Yan inboard could take the tightest turns, either way with a perfect “gravity” bank. There was no skidding whatsoever. Running down wind in a heavy sea will find a Penn Yan being able to run wide open because it is light in the bow and heavy in the stern.

“Many of the smaller length inboards built back in the 1930s through ’50s had the habit of nosediving when the throttle was cut way back. Penn Yan inboards with the front seat loaded to capacity and the stern seat empty, and ignition switched off at full speed to drag the propeller, will instantly lift its nose and settle into the water like a duck. A Penn Yan takes a wide-open throttle from a standing start. It lifts its nose instantly and “gets up and out of the wet” in a hurry. Penn Yans were also easy to steer; with the engine and rudder mounted so far aft, the constant fight of the rudder just disappeared.

“The stern engine arrangement used by Penn Yan was used ever since 1932 and enjoyed great acceptance by all who owned such boats. Each Penn Yan inboard came equipped with a safety strut which was one-piece bronze casting attached to the transom carrying both the prop shaft and rudder stock. It was so rugged it could hardly be destroyed.

“It has the effect of boat length behind the motor without hull buoyancy in that position, and that produced running characteristics we have already mentioned that were hard to believe. A safety feature lies in the fact that the prop is not under the bottom of the boat, and in any collision or grounding could not be driven up through the bottom of the boat, thus resulting in a sinking. The prop and rudder could be inspected, freed of weeds, or changed with the boat afloat. No stuffing box is required on the rudder stock, thus eliminating a possible source of leakage”

1956 Chris Craft Capri Foredeck Repair

1956 chris craft capri foredeck

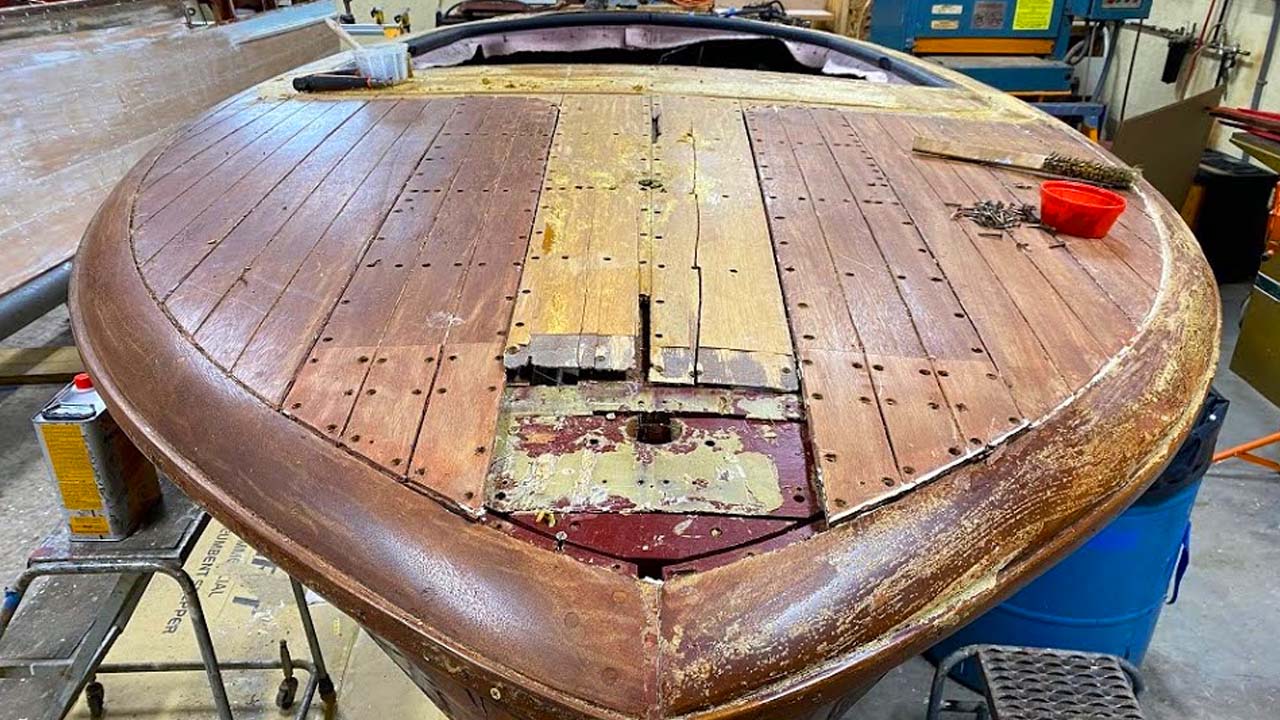
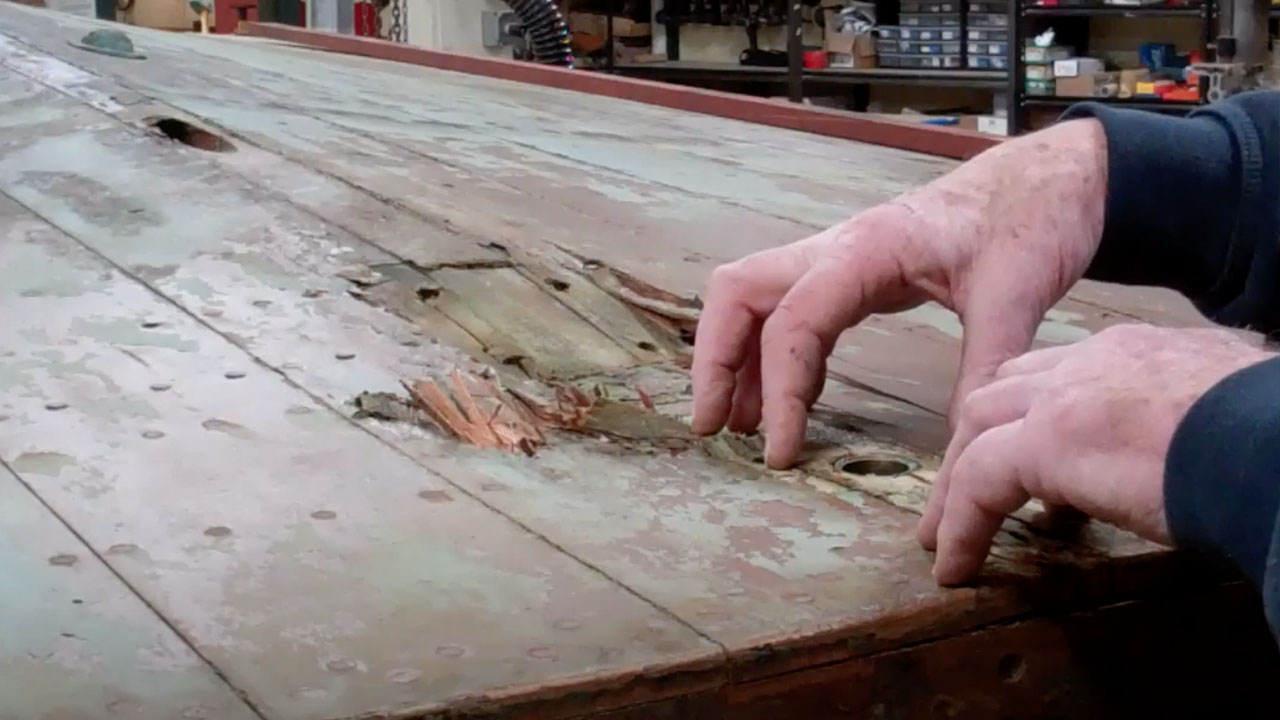
Shoddy butchers is the nicest thing I can say about the crew who raped the foredeck on our 1956 Chris-Craft 19’ Capri.

It would have been trivially easy to simply release these four planks. But no. Let’s just saw athwart the foredeck, fashion incredibly silly scarfs and rabbited joints using mahogany that does not come close to the original.

And why not at least bleach the entire deck so there is some hope that the new, incredibly mismatched planking at the bow melded at least a little with the rest of the deck. I have no idea how long these rapists were at assaulting this Capri, but it took us eight hours to extract all the worn-out screws, cut through whatever glue they reached for, and release the four planks and the patches.

Oh, and why oh why would these guys pay 3M 5200 where Sikaflex belongs?

It would have been professional to return everything to its original position using consistent, NEW silicon bronze Frearson wood screws, but no. Why not just reach for the screw recycling bucket and use whatever is in the first handful pulled out therefrom?

Then there is the truly shoddy work done at the bow beneath these planks. A major frame member is not even secured at its port end.

Enough. When we are finished, this travesty will be impossible to see.

And … Today was bilge-cleaning day for Anthony. Armed with a Sandvik scraper, a gallon of Roll-Off, and a quart into a spray bottle, he weighed in; sadly, not for long, however.

Starting deep down next to the keel and keelson, he began scraping the interior surfaces of the inner planking – the approximately eight-inch-thick planking that was laid in at about a forty-five degree angle.

“OMG!” erupted from the bilge. Anthony’s scraper buried itself in severely rotted wood with the first several swipes at scraping the external layer of grease off. We tested elsewhere with the same result. Virtually all of the bottom’s interior skin from the keel to the bilge stringers and from the helm station to behind the transmission is just gone.

Releasing the bottom is the absolutely last thing her owner wants to hear, but I am guessing that we will find similarly rotted exterior planking – at least on these planks’ inner faces – when we begin releasing the bottom planks.

At the risk of beating on a very tired old drum, here again is why other than guesstimating what preserving these ancient vessels will cost is tantamount to rushing into a fool’s errand.

1947 Chris Craft U22 Snapped Bottom Plank Fasteners

1947 chris craft U22 snapped bottom plank fasteners

Anthony began cleaning our 1047 U22’s bottom planks and sorting them into two groups – use and replace – yesterday. We usually unearth a few broken fasteners when stripping bottom planks, but never in our history have we discovered that more than seventy-five of them have snapped at the point where the threads and shank meet, or just about fair to the bottom frames. About half of the chine plank screws are snapped as well.

We can only surmise that the fasteners failed as a result of crashing into the rocky bottom, especially since virtually every screw in the aft third of the bottom snapped.

Bottom line, that most of the fasteners snapped during the crash tells us that the canvass lining and paint were all that was holding bottom planking planks in place. Ouch!

That said, Anthony must drill and use needle-nose Vice Grips to back out what remains embedded in the frames. We will then toothpick every hole using hardwood (ash) toothpicks dipped in Gorilla glue. This video from 2019 illustrates the process and what our U22 will look like once she has been “porcupined.” Once the glue has cured, we reach for our Fein MultiMaster Oscillating Cutting Tool to give her bottom and chine framing a “quill-cut.”

Then all the stubble will be sanded fair before we begin flooding the frames with Smith’s Clear Penetrating Epoxy Sealer.

1956 Chris Craft Capri Wiring & Bilge Issues

1956 chris craft capri wiring bilge repair

The Capri’s engine is out, crated and begins its trek to Peter Henkel, Inc. in Marine City, MI tomorrow.

While her owner reports that the engine has run reliably and strongly for at least a decade, we now know that it has also been losing copious amounts of oil and transmission fluid into the bilge. Indeed, the transmission had very little fluid in it, which probably helps explain the issues her owner has experienced with shifting and staying in gear.

This engine is plumbed in an interesting manner. For example, raw water is drawn in, but first passes through what appears to be a transmission cooler before continuing to the water pump. Perhaps this plumbing is a component of the Moroso kit that was used to marinize what had been an automobile engine.

We will learn much more once Robert Henkel lays hands and eyes on, and goes through the engine. All the fluids that have leaked from the engine and transmission over the years, perhaps decades, found a home in the bilge. The clip gives you a feeling for how much, but we pulled the engine yesterday, only to find several actual pools of oily fluid that has soaked into the wood by this afternoon. I can only guess what we will find once we have cleaned the bilge, flipped the hull and stripped off her bottom paint, especially what is left of it on the keel, garboards and related planks. We agreed with her owner that, if at all possible, we would not begin releasing bottom planking, but if we discover planking that is as oil-soaked as the bilge suggests it is, we will have no alternative. (She appears to retain her original planking, so just plucking off a plank here and there is near impossible. Remember, hundreds of ½’ slot-head screws and that sheet of canvas are lurking beneath the exterior planks.)

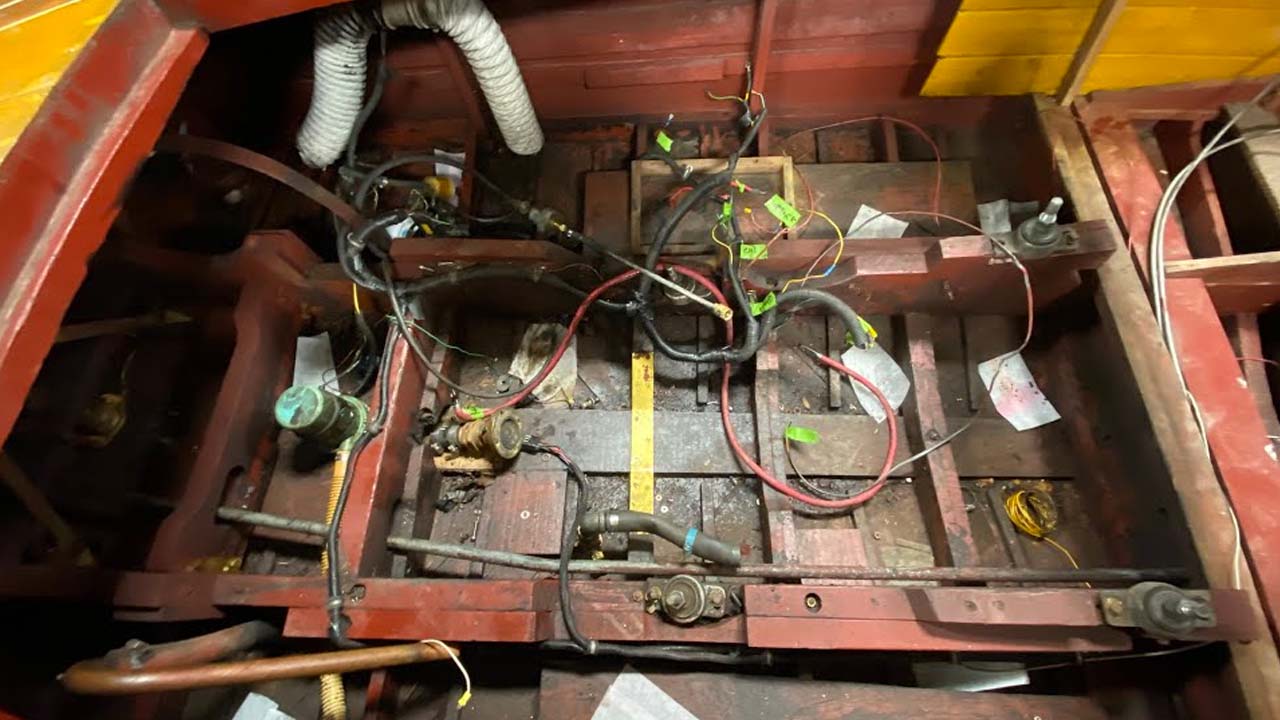
The wiring is an absolute nightmare, and dangerous to boot. The engine gets fuel via an electric fuel pump that someone wired directly to the positive side of the coil, which can if the wire is sized sufficiently large so that the pump is supplied with the voltage it needs without over-heating the wire. This boat’s pump is fed current from the coil via a 14 ga wire, which seems at least skimpy to me.

Beyond that, we have found seemingly unconnected masses and rats nests of all sorts of wire, most of which is not AWG, throughout the bilge and especially behind the gauges. (We will do our best to convince her owner that the truly safe course involves stripping all of it out and wiring it again from the get go.)

Since the bilge is oil-adulterated from just ahead of the shaft log through and to beneath the helm station, we must remove the rest of the seating, the bench seat bases and all of the flooring before Anthony and I begin fully enjoying going after all that grease and oil with putty knives, wire brushes and gallons of Roll-Off!

1956 Chris Craft Capri Preservations Begins

1956 chris craft capri preservation

We have launched the preservation of a beautiful 19′ 1956 Chris-Craft Capri that has been the victim of some “difficult” restoration over the years.

She has been re-powered several times and now has a GM 350 automobile engine in her bilge that was marinized using what appears to me an Osco conversion kit. We will know more once we have shipped her to Robert Henkel, Peter Henkel, Inc. in Marine City, MI (www.chris-craft-parts.com)

The engine is too long for its bay, so the lower forward pulley invades the aft cockpit about 2-3 inches. This fact forced someone to add a stand-off addition to the upper aft seating assembly, which, in turn makes the seat back uncomfortably erect. Correcting the latter issue means either moving the engine aft, which is impossible, or swapping engines, which seems to be overkill given the expense involved. (I will ask Henkel if he can install a shorter lower pulley and assembly.)

Beyond that, I will let my commentary with the clip convey the issues we must confront.

One added thought. Several times this week, potential clients have complained bitterly when I share the reality that, unlike auto repair which is billed by the flat rate book, the cost of preserving antique and classic boats is largely a crap shoot unless and until deconstruction is behind us. Even then, moving forward all too often exposes additional issues.

Bottom line. I can offer a ballpark guesstimate most of the time, but in no way can I be held to it. We will know how much it will cost when we are finished preserving her; not a minute before. Anyone who tells you otherwise is blowing smoke you know where.

1953 Penn Yan 12′ Swift CZT Preservation Complete!

1953 penn yan swift czt preserved

Here we are, with her preservation complete, and still we have failed to find either offensive aftermarket “stuff” that was added, or any evidence of any “woodwork” since this Penn Yan 12’ Swift, CZT-2351, left the factory in Penn Yan, NY in 1953.

She is original through-and-through, and elegantly so now, what with 24 coats of Pettit Hi-Build Varnish, and Total Boat Jade Green topside paint adorning her decks, seating and hull. No effort was spared in brining her back to as-new and absolutely show-ready condition.

“All” that remains is making her Tee Nee trailer look like this one. Oh, and Fran Secor, Otego, NY, who is an outboard engine rebuilder and restorer without equal, must finish restoring her 18 HP Johnson Seahorse.

Then, sometime next spring, but not before we “must” execute a thorough sea trial, she will be on her way home in Seattle, WA.

Now, if only I could find an early 50’s 12’ Penn Yan Swift CZTM of equal originality to store and add to our personal collection! Contact me if you have one that could be for sale!

1947 Chris Craft U22 Bottom Damage Quandry

1947 chris craft U22 bottom damage

This video is prompted by a comment from Mike Erstad on our last video, the one bringing the snapped port bilge frame onto the table.

Mike’s comment, “The way you described, it sounds like they were in a port side turn at high speed and didn’t make it out of the shallows before grounding….”

I replied, “Mike, your comment, together with emails I have received, prompted me to insert the prop shaft-strut assembly into the shaft tunnel and set the strut in place … at least as well as It fits. Now we have a puzzle. The gouge in the bottom plank well forward of where the shaft exits the bottom is clearly on starboard, but, as you will see in the video I will shoot in a while, the shaft-strut-prop assembly and the rudder are bent towards, not away from starboard! We’ve puzzled with what we see and our initial thought is that, as the assembly was driven towards starboard, a counterclockwise – viewed from the transom – torque force was visited on the strut , forcing its mounting block and the two frames that were destroyed into the port chine frame, snapping them in the process.”

So, here is the promised clip. And your thoughts, theories, hypotheses are?

1947 Chris Craft U22 Chine Frame Damage

1947 chris craft U22 chine frame damage

With her bottom completely stripped and cleaned, we gained a clearer view of the frame components, and discovered one more significantly damaged component.

Remember, her bottom initially slammed into a submerged rock or ledge about halfway forward of the transom, leaving a huge gash/scrape in the affected bottom plank.

Next her running gear bottomed out, being hit from the starboard side and driven towards port. Until today, when Joe was installing two replacement frames, he discovered that the hull, especially aft of the prop shaft tunnel will rack laterally when shaken from side-to-side. Why?

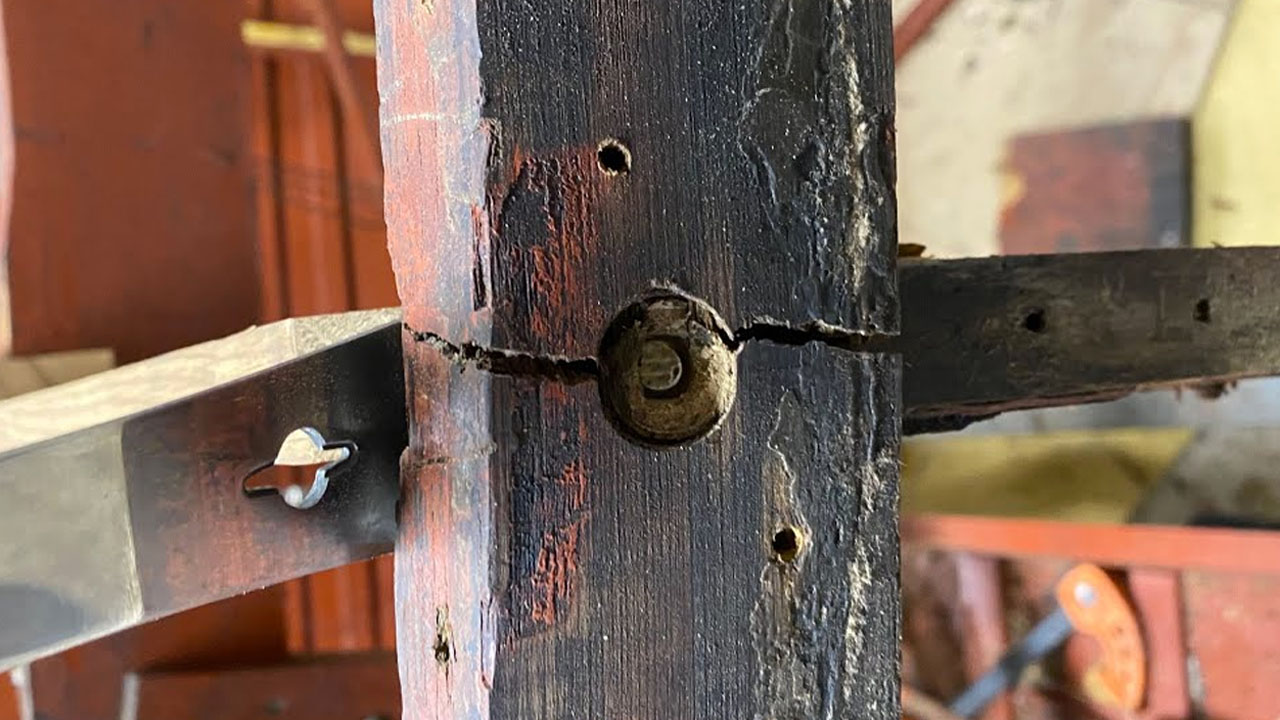
The bottoming, which drove the running gear to port, also drove the two destroyed frames to port and through the chine frame. As the clip shows, the port chine frame was broken through-and-through in two places where the bottom frames land on the chine frame. The carriage bolt securing the port end of the more forward of the two destroyed frames was snapped in the process.

This is why, when working on a bottom, releasing the chine plank is critical. Doing so exposes the chine-frame-bottom-frame joints, which permits close inspection of each landing, as well as the bolts holding things together.

We will cut a sixty-degree angle scarf into the time frame two bays forward, fabricate a new aft section and then secure everything together with silicon bronze carriage bolts passing through a scarf block and through the new and old frame sections. Everything will be joined using 3M5200 adhesive.

Great discovery, Joe!

1947 Chris Craft U22 Bottom Skeletonized

1947 chris craft U22 bottom skeletonized

Stripping her bottom completely was absolutely the right choice. Were you to navigate back to an earlier video, you would here me expressing virtual glee around how clean and oil-free our 1947 Chris-Craft U22’s bilge is/was.

Wrong!

She’s over seventy. Her bottom had never been released until today. Let this be a lesson to all of us.

Even if her engine never leaked, and even if no one spilled oil when sucking it our of the filler pipe, just regular use translates into goo, grease, grime, oil and God knows what else finding its way into the bilge. Everything gets coated and more so over the decades.

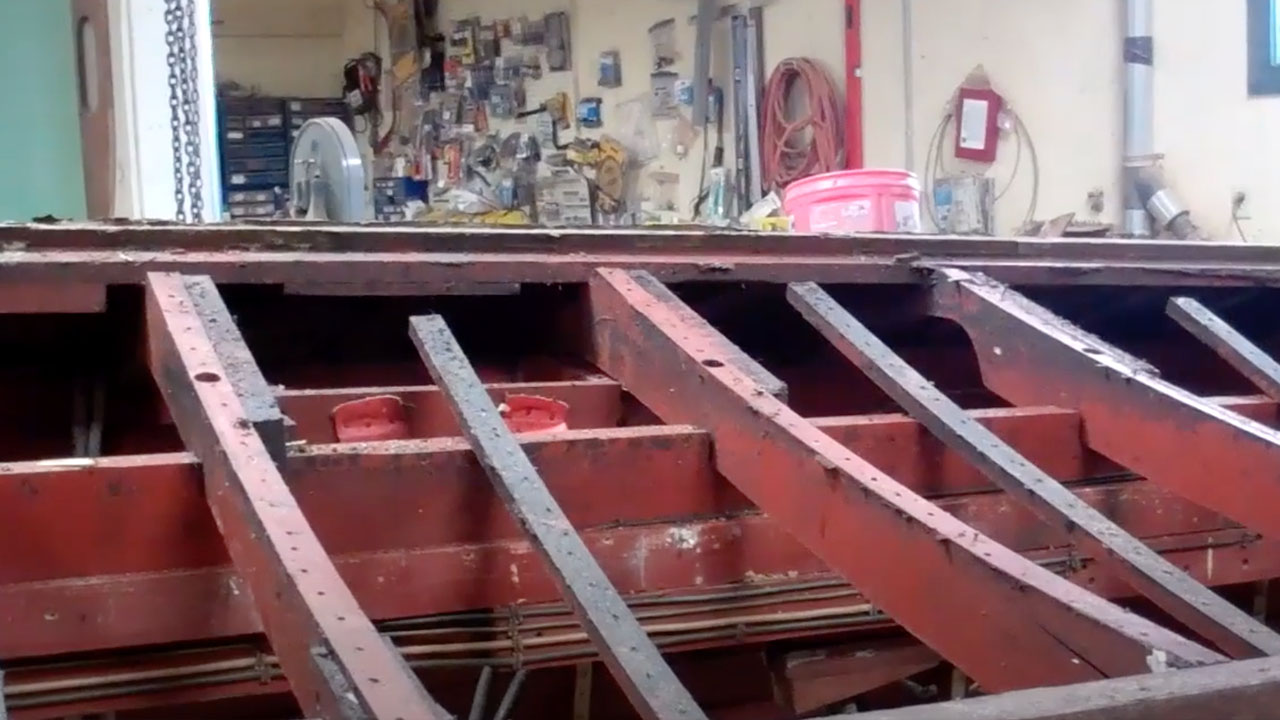
As this clip testifies, her framework is a greasy mess. Never could it hold paint. Once we finish stripping everything, we will reach for our Simple Green Industrial Degreaser and use literally gallons of it virtually full-strength cleaning and scrubbing. Then all surfaces will be coated in Sandusky Chris-Craft Mahogany Bilge Paint.

Thanks to a butt joint at about amidships, we will only release the aft section of chine plank, which will expose the chine frame and ends of the two aft bottom frames.

Releasing/replacing the center transom frame means first releasing all three, not just the bottom, transom plank.

Anthony has now released the port-side bottom planking, thereby exposing similarly greasy, grimy frame members.

Onward…

1947 Chris Craft U22 Crash Damage Update

1947 chris craft U22 hull damage update

Phew! Rolling a Chris U22 is never easy.

A suggestion, when flipping clockwise when standing at the bow, tie a rope to the port side – to the port bilge stringer or other strong frame member. Run the rope over the port gunwale, under the boat, back up starboard side, up over the rolling bar ending up right back on the port side.

That way when she rolls you can continue pulling on the rope from the port side. She kick over beyond vertical. (We attach the rope to a winch for larger boats like a Chris U22.)

Be sure you have sufficient clearance above the floor as the boat drops when it has rolled halfway around. (We cheat by placing sheets of blue board where she is the widest.)

Remember, this is the Chris that bottomed out. The longitudinal, deep gouge in the fourth starboard plank outboard of the keel tells us that she initially bottomed there and that the damage continued aft, as we have chronicled in earlier videos.

In fact, her occupants should count their lucky stars that the rocks did not drive through the wood bottom, which would have almost surely sunk the boat quite quickly soon thereafter.

Having her upside down allows us to assess the situation and plan a path forward that, if possible, exposes all of the damaged framing without releasing the entire bottom. Happily, such is possible as the aft garboard and next planks extend only eight and ten feet respectively forward from the transom. Releasing these four planks – two on either side of the keel – should give us the access we need. (Note the “should.” We will only know for sure once the planks have been released.)

Since the center transom frame member was badly damaged and must be repaired, if not replaced, we must also release the bottom transom plank.

All that said, we will reach for our picks and Rotabroachs – search Amazon for Blair-Equipment 11090N-Rotabroach – and begin exposing and releasing fasteners.