1947 Chris Craft Whiteside U22 Preserved

1947 chris craft whiteside U22 preserved

For guidance on installing a True 5200 bottom, please click here… for details roster of materials and their sources, click here.

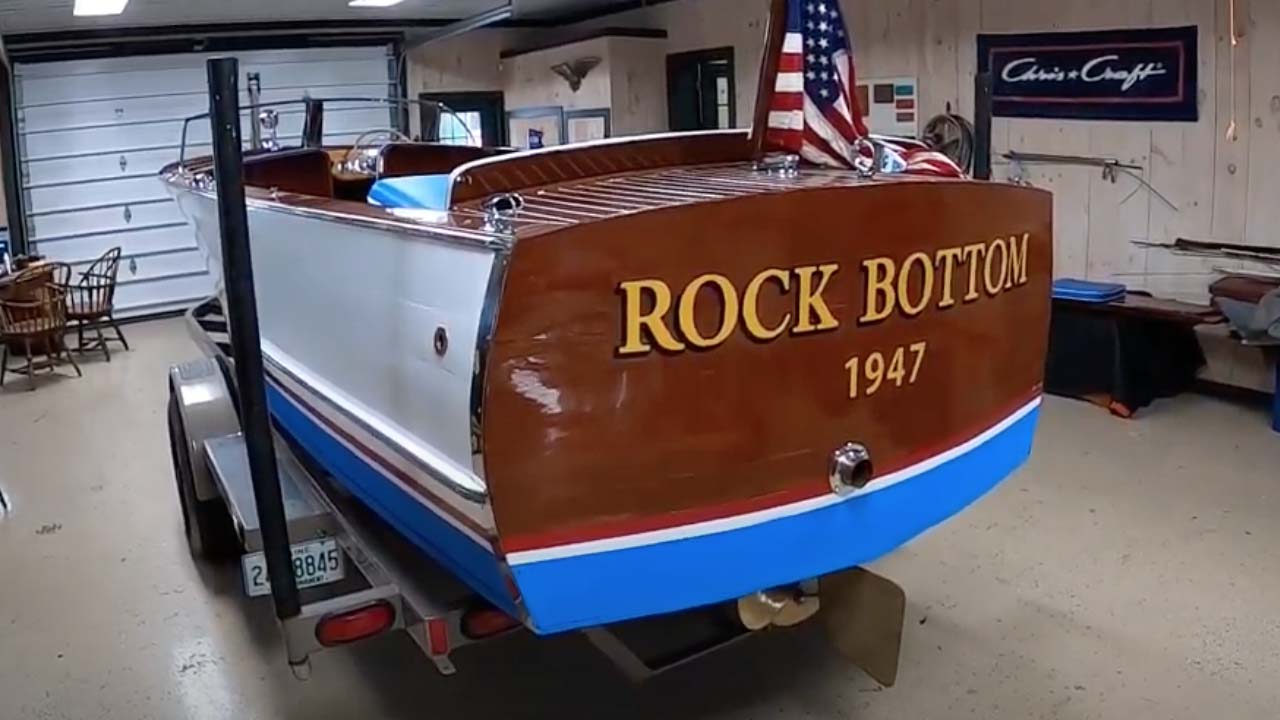
If only the sun were shining! Rock Bottom 1947 has been saved and today was to be her winter debut, that is, before we received six inches of snow last night. So, as we say in Vermont, “We are making do,” and shooting her debut indoors.

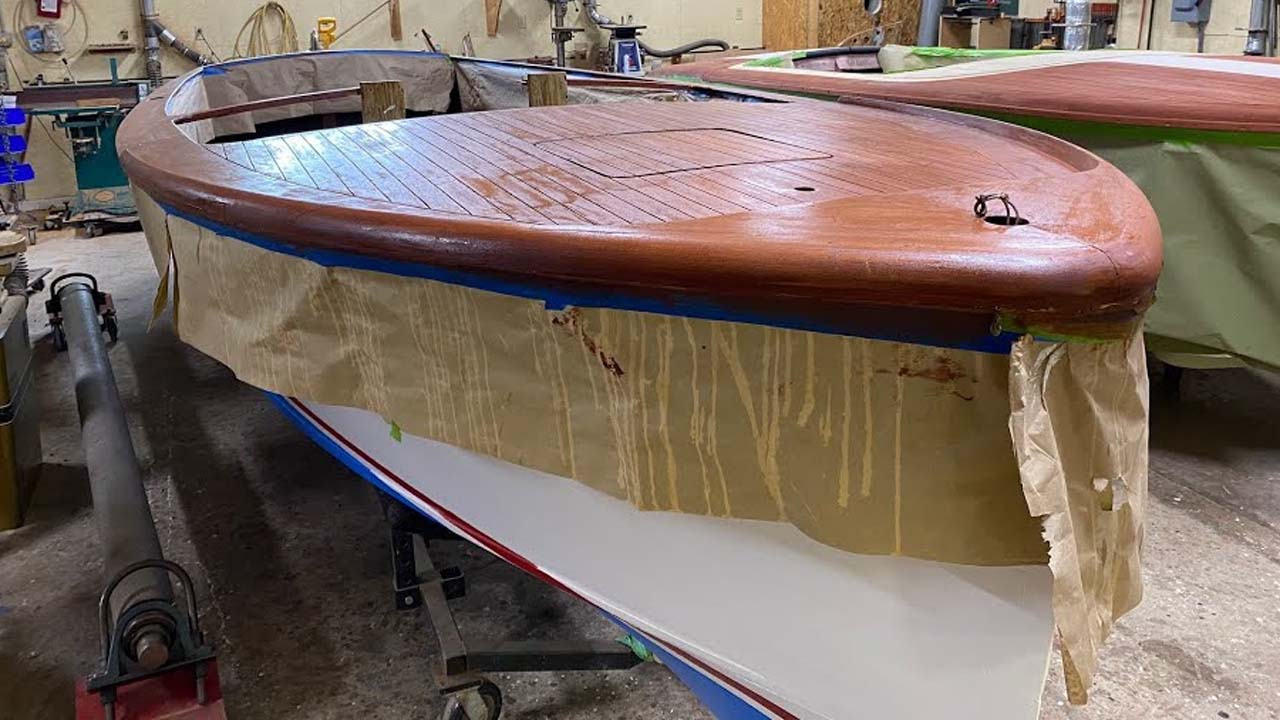
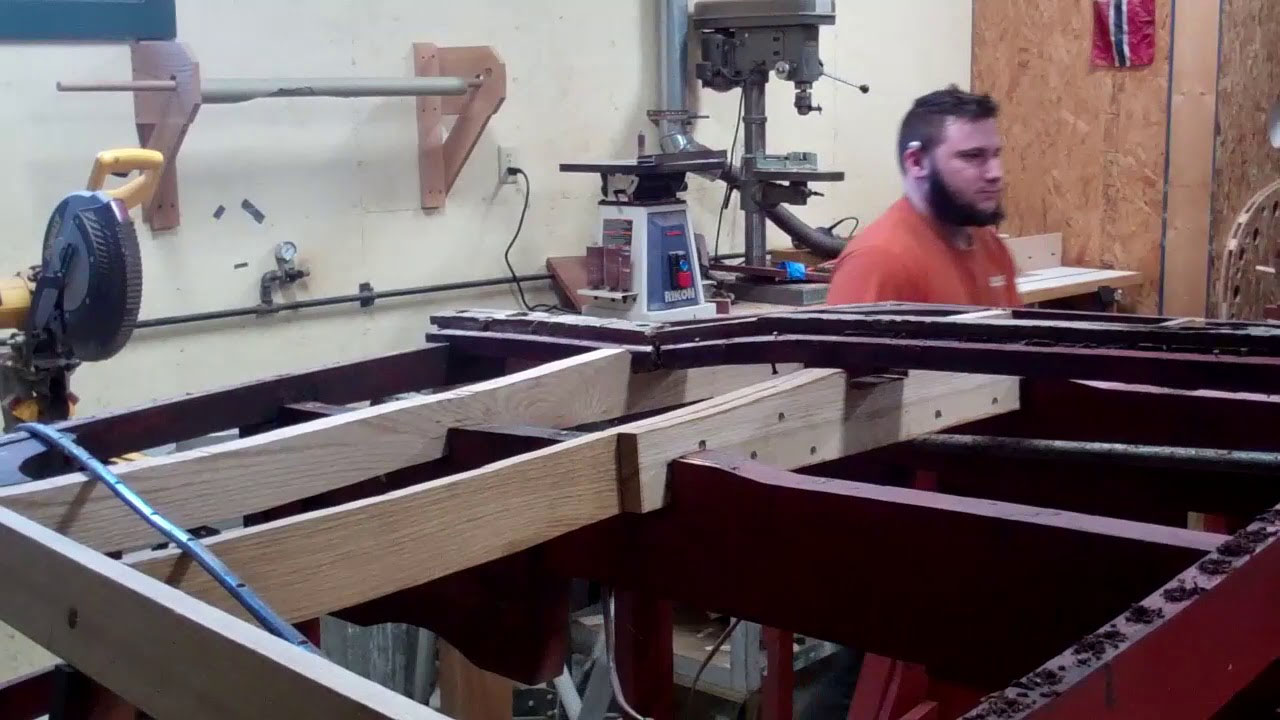
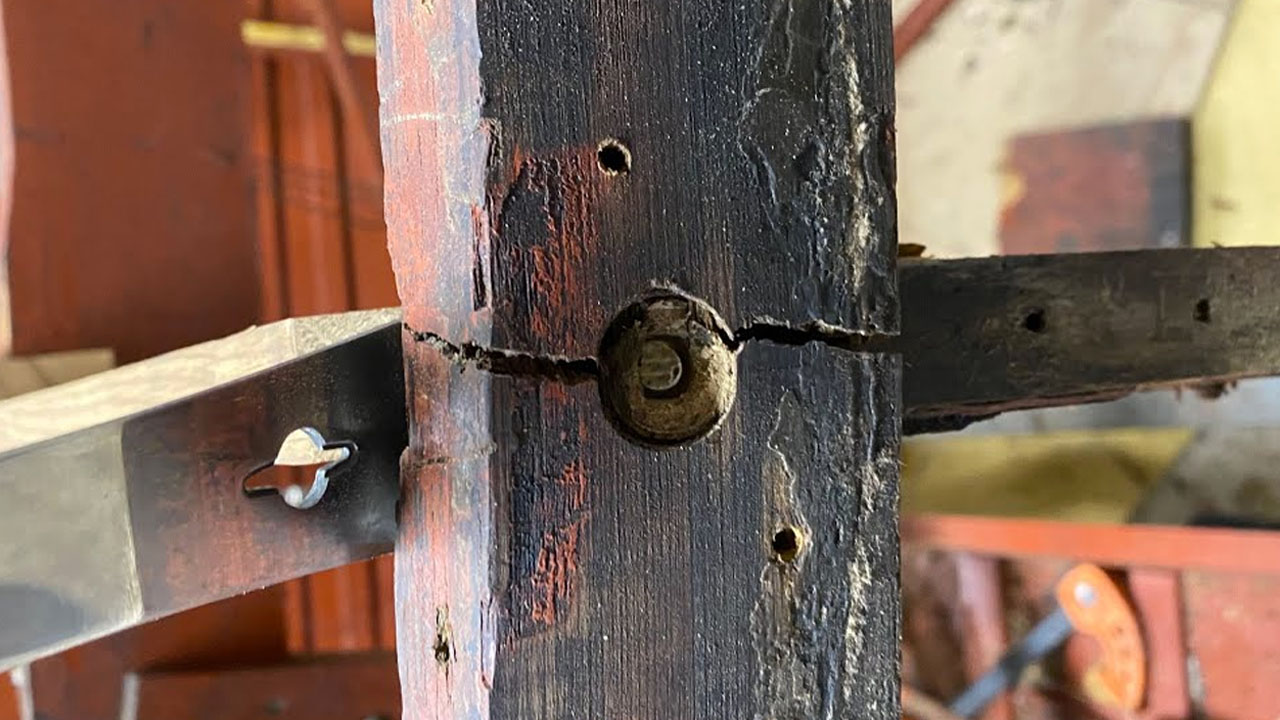
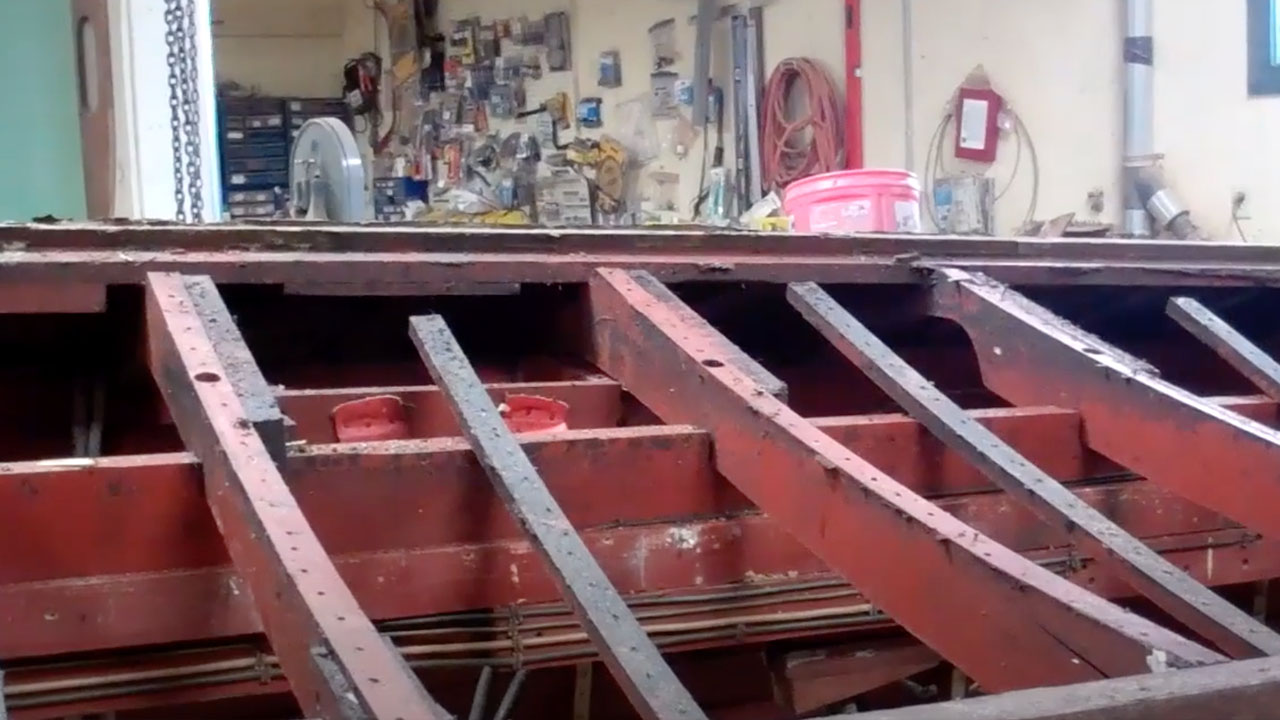
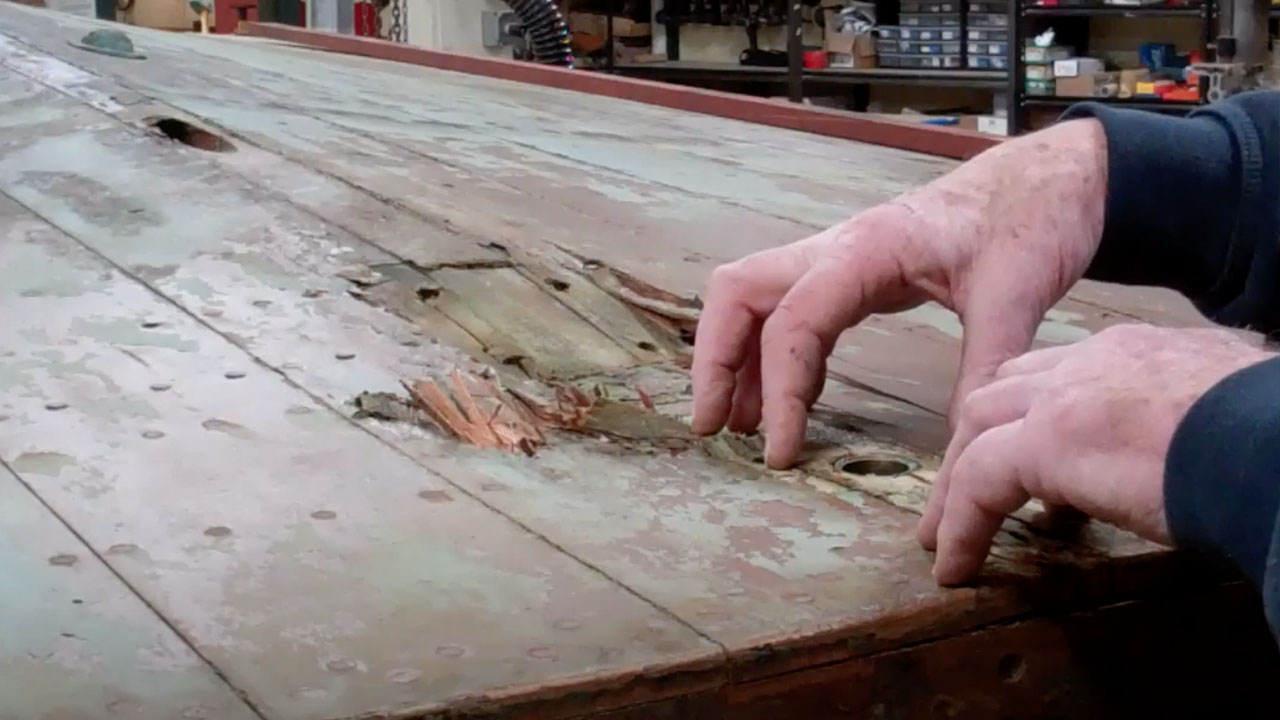
She’s endured being majorly disassembled. Her entire bottom and chines were released, failed and oak-soaked frames were replaced. Then the frames received four coats of REAL Smith’s Clear Penetrating Epoxy Sealer and three coats of Smith’s Penetrating Sealer. Three coats of Sandusky Paint Company Chris-Craft Mahogany Bilge Paint followed.

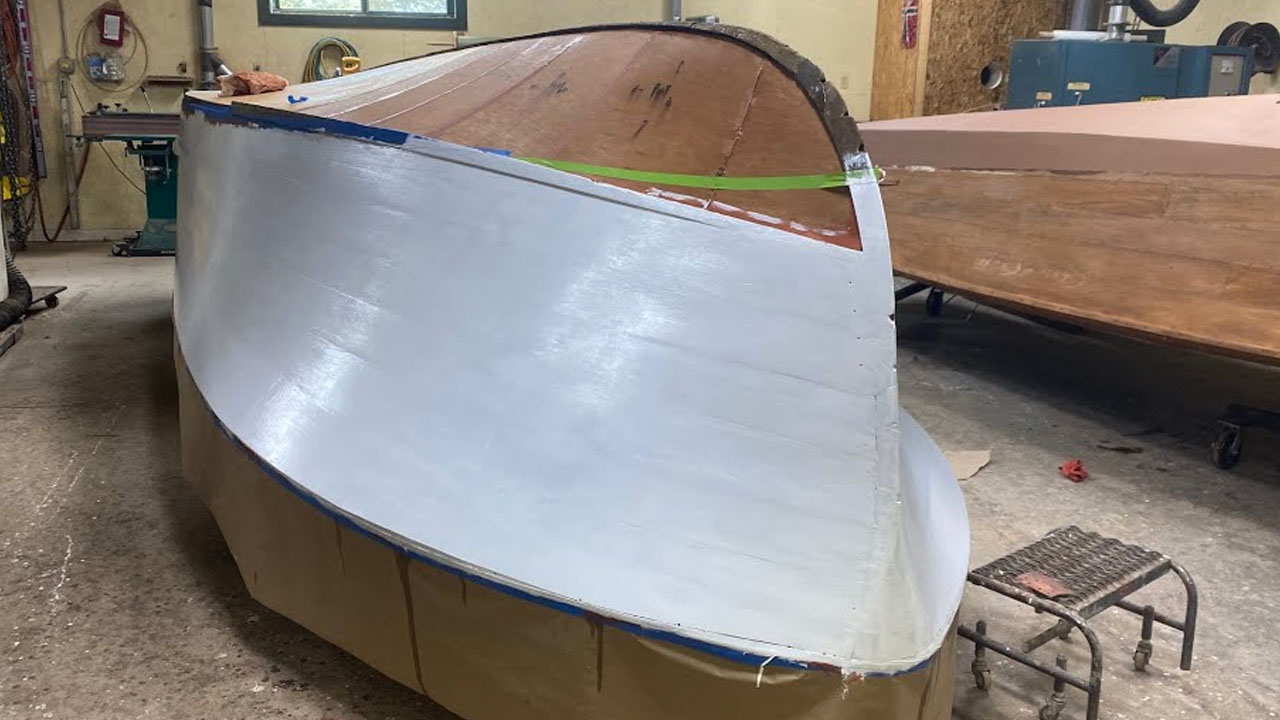
We fabricated her inner skin using 4 mil Meranti Aquatek Marine Plywood that was dosed with four coats of CPES on both sides and all edges and then installed bedded in copious amounts of mahogany 3M 5200 using #6 Frearson driver, silicon bronze flathead wood screws. (The inner faces received three coats of SANPACO bilge paint ahead of installation.)

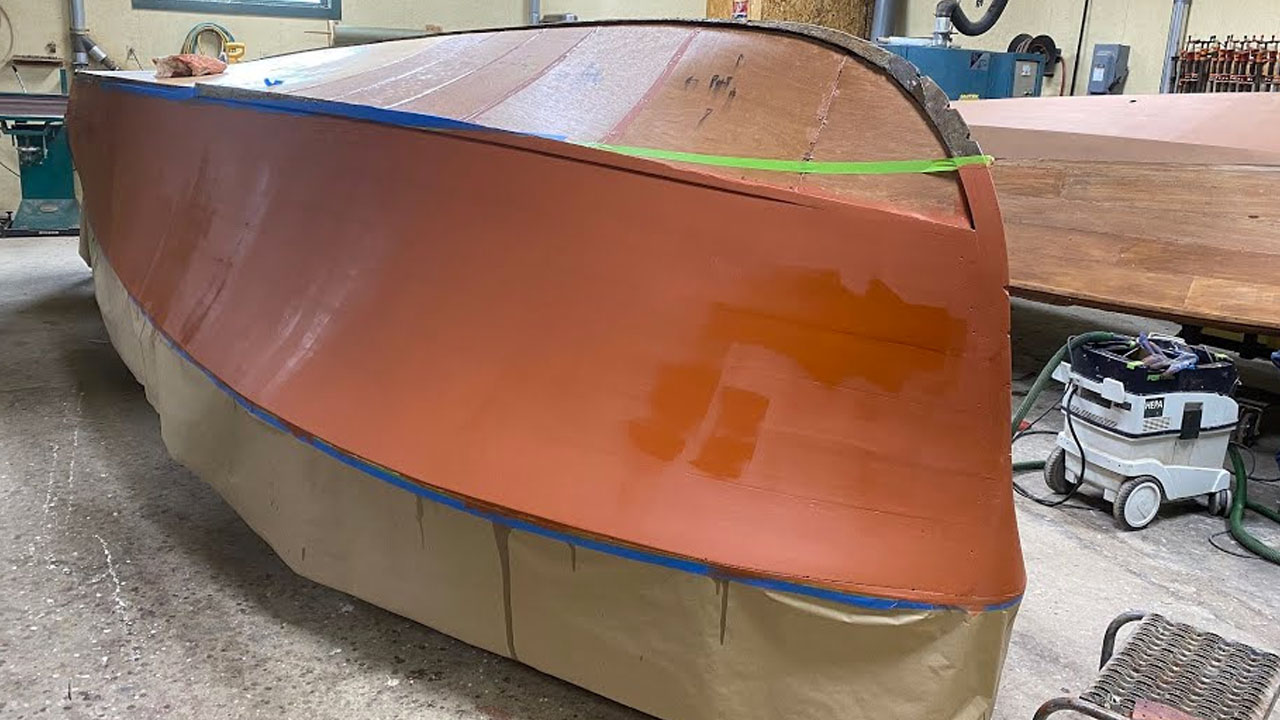
Her 3/8” Meranti planks, combined with her Meranti plywood inner skin, especially having been heavily frosted with 3M 5200, delivers a near bomb-proof bottom.

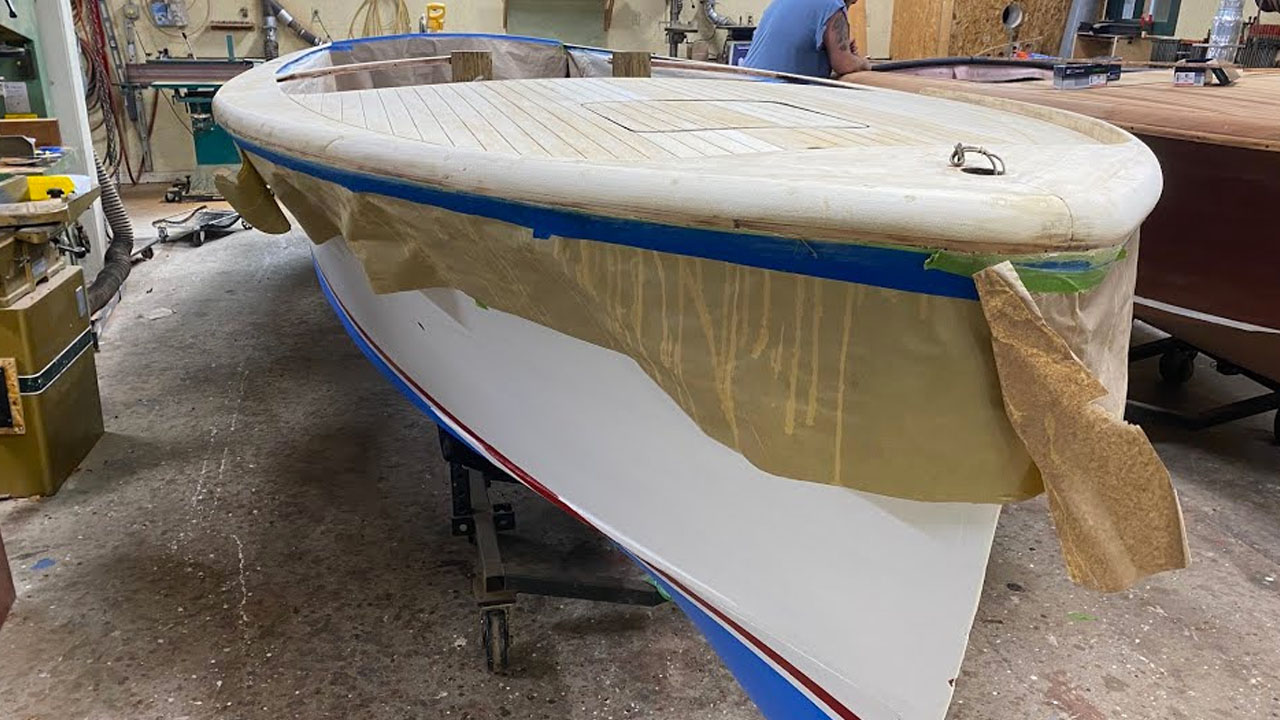
The rest of our work was the standard sequence – strip, fair, stain, seal, paint or varnish, varnish some more, and some more, all followed by final assembly. As always:

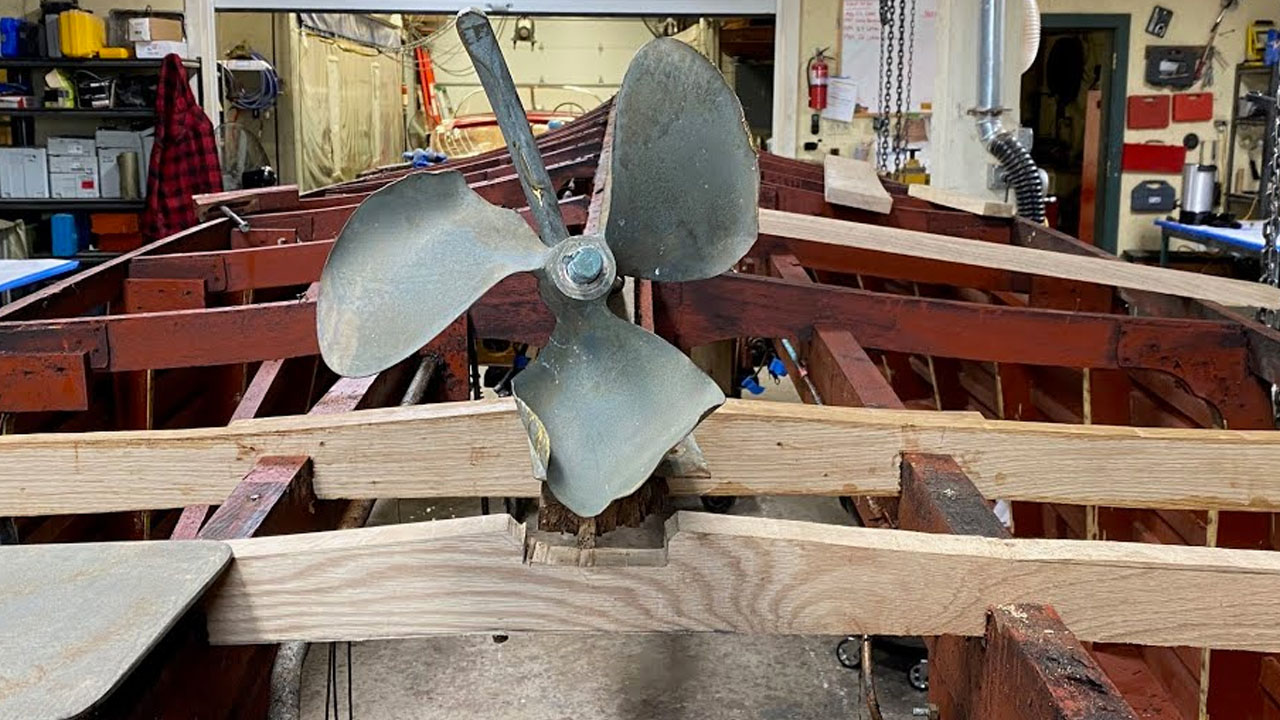
  • Robert Henkel, Peter Henkel INC recovered, rebuilt and thereby saved Rock Bottom’s original engine and driveline
  • Shauna Whiting, Kocian Instruments, transformed her tired gauges into cosmetically stunning, perfectly functioning instruments they once were
  • Mickey Dupuis and his crew at D&S Custom Metal Restoration transformed dull and scratched into incredibly show-ready hardware
  • Chris Hanson, Marine Canvas of Shelburne, restored her upholstery to as new condition.

We did the rest and cannot wait to drop her into Lake Champlain next spring so we can challenge her with her sea trial before returning her to the only home in Maine she has ever known.

1947 Chris Craft U22 Stain Seal Milestone

1947 chris craft U22 satin seal varnish

Our 1947 Chris-Craft cedar-planked U22 blew past a major milestone today. Her deck, gunwales and transom have been sanded fair, stained with Lake Oswego Boat Co. J’eld stain – Post-War Chris-Craft, and sealed with multiple coats of Smith’s CPES.

Next we will scuff sand these surfaces using medium Scotch Brite pads, clean them with Acetone-dampened shop towels and begin applying Pettit Flagship High-Build varnish.

After applying about 15 coats, and because they will be painted white, we will fill the deck seams using mahogany Sikaflex, paint them white Interlux Boottop and Striping Enamel and then apply the final five or so coats using Pettit Z-Spar Captain’s Ultra Clear varnish, thereby adding UV protection to the paint.

Rather than type out all the materials’ names and source links correctly each time, you can find a comprehensive roster in one place.

1947 Chris Craft Cedar U22 Albino Update

1947 chris craft whiteside U22 albino update

Please have a safe and sane July 4 weekend!

Yes, she is the U22 who encountered the gnarly rocks, and, yes, she has survived to run her home waters for many a decade to come.

She’s also the centerpiece of the film, On Golden Pond.

Her engine is back from Robert Henkel, Peter Henkel Inc., Marine City, MI, where he executed a complete rebuild. That work included the short and long blocks, transmission and everything bolted onto the engine.

She received a True 5200 Bottom, repaired keel, new landings for the strut and rudder mountings. Her topsides, decks, covering boards and transom were stripped to bare wood.

Her bottom is now painted in the correct blue, with a double boot stripe and Interlux Semi-gloss White Premium Yacht Enamel (six coats to date).

After sanding all bright-finished surfaces fair, Anthony applied Daly’s A & B Wood Bleach – 3:1 B:A ratio – throughout the day yesterday. The result, perhaps the first albino U22 you have seen!

Once the wood tests ten percent moisture or less, maybe this afternoon, but more likely next Monday, we will stain it using Lake Oswego Boat Company’s Post War Chris Craft Gel’d stain.

After we scuff-sand using medium Scotch Brite pads, we will apply Smith’s CPES – four coats – followed by scuffing once again.

Finally, we will begin applying Pettit Flagship High-Build varnish.

It won’t be long before the engine “drops” in and we are in assembly!

Rather than type out all the materials’ names and source links correctly each time, you can find a comprehensive roster in one place.

1947 Chris Craft Cedar U22 Topsides Update

1947 chris craft U22 topside priming painting

We re-opened, well sort of opened, this morning. The doors remain locked. Each of us is masked and gloved, and working in a separate room. At least the crew can complain together about sagging paint, cranky bolts that break and bead blasting in our outdoor shack at 37 F! Stay safe! After a final sanding of the Pettit Tie Coat Primer, and a first coat of topcoat applied on Saturday, I am applying the second base coat of semi-gloss white Interlux Premium Yacht Enamel on the topsides of our 1947 Cedar-planked U22.

I am rolling the paint on with an Arroworthy Mighty Mini 4” foam roller, and then tipping it immediately with a 3” foamy, the end of which I keep full of paint.

Why such a short roller, and why this one? We’ve tried 7” yellow foam roller covers, but the fit is terrible with surfaces like a wood boat’s topsides. The ends of the cover tend to leave tracks of extra paint, which makes uniform application very challenging.

I like this roller because its domed foam outer end is great for teasing paint into spray-rail-topside joints as well as those between the topsides and chines.

I work two planks at a time, roll the paint on from one end of the bull to the other, tipping as I go. We will apply four base coats with sanding using 200 grit after the second and fourth coats. Doing so exposes the declivities, which will remain slightly glossy against the post-sanding matte finish elsewhere, and fill-and-fair them with 3M Marine Premium Filler.

Each faired spot will be primed with Pettit Tie Coat Primer and hand block sanded, and then two more coats will be rolled and tipped.

Next comes a final sanding with 220 or higher grit, after which any remaining declivities will be filled, faired, primed and spot painted.

After one more sanding pass, we will apply the final two coats, at which point her topsides will be truly stunning.

1947 Chris Craft Cedar U22 Topside Primed!

1947 chris craft U22 topside primed

May Day 2020 is also Cedar Topsides Paint-Prep Milestone Day for our 1947 Chris-Craft U22. She has been:

Her topsides have been worked on before, probably multiple times over her 73 years, and in at least one of the times that the topsides have been repainted, someone tried to fill all the planks seams with a material that I simply could not remove without tearing wood fibers and creating ragged edges.

Perhaps then, or at some other time, she was also assaulted by a random orbit or orbital sander, because the topside planking was replete with undulating hills and valleys. While they were nowhere as severe as we’ve seen on other boats, and they really weren’t that evident until I began applying CPES, but there they were.

The remedy involved first sanding across the grain at an approximate 45 degree angle with 80 grit, followed by sanding with the grain. I then applied two more coats of CPES and sanded again once it cured.

Next I applied the final coat of CPES and the first coat of Tie Coat Primer, and, albeit significantly less apparent, some hills and valleys were still evident under a strong shop light.

I sanded, applied two more coats of Tie Coat Primer, sanded again, applied another coat and spot sanded a final time. Today I blew through the topside prep/priming milestone as I applied the fifth and final coats.

Later this afternoon I will apply the first of at least five coats of semi-gloss white Interlux Premium Yacht Enamel.

Applying five coats allows for sanding with 180 and then 220 grit following the second and fourth coats.

1947 Chris Craft U22 Snapped Bottom Plank Fasteners

1947 chris craft U22 snapped bottom plank fasteners

Anthony began cleaning our 1047 U22’s bottom planks and sorting them into two groups – use and replace – yesterday. We usually unearth a few broken fasteners when stripping bottom planks, but never in our history have we discovered that more than seventy-five of them have snapped at the point where the threads and shank meet, or just about fair to the bottom frames. About half of the chine plank screws are snapped as well.

We can only surmise that the fasteners failed as a result of crashing into the rocky bottom, especially since virtually every screw in the aft third of the bottom snapped.

Bottom line, that most of the fasteners snapped during the crash tells us that the canvass lining and paint were all that was holding bottom planking planks in place. Ouch!

That said, Anthony must drill and use needle-nose Vice Grips to back out what remains embedded in the frames. We will then toothpick every hole using hardwood (ash) toothpicks dipped in Gorilla glue. This video from 2019 illustrates the process and what our U22 will look like once she has been “porcupined.” Once the glue has cured, we reach for our Fein MultiMaster Oscillating Cutting Tool to give her bottom and chine framing a “quill-cut.”

Then all the stubble will be sanded fair before we begin flooding the frames with Smith’s Clear Penetrating Epoxy Sealer.

1947 Chris Craft U22 Bottom Damage Quandry

1947 chris craft U22 bottom damage

This video is prompted by a comment from Mike Erstad on our last video, the one bringing the snapped port bilge frame onto the table.

Mike’s comment, “The way you described, it sounds like they were in a port side turn at high speed and didn’t make it out of the shallows before grounding….”

I replied, “Mike, your comment, together with emails I have received, prompted me to insert the prop shaft-strut assembly into the shaft tunnel and set the strut in place … at least as well as It fits. Now we have a puzzle. The gouge in the bottom plank well forward of where the shaft exits the bottom is clearly on starboard, but, as you will see in the video I will shoot in a while, the shaft-strut-prop assembly and the rudder are bent towards, not away from starboard! We’ve puzzled with what we see and our initial thought is that, as the assembly was driven towards starboard, a counterclockwise – viewed from the transom – torque force was visited on the strut , forcing its mounting block and the two frames that were destroyed into the port chine frame, snapping them in the process.”

So, here is the promised clip. And your thoughts, theories, hypotheses are?

1947 Chris Craft U22 Chine Frame Damage

1947 chris craft U22 chine frame damage

With her bottom completely stripped and cleaned, we gained a clearer view of the frame components, and discovered one more significantly damaged component.

Remember, her bottom initially slammed into a submerged rock or ledge about halfway forward of the transom, leaving a huge gash/scrape in the affected bottom plank.

Next her running gear bottomed out, being hit from the starboard side and driven towards port. Until today, when Joe was installing two replacement frames, he discovered that the hull, especially aft of the prop shaft tunnel will rack laterally when shaken from side-to-side. Why?

The bottoming, which drove the running gear to port, also drove the two destroyed frames to port and through the chine frame. As the clip shows, the port chine frame was broken through-and-through in two places where the bottom frames land on the chine frame. The carriage bolt securing the port end of the more forward of the two destroyed frames was snapped in the process.

This is why, when working on a bottom, releasing the chine plank is critical. Doing so exposes the chine-frame-bottom-frame joints, which permits close inspection of each landing, as well as the bolts holding things together.

We will cut a sixty-degree angle scarf into the time frame two bays forward, fabricate a new aft section and then secure everything together with silicon bronze carriage bolts passing through a scarf block and through the new and old frame sections. Everything will be joined using 3M5200 adhesive.

Great discovery, Joe!

1947 Chris Craft U22 Bottom Skeletonized

1947 chris craft U22 bottom skeletonized

Stripping her bottom completely was absolutely the right choice. Were you to navigate back to an earlier video, you would here me expressing virtual glee around how clean and oil-free our 1947 Chris-Craft U22’s bilge is/was.

Wrong!

She’s over seventy. Her bottom had never been released until today. Let this be a lesson to all of us.

Even if her engine never leaked, and even if no one spilled oil when sucking it our of the filler pipe, just regular use translates into goo, grease, grime, oil and God knows what else finding its way into the bilge. Everything gets coated and more so over the decades.

As this clip testifies, her framework is a greasy mess. Never could it hold paint. Once we finish stripping everything, we will reach for our Simple Green Industrial Degreaser and use literally gallons of it virtually full-strength cleaning and scrubbing. Then all surfaces will be coated in Sandusky Chris-Craft Mahogany Bilge Paint.

Thanks to a butt joint at about amidships, we will only release the aft section of chine plank, which will expose the chine frame and ends of the two aft bottom frames.

Releasing/replacing the center transom frame means first releasing all three, not just the bottom, transom plank.

Anthony has now released the port-side bottom planking, thereby exposing similarly greasy, grimy frame members.

Onward…

1947 Chris Craft U22 Crash Damage Update

1947 chris craft U22 hull damage update

Phew! Rolling a Chris U22 is never easy.

A suggestion, when flipping clockwise when standing at the bow, tie a rope to the port side – to the port bilge stringer or other strong frame member. Run the rope over the port gunwale, under the boat, back up starboard side, up over the rolling bar ending up right back on the port side.

That way when she rolls you can continue pulling on the rope from the port side. She kick over beyond vertical. (We attach the rope to a winch for larger boats like a Chris U22.)

Be sure you have sufficient clearance above the floor as the boat drops when it has rolled halfway around. (We cheat by placing sheets of blue board where she is the widest.)

Remember, this is the Chris that bottomed out. The longitudinal, deep gouge in the fourth starboard plank outboard of the keel tells us that she initially bottomed there and that the damage continued aft, as we have chronicled in earlier videos.

In fact, her occupants should count their lucky stars that the rocks did not drive through the wood bottom, which would have almost surely sunk the boat quite quickly soon thereafter.

Having her upside down allows us to assess the situation and plan a path forward that, if possible, exposes all of the damaged framing without releasing the entire bottom. Happily, such is possible as the aft garboard and next planks extend only eight and ten feet respectively forward from the transom. Releasing these four planks – two on either side of the keel – should give us the access we need. (Note the “should.” We will only know for sure once the planks have been released.)

Since the center transom frame member was badly damaged and must be repaired, if not replaced, we must also release the bottom transom plank.

All that said, we will reach for our picks and Rotabroachs – search Amazon for Blair-Equipment 11090N-Rotabroach – and begin exposing and releasing fasteners.