1940 16′ Lyman Yacht Tender Interior Stripping & Finishing

1940 lyman yacht tender interior stripping finishing

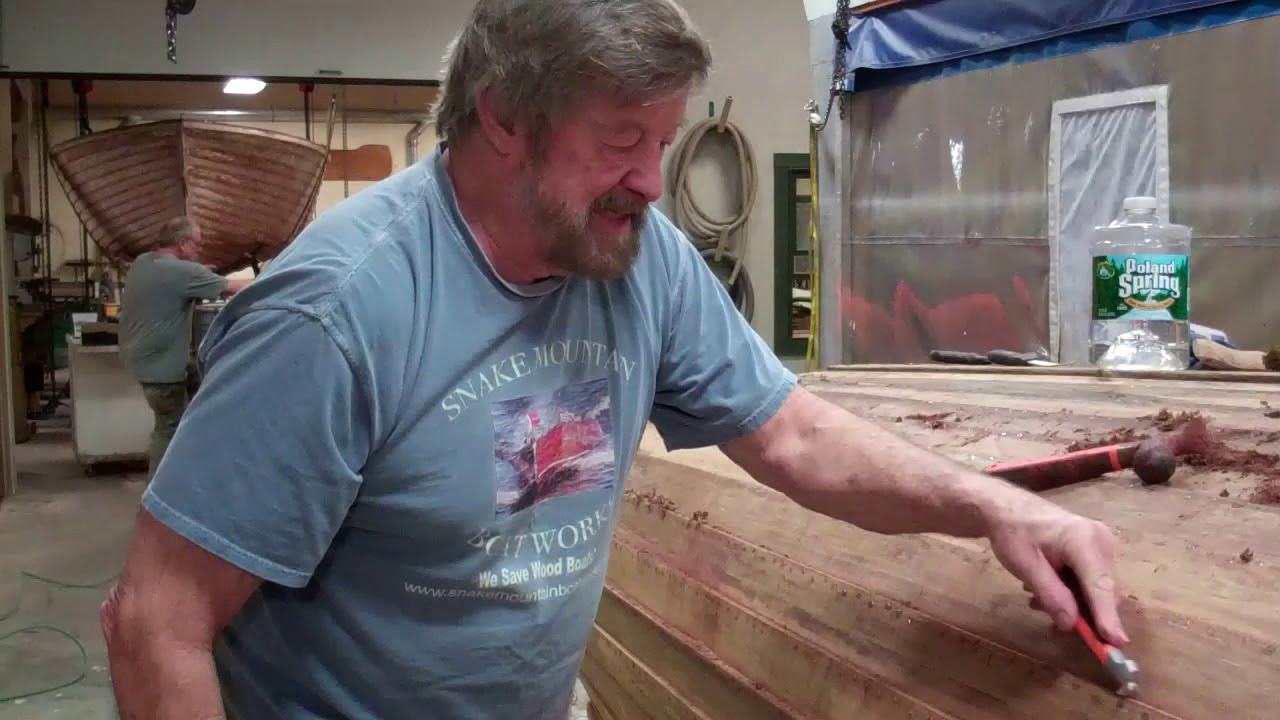
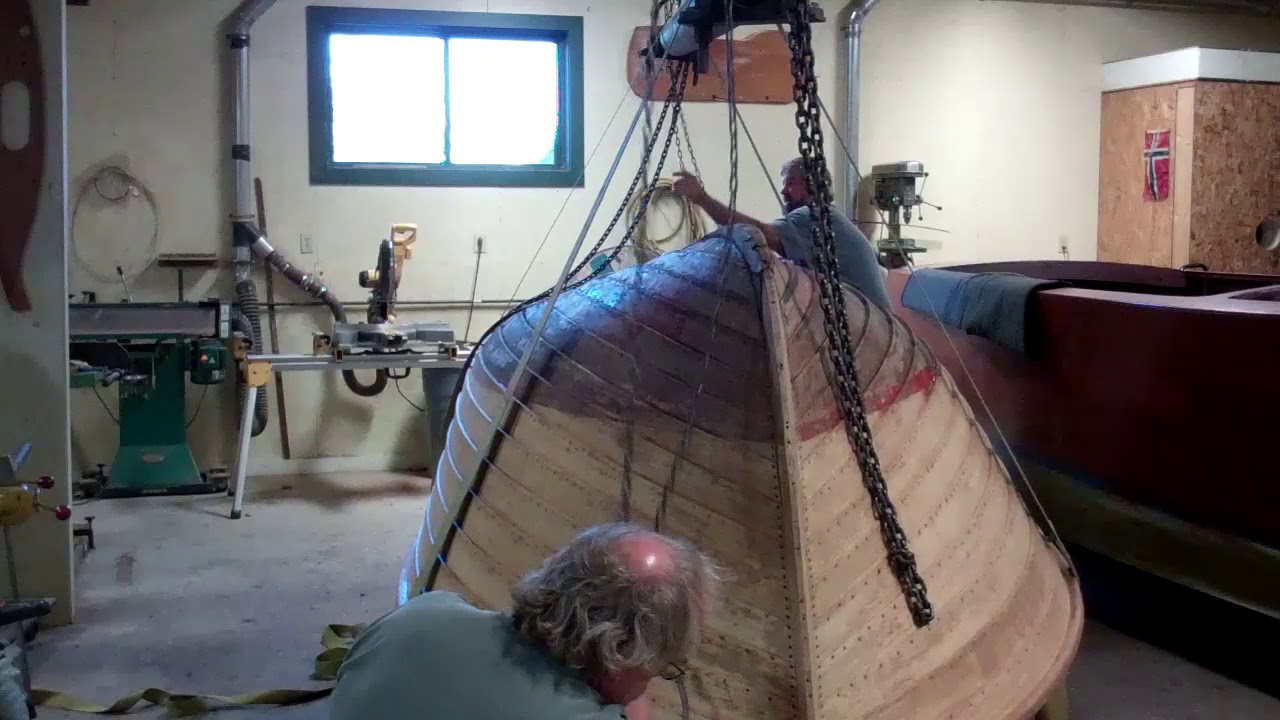
What a “wonderful” work environment! Not! I have enjoyed two weeks “down under” the flipped 1940 Lyman Custom Yacht Tender hull removing all traces of paint and varnish and then sanding all surfaces smooth.

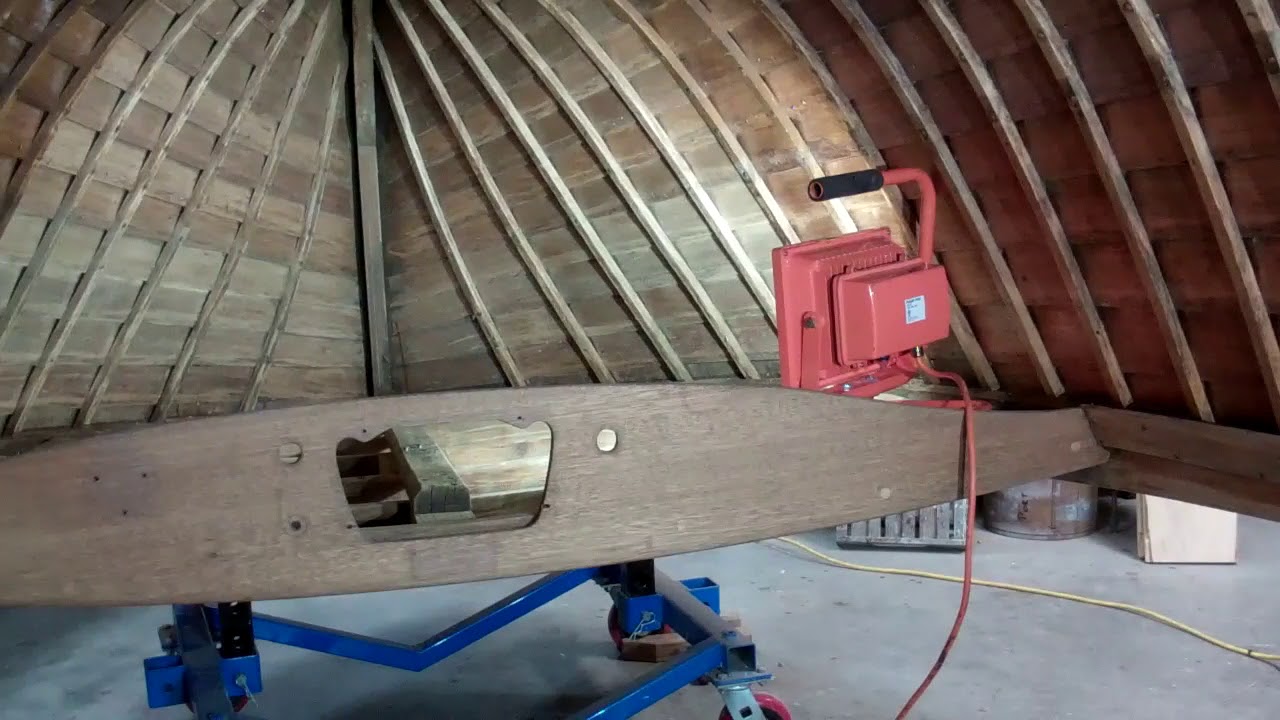
Finally all surfaces have received at least one CPES application, and the bilge and transom have received three. I will next apply a second coat of CPES to the interior topsides, and all of it will be ready for finishing.

The bilge will receive three coats of Sandusky Lyman Sand Tan bilge paint up to the floor level. How the interior topsides are finished remains TBD at this point.

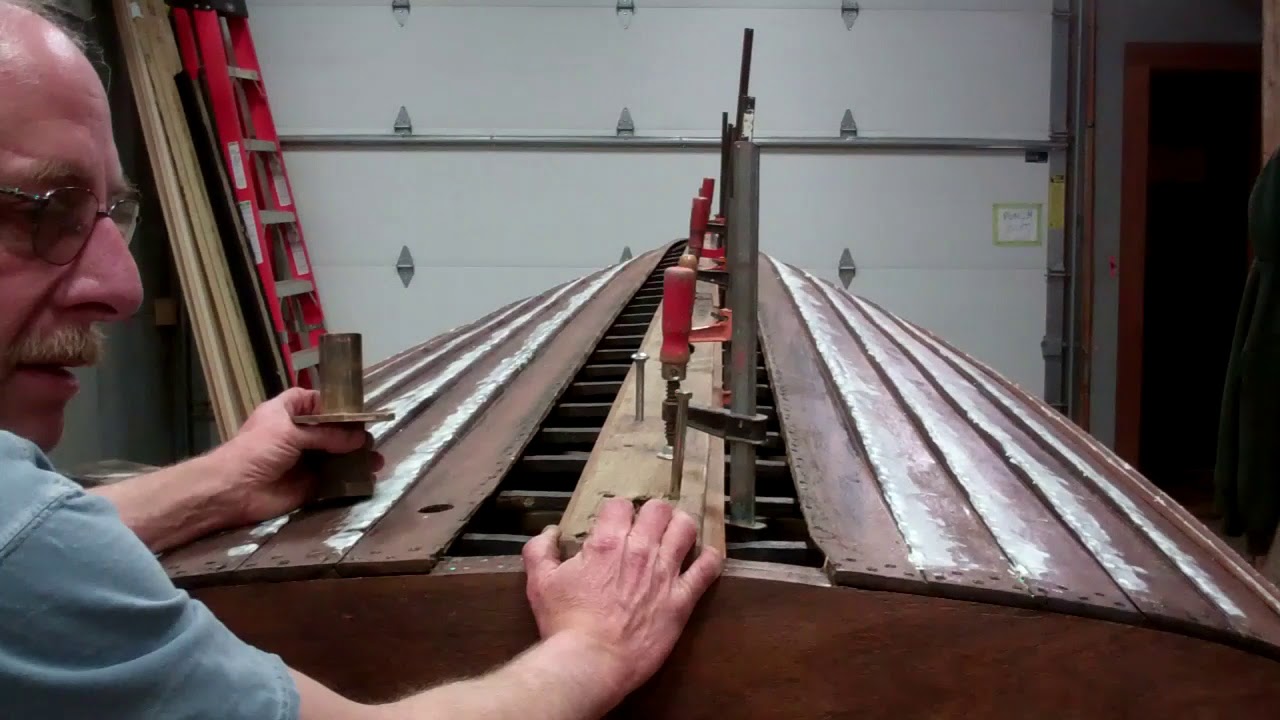
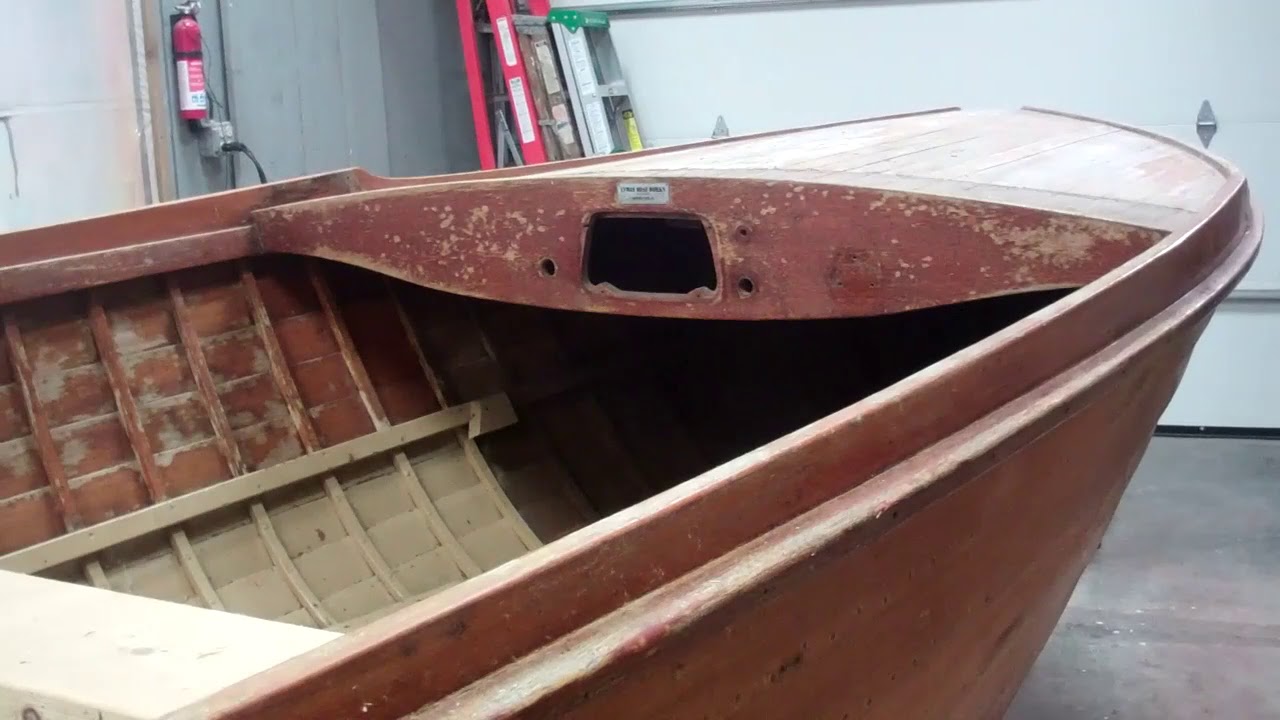
As is evident in previous videos, she arrived painted – blue, green and finally tan – up to and including the stiffening rail that runs longitudinally about halfway up the topsides inner face, and varnished from that rail to the gunwales.

Thanks to the New England Lyman Group, and the 1941 catalog a member shared, we know that Lyman offered a base configuration that buyers were invited to customize. The aft seat could face forward or, in very few cases, aft. The exterior could be finished bright or painted white. The interior was offered completely varnished from gunwale to keel, but owners could specify various combinations of bilge paint and varnish according to their wishes.

Susan’s original owner chose the completely-bright option based on what I found when stripping the paint. After an informative dialog with the NELG membership, and with the help of Ryan Koroknay, I confirmed that the inner-most, oldest layer, a bilious robin’s egg blue, had been applied directly over varnish. Very careful scraping yielded several paint chips with strong evidence of varnish on their inner sides.

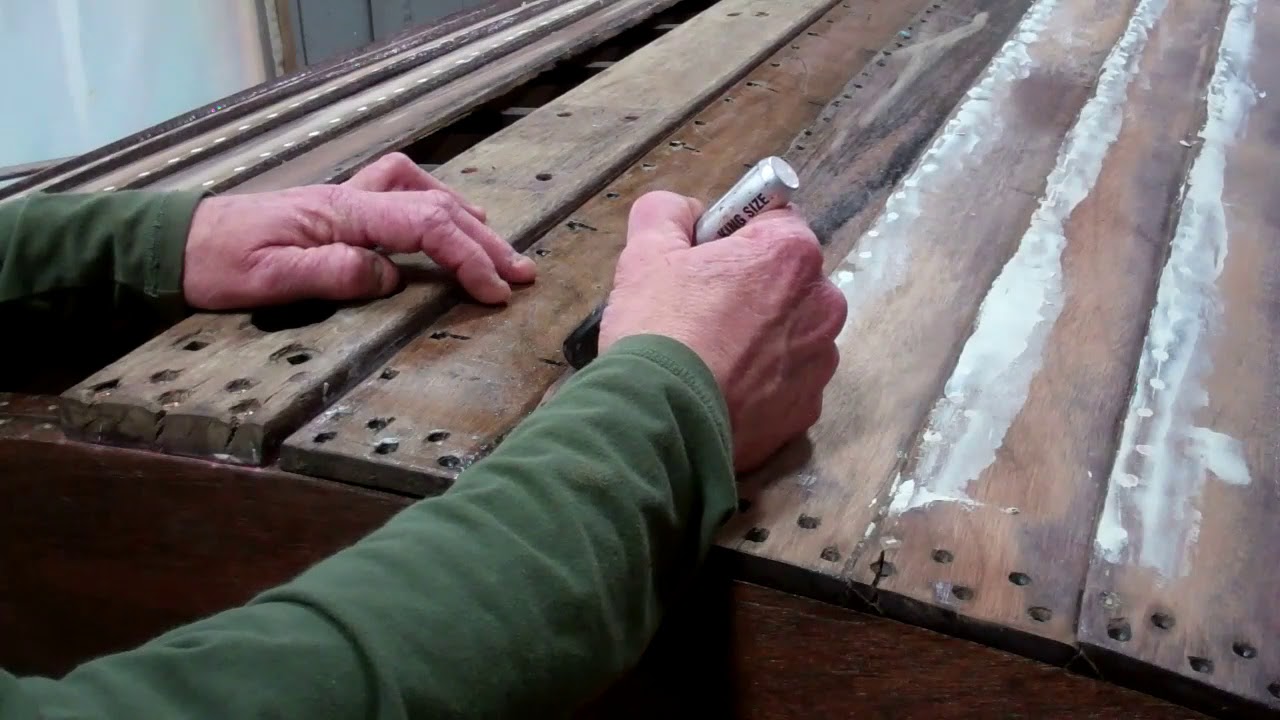
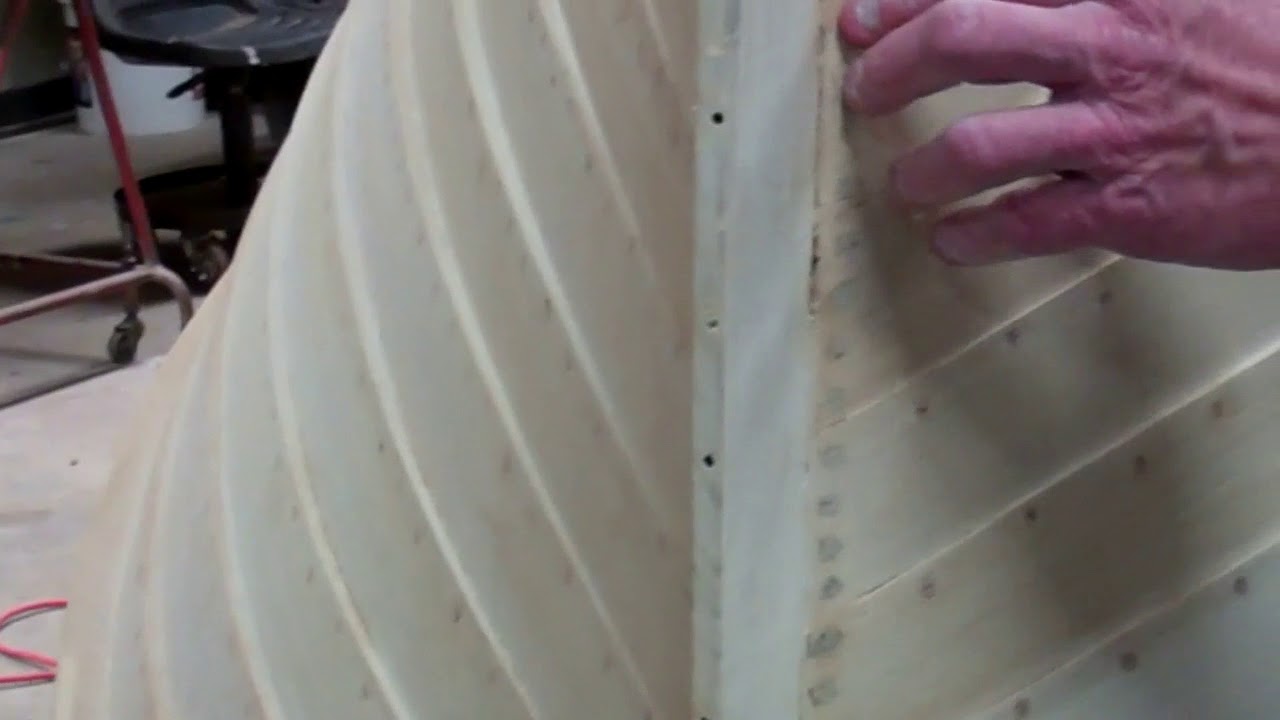
Susan sports cypress topside strakes from her waterline to her gunwales, or so I thought. However, once I had everything clean inside, the strakes running between the stiffening rail and floor level are noticeably darker than those from the rail to the gunwale. And there is evidence of the speckled grain that we often see in early mahogany planking.

So … what to do? Finishing everything bright down to the floor is my preference, and my research, which informs me that bright is how she left the Sandusky factory.

We will do some test varnishing early next week once the final CPES applications have cured, and make a final decision then.

Any ideas or preferences you wish to share will be most appreciated!
Time to go down under again, armed with a 3” chip brush, respirator, fan for fresh air and a pail of CPES!

1940 16′ Lyman Yacht Tender Bottom Priming!

1940 lyman tender bottom priming

Susan, our 1940 16’, Cypress Lyman Yacht Tender’s bottom has reached a critical milestone. Reconstruction followed deconstruction that included releasing the keel, garboards and keelson was followed by fabricating and installing a new keelson.

As of this morning everything is back in place. The keelson and keel were installed bedded in 3M5200. The garboards were secured to the keelson using #6 x 1” Frearson head silicon bronze wood screws. 3M5200 was applied to the seams formed where the garboards and first strakes meet. Then RJ and I, happily with RJ running the clenching iron inside the hull, clenched the seams from transom to bow.

The bottom was faired using four applications of 3M Marine Premium Filler and sanded between coats. John hand sanded all of the strakes, garboards, keel, gripe and stem by hand until the bottom was absolutely fair.

We then applied the fourth coat of Clear Penetrating Epoxy Sealer from the waterline down. Why so much? Three coats were applied ahead of the Marine Premium Filler, but with everything sanded between coats, applying the fourth coat post-fairing buys additional insurance against water absorption and accumulation attacking paint adhesion and thereby facilitating rot.

From the Smith’s Web site: (CPES) creates a tough, flexible resin system that moves with the wood. It allows the wood to “breathe” so excess moisture does not accumulate behind it, promoting paint-failure and ultimately rot.

We then caulked all of the seams, those where two strakes meet, along the garboard-keel seam and that between the strake tails and the transom.

Milestone reached, Susan is poised for priming, and in our case the primer of choice is Interlux Interprotect 2000E Two-Part Epoxy, five coats of which will be applied over the next two days. Once we reach the target film thickness of 10 mils, Susan’s bottom will be protected against water absorption and it will be time to apply her bottom paint. (Since she will most likely be trailer or lift sailed, we may opt for Pettit Hard Racing Copper Bronze bottom paint in place of the traditional Sandusky Lyman Copper Bronze Antifouling paint, since the latter is designed for vessels that live in the water.)

1940 Lyman 16′ Yacht Tender Keelson, Keel, Gripe & Knee Update

1940 lyman yacht tender keelson keel gripe knee preservation

Our 1940 16’ Lyman Yacht Tender’s spine transplant is complete, and the patient is doing quite well. The new keelson and the keel’s underside received three applications of Clear Penetrating Epoxy Sealer (CPES). Following Danenberg, who insists that doing so delivers deeper penetration and more thorough sealing, the second coat was applied immediately following the first coat. The third coat was applied twenty-four hours later.

After fitting the keelson and keel to the boat and each other, and sinking a series of temporary position-holding screws through the keelson and into the keel, John bored the rudder and prop shaft bores. He also drilled the holes for the machine-threaded bolts that will secure the lifting ring, yes it is fixed to the keel/keelson and shaft log.

Confident that we could reassemble the pair and still have them matching, we separated them and frosted the mating surfaces with white 3M5200. (White is much less expensive than mahogany 5200 and delivers the same bonding strength. Since the bottom will be primed and painted, spending the extra that mahogany 5200 costs is just wasting money. However, be patient with the white as it takes as much as fifty percent longer to set up than the mahogany.)

After reassembling the now monolith-to-be and driving screws through the keelson into the keel, we installed it on ribs bedded with mahogany 5200. (Any squeeze out here will be visible in the bilge. Even though it will be thoroughly protected with Sandusky Paint Company Lyman sand tan bilge paint, we do not want to risk that a scuff or scrape exposes white 5200 beneath the paint.

John has also completed his knee semi-transplant, a truly complicated Dutchman, as well as fashioning Dutchman repairs to the forward end of the gripe. Once everything is sanded in and sealed with CPES, the bow will be ready for primer.

We will focus on installing both garboards, which will also be bedded in white 5200, over the next several hours, followed by securing the aft tails of the bottom strakes to the transom.

Then Michael “gets” to spend the rest of today and this weekend applying and sanding 3M Premium Marine Filler fairing compound to the countersinks. After a final application of CPES to the entire bottom, and caulking the strake-to-strake seams with 5200, Susan’s bottom will be ready for priming and painting.

Maybe next week?

1940 16′ Lyman Yacht Tender Bottom Work & Keelson Replacement

1940 lyman yacht tender bottom keelson replacement

John has fabricated and is now focused on installing the 1940 Lyman Yacht Tender’s new keelson. One hint if/when it is your turn to do so. Since the keel, and the keelson are bowed, they must be joined on the hull. While the difference in radii may appear small, there is a difference that will keep the rudder shaft, prop port and other components from lining up if the bores and fastener pilot holes are drilled and fasteners are driven in while the assembly sits on flat surfaces like work tables or saw horses.

John and I first positioned the keelson correctly along the ribs’ lower extremities and drove a half dozen or so temporary screws through the ribs and into the keelson. We then laid the keel in place, clamped everything together and drove position-holding screws through the keelson and into the keel.

Only then were we able to bore rudder shaft and other ports through the new keelson. We then removed the temporary screws passing through the ribs and into the keelson, which released the entire assembly.

It will be separated, receive a final application of CPES and then the keel and the keelson will be joined, yes, again on the hull, with a generous layer of 5200 “frosting” troweled on between the two planks.

Installing the garboards completes the replacement process, but cannot happen until all remnants of the old clench nails are removed.

We will finish fairing her below the waterline and John will complete the work needed on her stem and knee, and it will be time for Interlux PreKote primer.

Three coats of Sandusky Paint Company (SANPACO) Lyman Copper Bronze Antifouling paint

1940 Lyman Yacht Tender Gets a New Keelson

1940 lyman yacht tender new keelson

That we learn every day and with every boat we lays hands on makes wood boat conservation incredibly enriching.

Our 1940 16’ Lyman Yacht Tender, “Susan” has been our latest teacher since RJ and I began setting the below-waterline clench and rivet nails last Friday. (That RJ offered to “drive” the clenching iron while I popped each nail head with a bunch and dead blow hammer was a huge plus for me.)

We began at the waterline and worked strake-by-strake towards the keel. It was then that Mr. Murphy’s reared his ugly head. “Hey! We have a problem! I can see lots and lots of light coming through between the garboard and keel. It looks like the keelson is broken and split.”

Next came backing out what must be one hundred or so screws and then cutting through all of the starboard garboard’s clench and rivet nails. Yes the very ones we had just so carefully tightened!

Out came the garboard, exposing the garboard’s, formerly chamfered starboard edge, or in about forty percent of it, what was left of same.

Sure. We could rip that chamfered edge off wherever it had failed and fit pieces in place. Then, using many tubes of 3M5200 and lots of bilge paint on the other side, we could have hidden our “repair.” It might have even held for a while, but unlikely longer than a season or two at most. Releasing and installing a newly fabricated, white oak keelson is the correct solution, and for us the only one we will put our names on.

So, with the port garboard having joined its starboard counterpart on a wall rack several hours later, it was time to release the keel and keelson.

I believe you will agree that, having viewed what we released in the clip, consigning the original, now 78 year old, keelson to the scrap pile is the best path forward.

1940 Lyman Yacht Tender: How to Dry Scrape Bottom Paint

1940 lyman yacht tender dry scraping bottom paint

After being urged to give it a try by a local friend and fellow woody conservator, I am using two Bahco/Sandvik scrapers, a two-handed “ergo” model with a 2.5” scraping blade and a Triangle Scraper 625 with a triangle blade.

The two-handed scraper is excellent for cleaning strake surfaces, mostly down to bare wood, and also for making the initial passes along strake edges and the seams between strakes.

I use the triangle scraper for detail work on the strake faces, but especially for cleaning strake edges.

This boat is cypress throughout, and the wood seemed to really soak up the Circa 1850 wood stripper as I removed paint and mostly varnish from the topside strakes and the transom. It also appeared to discolor the wood, which forced me to make a second series of passes using a stainless steel scrubber “sponge” and my Sandvik scrapers.

I tested using chemical stripping on a small area below the waterline, only to have running streams of liquefied copper bronze and red antifouling paint threatening to stain the above-waterline strakes, which will be finished bright.

Reaching for the scrapers is clearly the answer here. The paint being removed remains dray, becomes powdery as it releases and is easily vacuumed.

I am sold on this method for removing bottom paint, at least until it disappoints on some future project.

1940 Lyman 16′ Yacht Tender Flipped!

how-to flip a 1940 lyman yacht tender

I should not have said, “She’s small. This flip should be easy. Let’s try it without the rolling strap.” Wrong! Physics rules, and the fact that she is beamy, especially as compared to the depth of her hull at the helm bulkhead, translated into no go with hands alone.

John reached for the “rolling” strap and attached it to the starboard – not the port, as I incorrectly say in the clip – bilge stringer. From there we wrap the strap over the starboard gunwale, past the keel, over the port gunwale and across the boat back to the starboard gunwale. Now we had physics on our side.

John pulled the strap and over she went, just as nicely as could be.

We will now focus on stripping Susan’s hull below the waterline using our go-to Circa 1850 Heavy Body Paint and Varnish Remover.

One more milestone fades into our wake!

1940 16′ Lyman Yacht Tender “Susan” – Preservation Launched

1940 lyman yacht tender arrival

Susan, hull number 10151, is a an intriguing 16-Foot, 1940 Lyman inboard runabout, but we knew very little about her when I bought her in June 2015, other than that she is absolutely original, complete with Cyprus strakes that were finished bright, and a rear-facing aft cockpit. I shot an arrival video, which you can enjoy by navigating here.

Her engine looks all the world to be a 60-HP, Chris-Craft B, except that it is now. Robert Henkel, Peter Henkel Inc., Marine City, MI, who executed a complete rebuild, and has an extensive research library, reports that, “It is a Hercules long block that the Nordberg Manufacturing Company of Milwaukee, WI purchased, completed and stamped its own logo, etc. on the exhaust manifold. Nordberg Manufacturing Co., which, before WWII, was best known for its steam, diesel and gasoline engines, in was founded in 1889 by Bruno Nordberg:
According to Wikipedia, the company was founded by Bruno V. Nordberg and Jacob Ellis Friend in 1886. Nordberg had been working previously at steam engine and sawmill maker E. P. Allis & Co. One hundred years later, in 1989, the company was sold to Finish conglomerate Metso. By 2004 the Nordberg operations were defunct. (Read more about Nordberg here on Wikipedia and Vintage Machinery).

Gene Porter, who is renowned for his encyclopedic knowledge of things Lyman took one look at her and asked, “Do you have any idea what you have here? She was used as a yacht tender before WWII. I’ve been searching for one of these boats for decades.”

Sorry, Gene. You may rank among the top of my best friends, but that will not get Susan away from me.

To date we have released everything down to the bare hull and will begin stripping ancient varnish today.

I have had her hardware preserved and plated by Mickey Dupuis, D&S Custom Metal Restoration in Holyoke, MA.

Shauna at Kocian Instruments, Forest Lake, MN, executed her typically masterful preservation of the gauge panel.

Time to break out the Circa 1850 Heavy Body Paint & Varnish Remover and go to work.

1940 Lyman 16′ Yacht Tender – How to Paint Bottom & Bleach Topsides

1940 lyman yacht tender bhow to paint bottom and bleach topside

John texted me early this morning, “That little Lyman turned into an albino!” Yes she did.

He experimented with our customary bleaching process. Rather than just applying and leaving the Daly’s Wood Bleach be, during the 5-1/2 hours bleach was being applied, he periodically scrubbed the surface ever so lightly with Scotch Brite pads.

One data point proves nothing, but given the absolutely uniform results, John, RJ and I will be treating the transom of the 1957 23’ Lyman Runabout to the same process.

Yes, I know that choosing Pettit Hard Racing Copper Bronze for the bottom paint is an anathema to the Lyman world, but my decision was driven by the reality that she will be a trailer- and lift-sailed boat, for which antifouling paint is not well suited.

John has worked his usual invisible Dutchman magic, and the countersink filler he concocted using two-part TotalBoat Thixo 2:1 Epoxy, cypress sand dust and Sandusky natural filler stain 9805, is a nearly exact match. (We decided against using wood bungs as the countersinks along the stem and aft transom corners are way too shallow for glue to hold them in place.

Now it is time for the wood to dry down to about 12-15 percent, at which time we will stain the topsides and transom with Sandusky natural filler stain 9805, and then seal everything with three coats of CPES.

Soon she will be albino no more!